


How to Wire + Install LED turn signals on your Motorcycle 9 different ways
Over the years of customising motorbikes we have mounted more LED turn signals than we could count, we are always trying to find creative ways to mount them and so here are nine ways you can mount LED Turn Signals on your motorcycle.
Before we get into the number of ways you can mount LED indicators, I’m going to give you a brief run down on wiring and troubleshooting indicators. After that we get in to the good stuff.
Ways to mount on the front of your motorcycle
- Light Grill Mount
- Triple Clamp Mount
- Headlight Mount
- Headlight Bracket Mount
Ways to mount on the back of your motorcycle
- Fender Mount
- Tail Tidy Mount
- Frame Tab Mount
- Frame Slug Mount
- Shock Bolt Mount
Wiring LED turn signals on your motorcycle and troubleshooting issues:
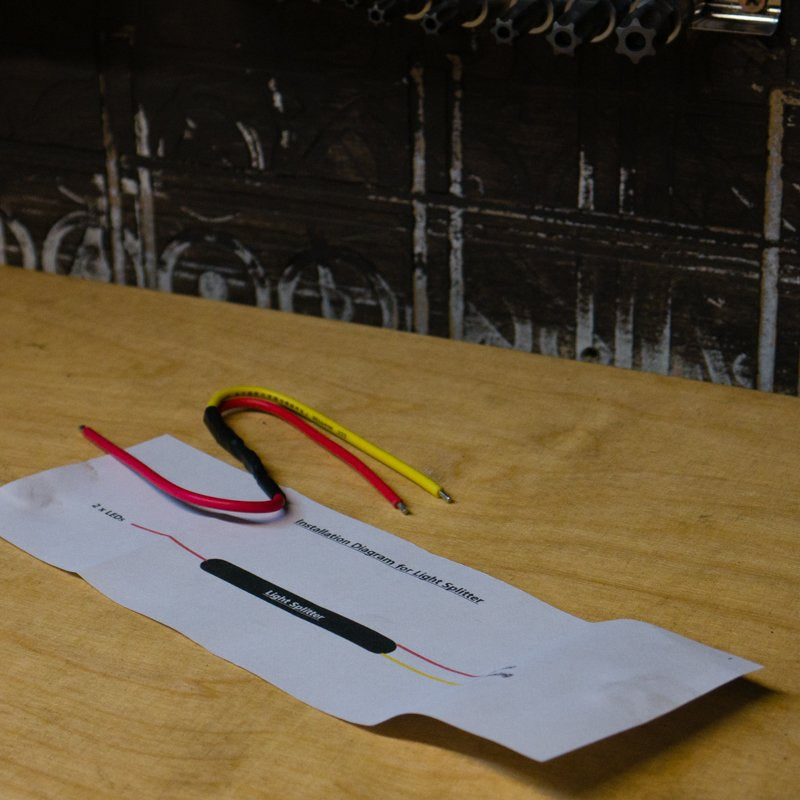
Lets start with the universal truth of electricity, and the universal way in which to wire your LED lights. Issues will arise with the flash rate on some motorcycles however this is easily fixed. On the rear of my customs the Indicator wiring will run into the electrics tray where it will link to the flasher relay or on my bikes, the black box control module. The black box module will control LED blinkers and normal incandescent (bulb type) blinkers without any need for resistors or relays. The front will be neatly wired to a connection either behind the headlight or under the gas tank
On a normal bikes electrical system they will hyper-flash (flash too fast). The best way to repair this is with a new flasher relay. An LED flasher relay is non load dependant and only costs around $15 from an auto electrics store. Important to note that there are 2 types 2 pin and 3 pin, make sure you check yours before you replace it.
If you are using your stock dash signal lights, some are wired in a polar positive arrangement and will need diodes put in place. The easiest way to spot this is when you turn the left side turn signals on, the right will flash too, either full or dimmed brightness. You will need to disconnect the dash light, put a diode circuit in place for left and right and add a ground to the opposite side of the dash light.

The other option is a load balancing resistor, this tricks your flasher relay into thinking that it still has normal bulbs by adding extra load to the circuit. This isn’t a great option for most older bikes, They’re messy and bulky, the flasher relay swap is preferable. The load balancing resistors are however one of your only options when it comes to motorcycles with a Can-Bus system. I’ve found most modern CAN-bus systems will automatically adjust to whatever indicator load you give it. Some will need to go through a reset protocol, but after that it will work perfectly. Some of the earlier CAN-bus (pre-2010 I think) systems don’t have this option and will throw an error in the CPU. Load balancing resistors are a good option on systems like this.
With the voodoo of electrics now sorted out (I hope) Lets look at the mounting options I commonly use in the Purpose Built Moto workshop. On bikes varying from brand new to vintage, Café Racers, Scramblers and Choppers these methods are tried and trued for both style and function.
Mounting LED turn signals to the front of your motorcycle:
I use a large variation of LED Headlight sizes and shapes on my custom motorcycles. So there are a few different ways to go about this. I’ll run you through 4 of my most common that will just about cover any LED turn signal install type you’ll come across.
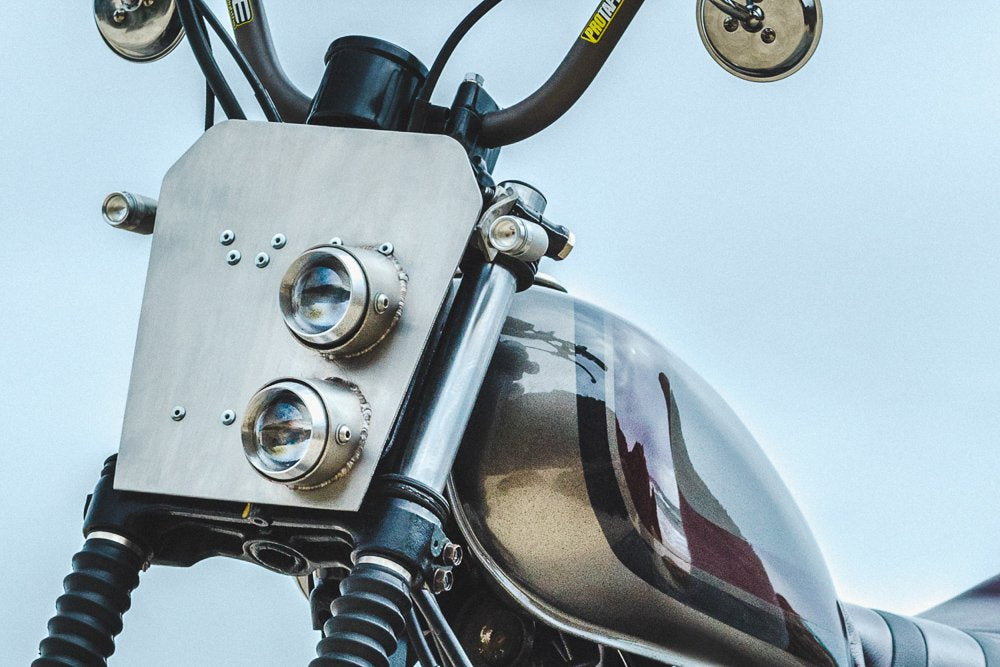
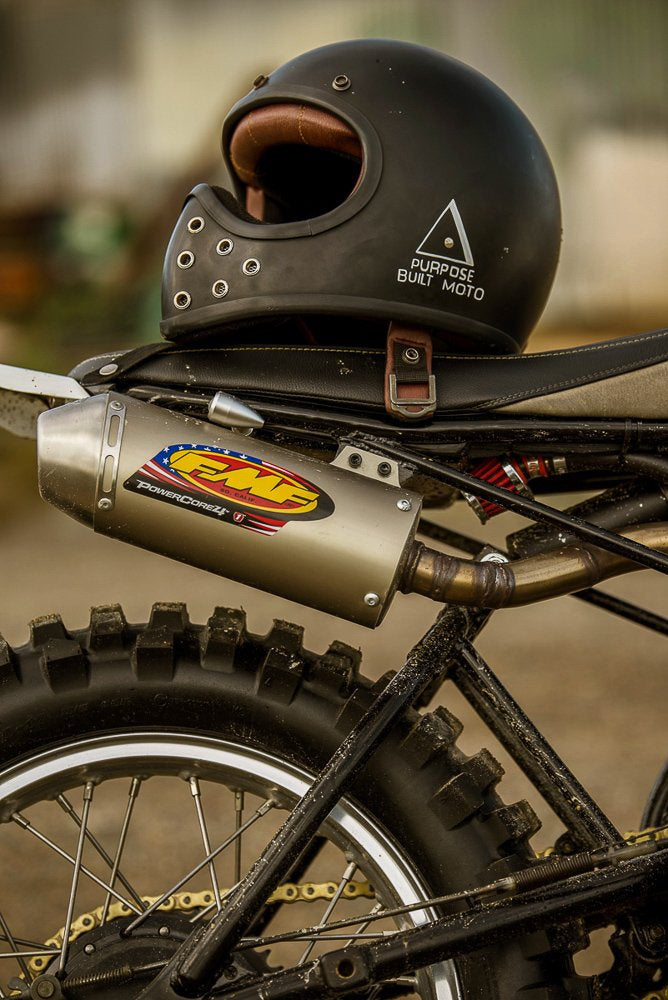
1. Light grill mount
A scrambler headlight grill or headlight plate is a great way to keep the off road race bred look of your scrambler in tact while making sure its street legal. Installing LED blinkers on your bike is an integral part of the minimal look.
Once the headlight plate has its mounting points fabricated, you can either fix and angle bracket to the headlight plate itself, or alternatively make the mount on the frame that holds the headlight plate. Both are simple to do, with a very similar result. The difference will be if you take off the headlight plate, the LED turn signals will either come off with it, or stay mounted to the bikes frame. I’ve used both its up to personal preference. Shown above is the XT250 Scrambler with the LED indicator mount welded to the back of the aluminium plate.
On scramblers I tend to keep the blinkers mounted high and tight, to avoid anything hitting them if you’re off road.
Shown below is a GN250 Scrambler with a similar mounting location but using a Triple clamp mounting bracket. This leads me to my next indicator install option.
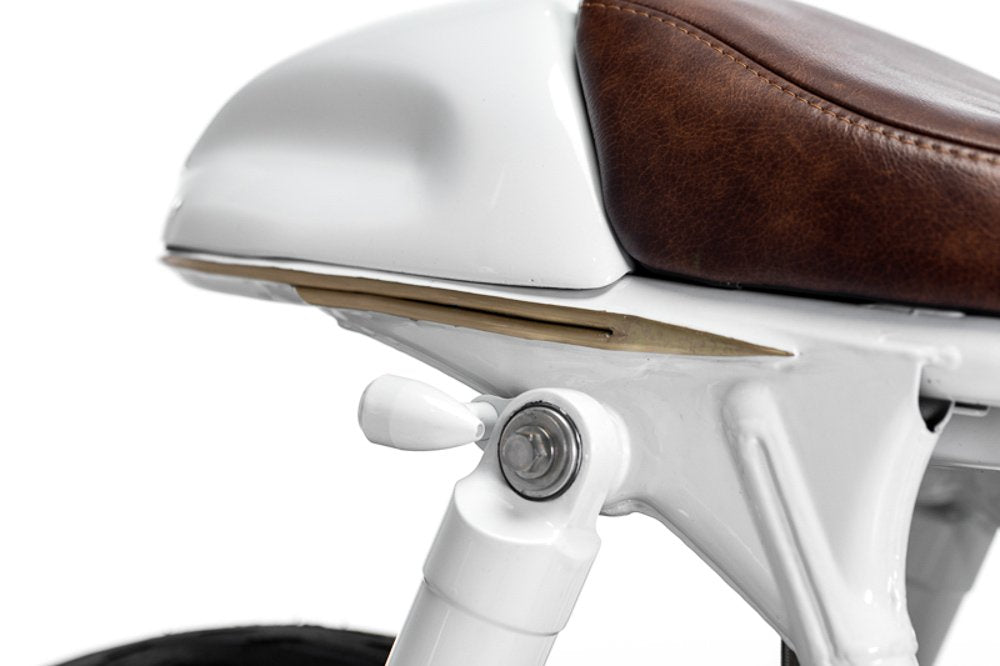
2. Triple clamp mount
Using the triple clamp mount style is very divers and adaptable, however you need to have the right bolt pattern on the triple clamp. Many of the more modern triple clamp set ups with countersunk bolt heads this isn’t an option. On older styles with protruding bolt heads or nut + bolt set ups this is a great way to discreetly mount your LED turn signals. I will mount my headlight in place where I want it, and then figure how to best mount the LED indicators. Whether that be on the top triple clamp or neatly hidden on the bottom, I will make up a small bracket with a hole for the LED turn signal and a hole to go under the triple clamp bolt head or nut. Just be mindful you may need to purchase a slightly longer bolt, and make sure you torque them correctly upon install.
This is arguably the most discreet way to tuck your indicators away nicely, and my personal favourite. You can take a look at the few examples of this install option in the pictures. Above the Scorpio 225 Café Racer, mounted low and super tight to the headlight. Below is the SR400 Scrambler utilising triple clamp mounted brackets that place the LED turn signal behind the fork.
-
7" Flashpoint Classic LED Headlight Black
From$330.00 -
7" Flashpoint LED Headlight Polished
From$320.00 -
7" Flashpoint Classic LED Headlight Polished
From$320.00 -
7" Flashpoint LED Headlight Black
From$320.00


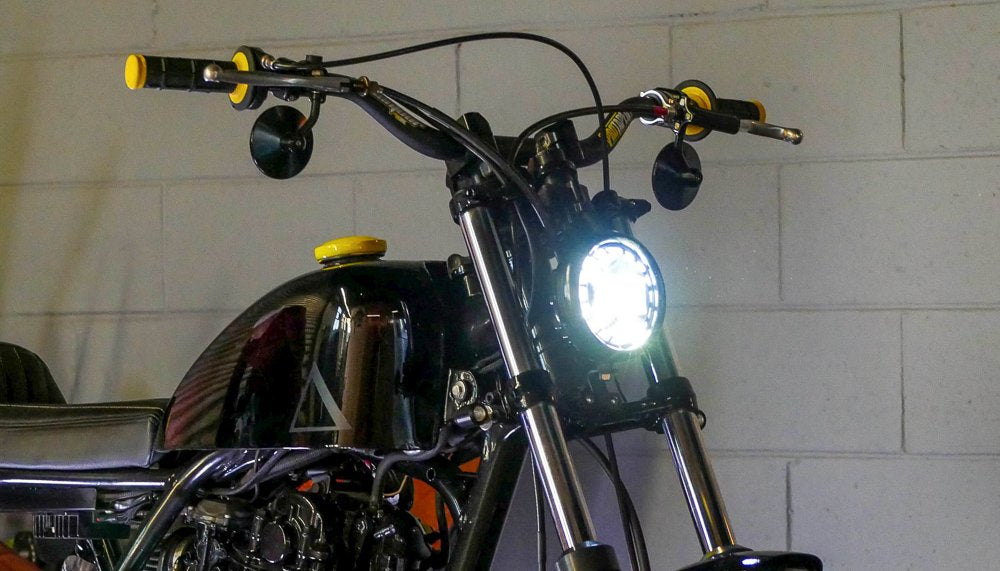
3. Headlight mount
This mounting option requires the use of a certain type of headlight and fork mounted headlight brackets. The Purpose Built Moto LED headlight range is built to couple with our LED indicator range. Using the LED turn signals as the fixing bolt for your headlight. Some other types do this as well.
With the headlight brackets installed do a test fit of the indicator as a headlight bolt, making sure there’s enough clearance room for the cable to be routed. Once fitted the turn signal needs to be facing forward, this can be achieved a few ways:
- Precisely shortening the turn signal spacer so once tightened its in exactly the right spot. This is the most difficult but by far the cleanest option
- Using a locking nut on the indicator thread to lock everything in place tightly
- Using washers and lock tight to achieve the right tension and position for the headlight and blinker.
I’ve used this method on bikes like the CX500 Signature series with the absence on the headlight ears and using a bottom mount, the finish is flawless. You can also see this method on our GS1000 Brat style project pictured below.
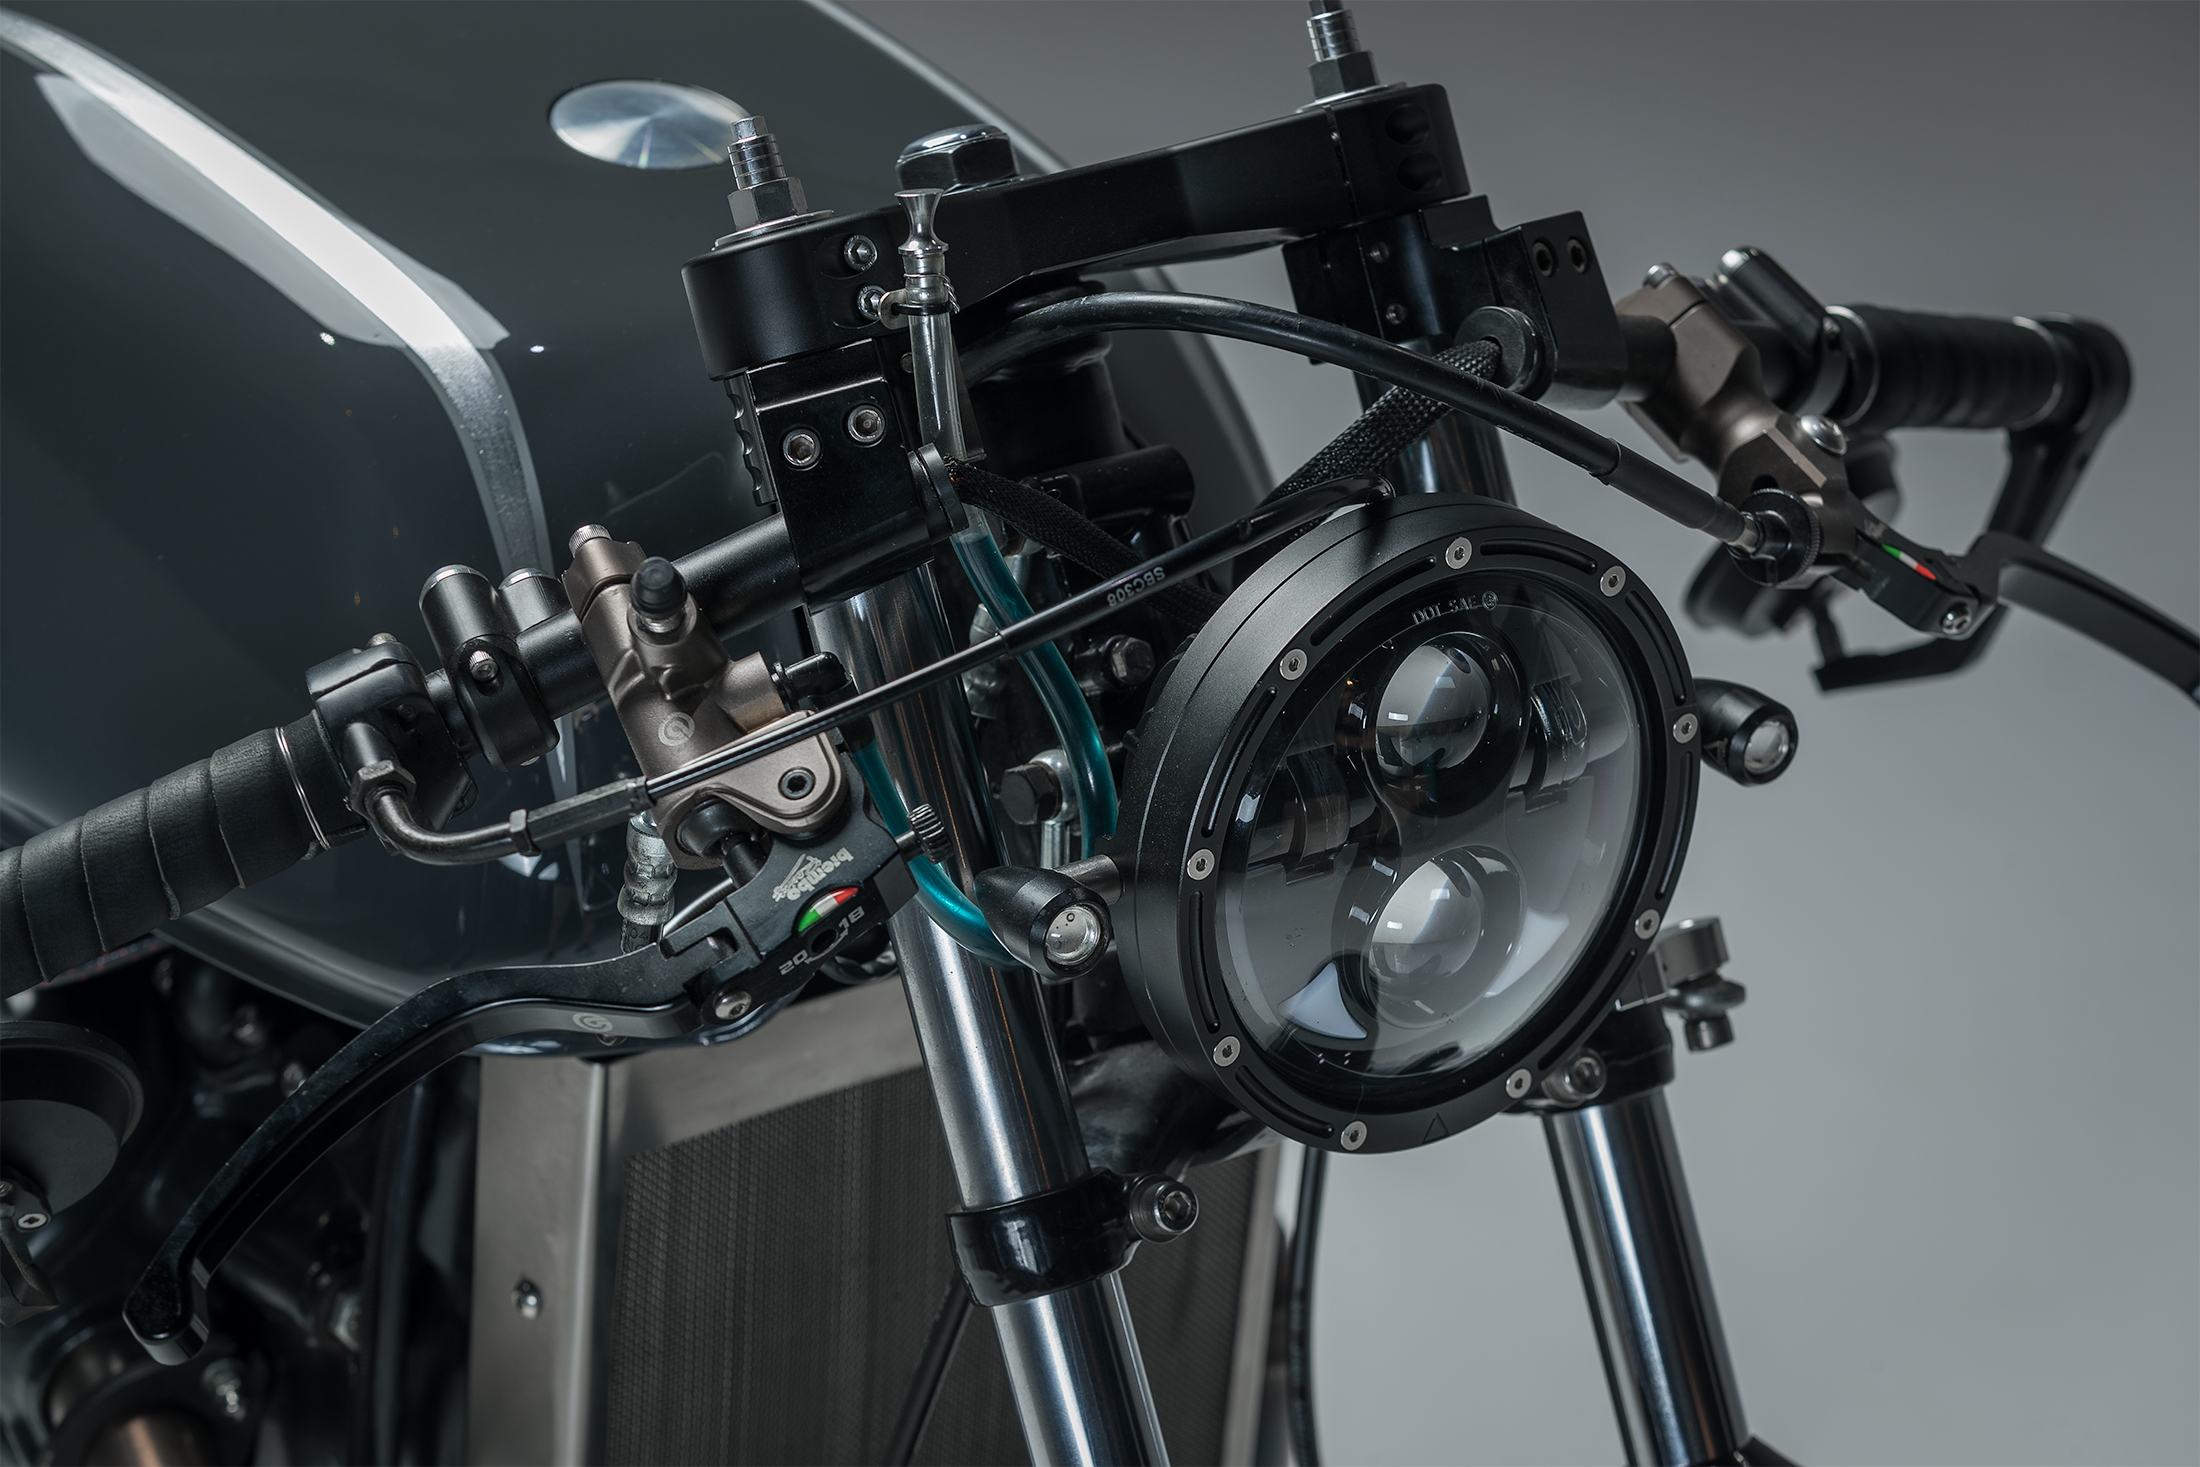
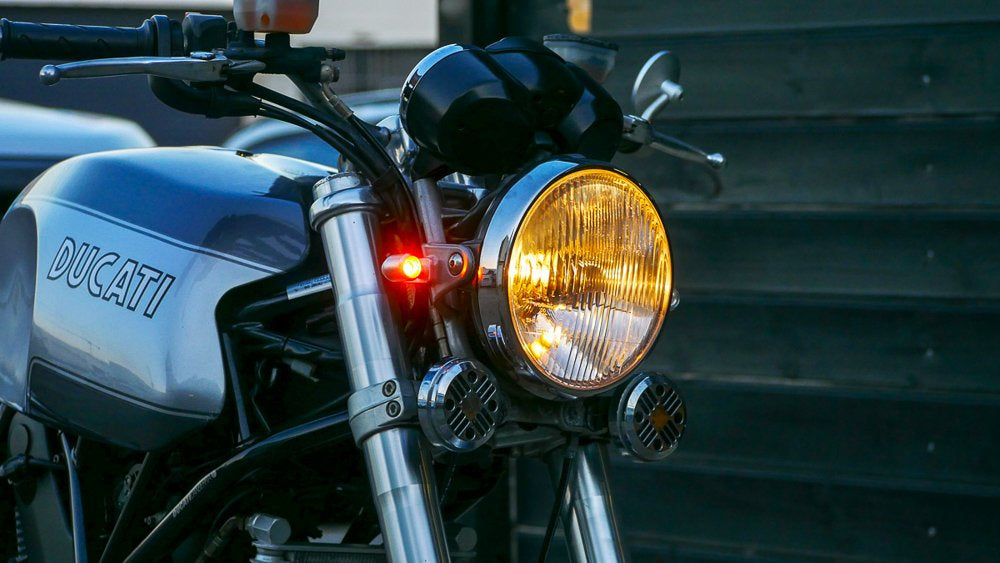
4. Headlight bracket mount
I really like this last option on a lot of the more modern customs where the factory headlight brackets are retained. And most definitely on the Ducati GT1000 you see below. The Ducati brackets are a real beauty in their own right, so I modify them to suit PBM LED turn signals with a small aluminium plate. The result is all class!
Removing the factory turn signals will reveal the mounting hole, it’s as simple as re-mounting your new LED blinkers and wiring them in. Modern triumphs also have a very easy mount to use this install method on all you need is a large diameter washer and its good to go! Below is the Triumph T100 scrambler I built a few years back with the LED blinkers nicely mounted onto the factory mounts.
Is your mind racing yet with ideas yet? If you haven’t already raced out to the garage and started tinkering, stick with me for the rear mount options for your LED turn signals. Lets dive in!

Mounting LED turn signals to the rear of your motorcycle:
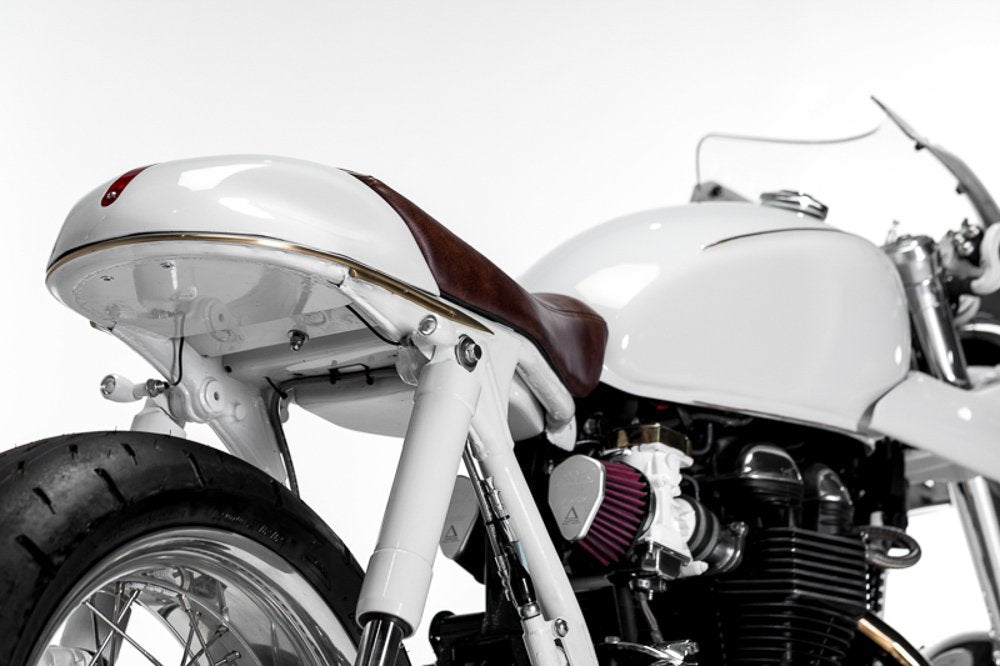
1. Fender Mount
There are a few pre-requisites for this mounting style. The first is you have a rear fender…. The next is that you have sufficient clearance on the rear wheel to allow the fixing points and cables.
When fender mounting an LED turn signal I will mark and drill a hole on either side of the fender, if the sides are square, your job is done, just mount the blinkers up.
If the sides are rounded which is far more common, I’ll Make 2 spacers approx. 14mm dia. with an 8mm hole or M8 thread, drill the fender sides out to suit the space and weld the spacers in place to allow a flat surface to mount the LED indicators to.
It can take a little patience to get it right but once you’ve finished the result is well worth it. Your rear fender will look well thought out, neatly finished and most of all have no ugly bracketry to be seen. You can take a look at the Brake light mounting article for a bit more detail on this process.
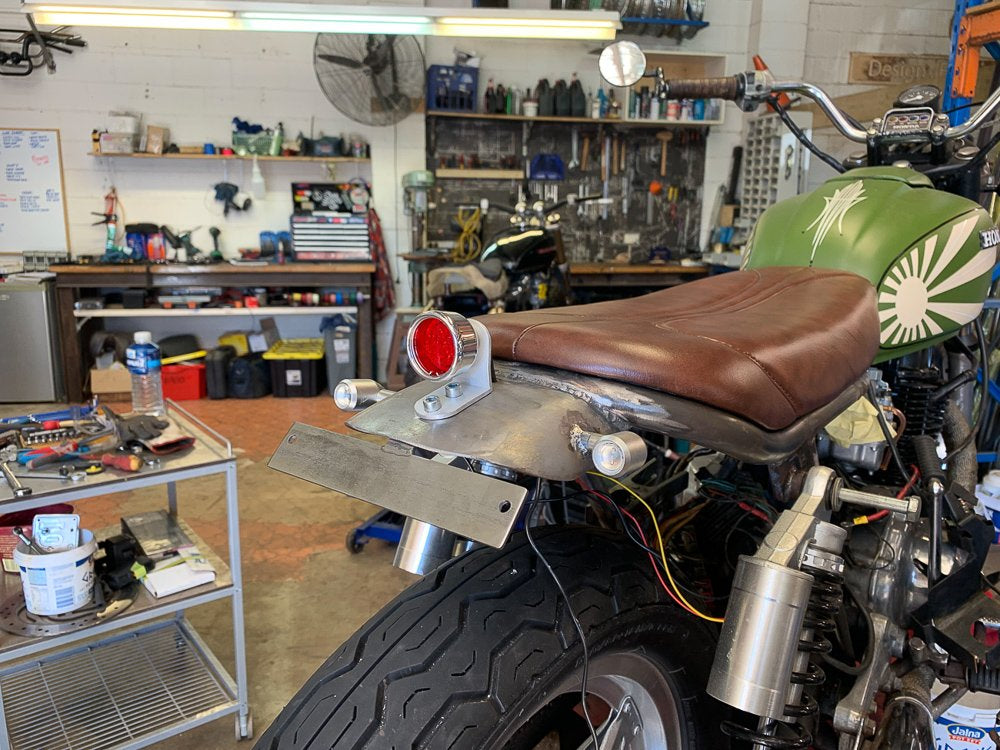
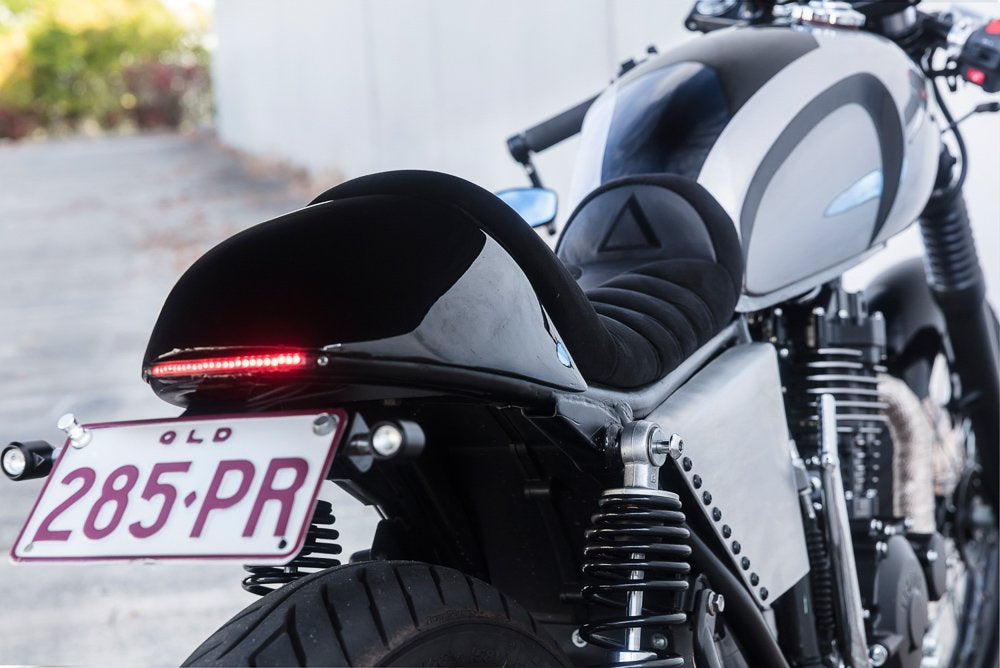
2. Tail Tidy mount
Quick, simple and effective. So where’s the down side? Well It may not look as good, however if you don’t have the ability or equipment to weld, this option will most likely be your go to. Laying out a simple sheet metal template you can include a turned down bracket on either side of your license plate holder or tail tidy.
Using either aluminium or mild steel, the only note I have on this one is to make sure you leave enough length on the blinker mount section to not only allow the hole but also the washer + 13mm nut as well.
previously I’ve made these tail tidies and made them so tight that getting a spanner on the nut to fix the indicator was extremely difficult.
Keep the clearance in mind and you’ll make your life a lot easier. Shown below is ourSol Invictus Cafe Racerproject utilising this mount type.
3. Frame Tab Mount
The frame tab mounting of a LED indicator is a versatile and simple way to go about it. The fabrication needs to be done before the frame is painted or powder coated but that’s really your only hold point. This style is a great option when the license plate is mounted off the side, or where the rear suspension is twin shock.
Using 2 small sections of flat bar cut and drill out the 8mm hole required to mount your LED blinkers.
Now its as simple as choosing your placement along the under side of the rear frame rail and welding them in place. I’ve found the sweet spot to be on the inner ½ of the frame tube (more towards the centre of the bike. This allows a good placement of the turn signal, but doesn’t have it protruding too far so as it stands out too much. If you are using a rear mounted licence plate just check that the LED blinkers are visible from the rear before finalising your mount position.
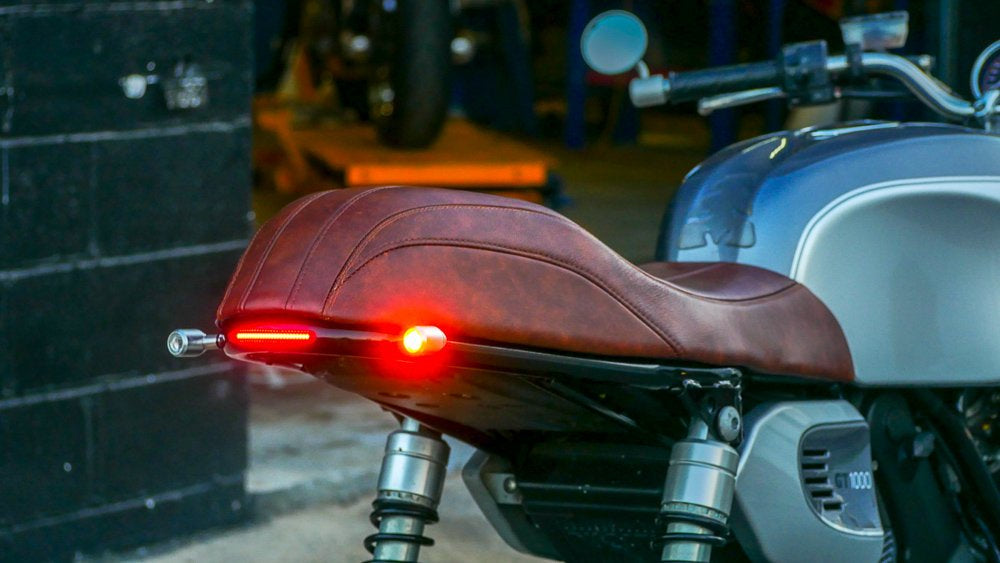

4. Frame slug mount
Similar to the above frame tab mount, albeit a little more complex and a bit nicer looking. This one’s for the builders who want to go that extra mile. Allowing a completely seamless mount, with no visible wiring.
Turn and thread or purchase our 2 x threaded bungs as along as your frame tube is wide (normally around 25mm) Choose your mount location on the rear frame rail and drill out the size hole to allow your threaded slug to slide through (ours are 14mm diameter). If the frame rails angle toward the back, like the Ducati GT1000 shown, the holes and threaded slugs need to be at 90 deg. with the centre line of the rear wheel to point straight backwards.
I will fasten the LED turn signals in to align the threaded bung perfectly before tack welding, then removing the LED turn signal before completing the welding. Once mounted the wiring can generally pass through the weld on slug and directly into the electrics tray hidden under the seat.
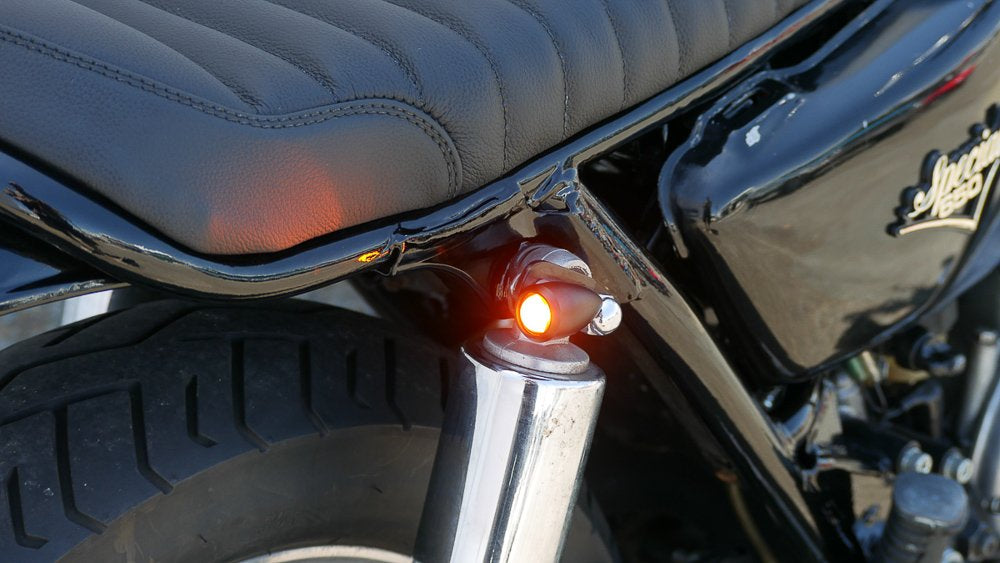
5. Shock bolt mount
The shock bolt mounting option is perfect if you aren’t stripping the frame to be repainted and requires no welding. Instead using some small brackets to mount the LED turn signals and utilising the top twin shock bolts as fixing points. As shown in the triumph sidecar project pictured.
It does however require your bike to be twin shock. Jack your bike up to remove the weight from the rear wheel and loosen the top shock mount bolt. You will need to measure the stud size to know what size hole to drill in your mounting bracket. These are usually 12-14mm.
Once you have your measurement, use some sheet metal or flat bar to cut 2 brackets. Each bike will be different but, in my experience, 60mm length will do the job nicely. Mark and drill both the shock bolt hole and the LED blinker mount hole (8mm) once those are done, you may choose to shape the bracket nicely, or simply round the corners.
After paint or polish just be sure to re-torque the rear shock bolts according to the manufacturers specs. Routing the cables is simple as they will dis-appear under the seat quickly and be able to be wired in there.
If you’ve made it this far, thanks for sticking with it. I have no doubt you’ll take the ideas shown here and make them your own. Have fun getting creative and mounting your own LED turn signals.
Make sure you leave me comment with your feedback!
I appreciate you taking the time
Tom.
WE BUILD BIKES WITH PURPOSE.
Purpose Built Moto is home for unique custom motorcycle builds. We offer a unique motorcycle customizing experience in the heart of the Gold Coast.


33 comments
Are the indicators red for rear and amber for front?
Hey,
how is it possible to repair the indicator? I am pretty sure that the led is broken. My indicator doesn’t work? Do i need to replace the entire indicator?
Hey,
how is it possible to repair the indicator? I am pretty sure that the led is broken. My indicator doesn’t work? Do i need to replace the entire indicator?
Hi Boris,
Yes out Dome 3 in 1 have both Amber and red for brake and signalling. that should address your issue no problem.
Hi,
I really like your DOME 3 IN 1 LED INDICATORS BLACK. They are minimal and slick. I would like to install them on my 2020 Indian springfield dark horse. But there is a twist. I am moving to Europe and I will have to change the whole rear setup from all red to red running and brake light and amber (orange) turn signals. Would these domes solve my problem as well?
Best regards, B
Hi John,
We have a number of articles on general electrical work on your bike. We also provide instructions and a diagram when we sell our 3 in 1 LED indicators.
I just read your 9 ways to mount led turn signals. I would really like a diagram about wiring turn signals front and back with running lights a brake lights in the same bulb . How are these wired to the diode and specifically on a complete rewire.