


Fender mounted LED Brake Tail light + indicator install
It’s a simple job, and there’s a million ways to do it. But how do you install a fender mounted tail light? Well this is one way that I’ve used that incorporates a tail tidy/plate mount and a tail light all in one. A quick install process, and as a bonus I’ll show you how I fender mount a set of LED turn signals too. One of my most popular email comments is “I love your Orbit LED brake light, but how am I meant to install it?”

So here’s your answer in the best way I can explain it, without just doing it myself. The Orbit brake lights have fast become a favourite with builders using Purpose Built Moto products. Its small, amazingly bright, easy to install and so versatile it suits any style and type of bike.
Tools you need:
- General Hand tools
- Hacksaw
- Center punch
- Electric drill
- Grinder
Materials you need:
- Orbit mini LED brake light
- M6 x 20mm bolts/nuts/washers
- 30mm x 30mm aluminium angle (only 20mm of it)
Optional
- 1 pair PBM Turn signals
- 16mm round stock – 50mm of
- 20mm x 3mm flat bar- 200mm of
The bike shown here was worked on for a customer and now Mate Alex “Curly” Laird. The tail section was set to turn out really neat, so I thought what better opportunity to show you how I do it. Alex is a gun sales rep, for the Young Henry’s Brewery. These guys fuel many moto events and have been lubricating the workshop for a while now too.
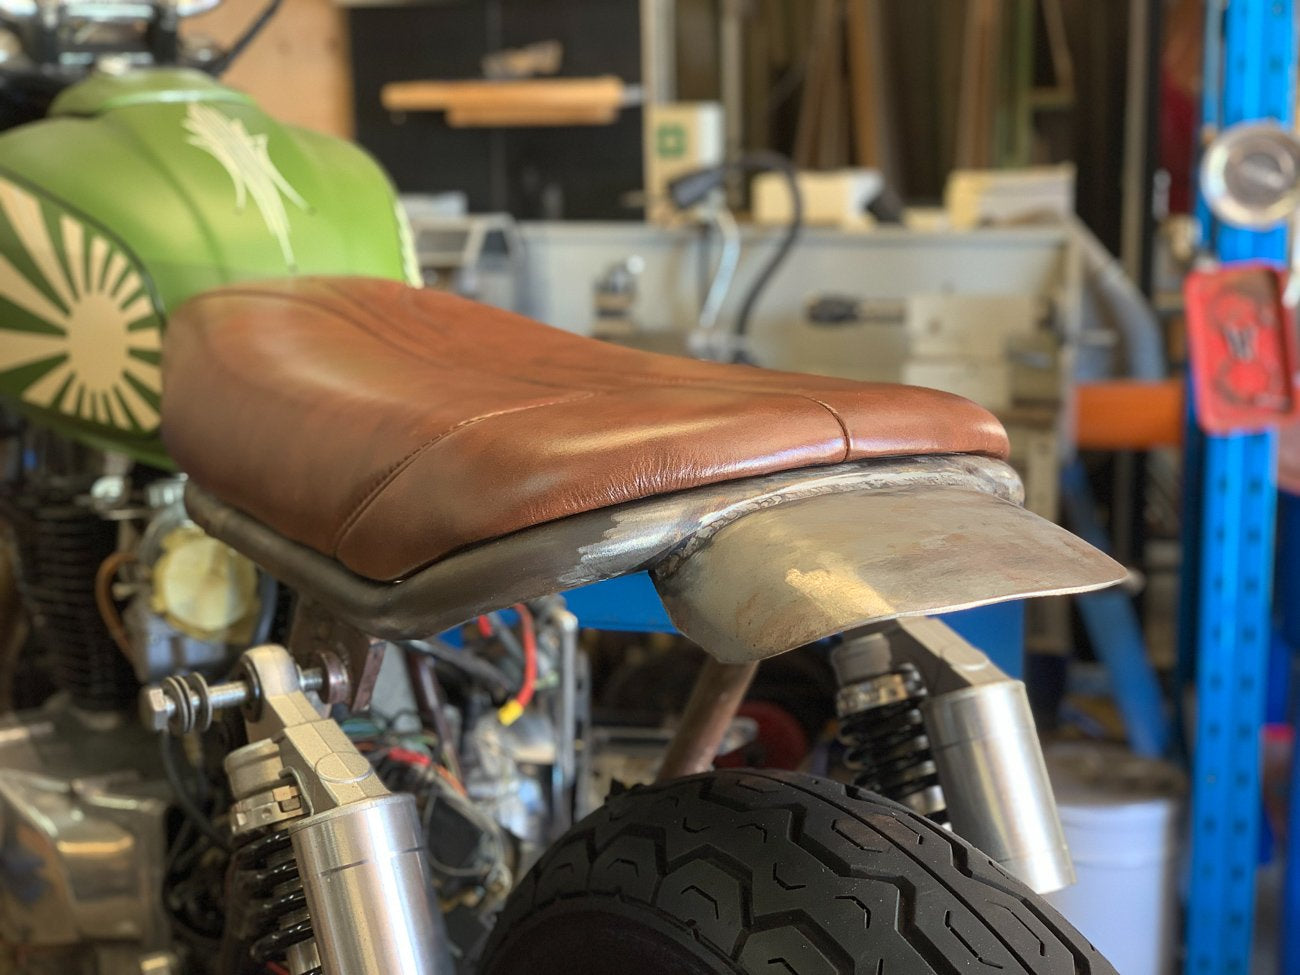
To get started you need a motorcycle, and a rear fender. Got that sorted? Good.
now cut your 30×30 aluminium angle to 20-30mm long. Once cut, drill 2 x holes @6mm diameter on one side. Making sure to leave enough space between for your bolt heads.
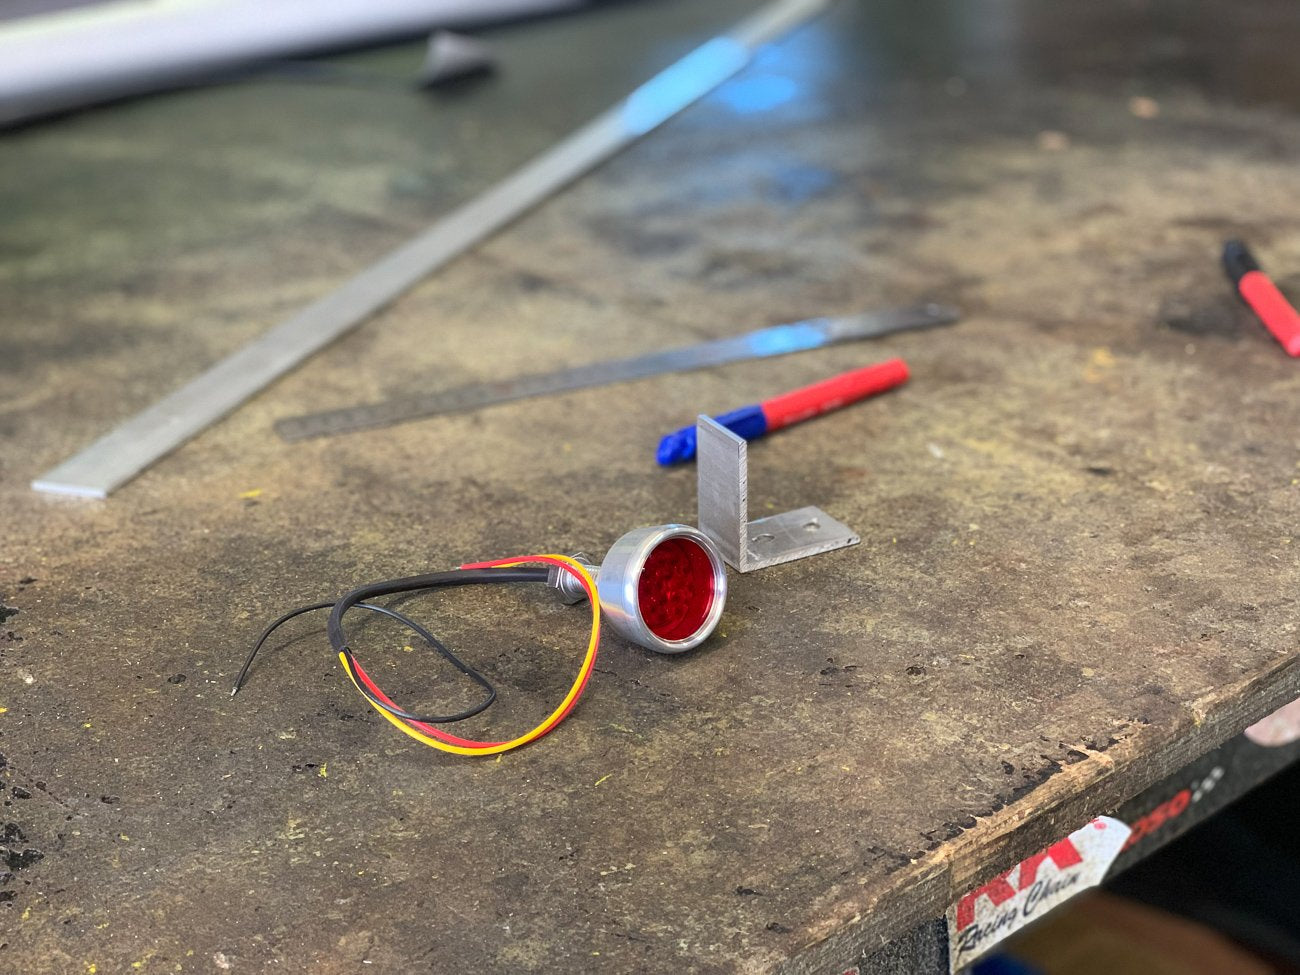
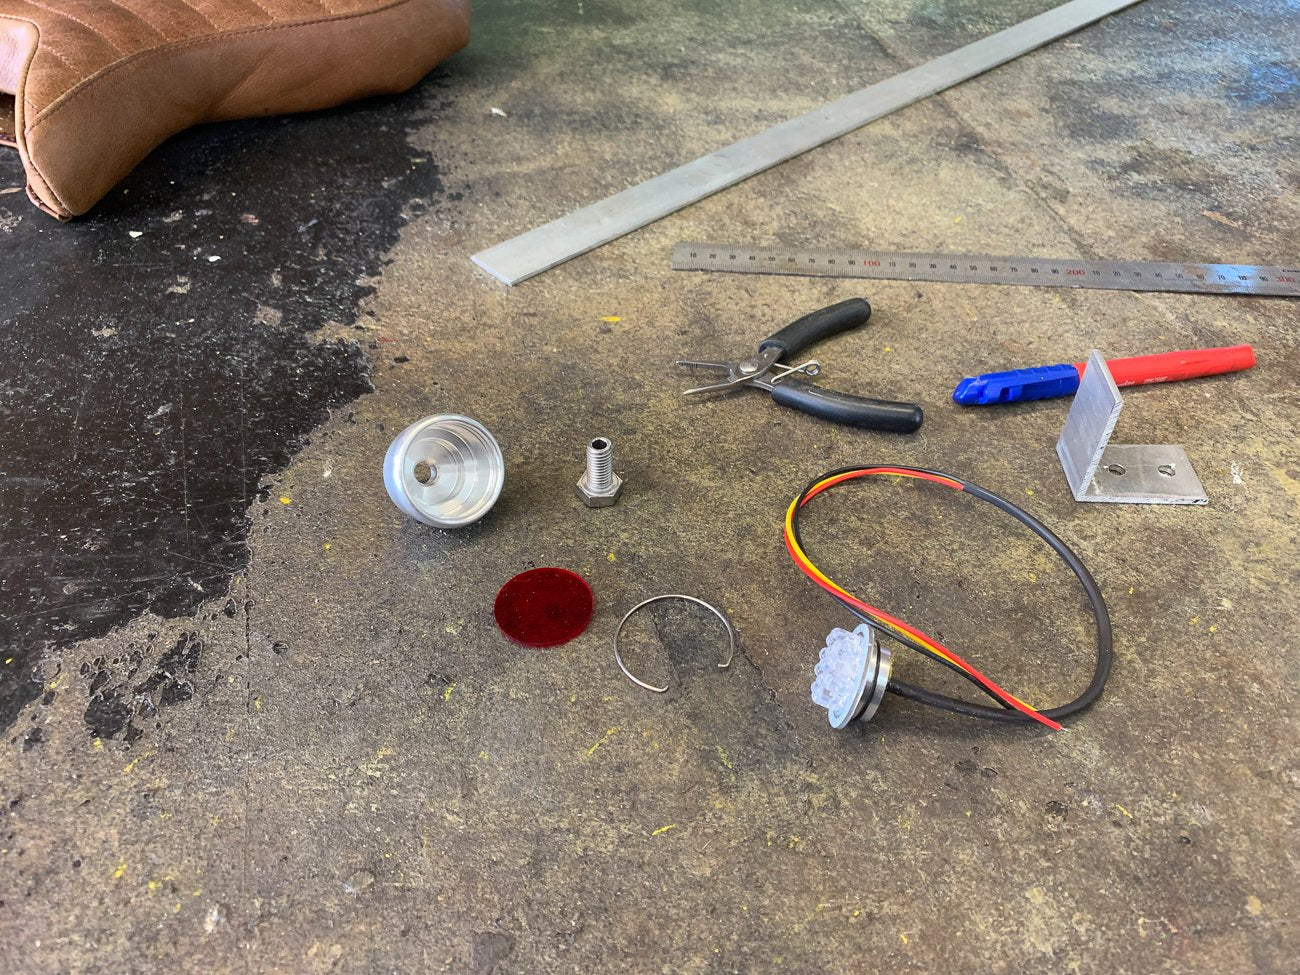
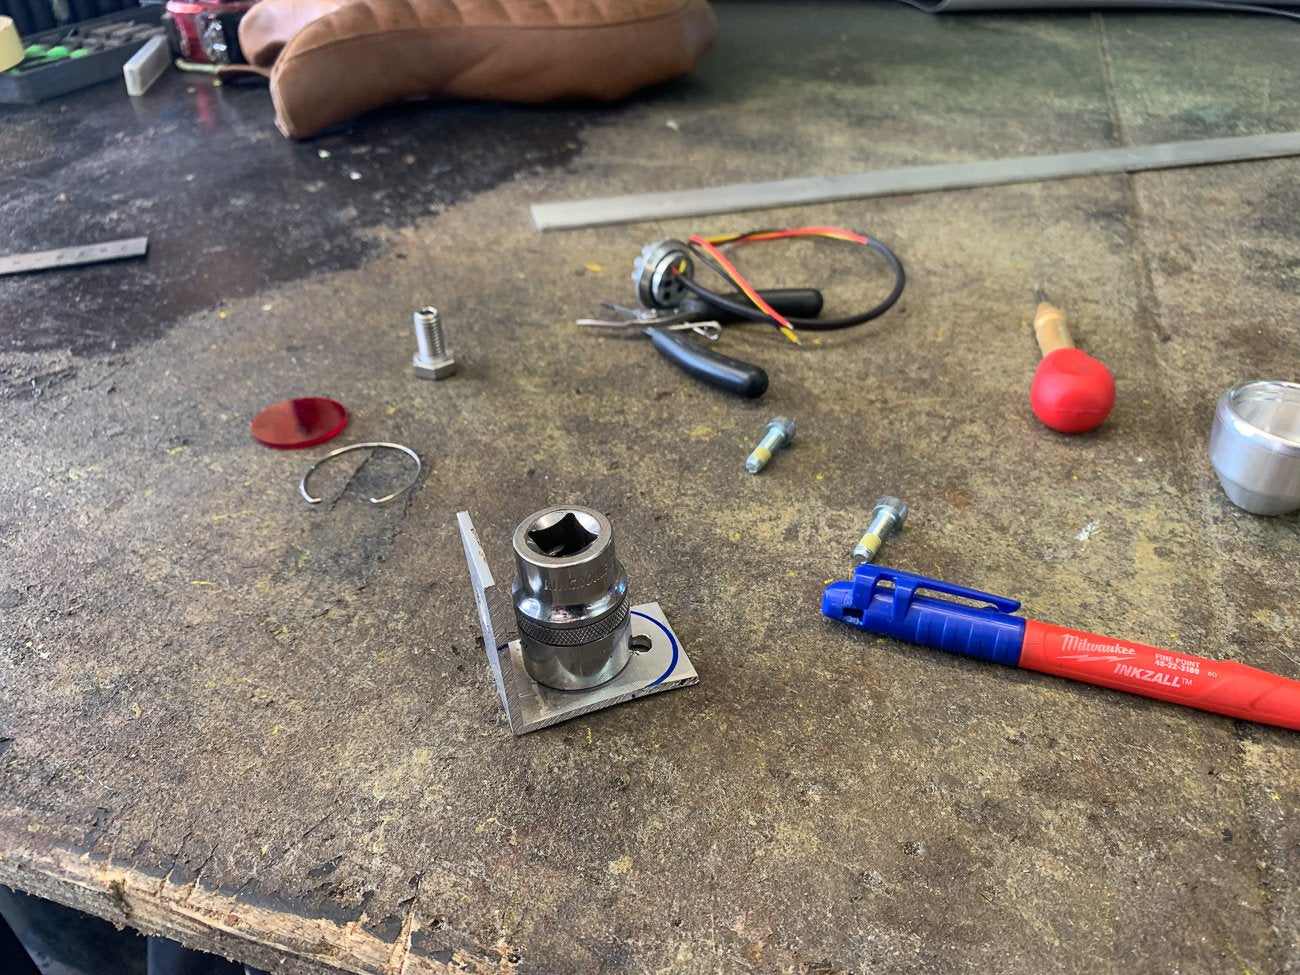
Dis-assemble the Purpose Built Moto Orbit Mini LED brake light. Set the lense, circlip, fixing bolt and LED unit aside. You only need the body for now.
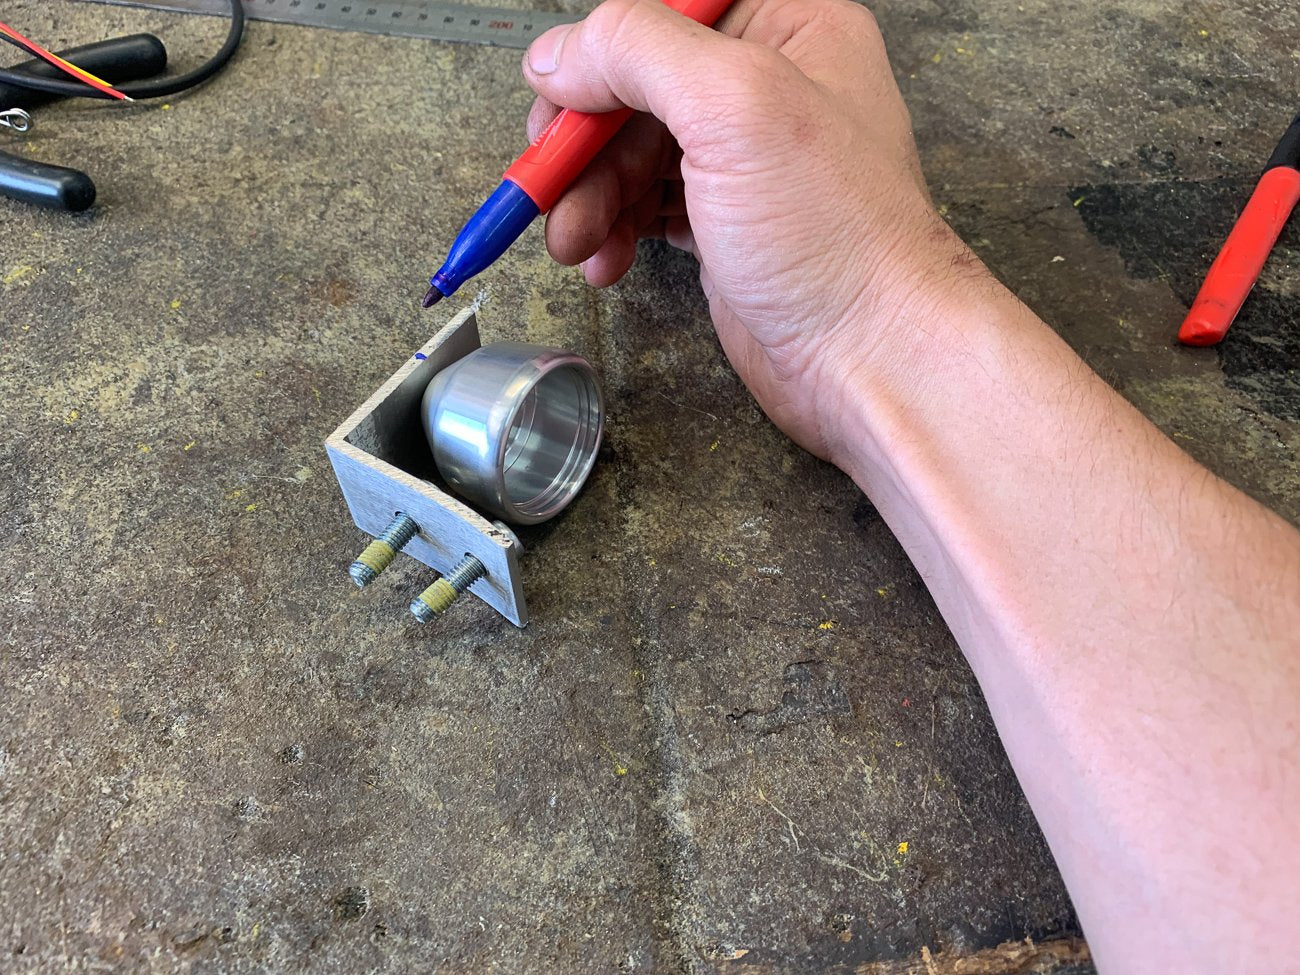
Laying the angle on its side, and lining the LED tail light body up to it, mark where your 10mm fixing hole needs to be drilled, and drill it out.
Once complete you can de-burr the holes, then mark and radius the angle bracket. I used a 26mm socket, but anything circular and the right size will do. This can be done with a handsaw and file, or a linisher if you have one.
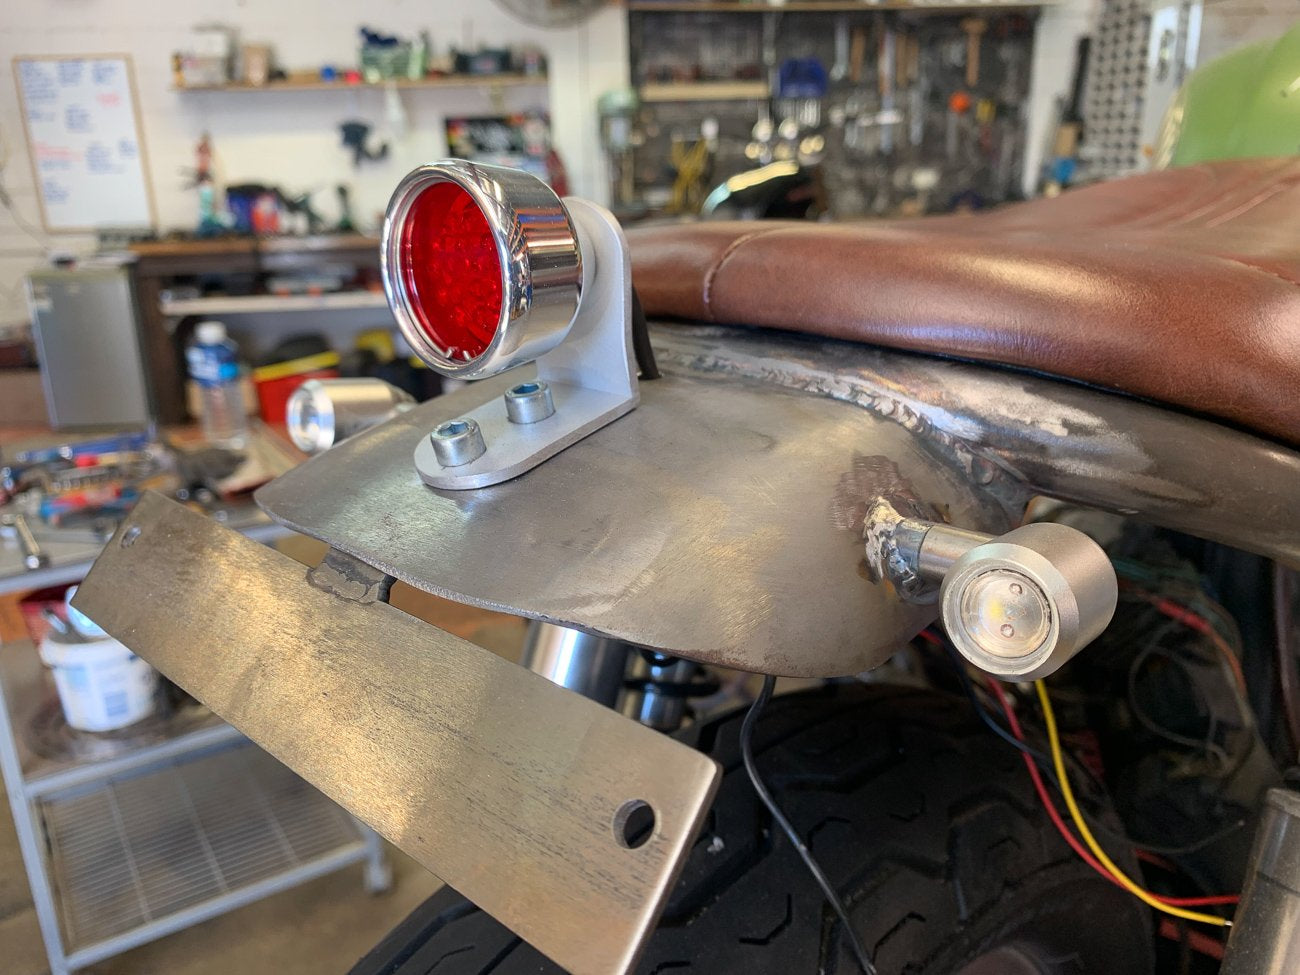
Once cleaned, we can start to think about the positioning of the brake light on your motorcycle rear fender. Depending on the fender angle and position, you may need to put a slight bend in the flat sections of the angle bracket. This will make sure the bracket conforms to the shape of the bike fender nicely, and the LED brake light is facing horizontally and not too far up or down.
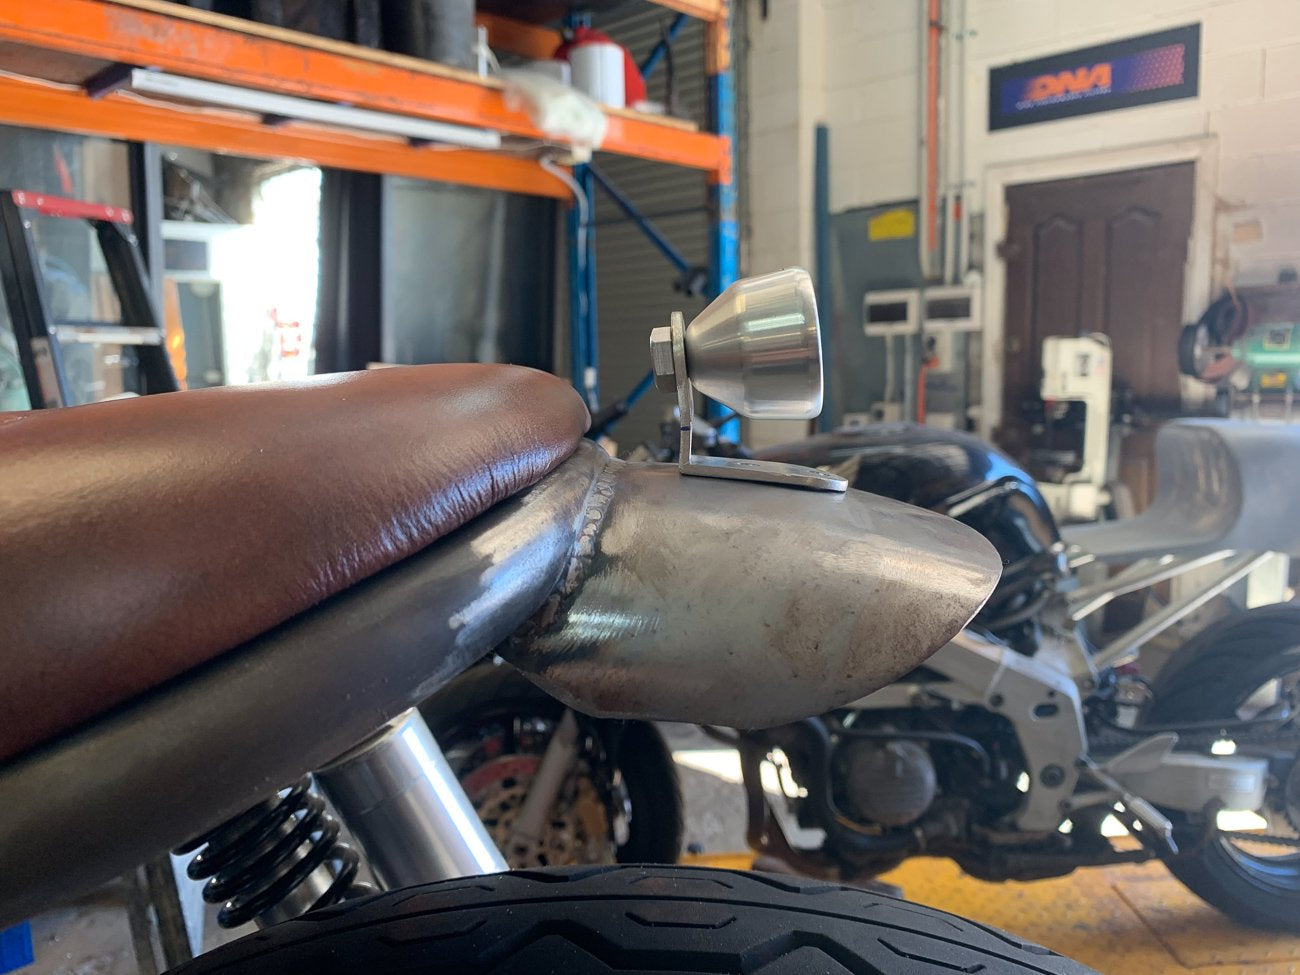
When you have your brake light and fender mount where you want it, mark and drill your rear fender to 6mm. If you want to go further and incorporate a tail tidy with this set up, sit the LED tail light aside. If you’re happy with this set up as it is, you can re-assemble the Orbit mini brake light, install it and fix your bracket down to the fender. Be sure to measure and trim any excess length off the M10 fixing bolt on the orbit LED brake light.
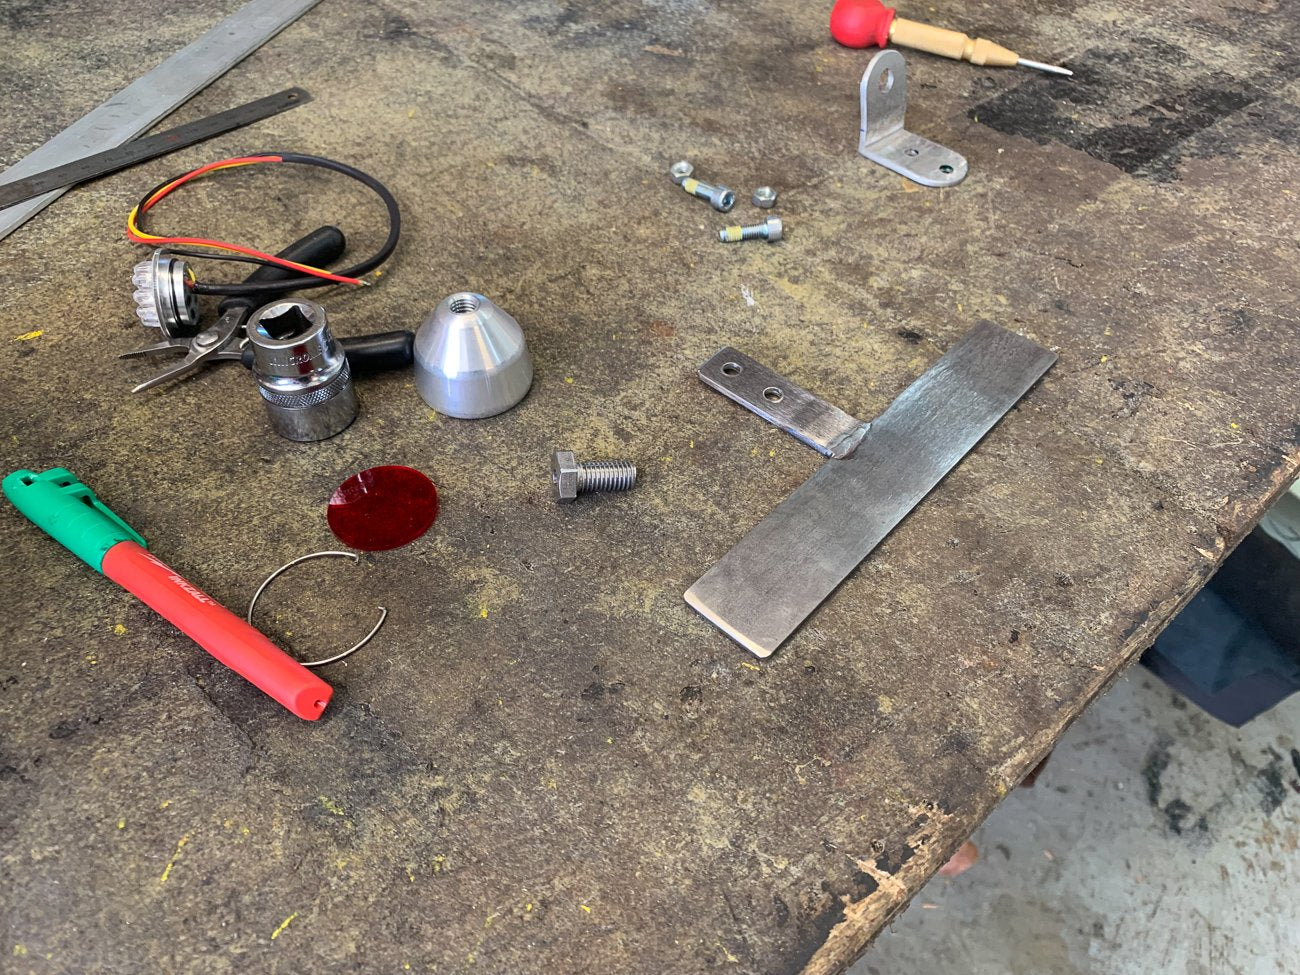
If you’re making the tail tidy/plate mount, there’s an easy way to do it. Measure from the 2 x 6mm holes to the rear of your fender and cut a length of 20 x 3mm flat bar to length.
Next measure your plate width and cut a second piece to match that measurement. Weld these two pieces in a “T” piece as shown. Drill holes to suit your plate mount and the 6mm fender bolt holes too. You’re now ready for fit up!
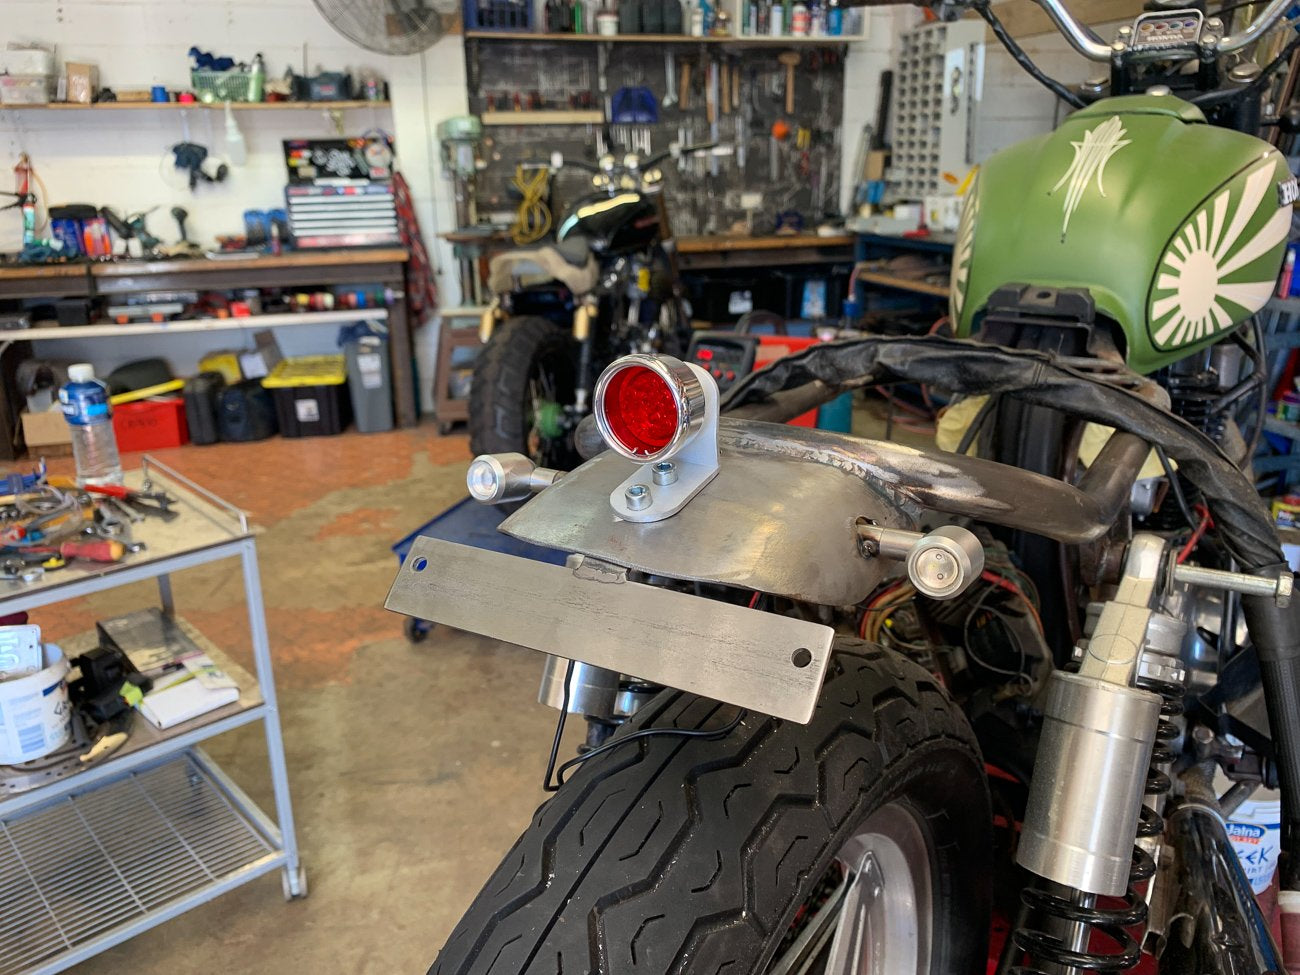
Once this is in place you’ll be stoked at just how clean your fender mounted LED brake light and tail tidy is. A very simple fabrication process from materials readily available from any hardware store, and only using hand tools almost anyone has in their garage.
During the process of finishing this fender with tail light I decided to Fender mount the LED turn signals. So I snapped some shots of that as well which I’ll show you here for fun.
Mounting an indicator on a round surface can be a real pain, but with a little thought and some carefully placed spacers you can achieve super clean results when mounting them up.
Using some 12mm mild steel round bar, I drilled an 8mm hole down the center. I had approx. 50mm of round bar, cut it in half and de-burred the holes.

Get the indicator situated where you want it mounted and mark the point where the LED turn signal will pass through the fender. Repeat for the otherside making sure its even. With those marks centre punch, pre-drill and finally drill a 12mm hole through the side of the fender. This will allow the spacer to go through and eventually be welded on.
I will normally mock up the LED turn signals in the spacers and place them in the fender here, just to make sure the holes are right and the lights look evenly spaced. While the lights are in-situ, I zip in 2 small tack welds. Its important to let the heat dissipate here so as to not get the LED indicator cable too hot. Take your time, and don’t melt the cables!!
I hope you’ve got some useful info out of this article, so make sure you jump on our mailing list to not miss out on any more of these helpful tech blogs or new custom builds rolling out of the shop.
Thanks for taking the time.
Tom.
WE BUILD BIKES WITH PURPOSE.
Purpose Built Moto is home for unique custom motorcycle builds. We offer a unique motorcycle customizing experience in the heart of the Gold Coast.


7 comments
This tail light doesnt have a plate light included.
You can grab our Plate Lights here: https://purposebuiltmoto.com/product/motorcycle-plate-light/
Hey there, quick question: can you use the led tail light as a plate light as well? Or is the only option to buy one separately. My plate will sit under the tailight, so I’d prefer a clean look of the single multi-purpose tail light rather than having to use another. Cheers
Thanks :)
The red and yellow can be used however you like on your bike.
Yellow is the Halo, red is the center.
Hey Tom! For wiring this beauty: Black = Ground / Red = ? / Yellow = ? Thanks!
Hey David
We would use 2.5mm or 14AWG cable
the LED indicator cable size is a lot smaller than that, but that gauge cable is more readily accessible.
you will need to extend all 3 wires unles you ground the Black cable locally on the fender.
Tom
Tom
if i need to take the 3 wire lead off your light – and i need to extend it via the fender or other – what is the wire size – type i need to connect to the harness area. Your led 3 wire – ground – running – brake – needs a 3 wire extension ?
D