


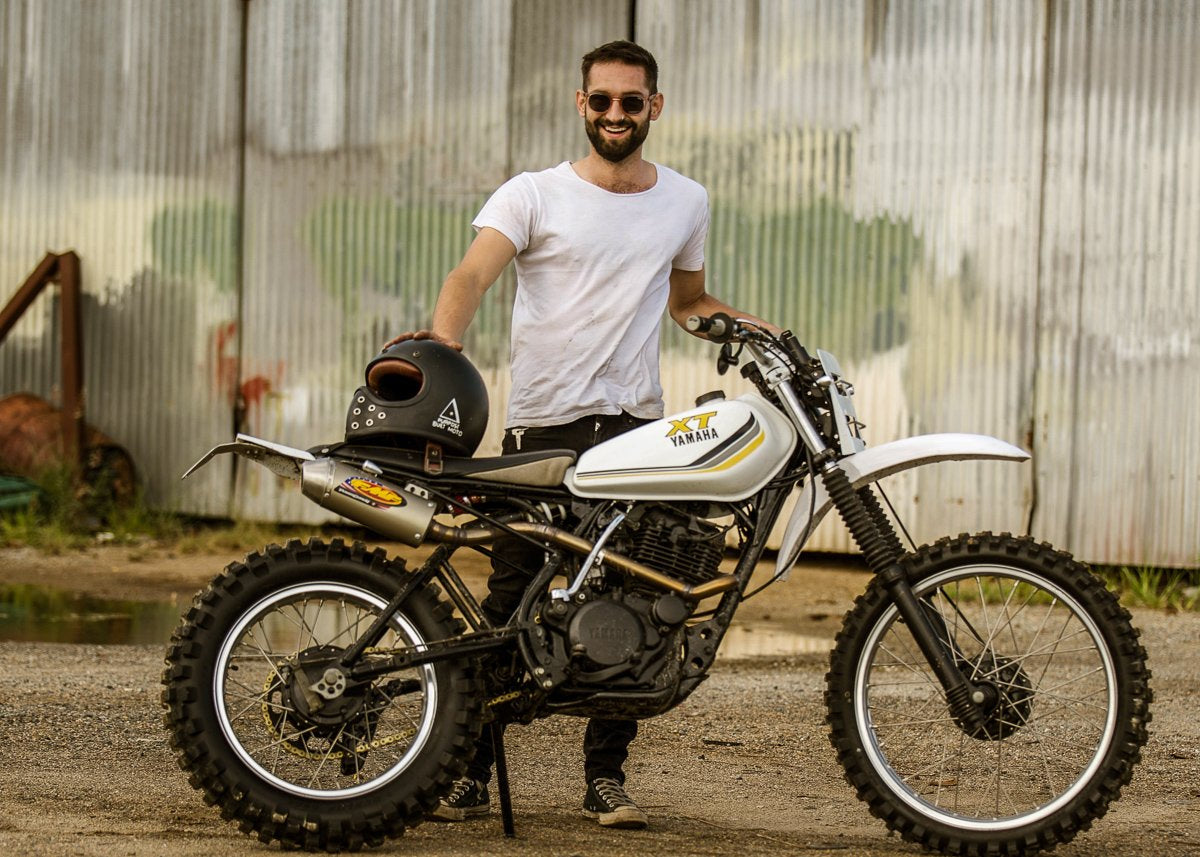
1990 XT250 Yamaha Scrambler build
When you mention a Yamaha Scrambler XT to any bike enthusiast a few things come to mind. Yamaha’s XT series set the bar in off road racing for a long time, and since then they’ve been synonymous with durability, performance and reliability. So of course, I have one rolled into the garage that looks anything but. Rolling Chassis, motor, box of parts and 3 words “make a scrambler”.
Easy Route vs Custom Build
The easy route would have been to mount a nice rounded fender and the run of the mill round tail light with roll stitched seat, probably lower it so it looked nicer, throw some 50/50 tyres on and be done with it. I don’t tend to take the easy way out, and the Yamaha XT250 MX scrambler won’t be any different. Why not build a Custom Motocross bike? I couldn’t think of a good enough reason, so that’s exactly what I did.
Tear Down and Frame Modifications
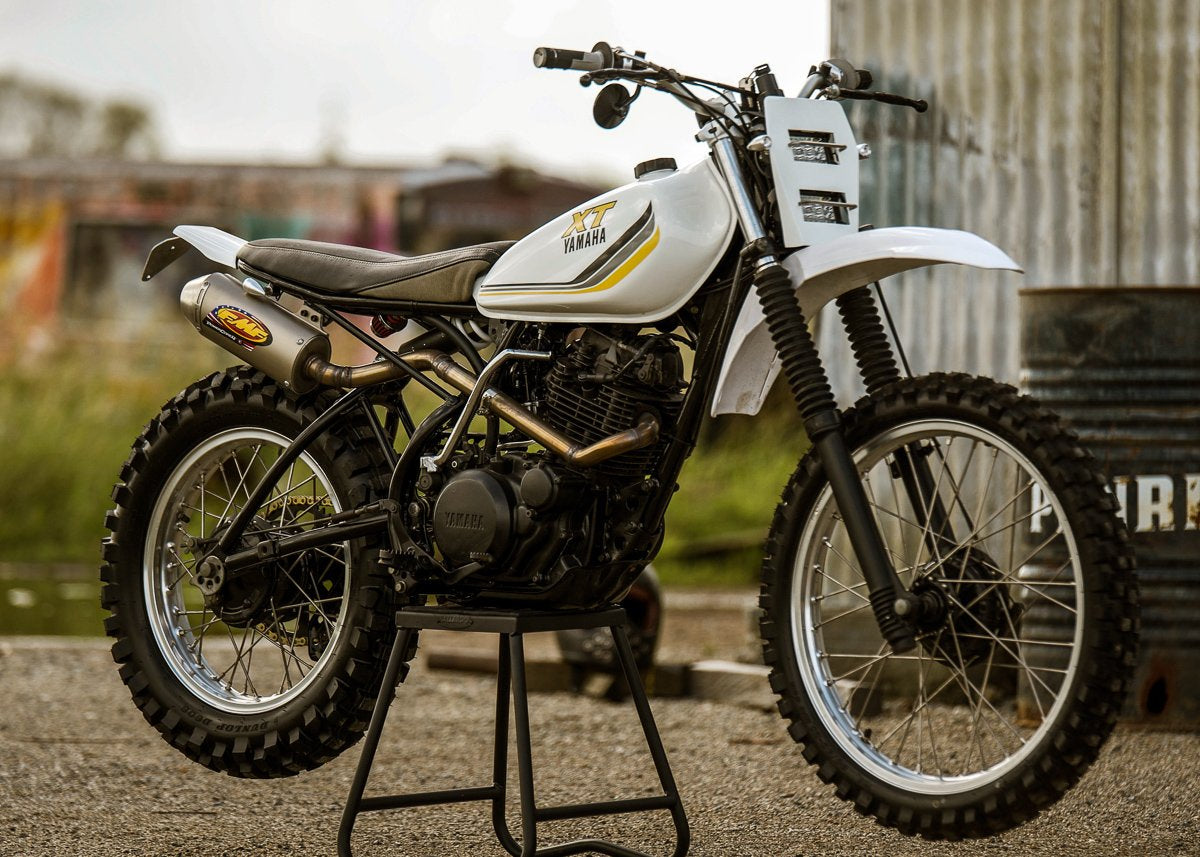
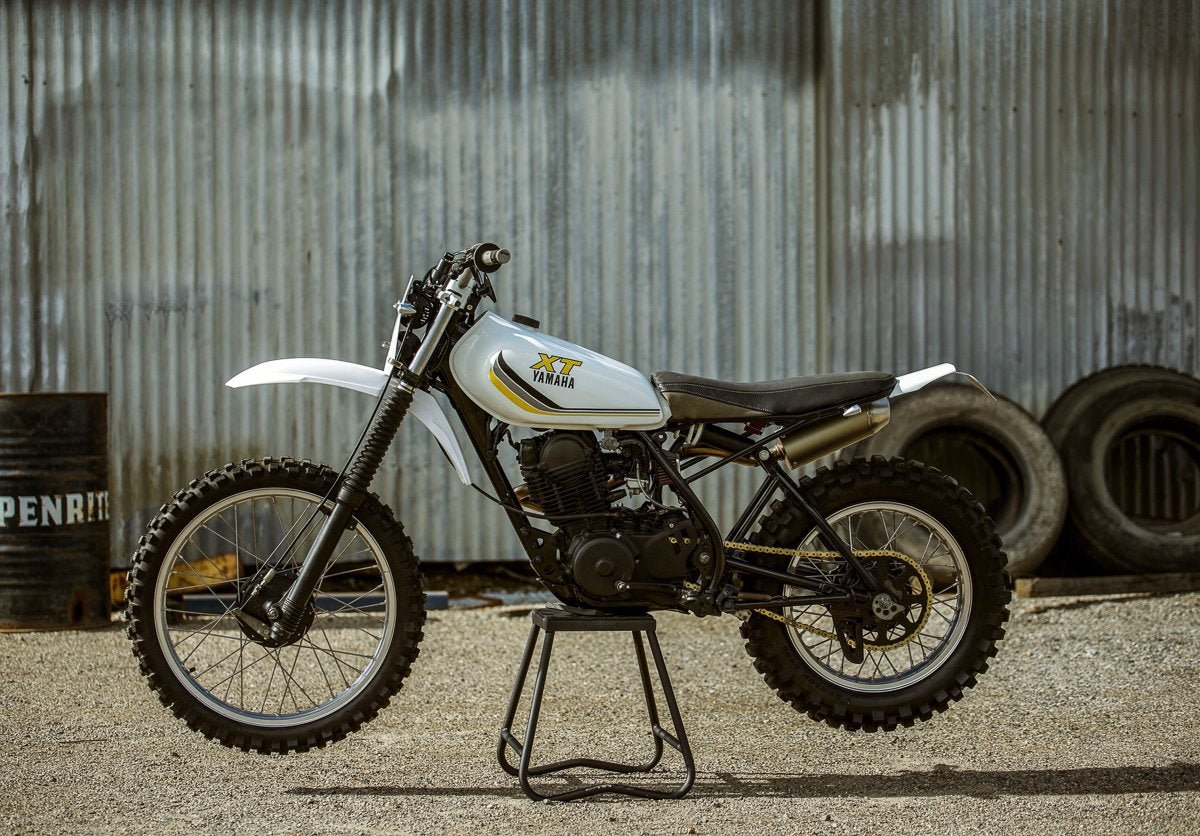
Tear down was simple, I think the only thing I removed was the old front fender, the rest was already missing. The light frame + monoshock of the Yamaha Scramblerlends itself to a simple design. The top seat rail was maintained with the bracing modified to better suit my ideas for the tail and exhaust. Next I dropped the forks through the triple clamps to sit nice and high on the front, and modified the rear suspension to suit. Overall lifting the Yamaha enduro bike 35mm.
Wheels and Exhaust
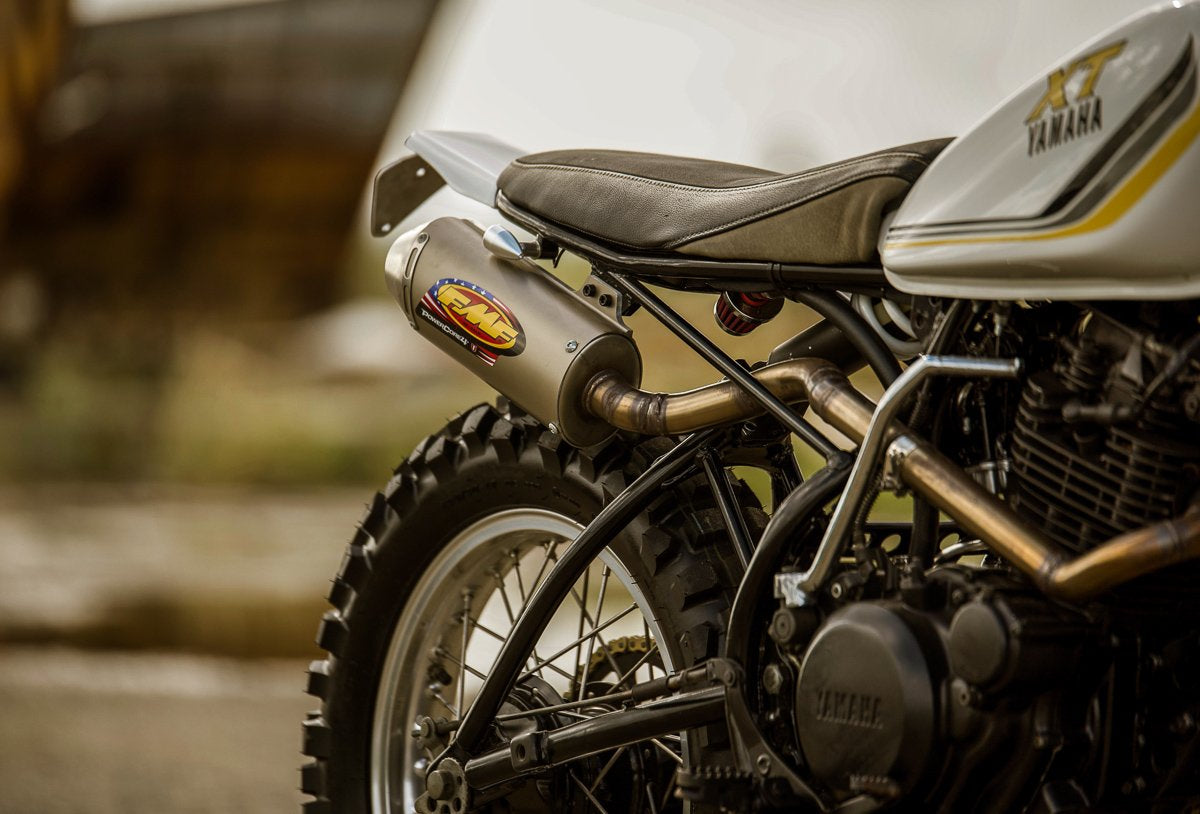
The wheels were stripped out, rims polished up and re-laced with stainless steel spokes. The freshly built wheels wrapped in a Dunlop D606 Off road tyre 17” rear 21” front. Once the bike was back on its own feet the exhaust was fabricated. The stainless steel header was put together piece by piece, and finished off with a modified FMF Powercore 4 muffler. The Muffler was cut + shut outside and in, and the link pipe was fabricated to snake inside the sub-frame. One of my favourite little details, it looks pretty trick.
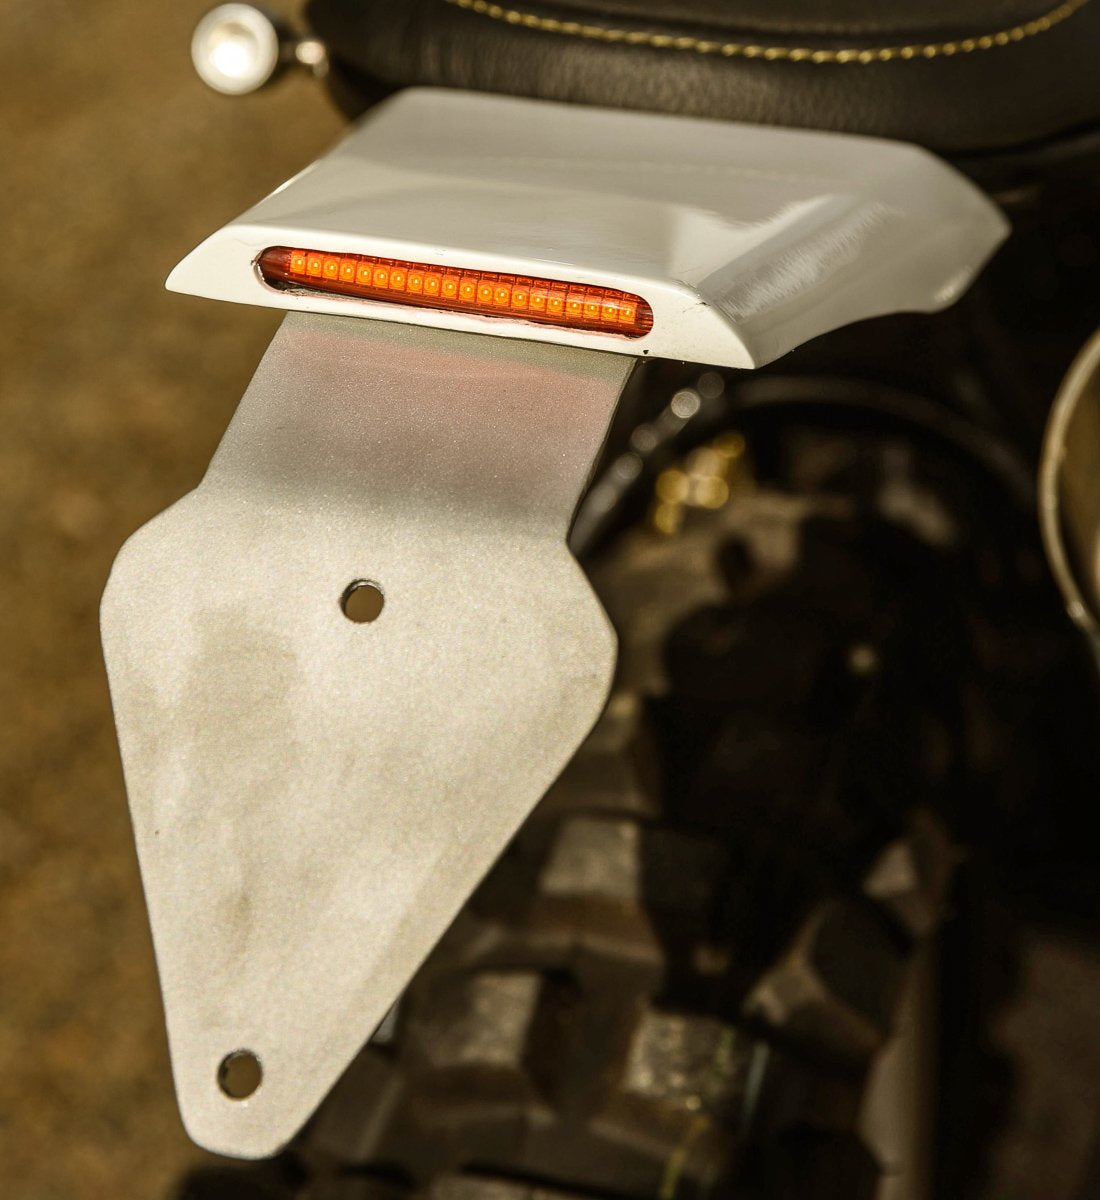
Rear Fender and Styling Details
Taking further styling queue’s from the Motocross bikes I grew up on, I went about hand making an aluminium fender to finish off the rear of the bike. Built to house an LED brake light and minimal mud guard, The tail piece was shaped and welded to accentuate the bare knuckles off road feel of the project. An important detail for me here is the opposing angles of the muffler and rear fender from the side . Crossing over each other just slightly is something you’ll often see on 4 stroke Motorcoss and Enduro bikes, that I always liked the look of.
Electrical System Simplification
Completely hidden under the seat, the electrics on this bike are fairly minimal. A 12V conversion was needed, with the addition of an Antigravity Battery. No starter motor, and the lighting circuits were further simplified with the use of the Purpose Built Moto Black Box control module. The black box with its lighting control, built in circuit protection and now a kill switch circuit takes care of everything electrical. Run through a set of push button switches on the handlebars, delivers a super clean finish.
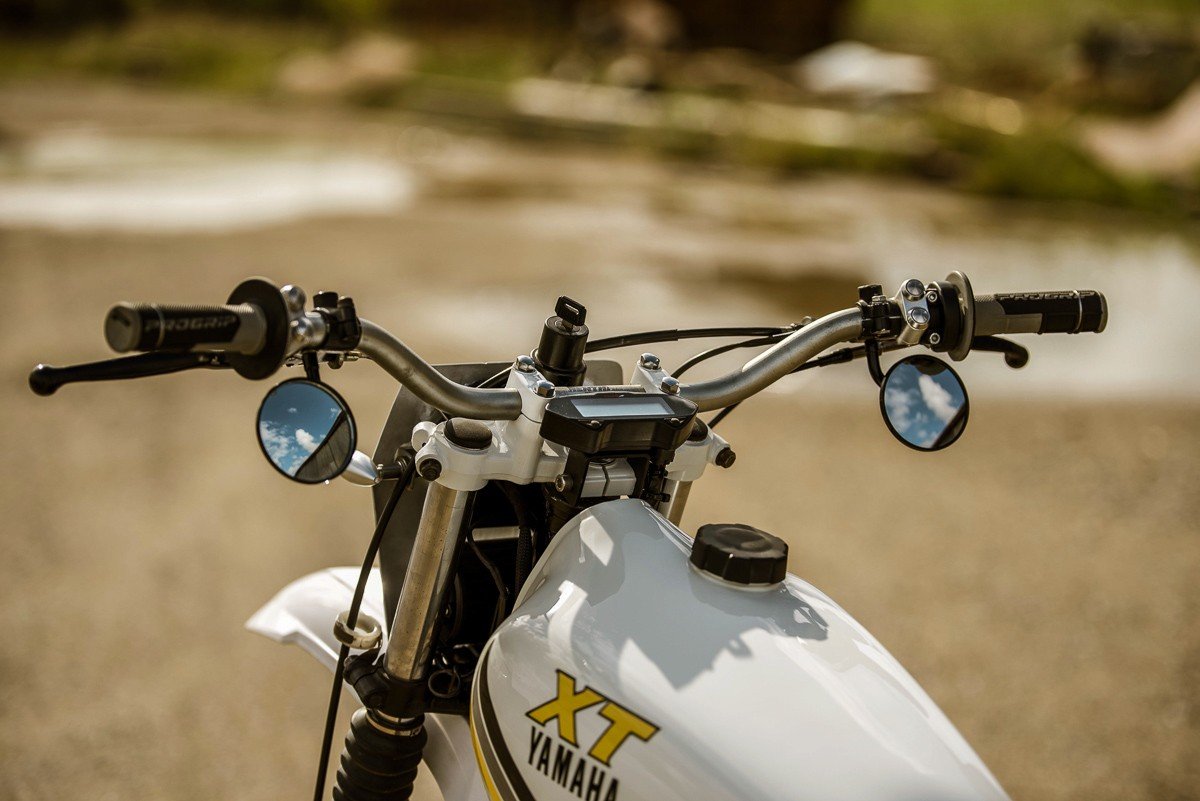
Handlebars, Lights and Gauges
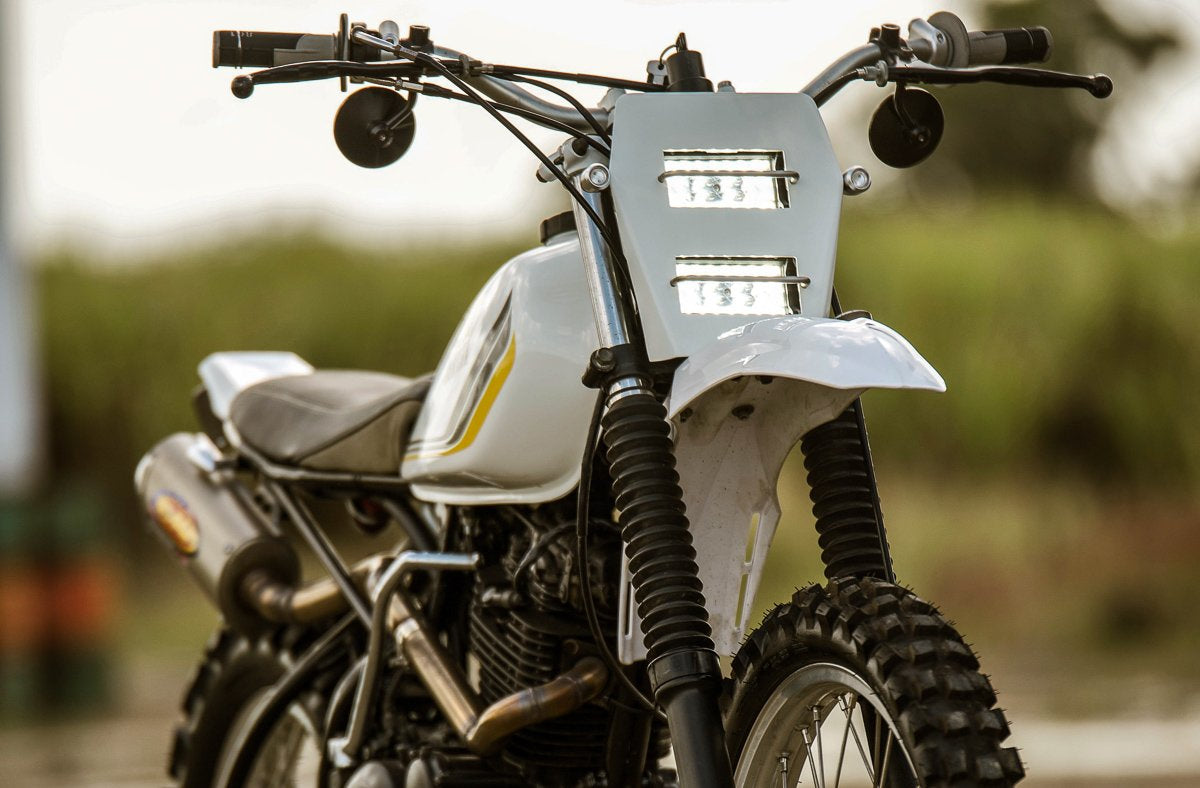
The XT250 Scrambler bars are a Renthal low rise MX bar, standard levers, pro-grip grips, and some custom scrambler mirrors that you can learn how to make here. Staying on the front of the bike, a universal Super motard fender was fitted over the 21” front wheel and a custom aluminium front plate built to house 2 x LED bar lights + PBM hollow tip LED turn signals. The headlight mounting plate was finished with some stainless steel brush guards, which I now know, (thanks to Bruce at Iron & Resin Garage) look like a set of kitchen drawer handles!! Fuck! I guess these things happen when you spend your life in a garage isolated from the outside world. The digital gauge mounted off the top triple clamp is a Koso enduro style dash, with warning lights and built in Tacho.
Engine and Carburettor Upgrades
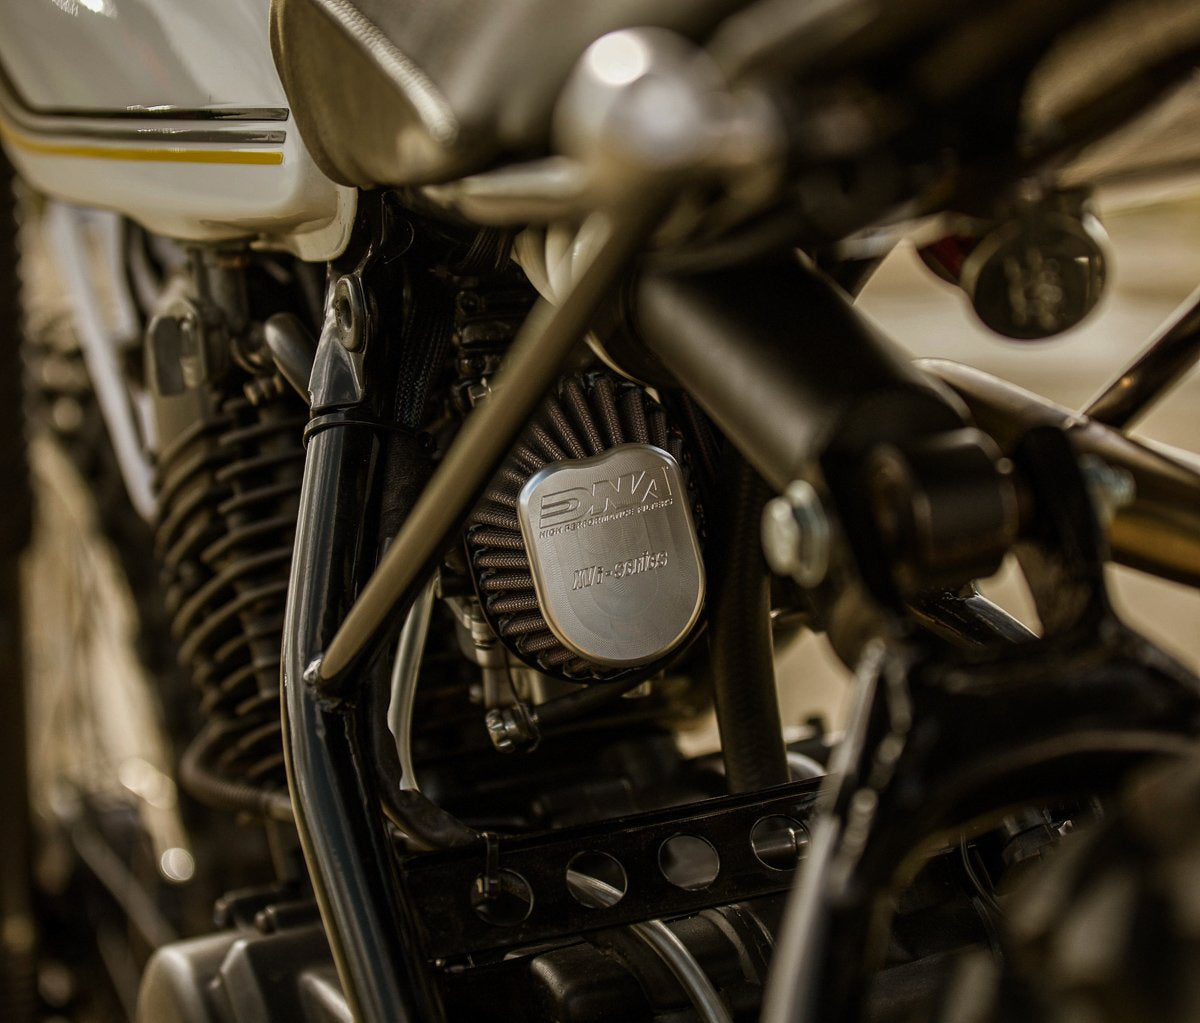
With the Styling all but sorted the motor was dropped out, cleaned up and a new clutch put in to handle the mighty 13.5 HP this ball tearer was putting out. The carb and intake was also upgraded with a Mikuni Flatslide carburettor and DNA Air filter put on. When re-building the Carburetor I was shocked to see someone had painted INSIDE the intake!! Yep, some 100% A-grade matte black was used to make sure the carburetor was blacked out. For those playing along at home….Don’t paint the inside of your carburetor. Everytime someone paints the inside of their carburettor a motorcyclist buys a step-through scooter, nobody wants to see that. Once wired up and firing, the XT250 was Serviced + Tuned on the Dyno by an old mate of mine Jamie at Dynomite Moto Brisbane.
Tank and Final Touches
The one thing that was retained on the Yamaha Scrambler XT as factory was the tank. One of the last tin tanks on these bikes the White, yellow and grey combo was too good to change. A set of reproduction factory decals painted in and the new fenders/ hand made guards painted to suit. The Custom MX style bar seat was finished and upholstered by Jamason from Timeless Autotrim (we share a shop) with some grey and yellow accent pieces.

Finished Ride and Test
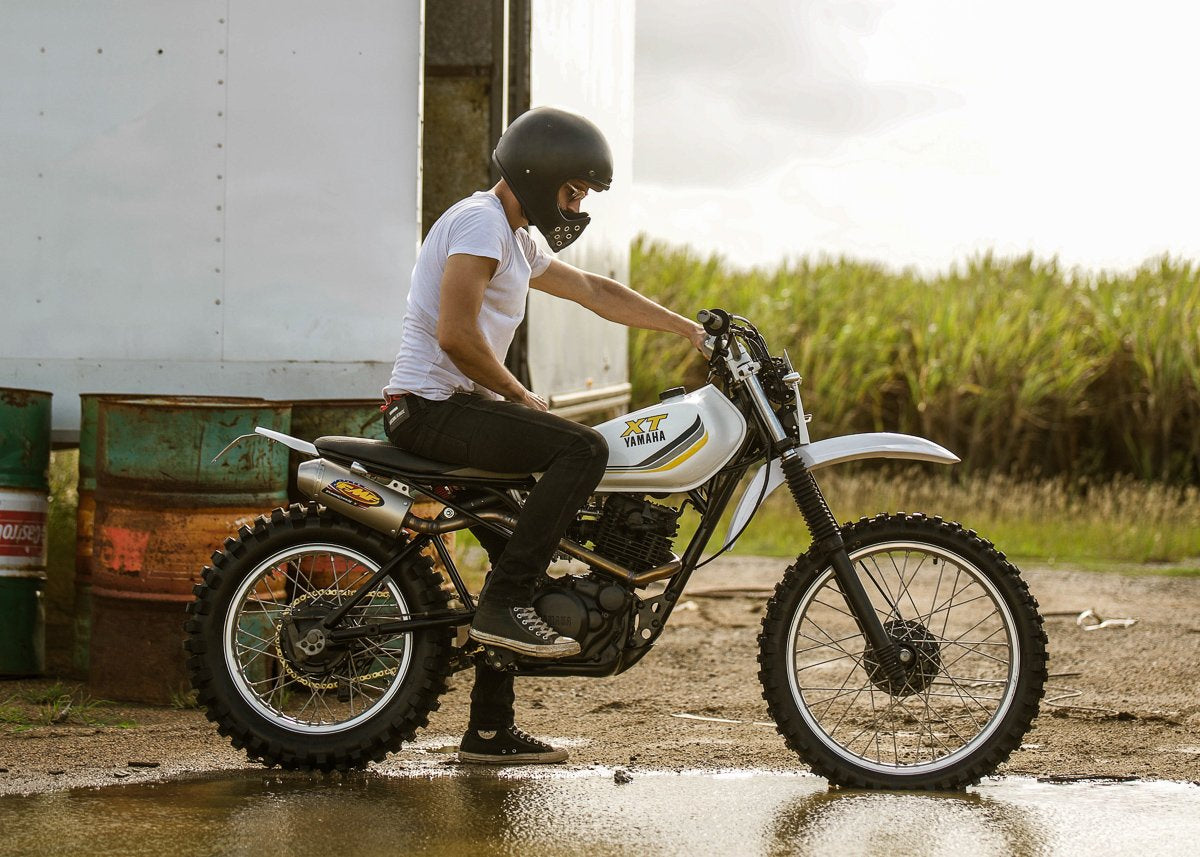
From where the Yamaha XT250 MX scrambler is now, you would never know it was a once neglected and mistreated farm bike. As with all scramblers, you know you’ve done a good job when they look good clean, but even better dirty. Test riding this bike on a farm property with a few gravel roads and mud puddles soon proved my assumption right. A Motocross inspired custom scrambler would be a shit load of fun. Box ticked, onto the next build.

WE BUILD BIKES WITH PURPOSE.
Purpose Built Moto is home for unique custom motorcycle builds. We offer a unique motorcycle customizing experience in the heart of the Gold Coast.


19 comments
Check out my comment to Ryan, I’m not going to give you every minute detail on our carbs.
Motorcycle tuning is a case by case basis and definitley not a one size fits all.
Hi Tom,
What model Mikuni flat slide carburetor did you use? When you tuned the carb, what jets, needle, and slide did you use? Were there any issues when fanning the throttle from the 1/8 open position—any flat spots or a bog? I would like to try your set up.
Alan
Yep thats the one mate.
UFO Universal Design 1 Supermoto Front Fender?
What brand front fender? Most “Supermoto Front Fenders” are star wars looking. Yours is clean. Thanks
Hey James, the bike has been rego’d for a few years now yeah, we dont have any of the original parts left over.
Tom
That’s a 1980-83 model aka Rambo first blood bike. Yamaha had surplus XT parts in the late 80s so they build some older model XTs and sold then along side the current year models. I’ve got a XT250 with 1978 on the plate, but its an 1980-83 model. So yours was build in 1990 with 1980-83 components. Nice build btw! Have you tried to register it? p.s. You wouldn’t have original front fender still laying around?