SIGN IN YOUR ACCOUNT TO HAVE ACCESS TO DIFFERENT FEATURES

FORGOT YOUR PASSWORD?

FORGOT YOUR DETAILS?

AAH, WAIT, I REMEMBER NOW!
  • Shop Headlights
  • Shop Indicators
  • Shop Fabrication
  • Shop Moto Kits
  • Shop Air Filters

Purpose Built MotoPurpose Built Moto

• Community Garage
• Custom Moto
• Custom Parts

Call: 0467 417 828
Email: tom@purposebuiltmoto.com

Purpose Built Moto
Gold Coast, Australia

Open in Google Maps
  • STORE

      Featured categories

      See all categories

      Headlights

      Indicators

      Tail lights

      Handlebar switches

      Fabrication

      Control relay

      Mufflers

      DIY Kit

      Mirrors

      Gauges

      Levers/Throttles

      Air filters

      Wholesale Parts

      Apparel


      Wholesale

      My account Request pricing
  • BLOG

      Blog sections

      See all blogposts

      Electrics

      Parts Installation

      Fabrication

      DIY Motorcycle Kits

      Seats

      Our Bike Builds

      Restorations

      Lifestyle

      Adventure Rides

  • SERVICES
    • Motorcycle Customisation
    • Exhaust Builds
    • Motorcycle Wiring
    • Custom Fabrication
    • Motorcycle Mechanic
  • GALLERY

      Gallery categories

      Cafe Racers

      Brat Style

      Scrambler / Tracker

      Bobber / Chopper

      Restorations

      Videos

      See all videos

      Bike Builds

      Parts Guides

      Events

      Other

  • CONTACT
    • Contact
    • FAQ
    • About
    • Testimonials
    • Media
    • Returns
  • MY CART
    No products in cart.

Home » Bike builds » Nicks GN250 Scrambler 3- Completing your project bike and getting it on the road

Home » Bike builds » Nicks GN250 Scrambler 3- Completing your project bike and getting it on the road

Nicks GN250 Scrambler 3- Completing your project bike and getting it on the road

by Tom / Wednesday, 07 December 2016 / Published in Bike builds, Bike customization, Tech articles

The Final steps are always the most exciting, The Scrambler is taking shape and  you can start throwing sneaky pics to the lads making them jealous. Trying to convince them to join you on your greasy knuckle quest of bikedom. If you missed the first parts in the build series, view them here.

Nicks GN250 scrambler 1.

Nicks GN250 scrambler 2.

Time to bust open the wallet, blow the cobwebs out and start making a list of excuses to tell your significant other of where those savings are going, trust me telling them its for  their birthday present has limited legs. The closing stages are where a lot of professionals get involved for me, I can’t spray or upholster so I leave it up to those who can.

If you’re up for the task of DIY on these steps hats off to you!

5. It’s going to get shiny, don’t get distracted.

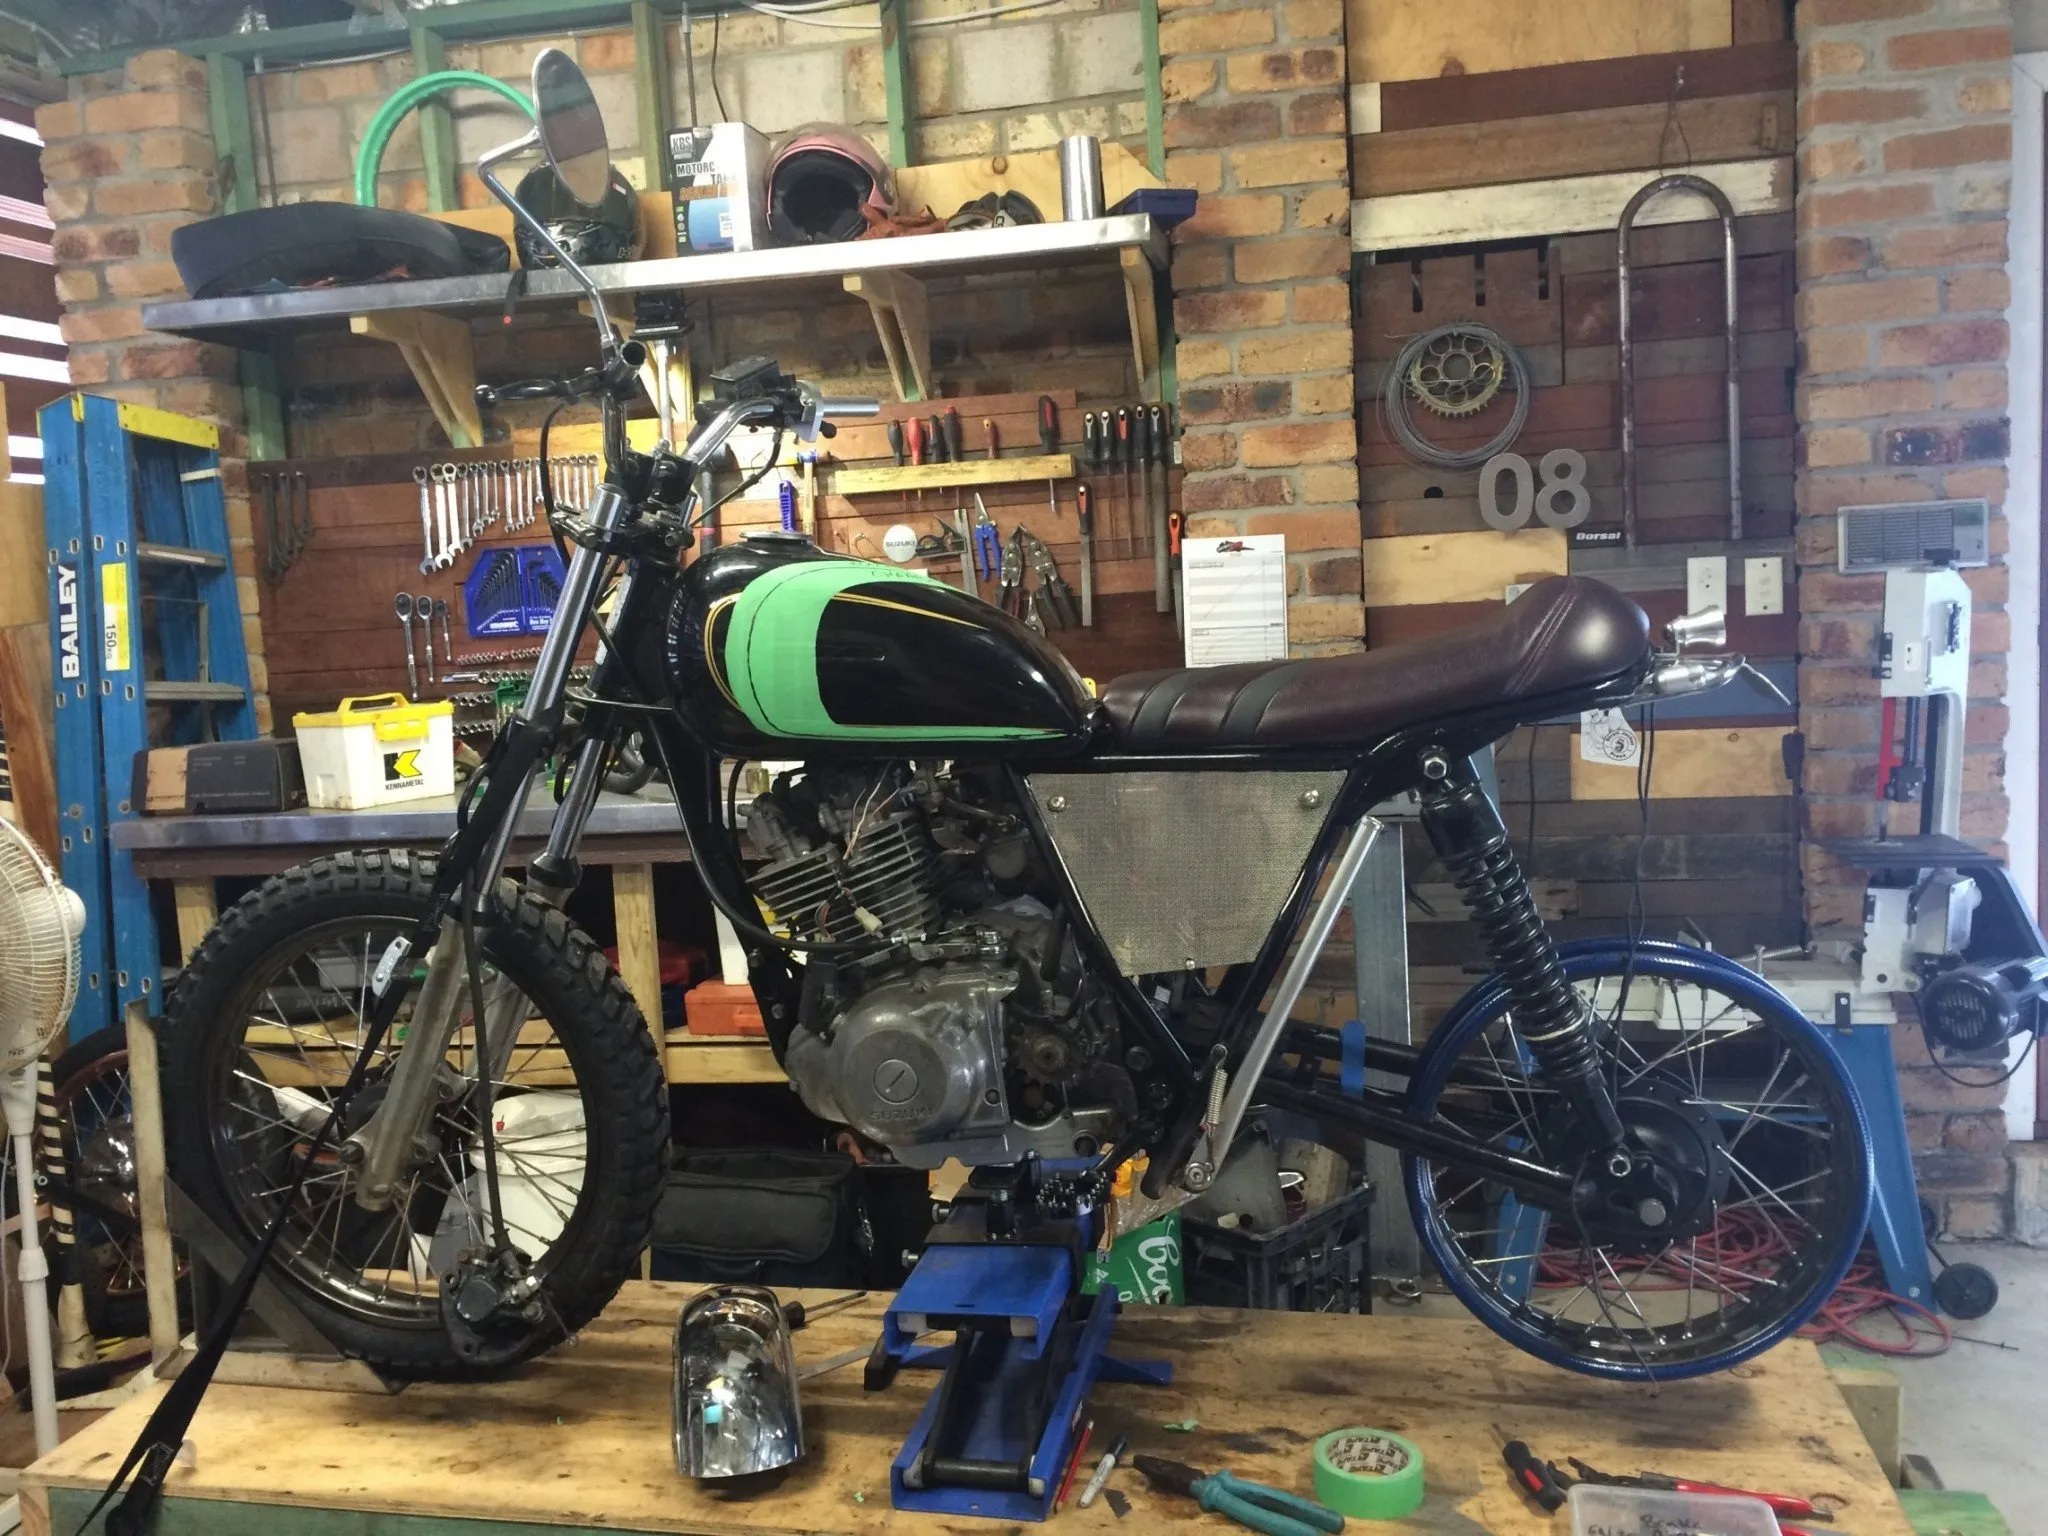
The Suzuki project was stripped for the final time, parts sent to paint and seat sent to the upholsterer.

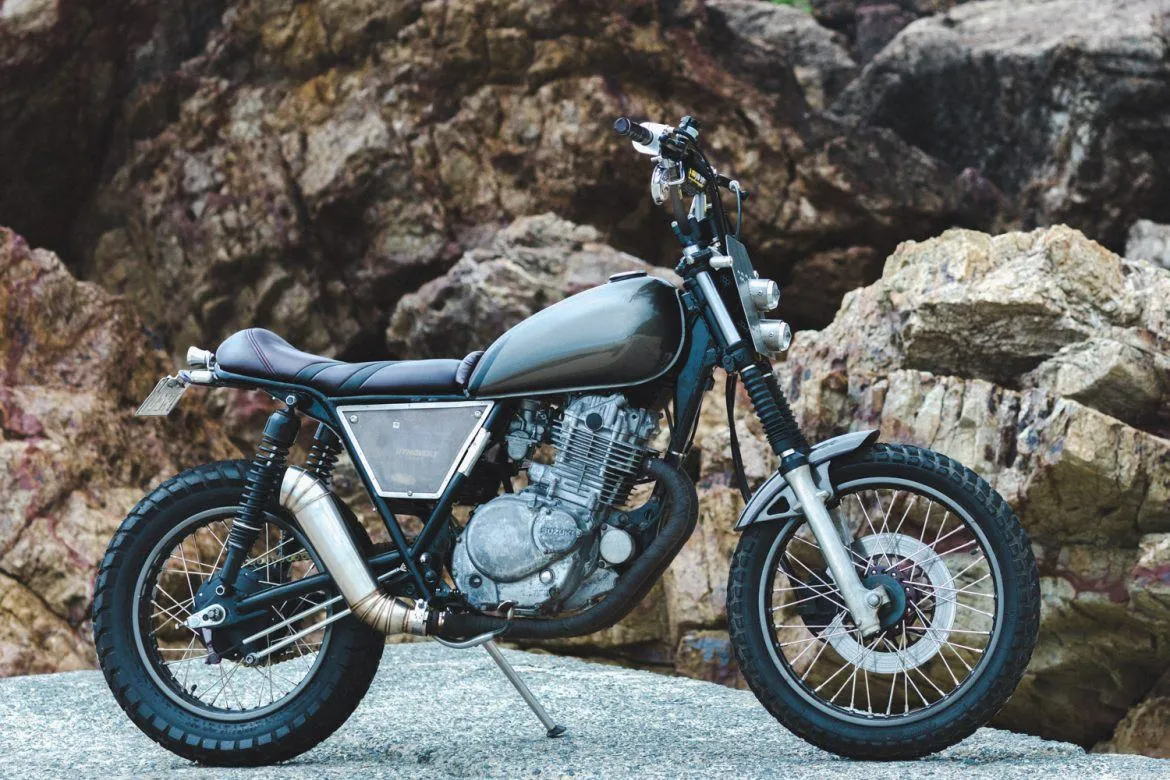
Nick opted to paint the frame himself and give the engine a quick once over with some cleaning fluid. As I said in the beginning he didn’t want anything too shiny and pretty on this bike. The color scheme I had in mind was reasonably simple. 1 main color- Gunmetal grey  with 2 detail colors of deep cherry red and black, set out in a simple design.

Custo Cafe Racer paint gold coast scrambler suzuki motorcycle shop

On my builds thus far I always feel less is more, I stick to 2-3 colors and like to use raw metal finishes where I can. That said I still do love an outlandish Airbrush job on the right bike.

To match with the cherry red details we had, I scoured the earth for a nice leather, I landed on a great Tannery in the UK that specializes in Antique colors and found exactly what I wanted. I will admit I knew nick was a little worried when I mentioned a red seat but when he saw what I was talking about he came around pretty quick.

With the brushed stainless steel parts we fabricated there wasn’t a whole lot to the paint and leather for this bike which made it all relatively cheap.  Before sending it in for paint and leather I will think about the paint design and settle on what I want, roughly mask out the design on the tank and fenders and mark the colors, same goes with the seat, It takes the guess work out of it.

suzuki scrambler custom build gold coast cafe racer australia

6. Final Assembly

At this point in time I was so busy with other work I had to get nick to build the roller in his own garage, once the dust settled we wheeled it back up on the table and set to work with finishing his ride off.

First was new chain and sprockets followed by mounting the rear fairings, Brake calipers, headlight plate, and protaper handlebars.

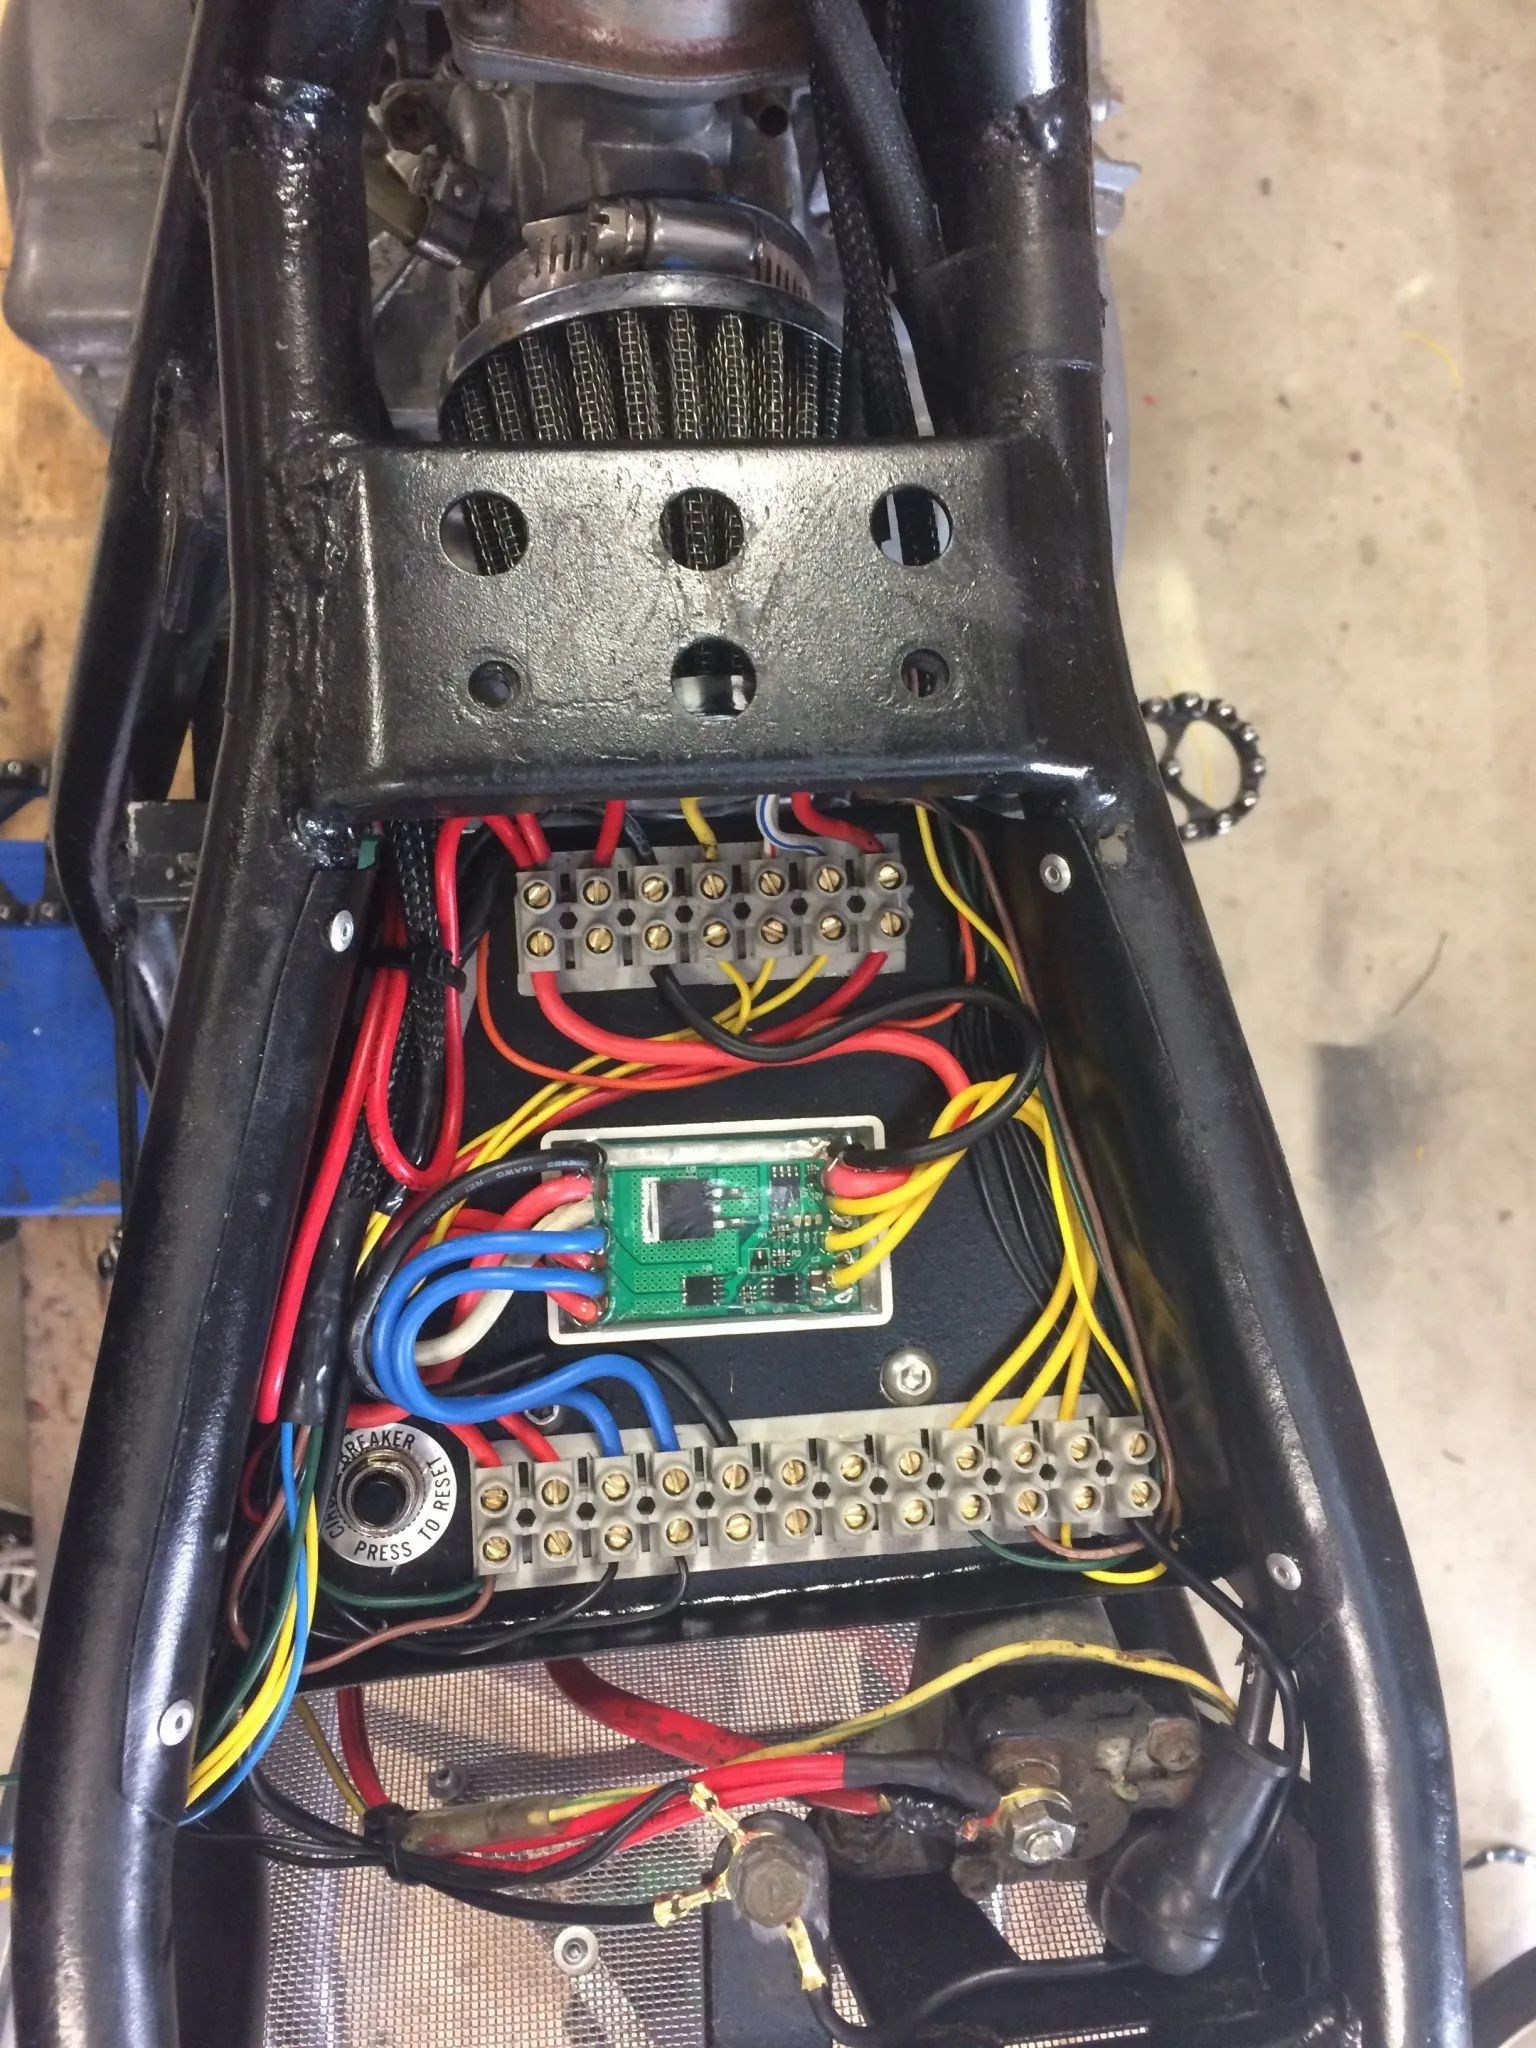
I folded up a quick electrics tray for under the seat and we went to work mounting all the lights and switches we needed to complete the wiring. Everything from indicators to your starter button everything went on there. This allows you to have an idea of what needs to be wired where and minimizes the chance of you missing something. With an original wiring diagram in hand and our new modified wiring diagram on the go I set out on the electrics. A detailed run down on your bikes electrics can be found here, complete with wiring diagrams.

Motorcycle Electrics 101- re-wiring your project bike.

For now let’s say we utilized the purpose built moto slim push button switches and silver anodized dome indicators along with a killer after hours choppers brake light and the custom built scrambler light plate. The wiring was hidden in the handlebars with the rest ran in some black snake skin to make it as discreet as possible.

Cafe racer electrics tray, LED flasher unit solid state switching motorcycle wiring

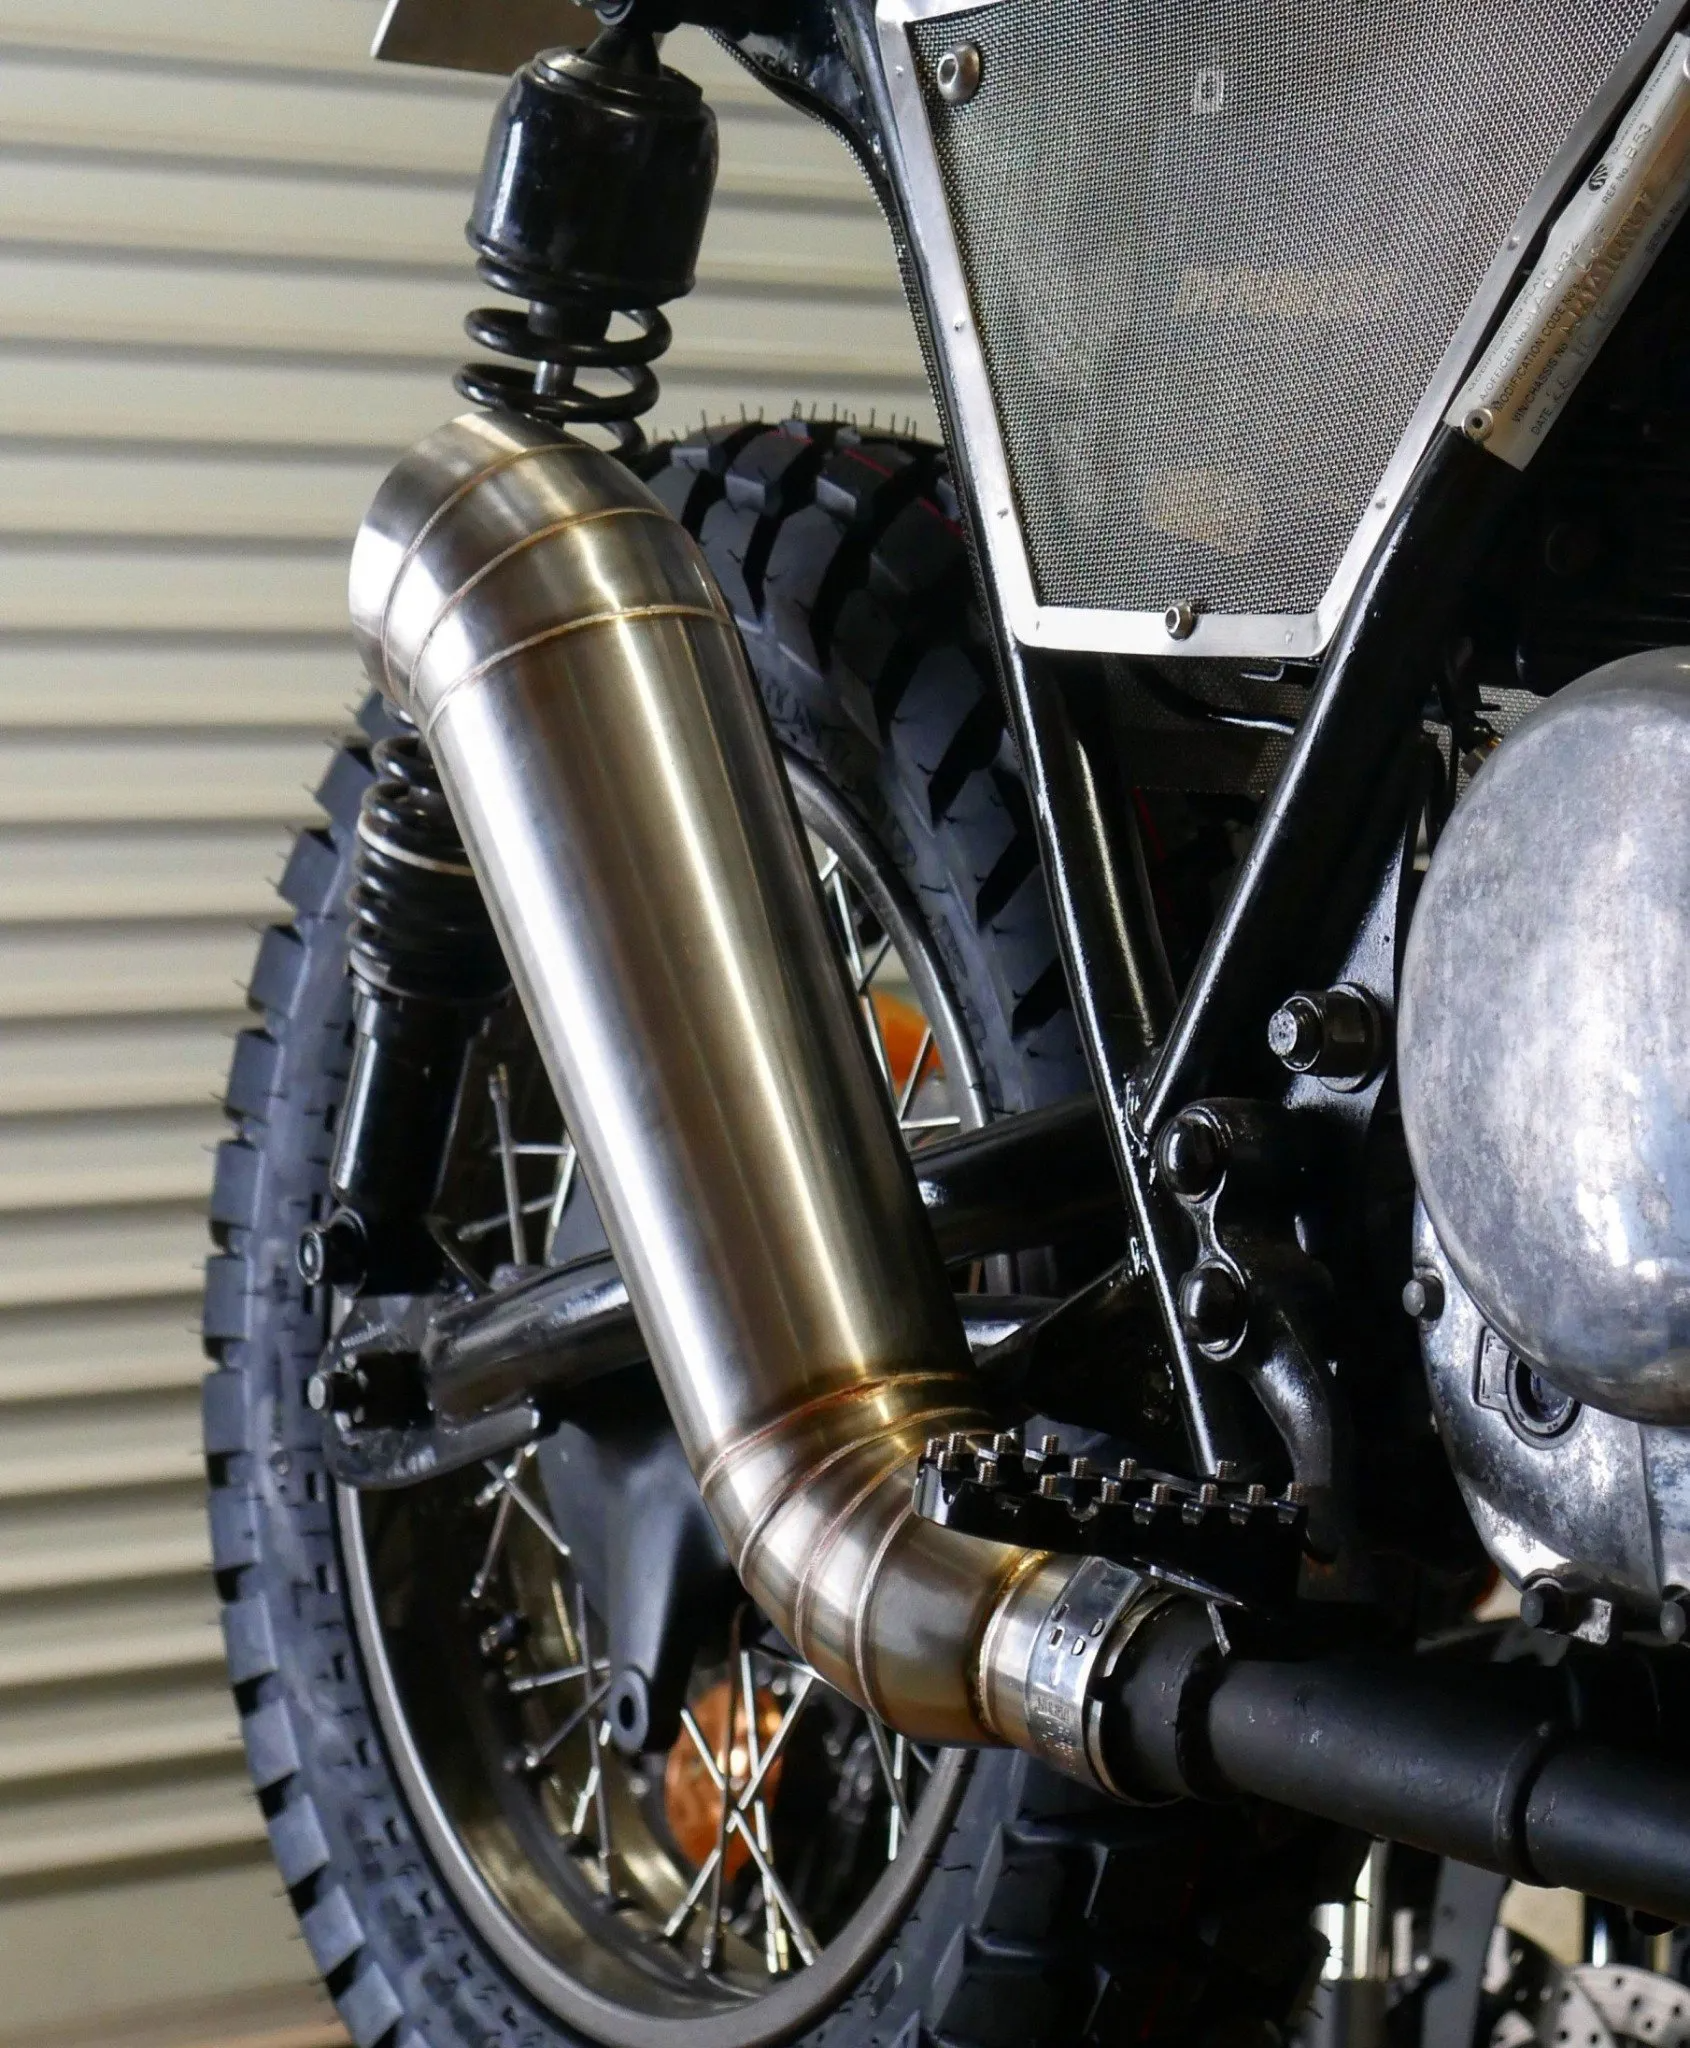
Another Trick bit I prototyped for nicks build is a high rise muffler, raw welded with a brushed stainless finish. Used in conjunction with his standard headers and some of that good ol’ black heat wrap we all seem to love!

Once bolted together we ran the bike to make sure nothing was awry before putting the tank and final fairings on, followed by the standard top to toe check with my trusty torque wrench.

During this last process nick was getting more and more itchy to get this little bastard on the road, with every work session bringing us closer to getting some wind on his face.

img_2392

That was it, bleed the brakes out and fire it! due to the upgraded exhaust and pod filter it would only run on choke, I pulled that carby and jumped from a 130 main to a 150, leaned the air slightly and she was running like a champ.
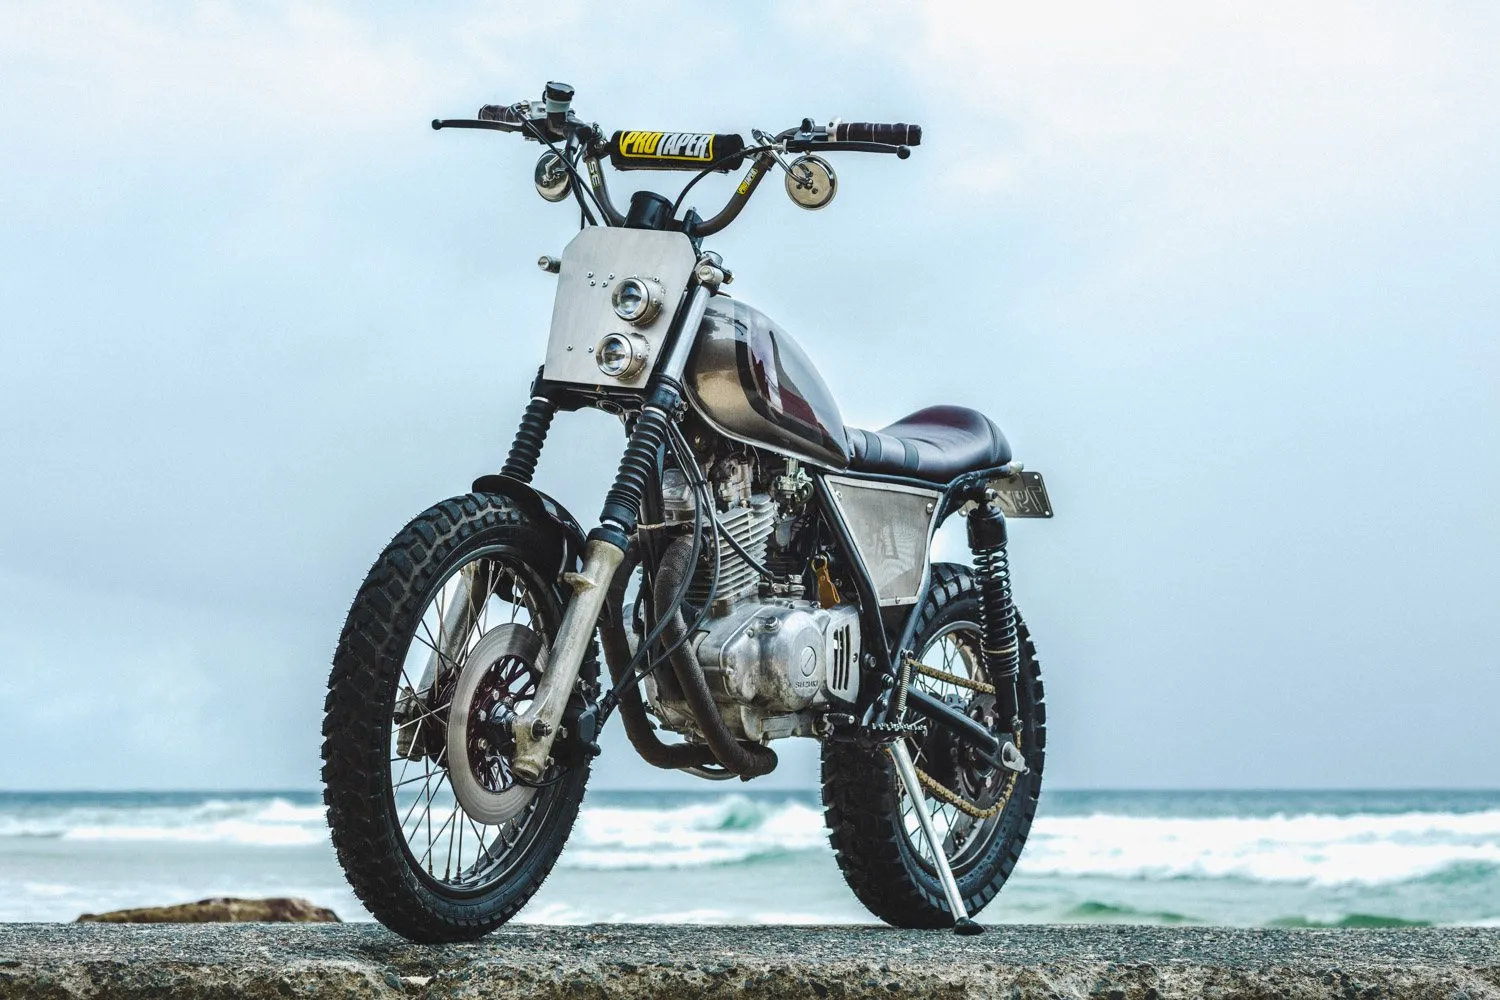
  1. Ride out!

The Bike was done, the last bit to be bolted on was the seat. We were standing in the garage, kinda looked at each other and I said  “that’s it mate, lets ride it!”

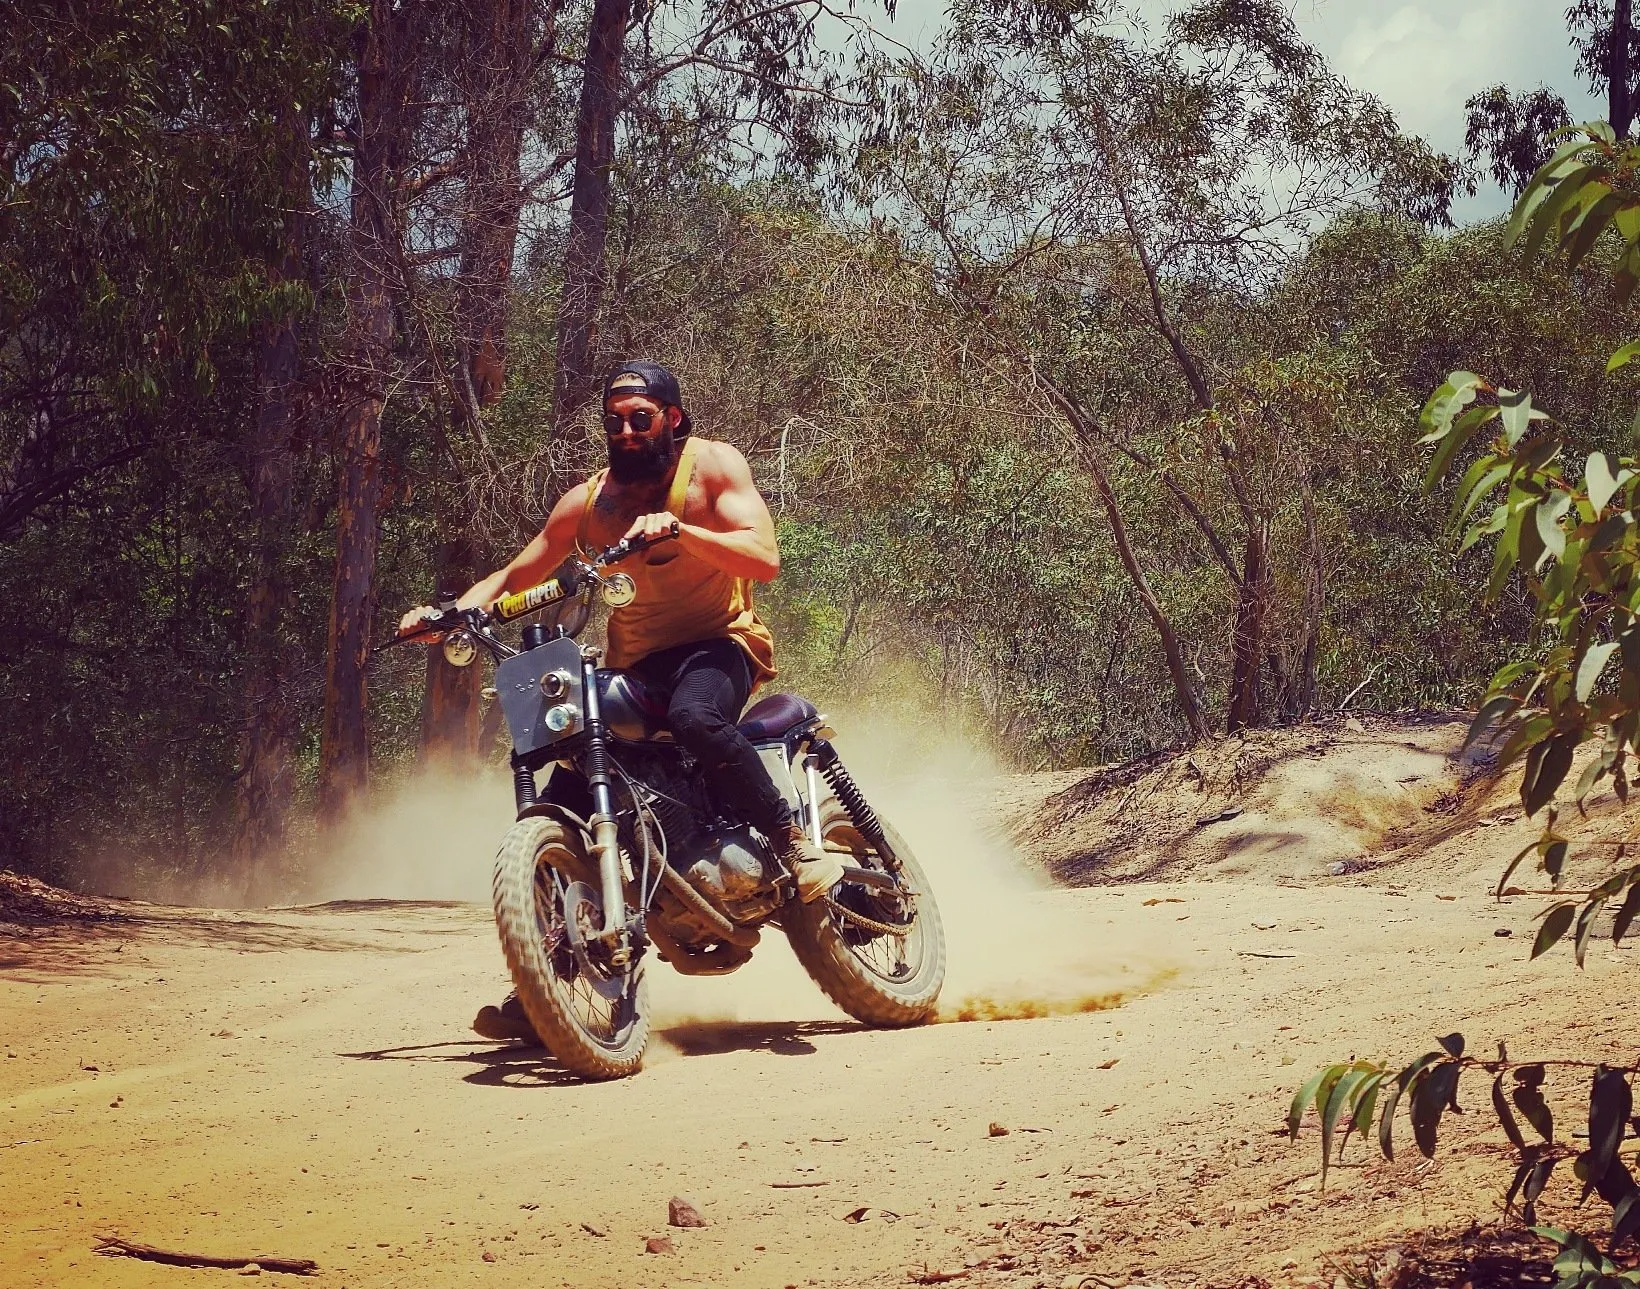
I could tell Nick was 50/50 nervous/excited, He blasted up and down the street a few times before we loaded it up on the ute (pick up for the our non-aussie friends) and headed for some trails. We spent months building a scrambler and it would be wrong to baptize it on the street. We hit some local dirt tracks and within minutes that damn thing was covered top to tail in dirt, perfect!

The raised stance gave a good high seated position although the rear suspension was a little stiff. The front was perfect and the re-purposed Pro-taper high rise mini bike bars handed out ultimate control for throwing it around some sharp corners and letting the rear wheel trail out under power. Then there was the sound, the new muffler we designed and used on the GN250 sounded beastly, it definetly lets you know its there without being obnoxiously loud. All this left me with one thought, ‘I need a scrambler…’

I hope you got some good insight into the process that bought his little ripper to be.

Please leave a comment below and sign up to our newsletter for more builds and exclusive content.

Thanks for taking the time.

Check out the full gallery here

Tom


cafe racer australia custom motorcyc;e scrambler builder suzuki gn250

About Tom

My purpose throughout this endeavor has been delivering the build experience to those who otherwise may not have ever had the chance. Taking an inclusive approach with your custom motorcycle project and focusing on making you a part of the experience. In parallel to this I also pour my energy into the manufacture of high quality, detail oriented and above all easy to install components for your motorcycle project.

10 Comments to “ Nicks GN250 Scrambler 3- Completing your project bike and getting it on the road”

  1. Andrew Patterson says :Reply
    February 23, 2017 at 2:36 pm

    Hi Nick,
    I have my wife’s GN250 that initially I was looking at turning into a café racer but now a scrambler seems like a better idea. I don’t have much of a clue when it comes to stripping and rebuilding bikes but I’m keen to give it a go and hey..what’s the worst that could happen? Anyway, do you have a set of instructions, hints and tips etc that would steer me in the right direction? I’d really appreciate it.

    1. Tom says :Reply
      February 23, 2017 at 3:27 pm

      Hi Andrew,

      Tom here, Nick is the owner of the GN Scrambler.
      I would suggest you check out the link below, its a 3 part series on the entire build of the GN250.
      full of info on how we went about it.

      https://purposebuiltmoto.com/nicks-gn250-scrambler-1/
      https://purposebuiltmoto.com/nicks-gn250-scrambler-2/
      https://purposebuiltmoto.com/nicks-gn-250-scrambler-part-3/

  2. Adam says :Reply
    February 12, 2018 at 6:51 pm

    How long are those rear shocks? Do they have any extra travel, since it’s a scrambler?
    Doen’t shorter wheelbase affect negatively steering?

    Thanks for infrmation.

    1. Tom says :Reply
      February 21, 2018 at 6:46 am

      Hi Adam,

      The Shocks are 420mm long from memory. long time ago now. A shorter wheel base will only come into play at high speed (GN250 tops out at 100kph)

      1. Rozk says :Reply
        February 28, 2021 at 7:49 pm

        Hi Tom,

        I started my GN250 project, and I won’t lie: it is very much inspired by your work.
        Although I stumbled upon a problem: after fitting longer rear shocks chain is severly grinding against swingarm. I fabricated a chain slider, but it won’t probably last long, since highest point of swingarm is higher than highest point of front sprocket.

        How did you dealt with chain in your projects?

        1. Tom says :Reply
          March 1, 2021 at 5:00 pm

          If you use the right material a chain slider will be all you need.
          We use a HDPE plastic to make ours.

          1. Rozk says :
            March 2, 2021 at 1:23 am

            OK, so I shouldn’t worry that swingarm rises the chain, just use sturdier slider.

            Thanks a lot!

  3. Fitting a cafe racer tail hoop to your project - Purpose Built Moto says :Reply
    December 28, 2018 at 1:34 pm

    […] here will effect another area of your bikes performance. One example I have done personally was A GN250 Scrambler. From standard the GN 250 has quite a relaxed rake (a lot of people build bobbers from them) so you […]

  4. MatthewSykes says :Reply
    May 23, 2022 at 8:15 pm

    Hi

    Did you do any work on the engine to increase power? If so I would be very interested.

    Thx,,

    1. Tom says :Reply
      May 25, 2022 at 3:38 pm

      The best thing to do on these bikes is a carburettor and exhaust upgrade, paired with a bit of porting work to the head and a performance coil.
      Further than that you can go deeper with High Comp pistons etc but the differences in power vs cost aren’t as good.

Leave a Reply Cancel reply

Your email address will not be published. Required fields are marked *

Our Parts Store

Shop Headlights

Our own builds use these cafe racer & scrambler headlights.


Shop Indicators & Turn Signals

Custom turn signals designed for a minimal style.


Shop Mufflers

Smooth note and a cafe racer style from our muffler collection.


Shop Tail Lights

Minimal and night piercing tail lights. From our shop to yours.


Shop Handlebar Switches

Custom handlebar controls for your cafe racer's wiring.


Fabrication Parts

Custom parts for fabrication.


Shop Lighting Modules

Control Relay Modules to simplify the electrics of your motorcycle


Air Filters

DNA Performance Filters

  • Shop Headlights
  • Shop Indicators
  • Shop Fabrication
  • Shop Moto Kits
  • Shop Air Filters
  • Shop Mufflers
  • Shop Tail Lights
  • Shop Buttons
  • Builders Blog
  • Installation Guides
  • Contact
  • Request a quote
  • Shipping and Returns
  • Request Wholesaler Account
  • Wholesaler Login
  • Sitemap
  • Privacy Policy

Payment Options

Payment Options

PURPOSE BUILT MOTO
Gold Coast, Australia

Call: 0467 417 828
Email: tom@purposebuiltmoto.com

  • GET SOCIAL
STORE
  • DIY Kit
  • Headlights
  • Indicators
  • Tail Lights
  • Handlebar Switches
  • DNA Air Filters
  • Mufflers
  • Custom Seats
  • Control Relay
  • Wheels
  • Fenders & Fabrication Parts
  • Wholesale Parts
  • Apparel
BLOG
  • Bike Customization
  • Parts Installation PDFs
  • Our Bike Builds
  • Lifestyle
  • Adventure Rides
ABOUT
  • Contact
  • Media
SERVICES
  • Motorcycle Customisation
  • Custom Motorcycle Exhausts
  • Motorcycle Mechanic
  • Motorcycle Rewiring
GALLERY
  • Videos
  • Cafe Racer
  • Brat Style
  • Scrambler / Tracker
WIN
  • STORE
    • DIY Kit
    • Headlights
    • Indicators
    • Tail Lights
    • Handlebar Switches
    • DNA Air Filters
    • Mufflers
    • Custom Seats
    • Control Relay
    • Wheels
    • Fenders & Fabrication Parts
    • Wholesale Parts
    • Apparel
  • BLOG
    • Bike Customization
    • Parts Installation PDFs
    • Our Bike Builds
    • Lifestyle
    • Adventure Rides
  • SERVICES
    • Motorcycle Customisation
    • Custom Motorcycle Exhausts
    • Motorcycle Mechanic
    • Motorcycle Rewiring
  • ABOUT
    • Contact
    • Media
  • GALLERY
    • Videos
    • Cafe Racer
    • Brat Style
    • Scrambler / Tracker
  • WIN
  • GET SOCIAL

2023 © Purpose Built Moto. All rights reserved.

TOP
View Cart Checkout Continue Shopping
[]