


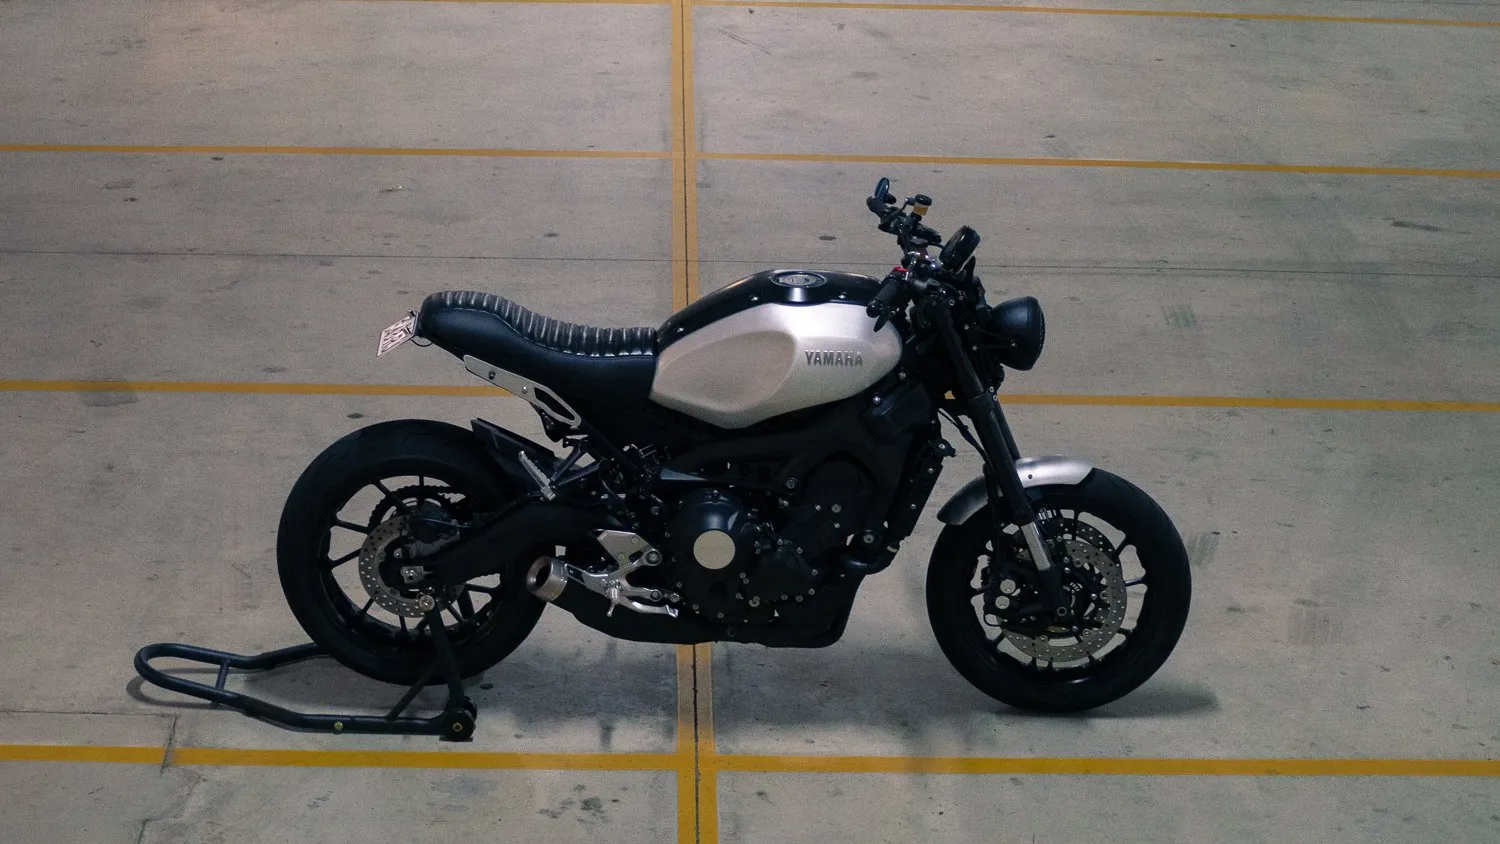
Yamaha XSR900 Café Racer- The Subtle Yamaha custom.
Something a little different from the Purpose Built Garage with this Custom XSR900 Café Racer , give me a minute to explain. If you’ve followed Purpose Built Moto for any amount of time, you’ll know that there aren’t many times where you look at our custom motorcycles and think “yeah that could of rolled off a production line”. Generally we emphasize the hand made, the one off, and the unique aspects of our bikes, things that we don’t want to repeat time and time again and ideas or mods that you don’t see anywhere else. In essence that’s what a custom motorcycle is to me, having something that’s yours and no one else’s.
A Subtle Approach to Customisation
This custom Yamaha XSR900 is a slight deviation from the outlandish idea category. The rider of this bike is a proponent of the subtle and stylish. It had to be special and unique, but also decidedly understated. I think if I had to describe the Purpose Built Moto XSR900 in a word it would be “succinct” its to the point with nothing unnecessary to be seen. Each modification carefully planned and executed to add the desired unique and hand built qualities, but if you didn’t know what you’re looking for, no one would even notice. A little more white shirt and dinner jacket, a little less Hawaiian party shirt.
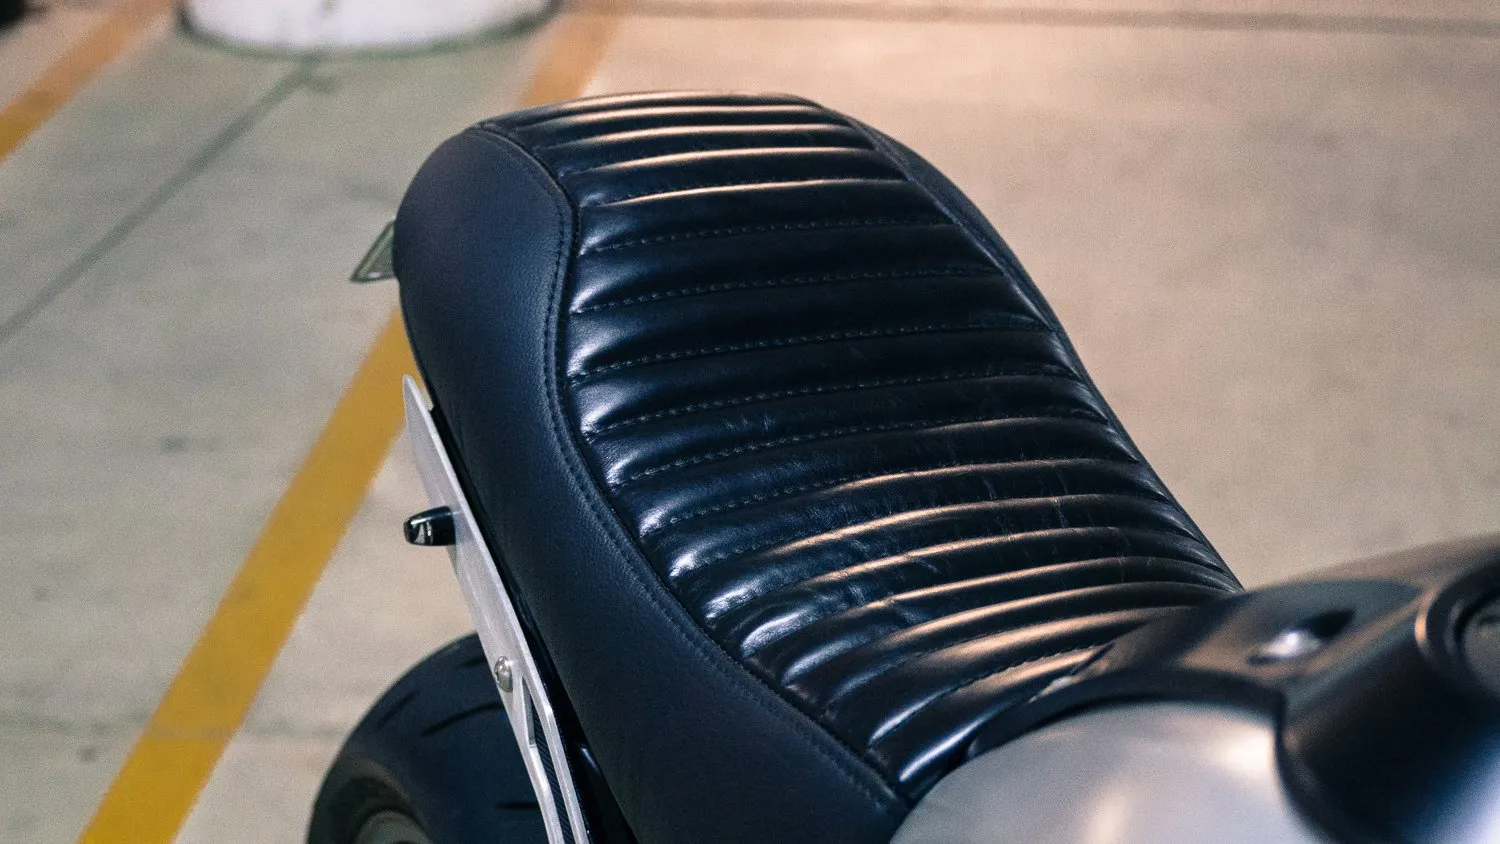
Seat and Tail Section Changes
So let me run you through exactly what happened to the Yamaha XSR900 Café Racer while it was in the shop.
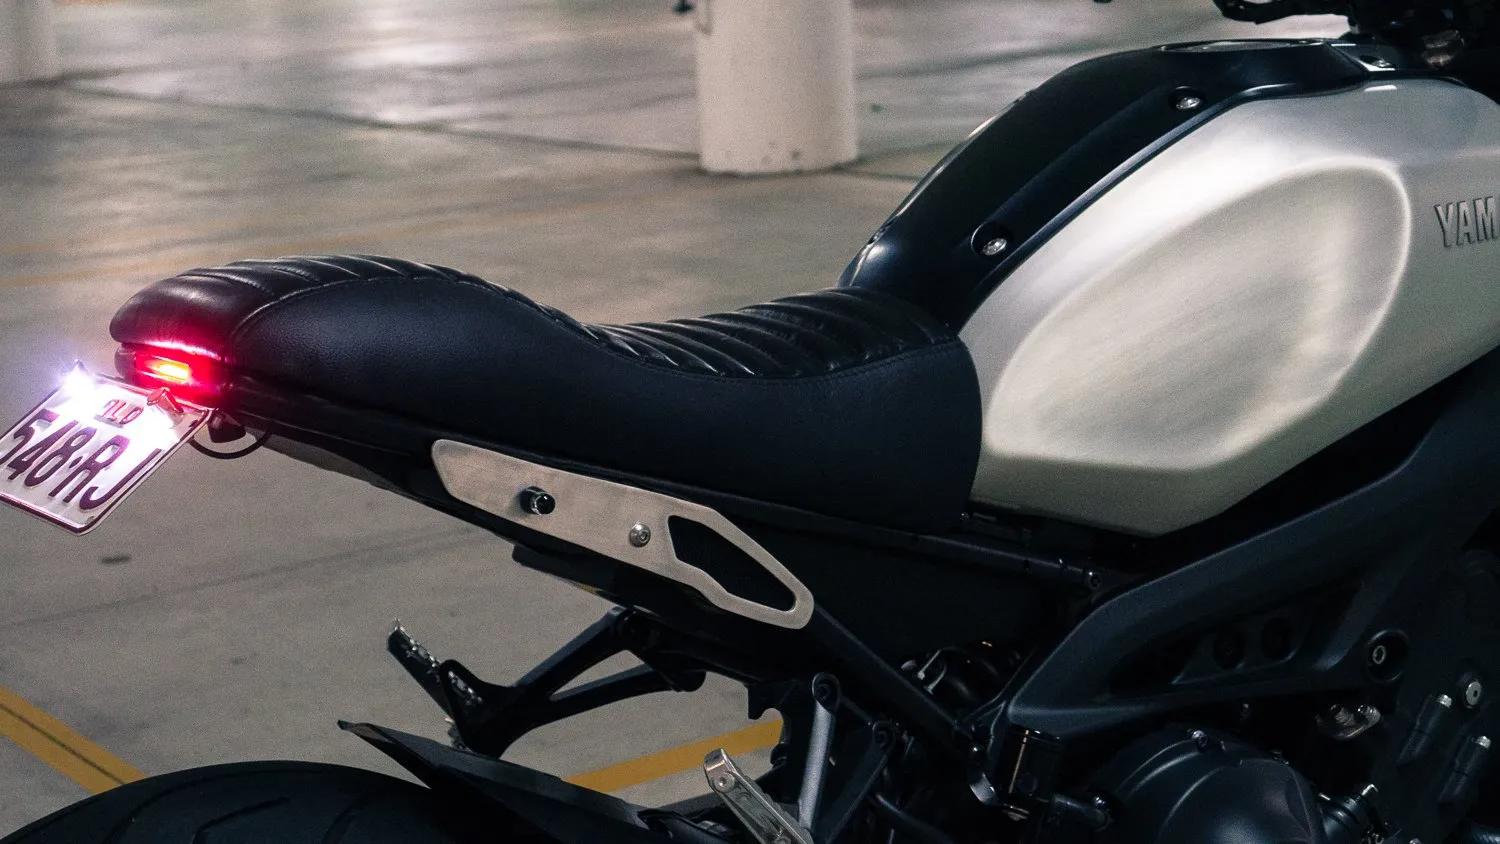
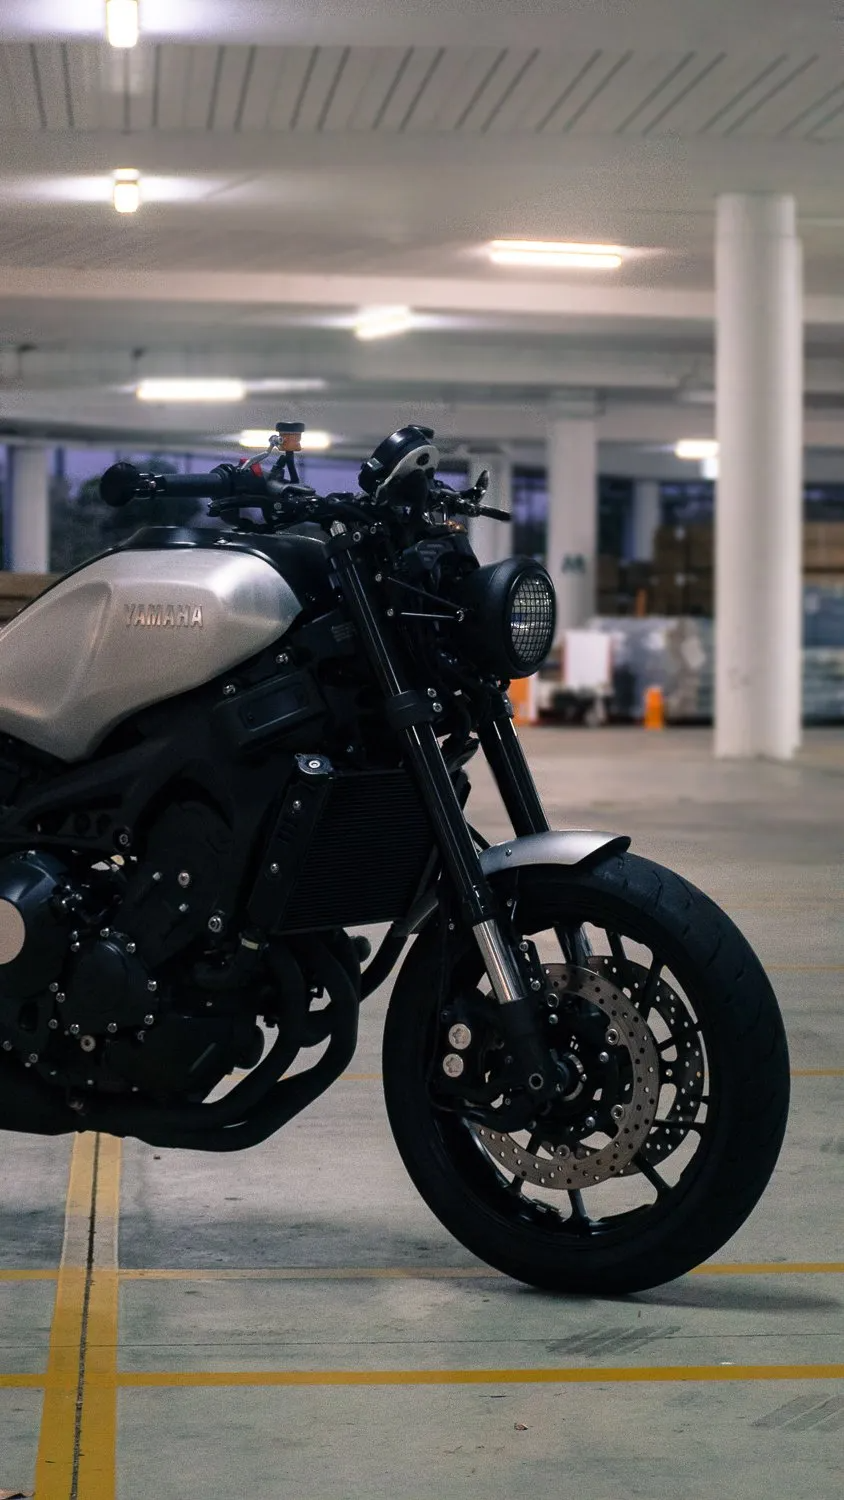
First on our list was the seat/tail section. Giving a shorter tail section on the custom XSR900 was simple. Once the (already pretty nice looking) factory tail section was removed, the electrics tray was trimmed up, and the keyed seat latch was slightly modified so it could be re-used when we made our new custom seat for the Yamaha.
Frame Adjustments and LED Integration
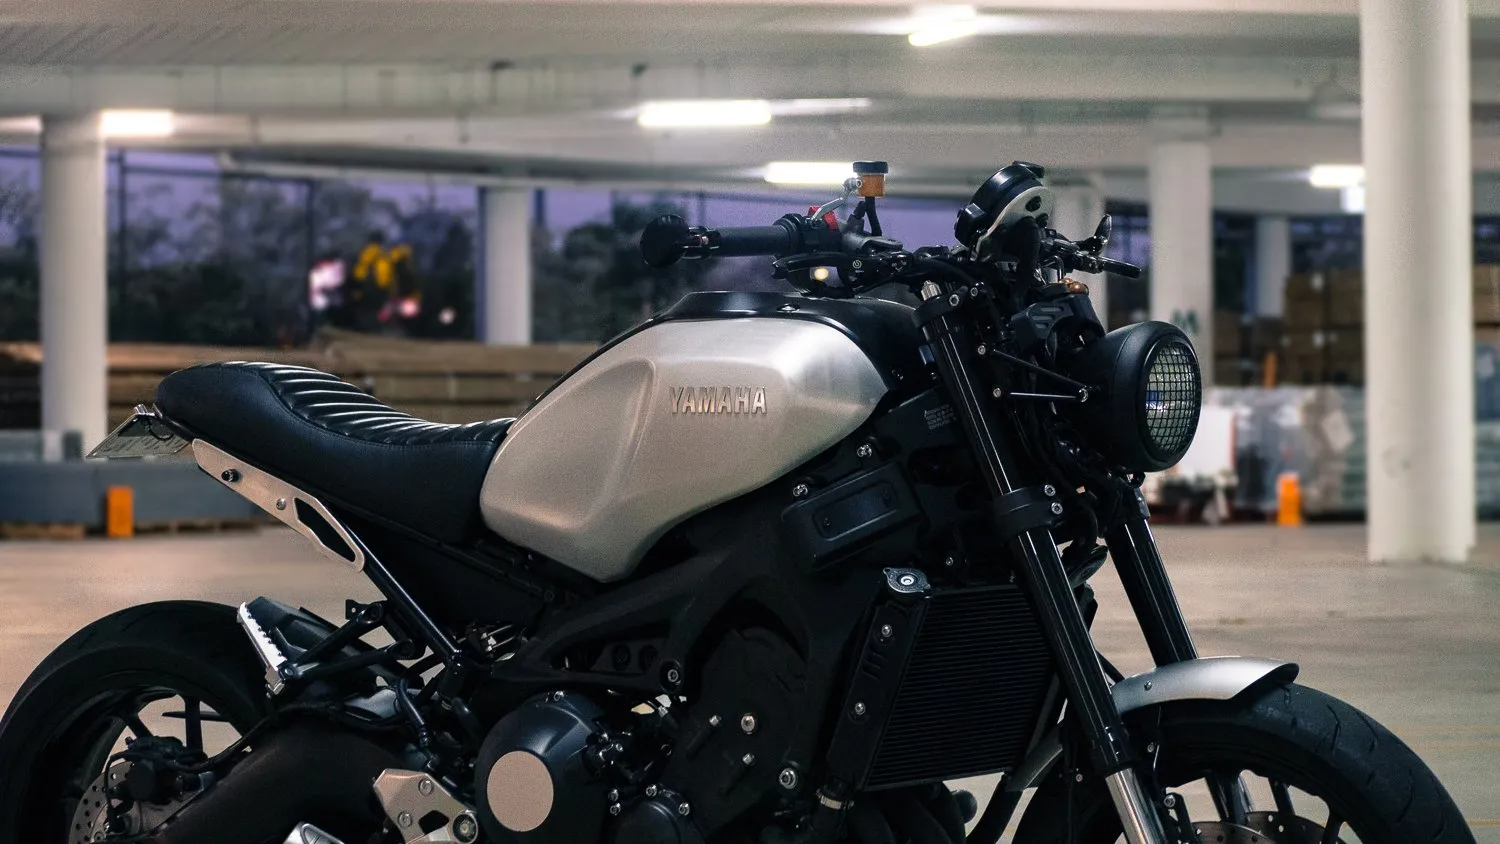
Before the seat could be made, the frame needed to be modified slightly. We wanted to French in an LED strip to remove any unnecessary bulk from the tail. The Yamaha XSR900 Café Racer doesn’t lend itself to a generic hooped tail. The rest of the bike is a little too angular and sharp in its aesthetic. Instead we opted for a squared off tail section, that was linked by a small 45 deg. pie cut section to remove the sharp 90 deg. Corner. I’m going to write an article on recessing LED lights in the frame, I just haven’t gotten to it yet. so keep an eye out for that.
Aluminium Frame Covers and Design Details
Once the new seat pan was made and the shape settled upon, the old frame covers were removed too. A little bulky now with the streamlined seat. They were protruding out the side, hence quickly removed to make way for another Idea that struck me. The frame needs a little cover regardless, from the factory there’s some unsightly bracing that I needed to hide. I fitted a few threaded slugs to the bracing, patterned and cut out some 3mm Aluminium covers and detailed them with some tight weave Black mesh. The covers are held in place with 1 x M8 thread and the indicator acts as the second stay. These accents tie the brushed aluminium from top to tail on the bike.

Front End Upgrades
Moving to the front end, I was supplied a headlight, and front fender with the bike to fit. Both parts sold as a blot on fit. Both parts needed me to fabricate the brackets to fit them. As a side note, if you’re taking a bike to a bike builder, any of them worth their salt cringe at “bolt on” accessories. Let them (us) do our job and make you something unique and special. You get more out of it, and we get better job satisfaction because of it! Anyway. The Stock headlight was removed to make way for the new 5.75” Scrambler style grill headlight. I made some simple brackets using the factory mounts and again used the front indicators to fix the new headlight to the bracket. I use this trick all the time with my LED headlights + indicators, it saves you making separate brackets for each light, and no visible bolts holding the headlight on, like magic!
Performance Components and Handlebar Setup
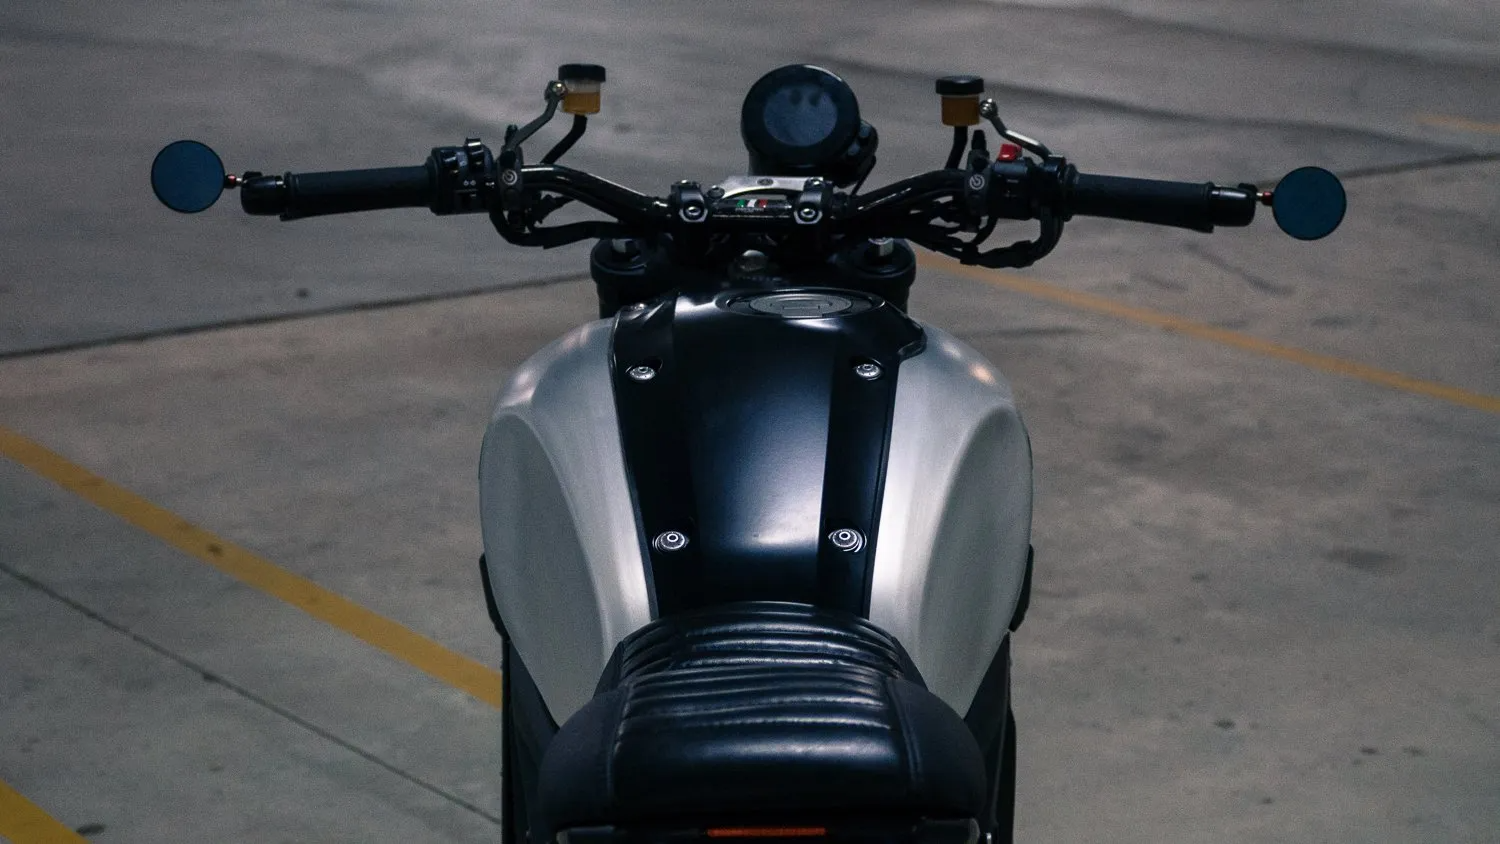
The XSR900 received a set of Carbon Fibre bars, complemented by Brembo Hydraulic master cylinders, Rizoma bar end mirrors and a Frando Hydraulic clutch conversion from Motoproducts.com.au
Front Fender Fabrication
The new brushed Ally fender was spaced using that trick I think we all learned in the early 2000’s from the American chopper boys…. A bit of fuel hose taped to the tyre haha, thanks Paul Sr. Again I turned up some small counter-bores and fabricated a tidy little bracket for the USD forks.
Colour Scheme and Final Finishing
In keeping with the subtle approach to the bike, the colour scheme was largely left alone. All of our fabricated parts were given a coat of Satin black as was the Tanks centre piece, removing the gun metal grey. The frame covers and front fender were left in a brushed aluminium finish tying the side tank covers with the rest of the project.
Final Result of the Custom Build
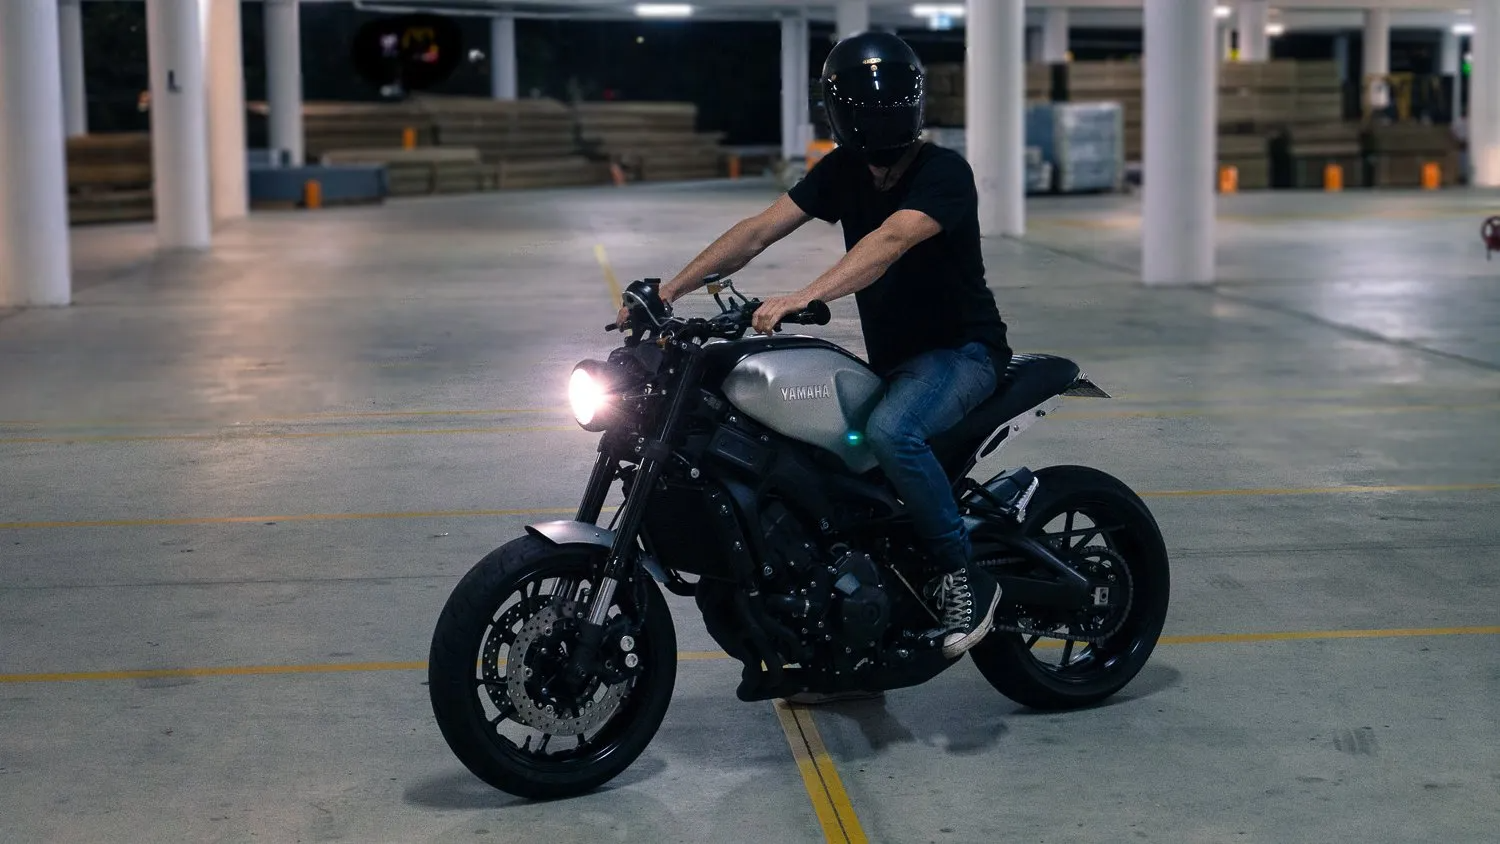
With a little thought, theres nothing to say that the words “quick tidy up” have to mean a half assed custom. Although the Yamaha XSR900 received only a few select modifications, It shows a great example of what can be achieved with a little creativity. Using a bit of restraint in the design has payed out well on this Custom XSR900 café racer that if you didn’t look twice, you’d never tell the parts were hand made.

WE BUILD BIKES WITH PURPOSE.
Purpose Built Moto is home for unique custom motorcycle builds. We offer a unique motorcycle customizing experience in the heart of the Gold Coast.


17 comments
great looking seat. need more sqaare and butt coverage area for passengers.
What is yamaha thinking on any model; lincluding 22-24 ?
anyway; some frame has to be changed; but still need to be able to use top box, pannier mounting , as original
Its custom made
Thanks for responding. i have a another question.
How long cluth cable?? 20cm? 21cm??
I beleive this was the long pull style.
really thanks for your reply. i have a more question. I’m curious about the length and brand of the clutch cable you used.
I look forward to hearing from you.
thanks!
Beautiful!! frando hydraulic clutch is two virsion. Xsr900 frando cluthch short virsion or long virsion?? Which version can be fitted?
I believe this is the long pull version