


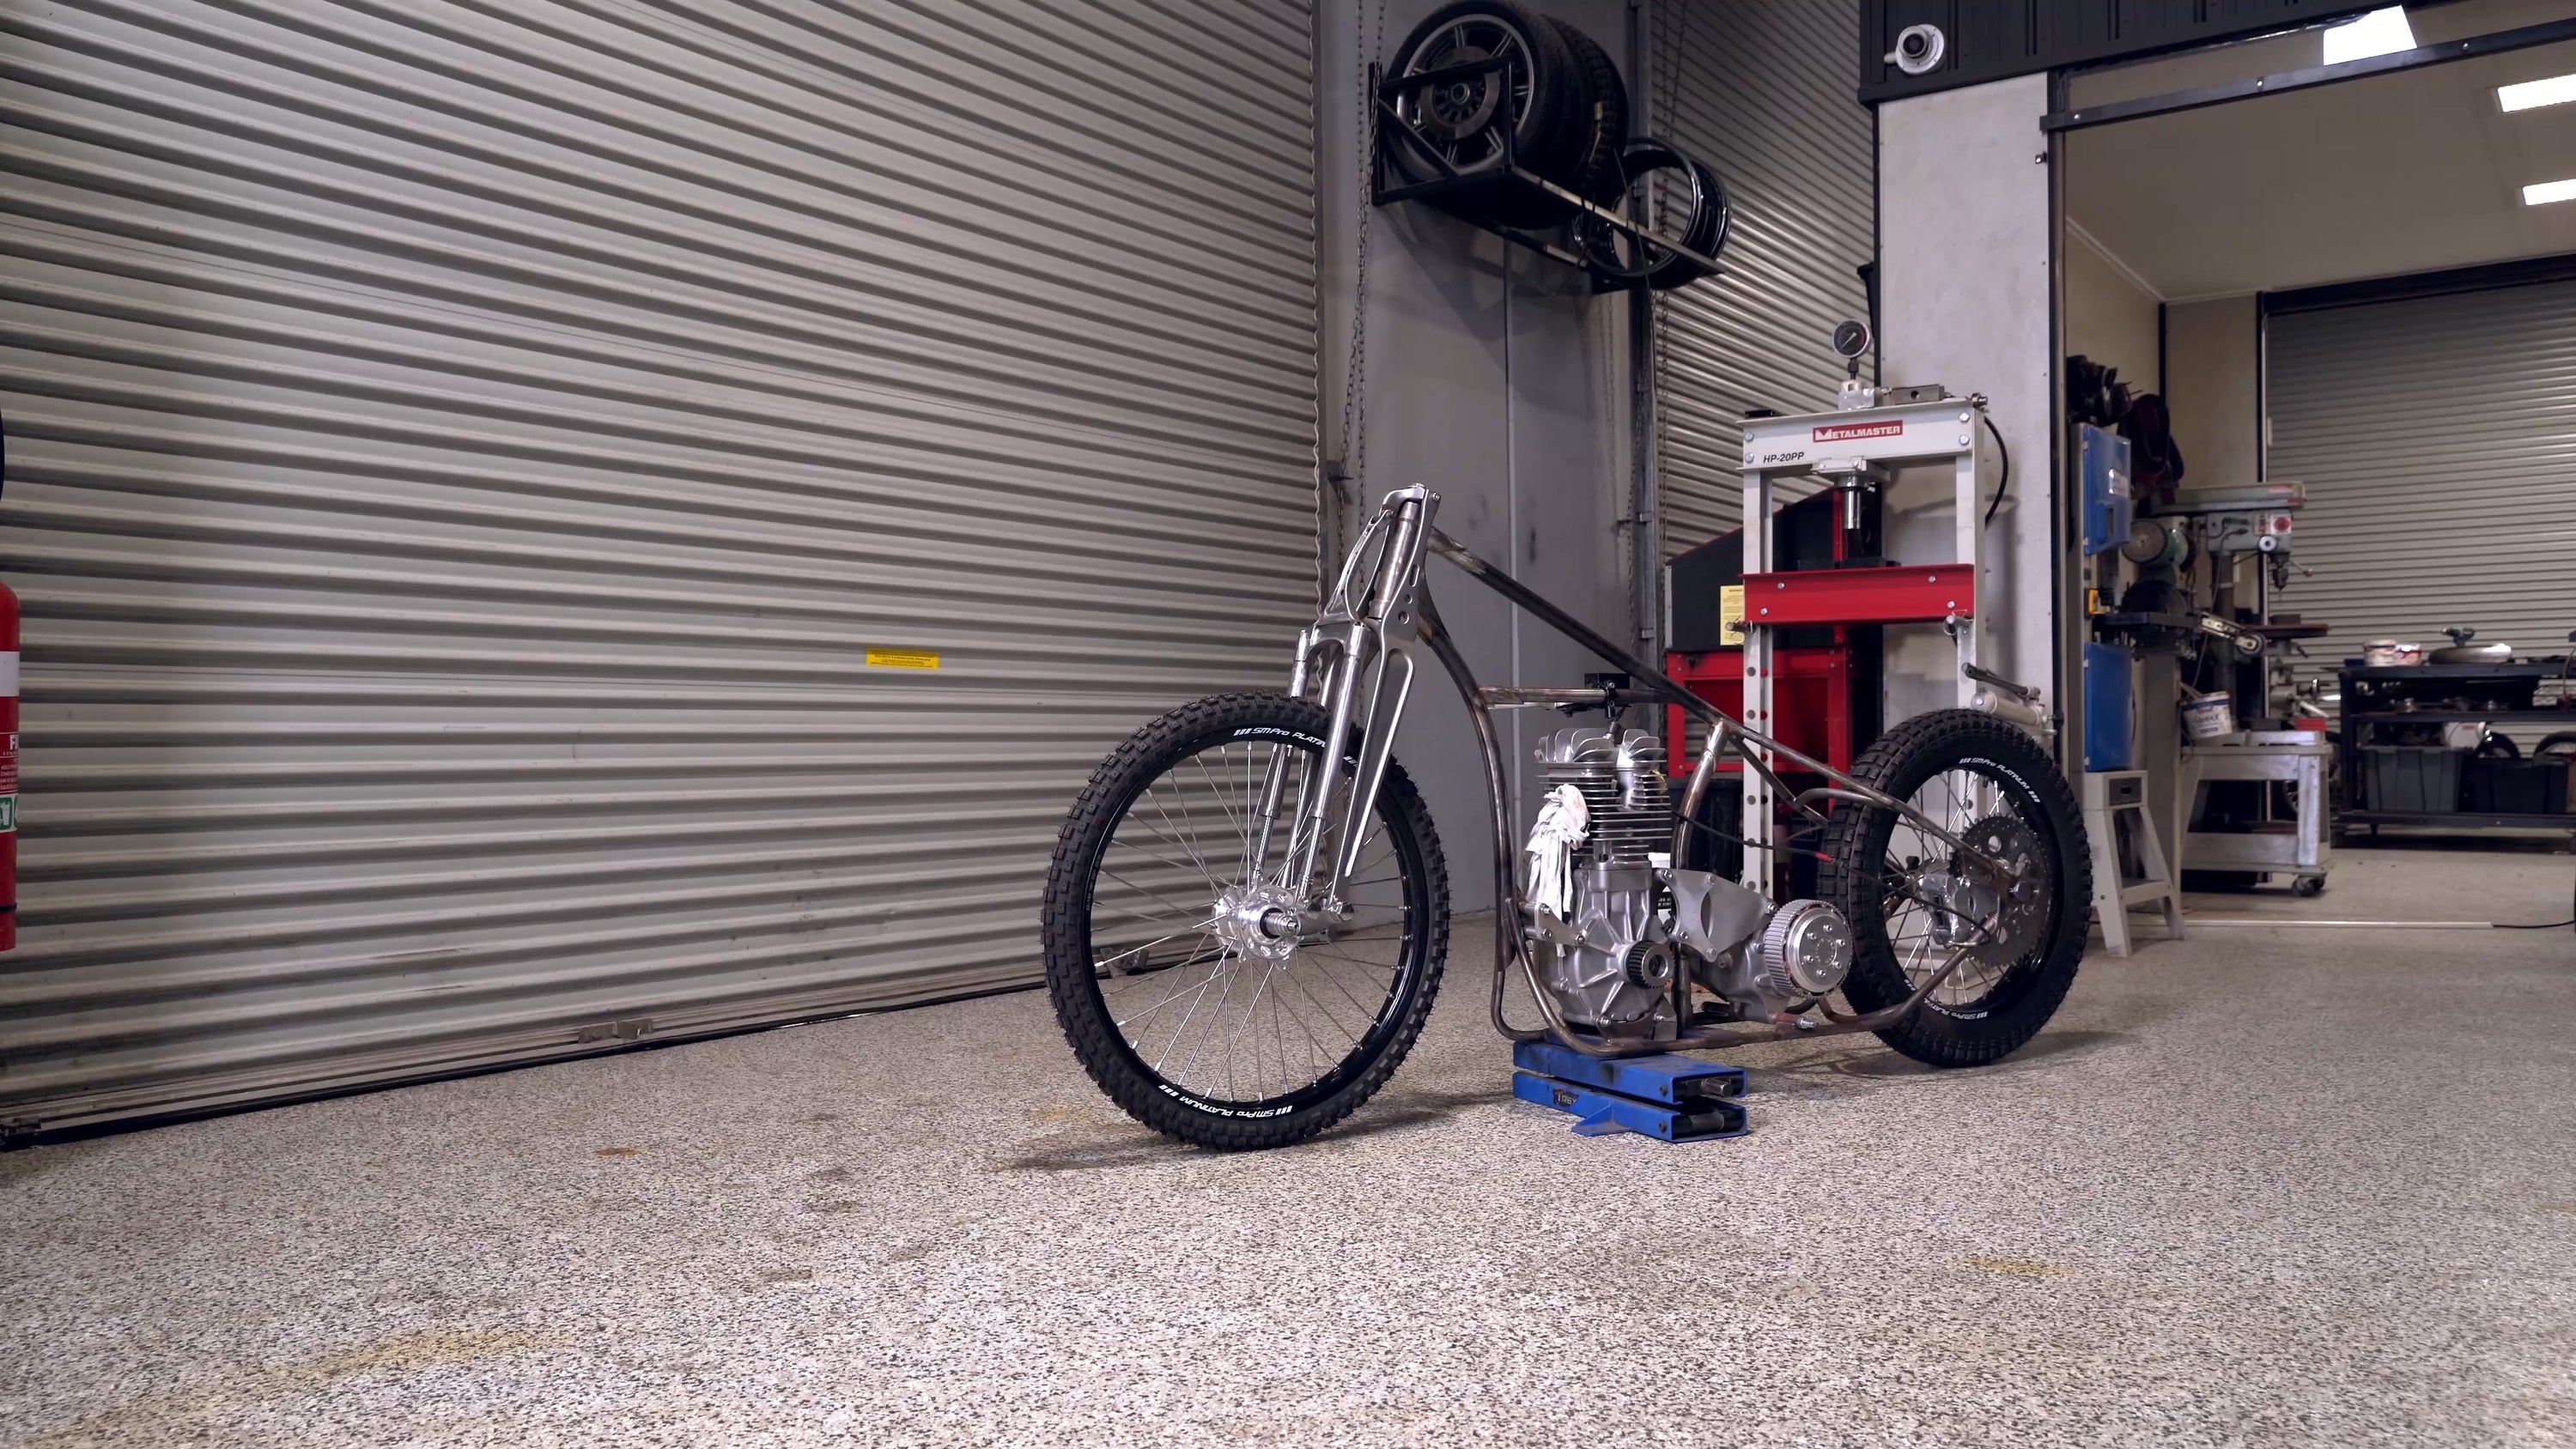
The journey from concept to creation is always a bit of fun, especially when it involves reimagining a motorcycle design. Our latest build, the custom springer front end, is no exception. Tom's vision was to craft a springer without the traditional springs, opting for a sleek, minimalist design that stands out for its uniqueness and simplicity. This required a lot of planning and preparation before execution.
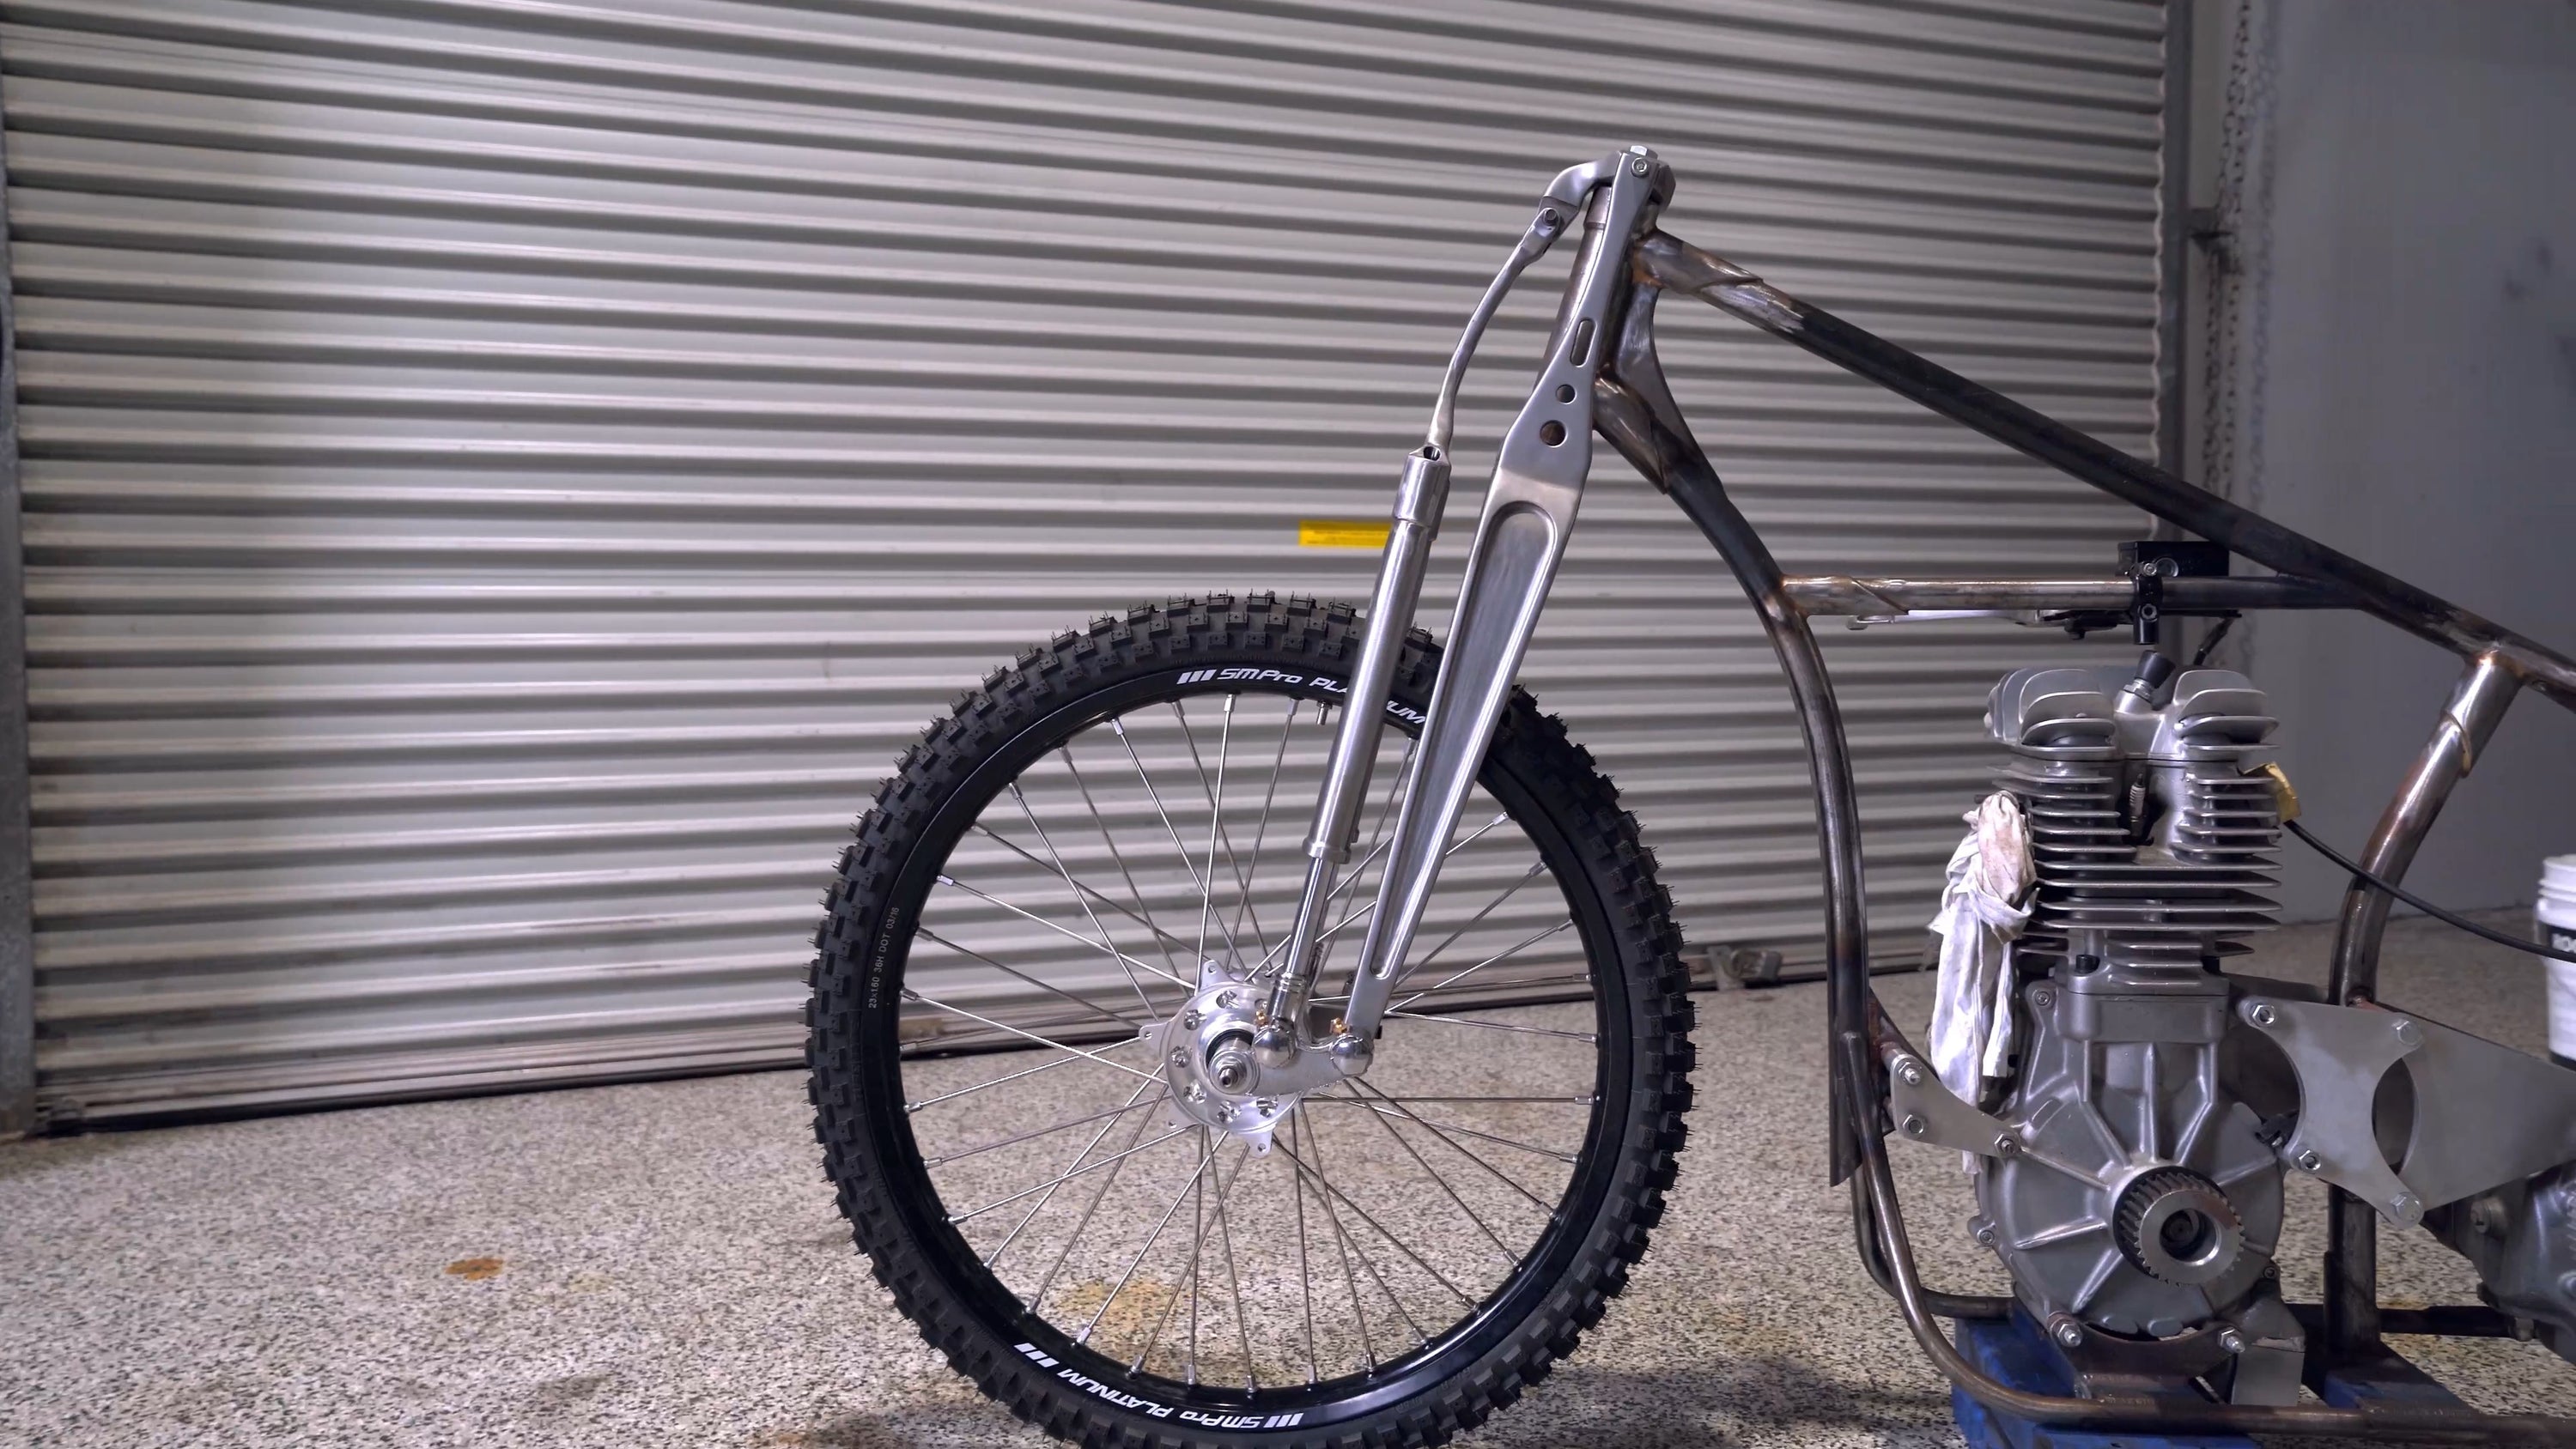
Once the design was finalised through hand and CAD drawings, we started the process of bringing this vision to life. The components for the springer include the head stem, rear leg (or fixed leg), fork tubes, fork legs, cross brace, cross brace link (these last four components making up the front or moving leg of the springer), and the rockers—the crucial moving parts that connect both legs to the axle.
Thanks to SWS Welding, whose support and equipment have been incredible.
The Build Process Detailed
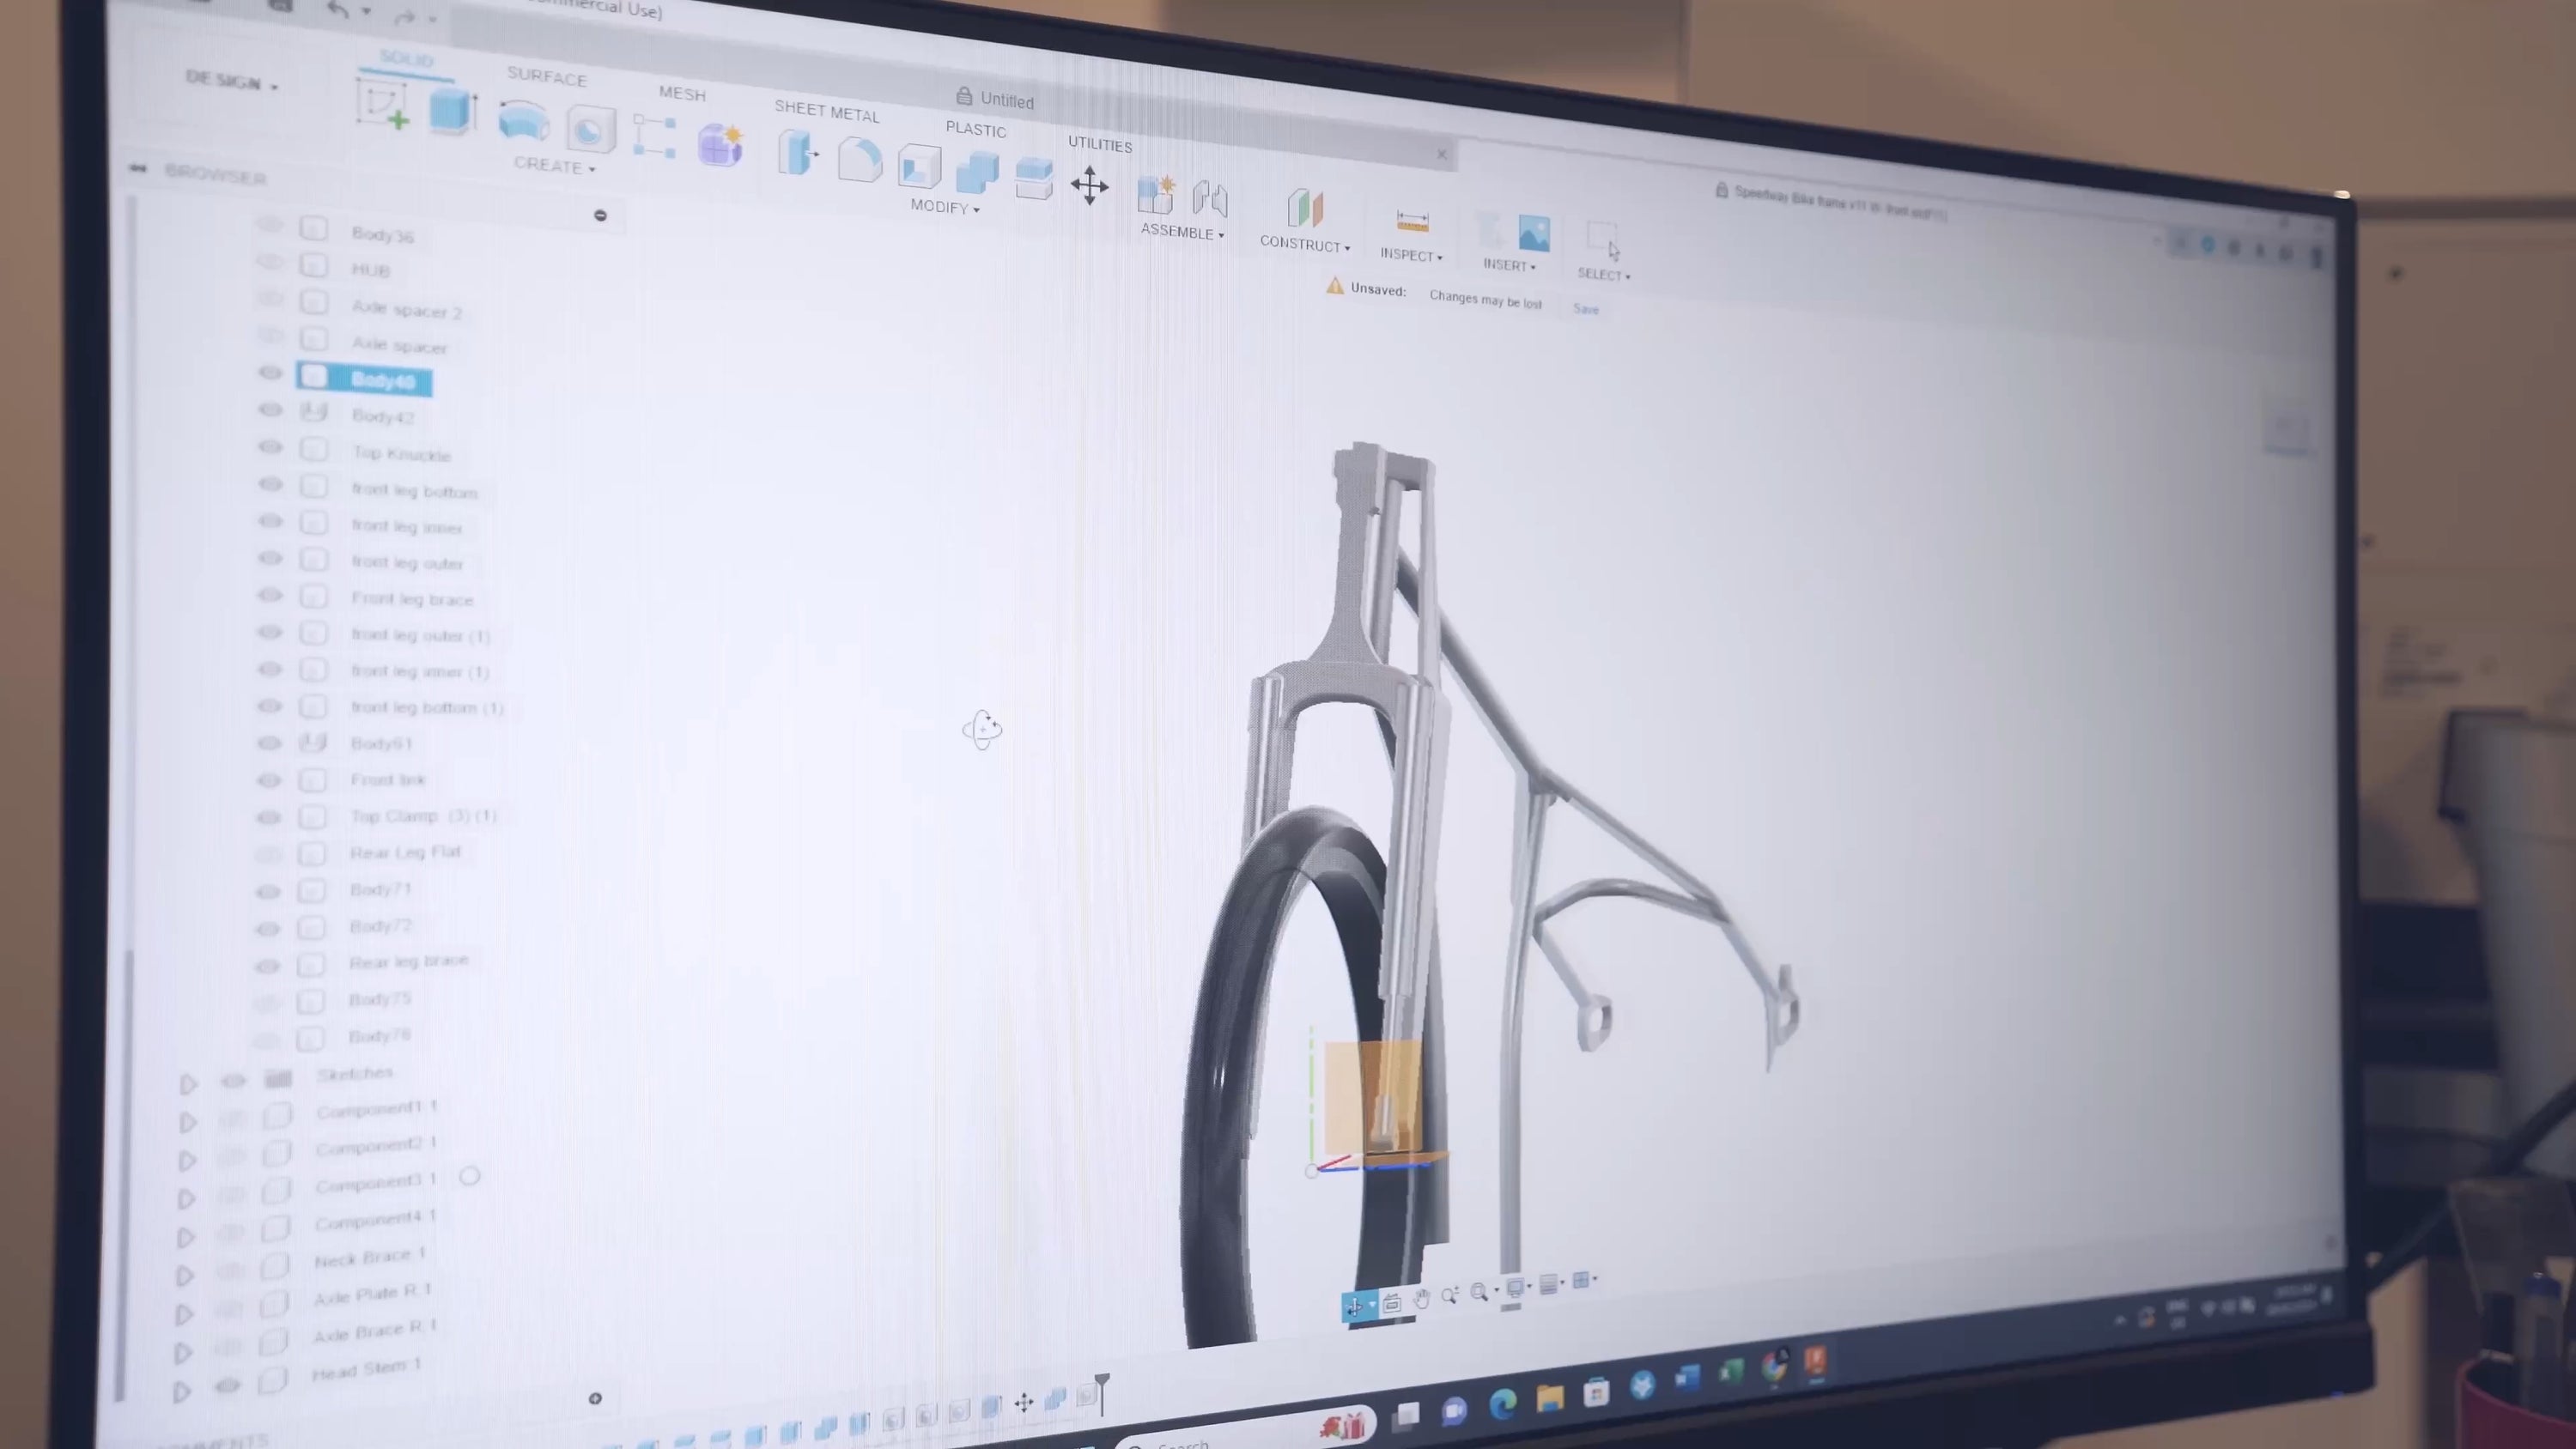
CAD Design Layout: The build starts with ensuring the geometry of the frame and forks is precise. using CAD designs, we laid out the measurements for our raw materials, making sure every cut and weld was perfect.
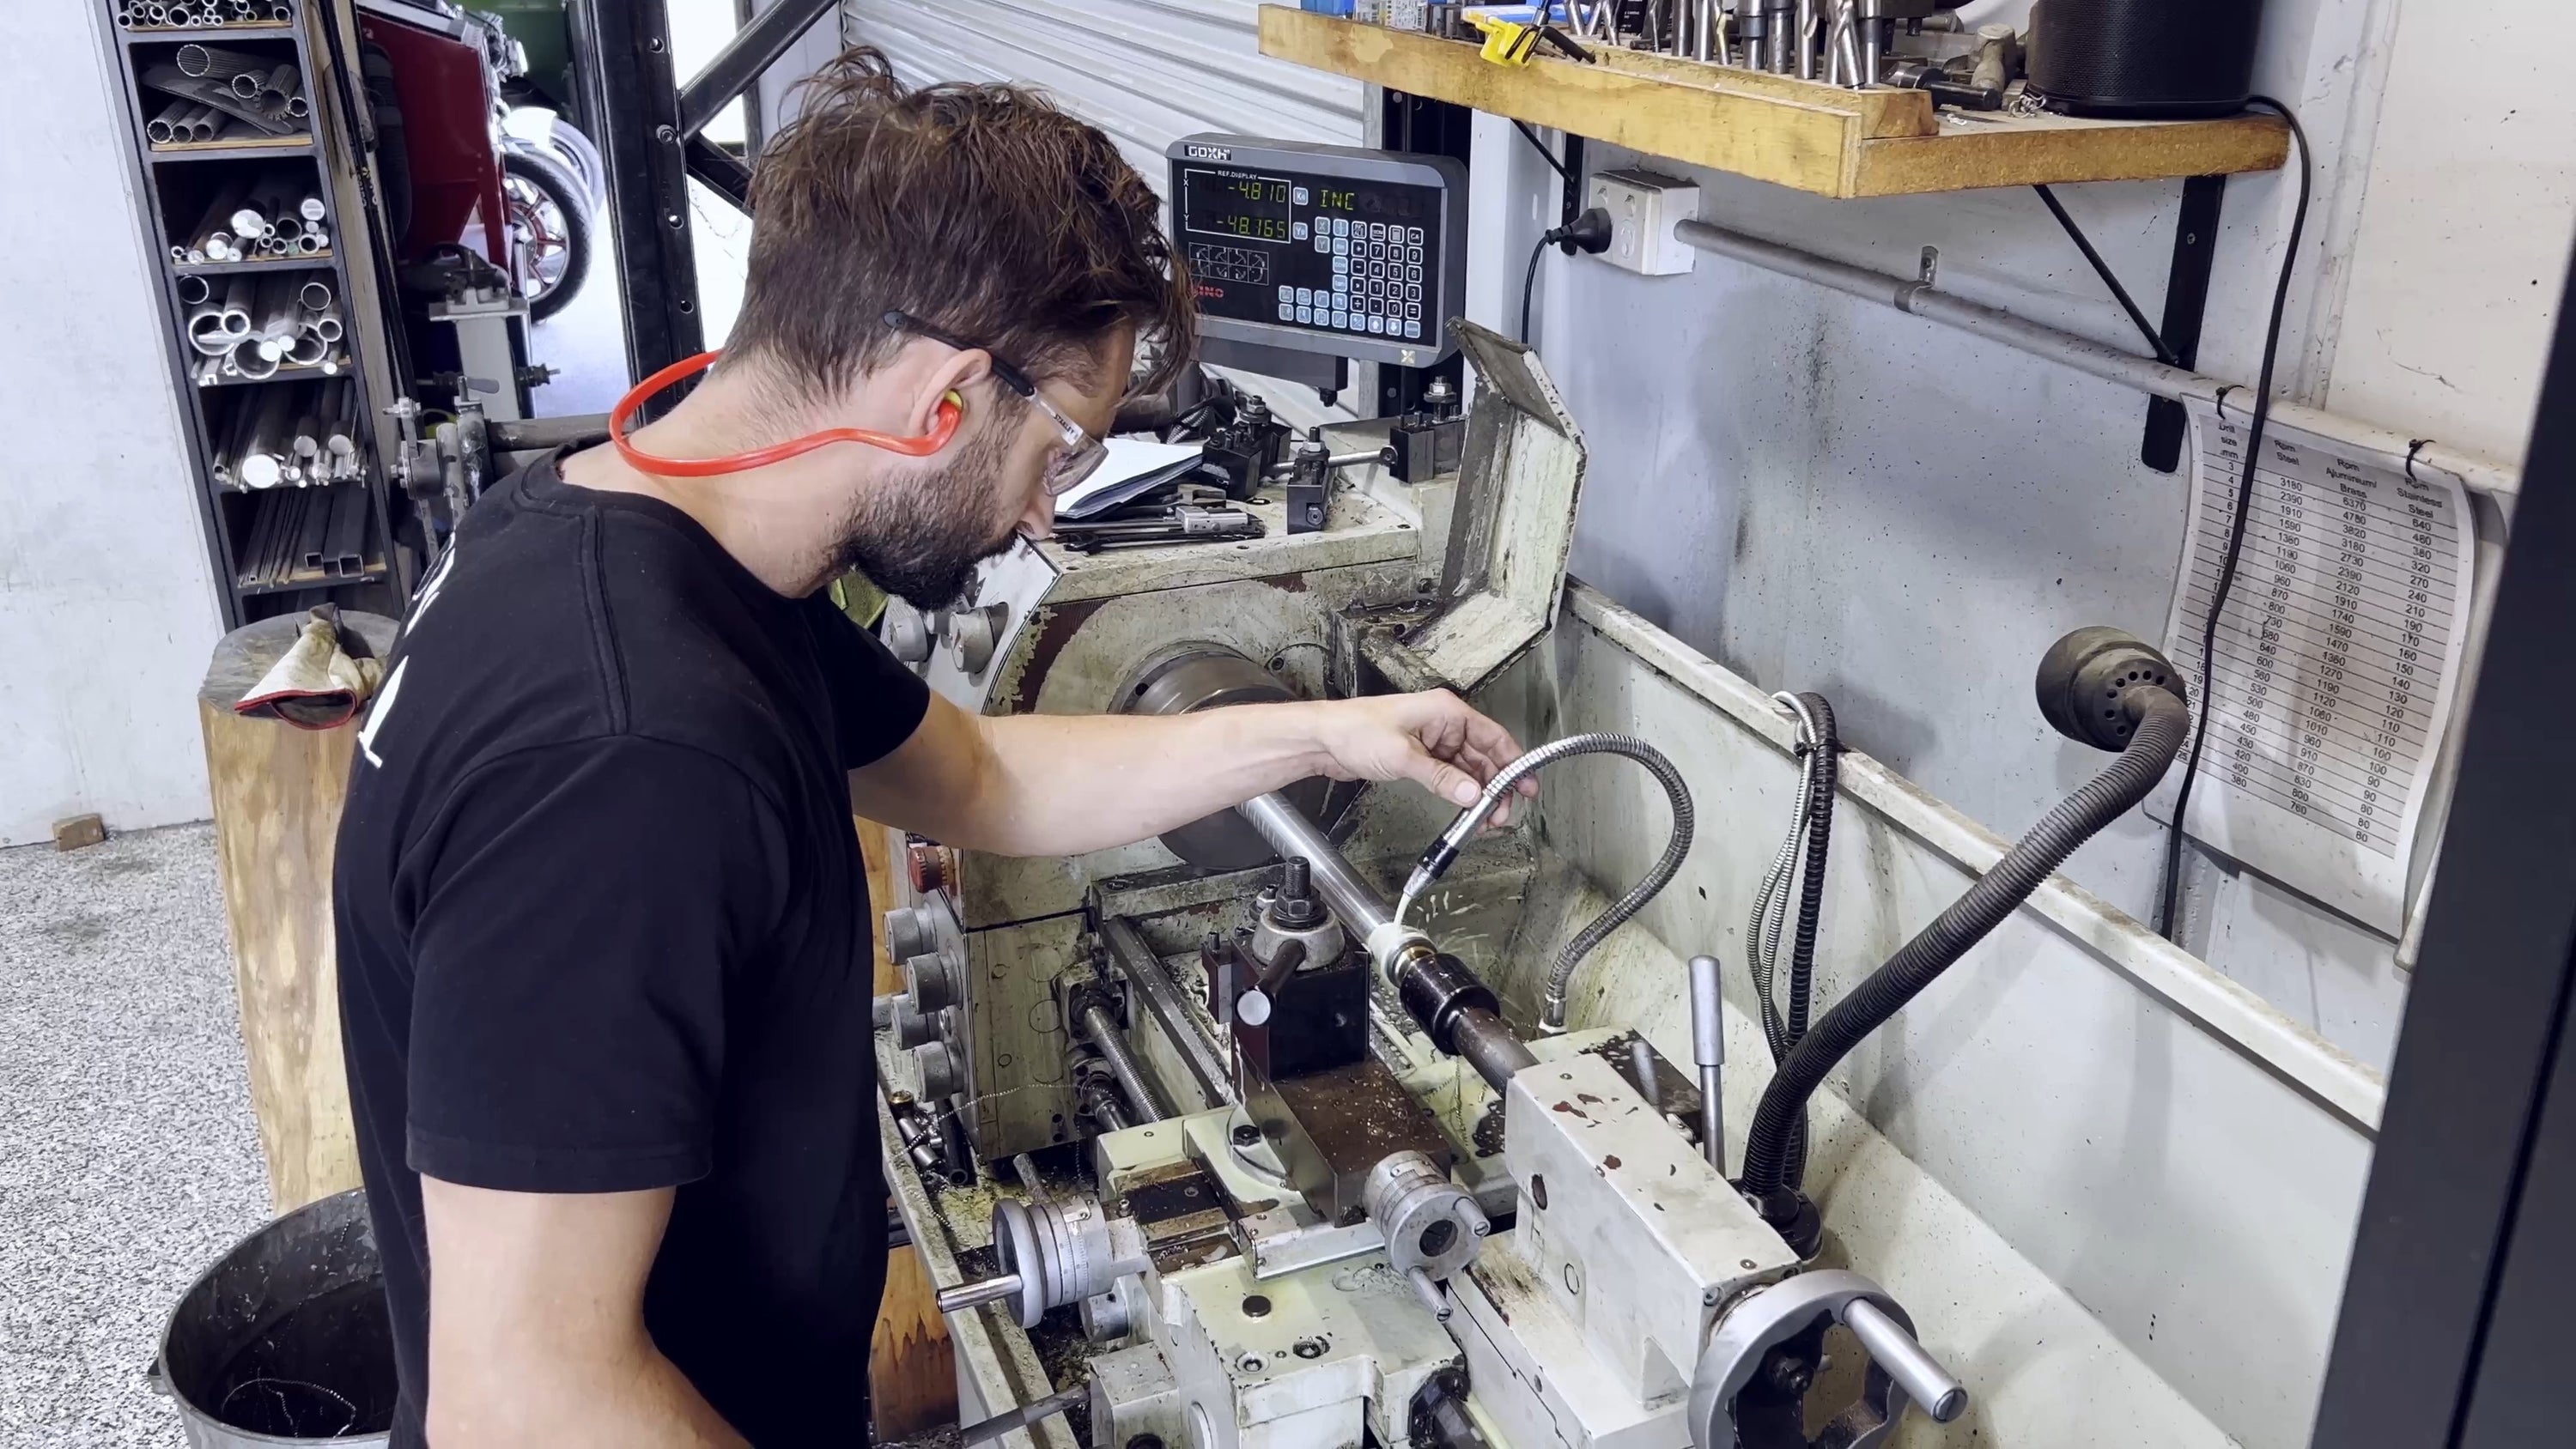
Machining the Telescopic Forks: Our front leg telescopic forks are made from hardened chrome solid bar and hydraulic cylinder steel, materials chosen for their durability and strength. Tom spent literally days turning down the different components for this.
Bearing Cups and Bushings: To complement the forks, we machined graphite fixed bushings and bronze moving bushings, fixed to the chromed fork leg. Secured with clip rings and circlips, these components allow for a smooth movement within the forks.
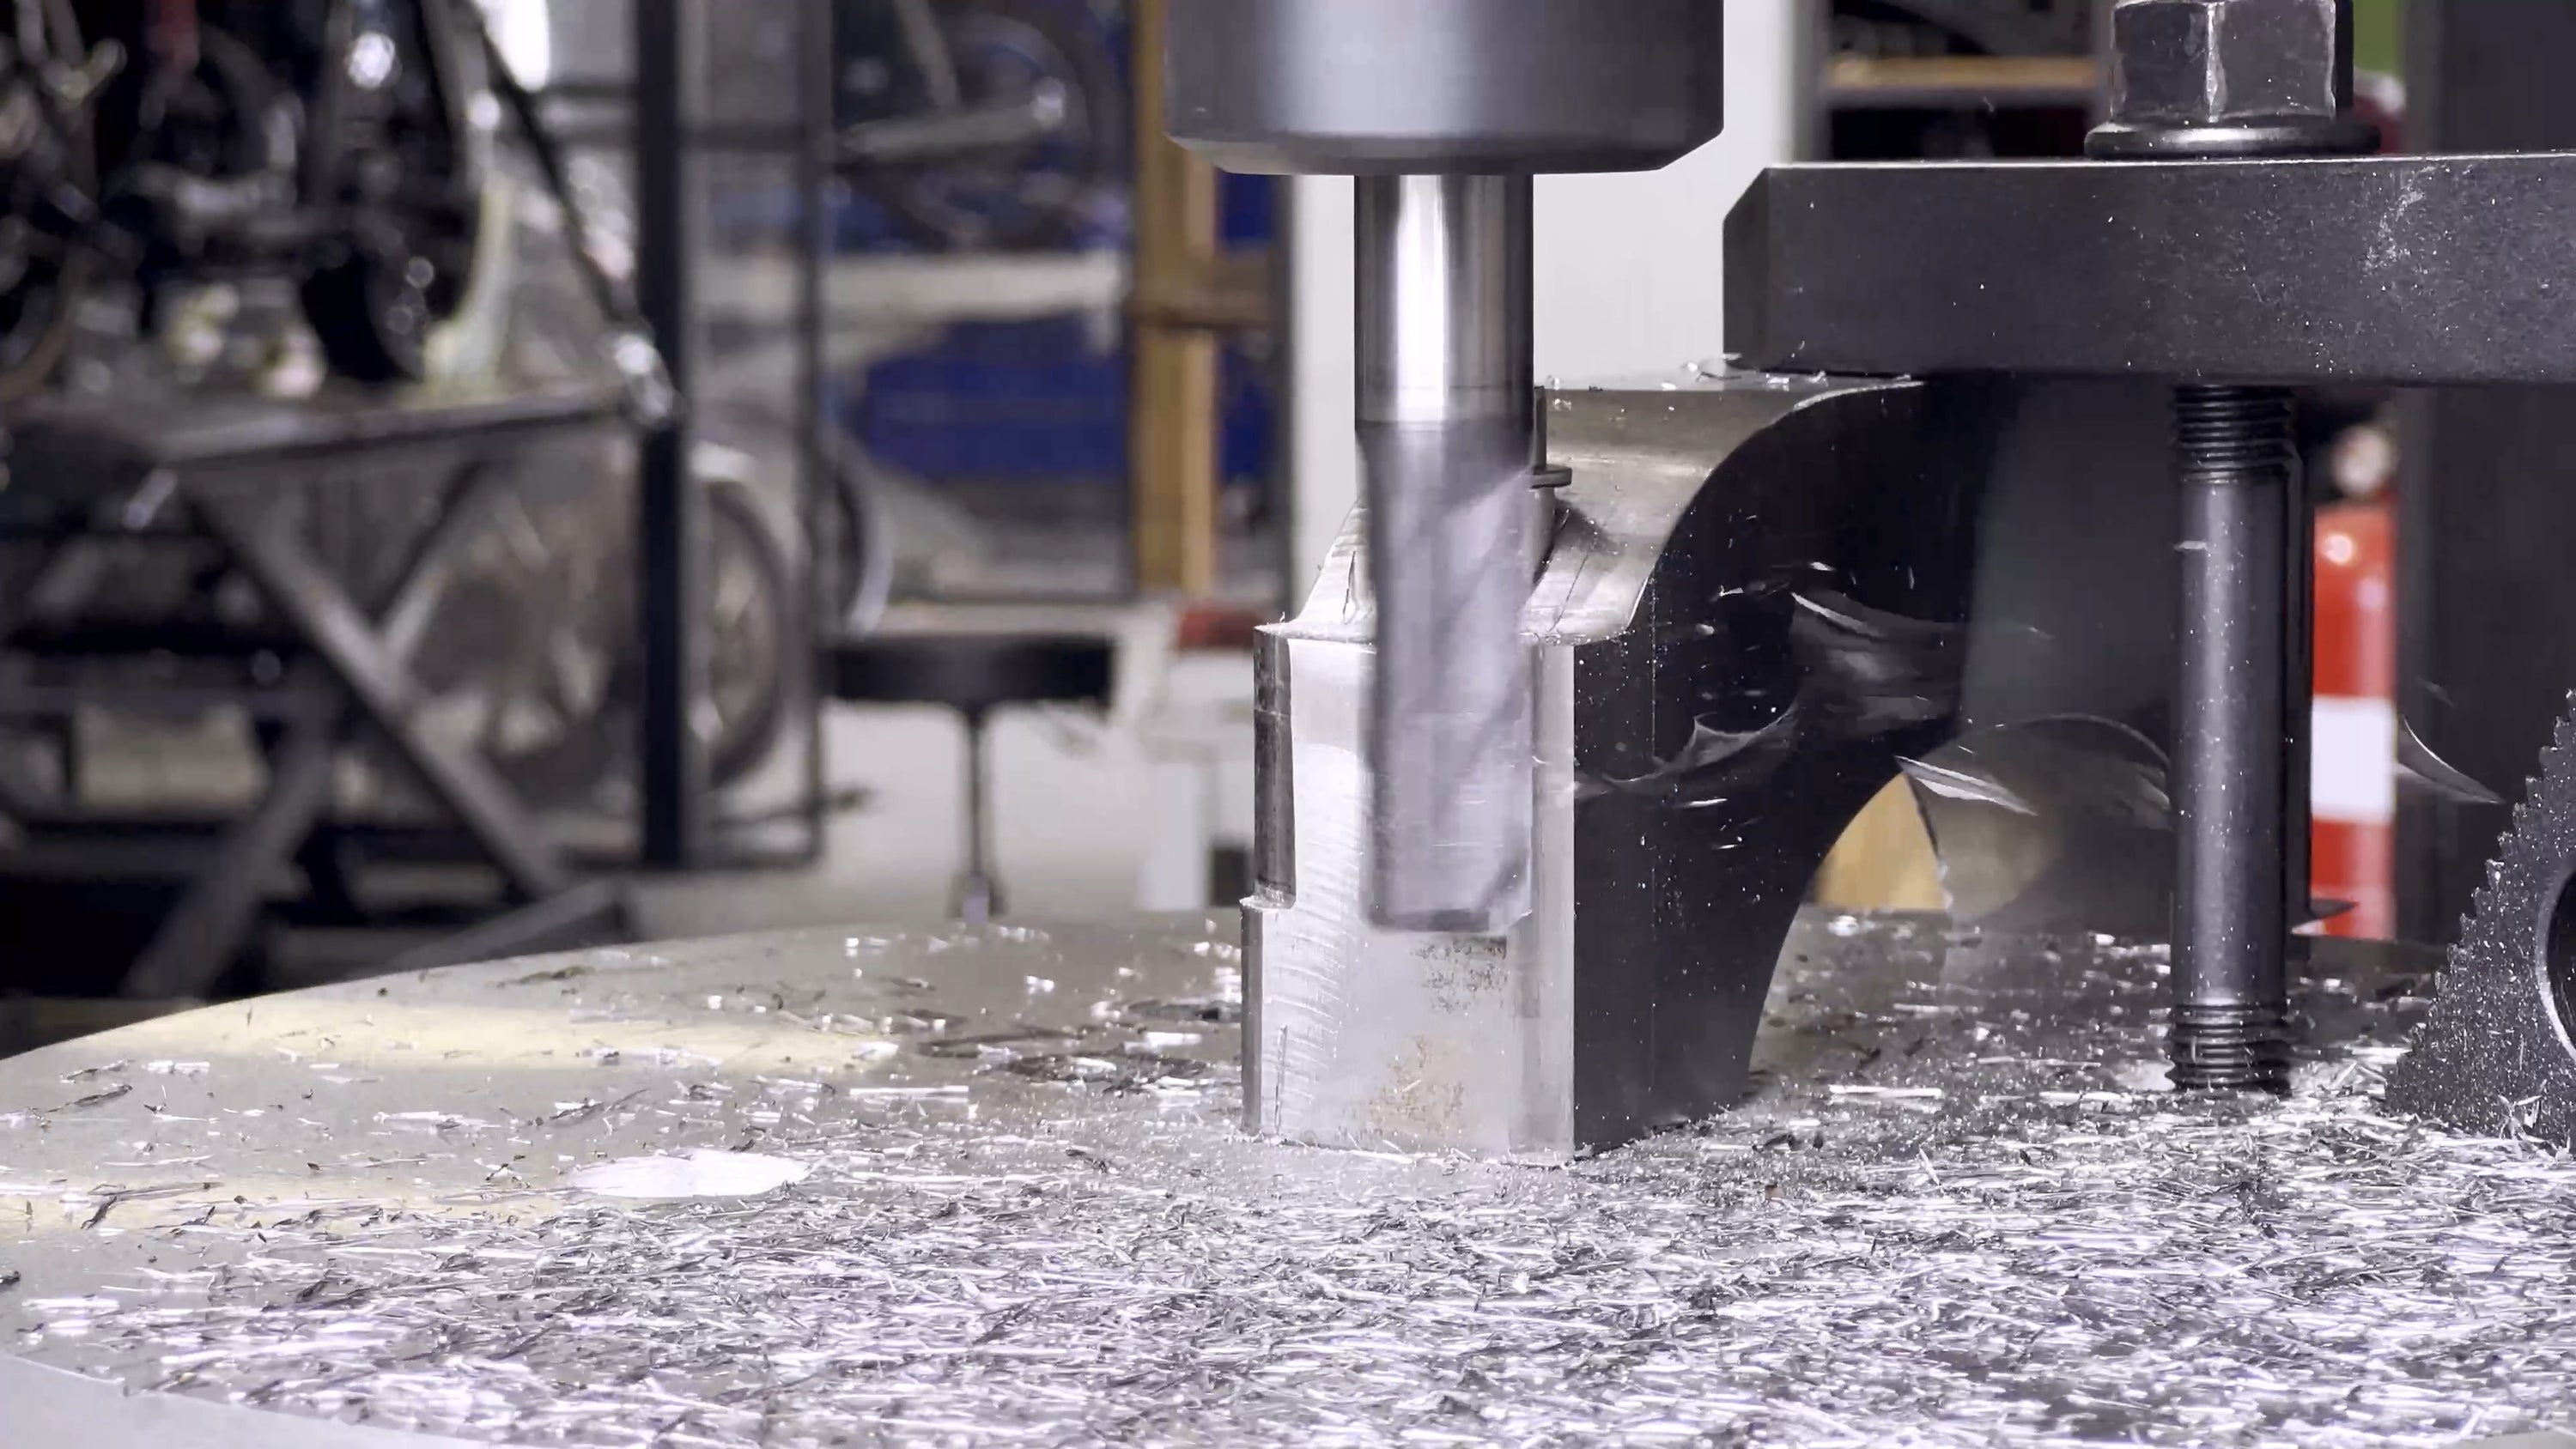
Front Leg Cross Brace: The cross brace was crafted from a block of 40mm mild steel. Through milling and machining, we drilled holes for fork leg coupling and added the external shape.
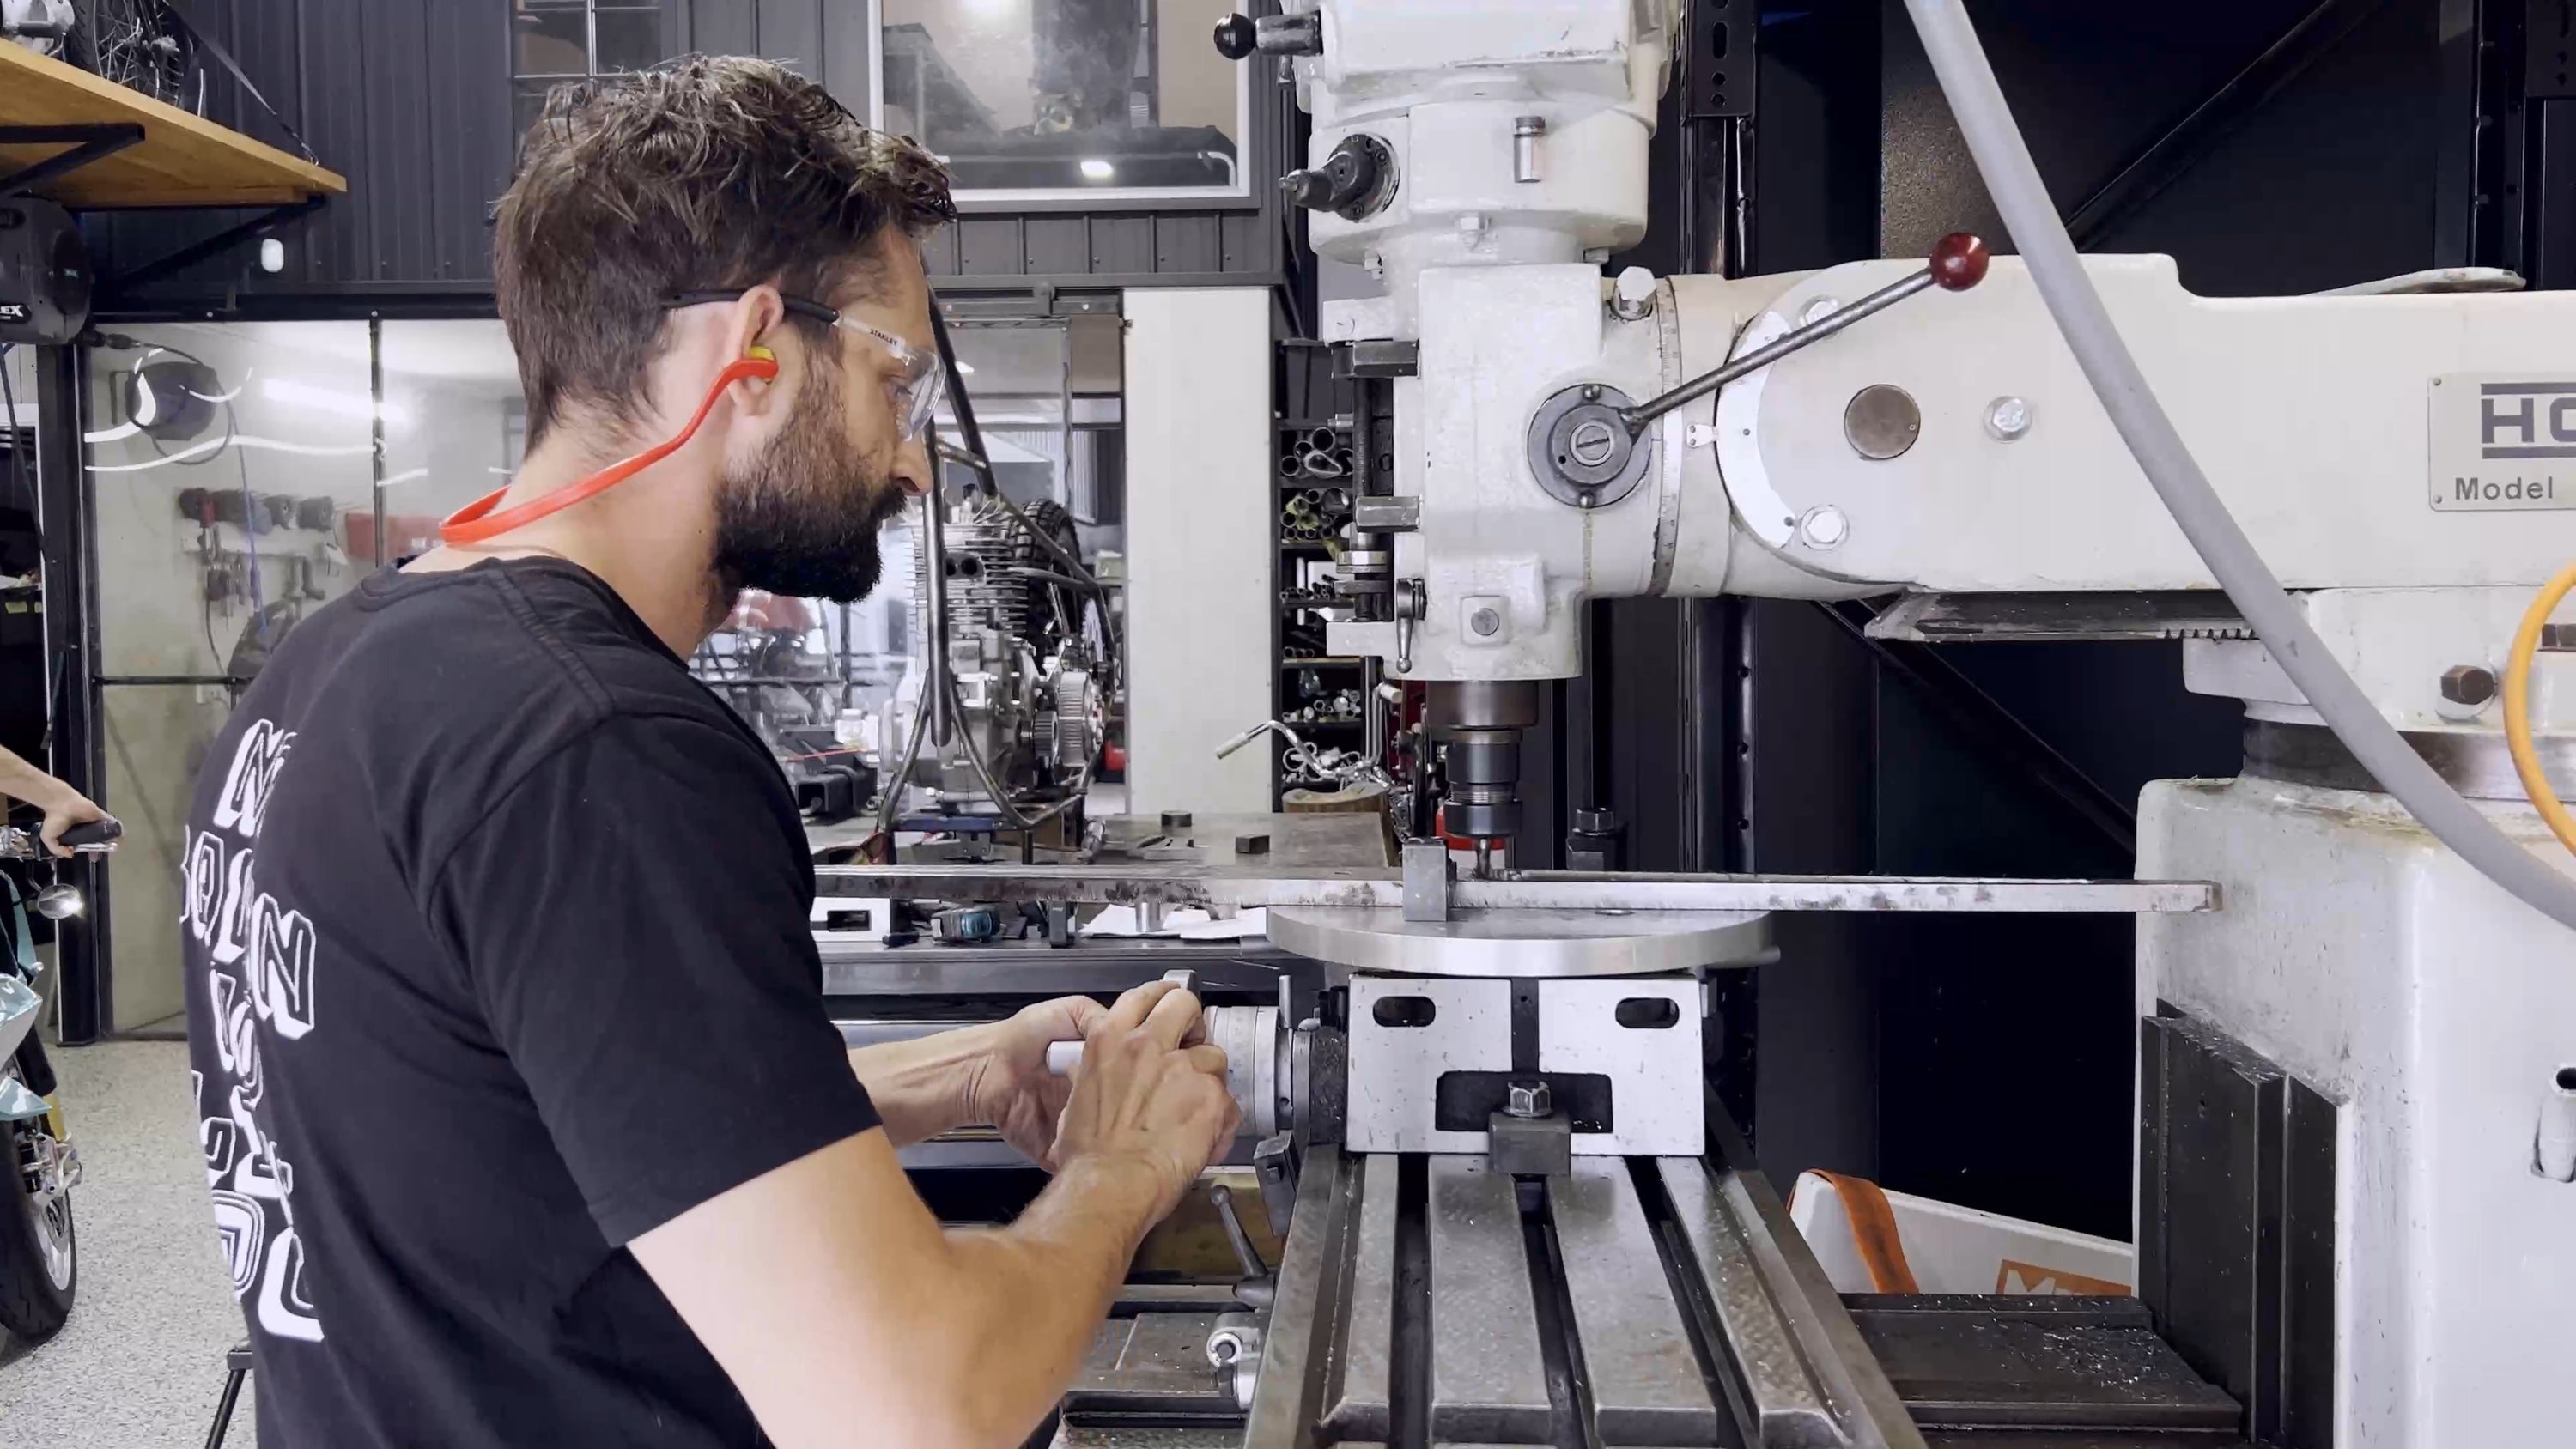
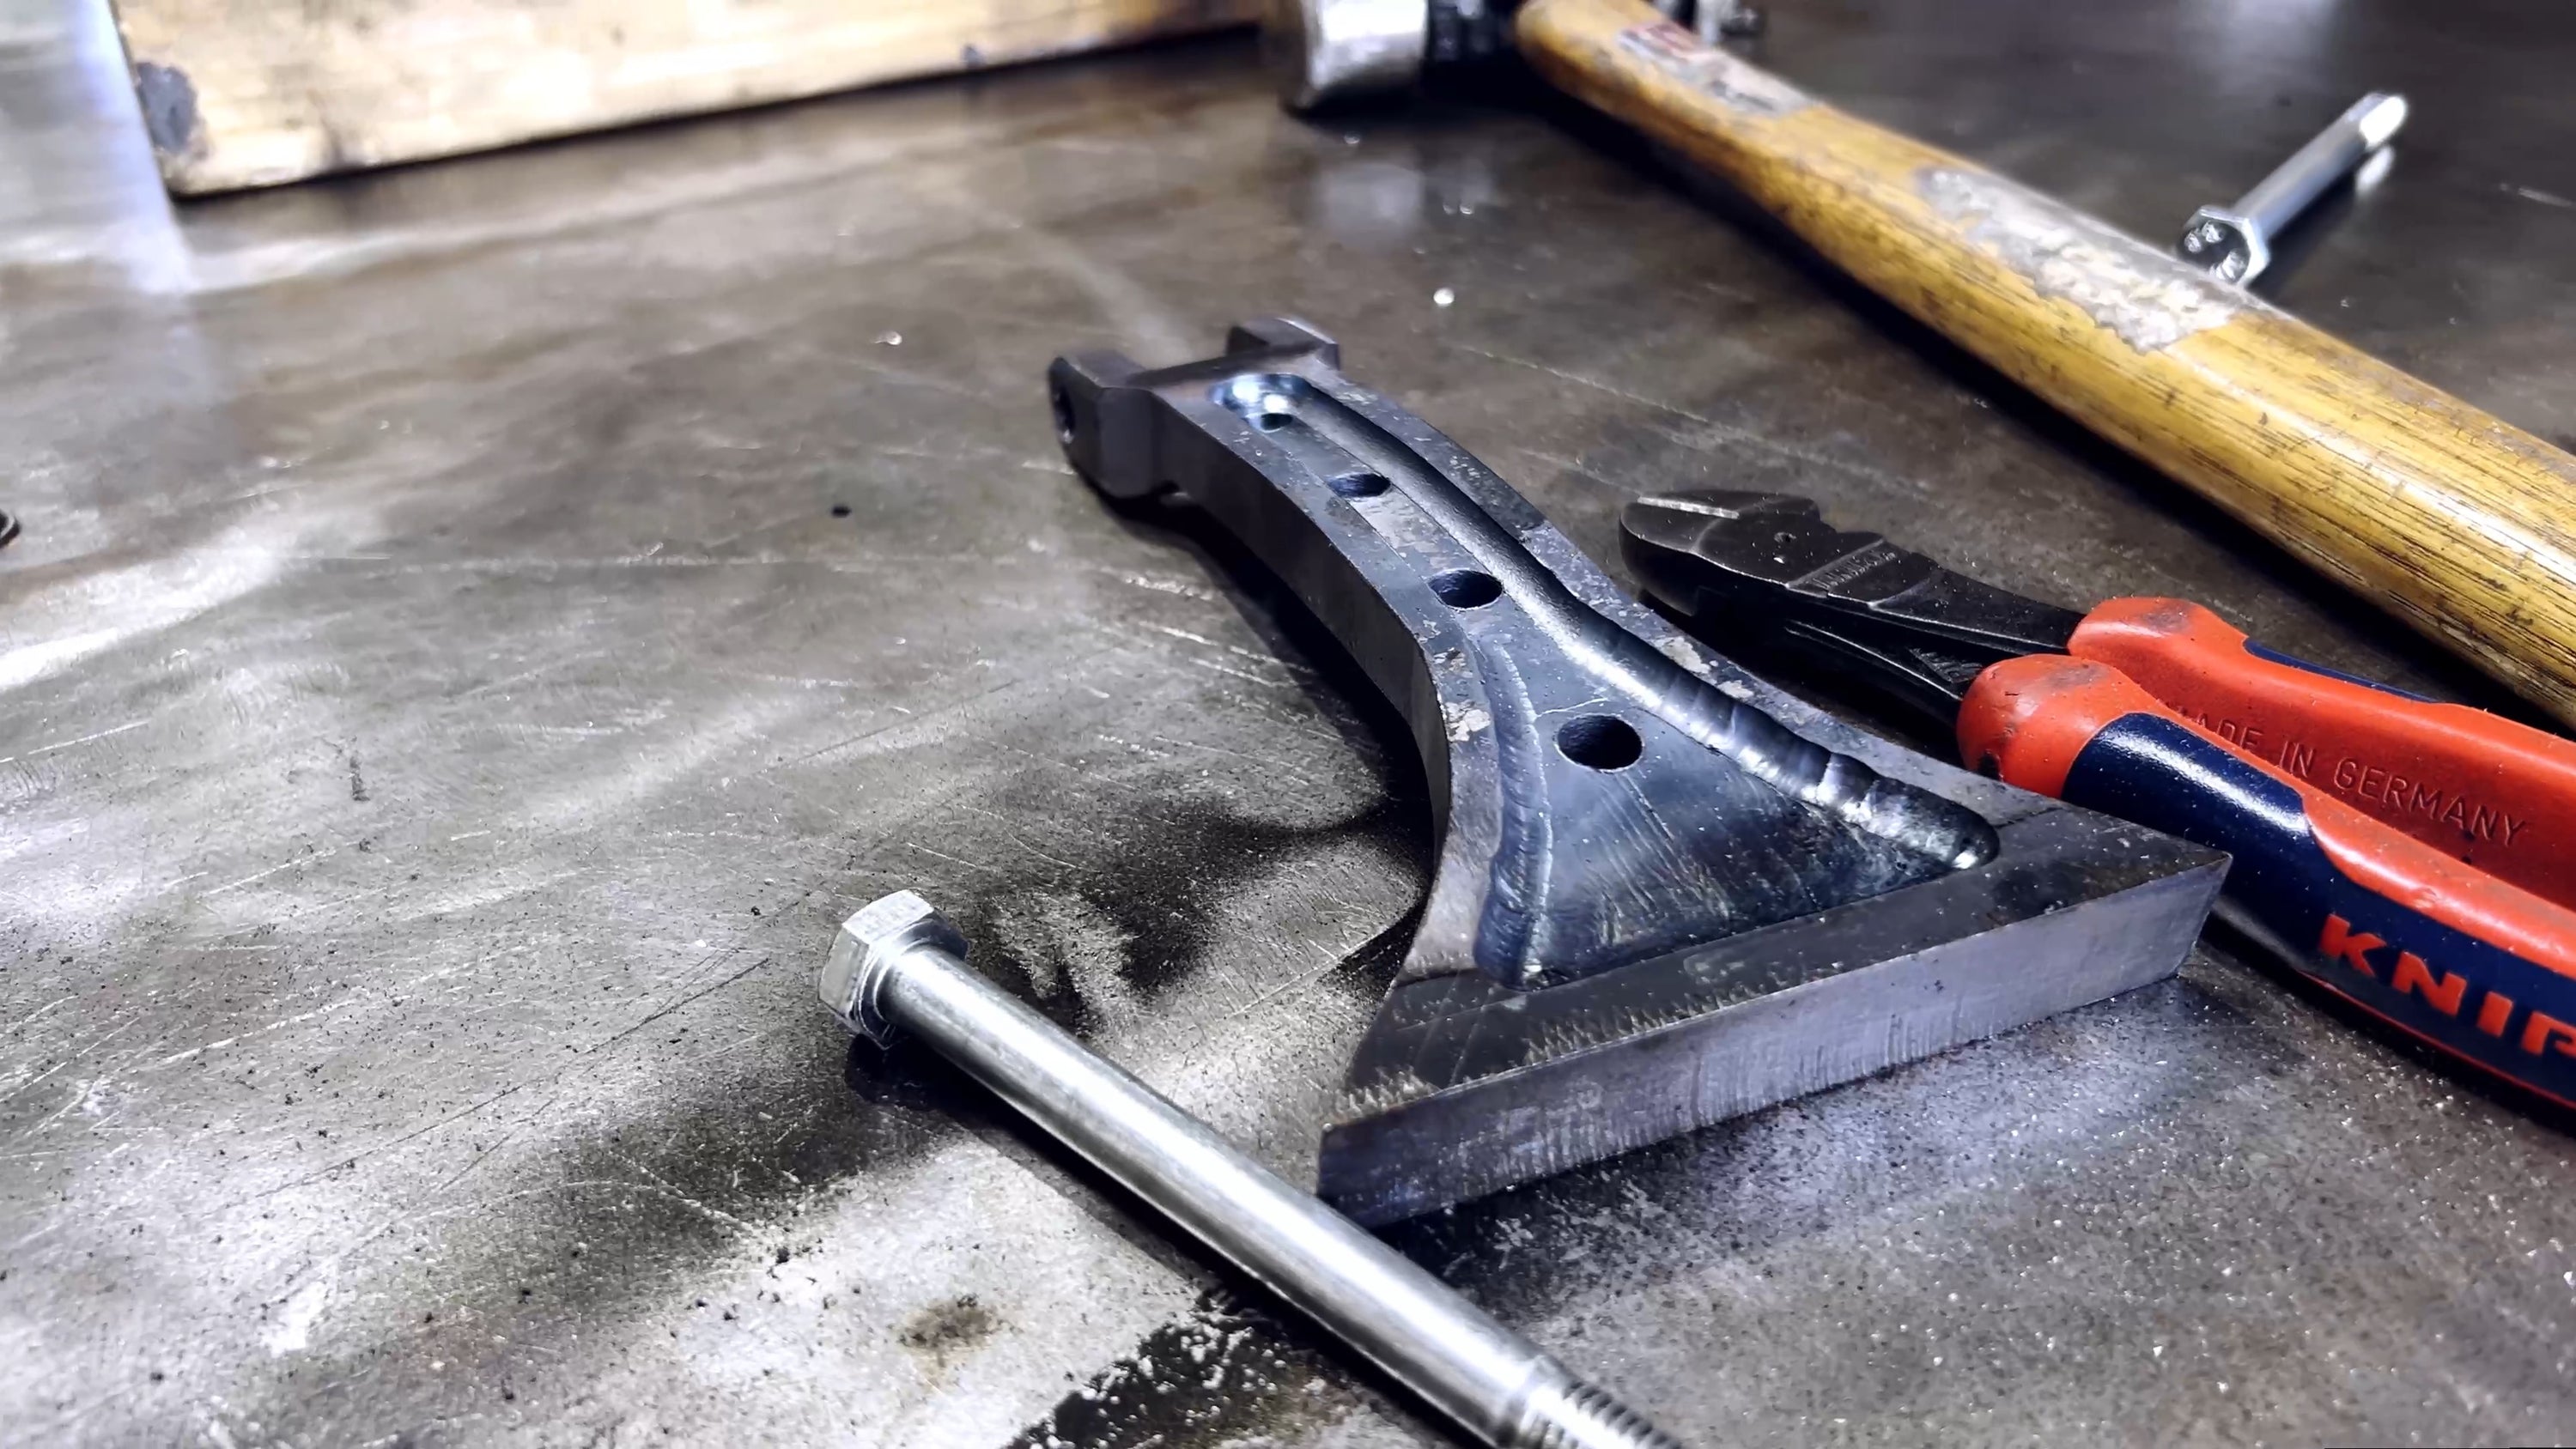
Detail Machining for the Fixed Leg: Starting with a 15mm mild steel plate, we machined detail into the leg, reducing weight without compromising style or functionality, and giving the fork leg a unique look.
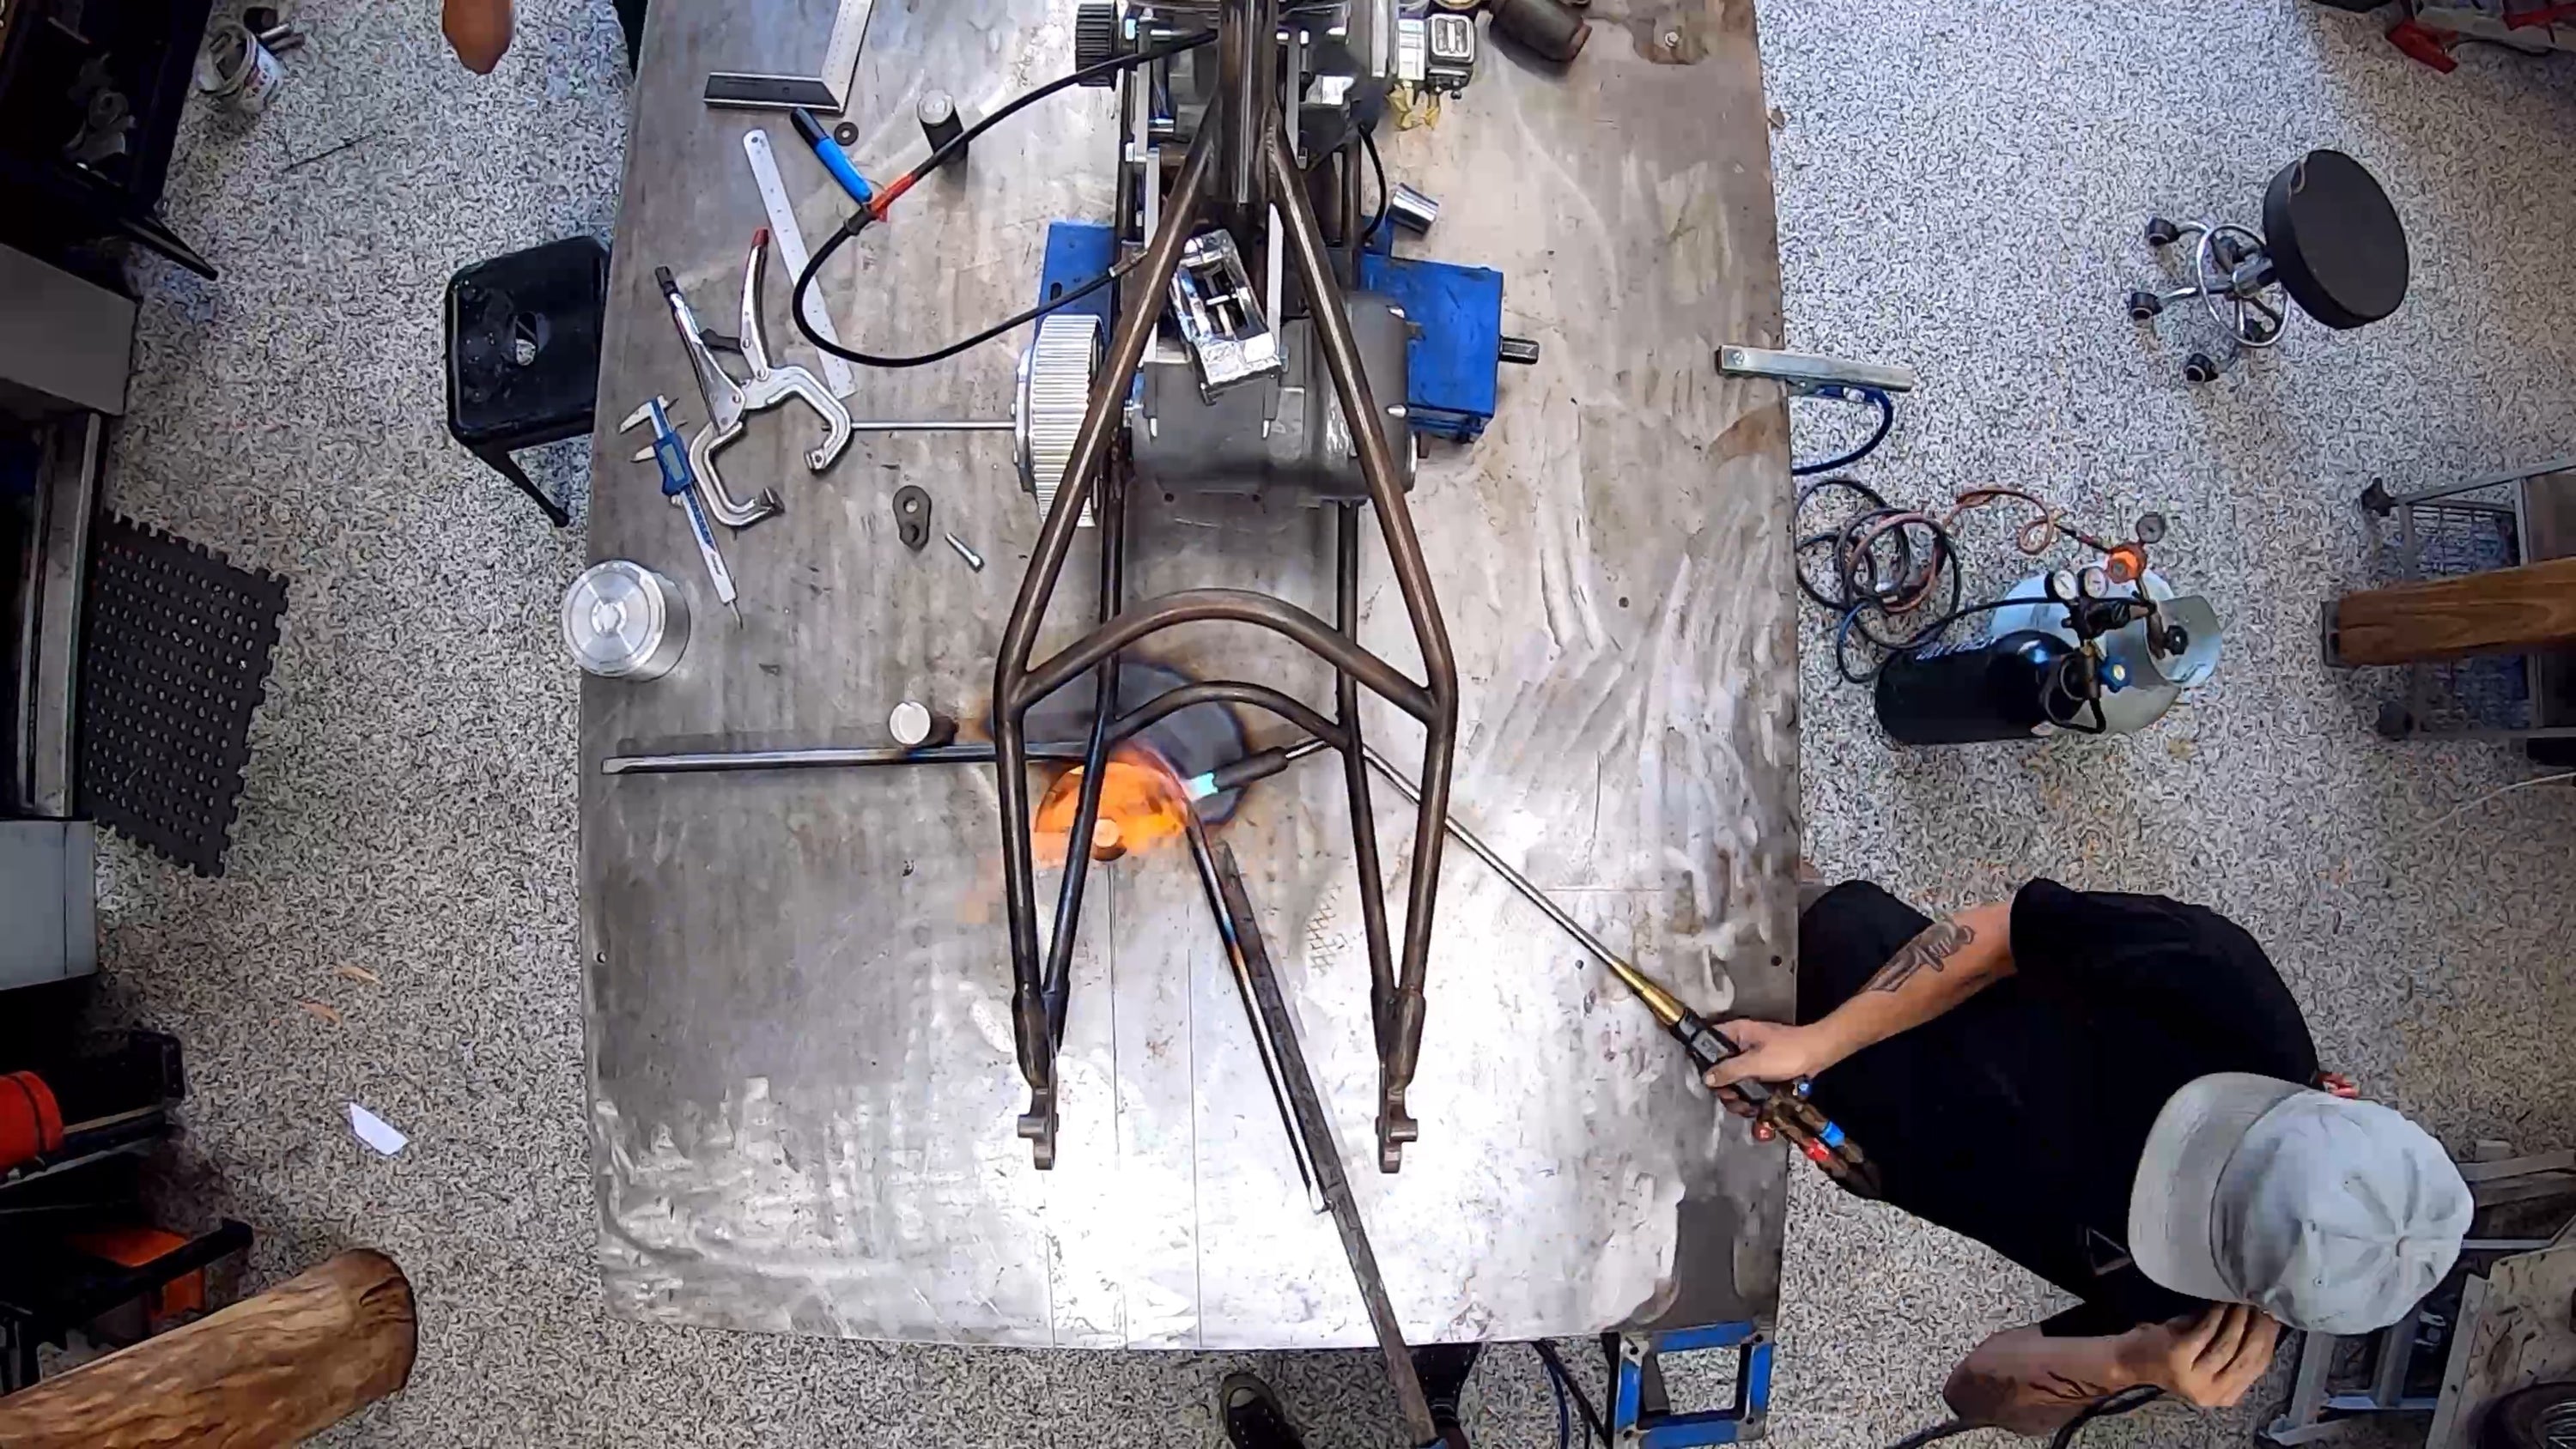
Rear Leg Bending: Using a custom jig, we bent the rear leg to fit over our front wheel. This step was crucial for aligning the springer's aesthetics with its function.
Machining the Top Clamp and Cross Brace Link: We then machined the top clamp and added detail to the cross brace link which connects the telescopic leg to the top clamp's knuckle pivot. These parts were hand-finished.
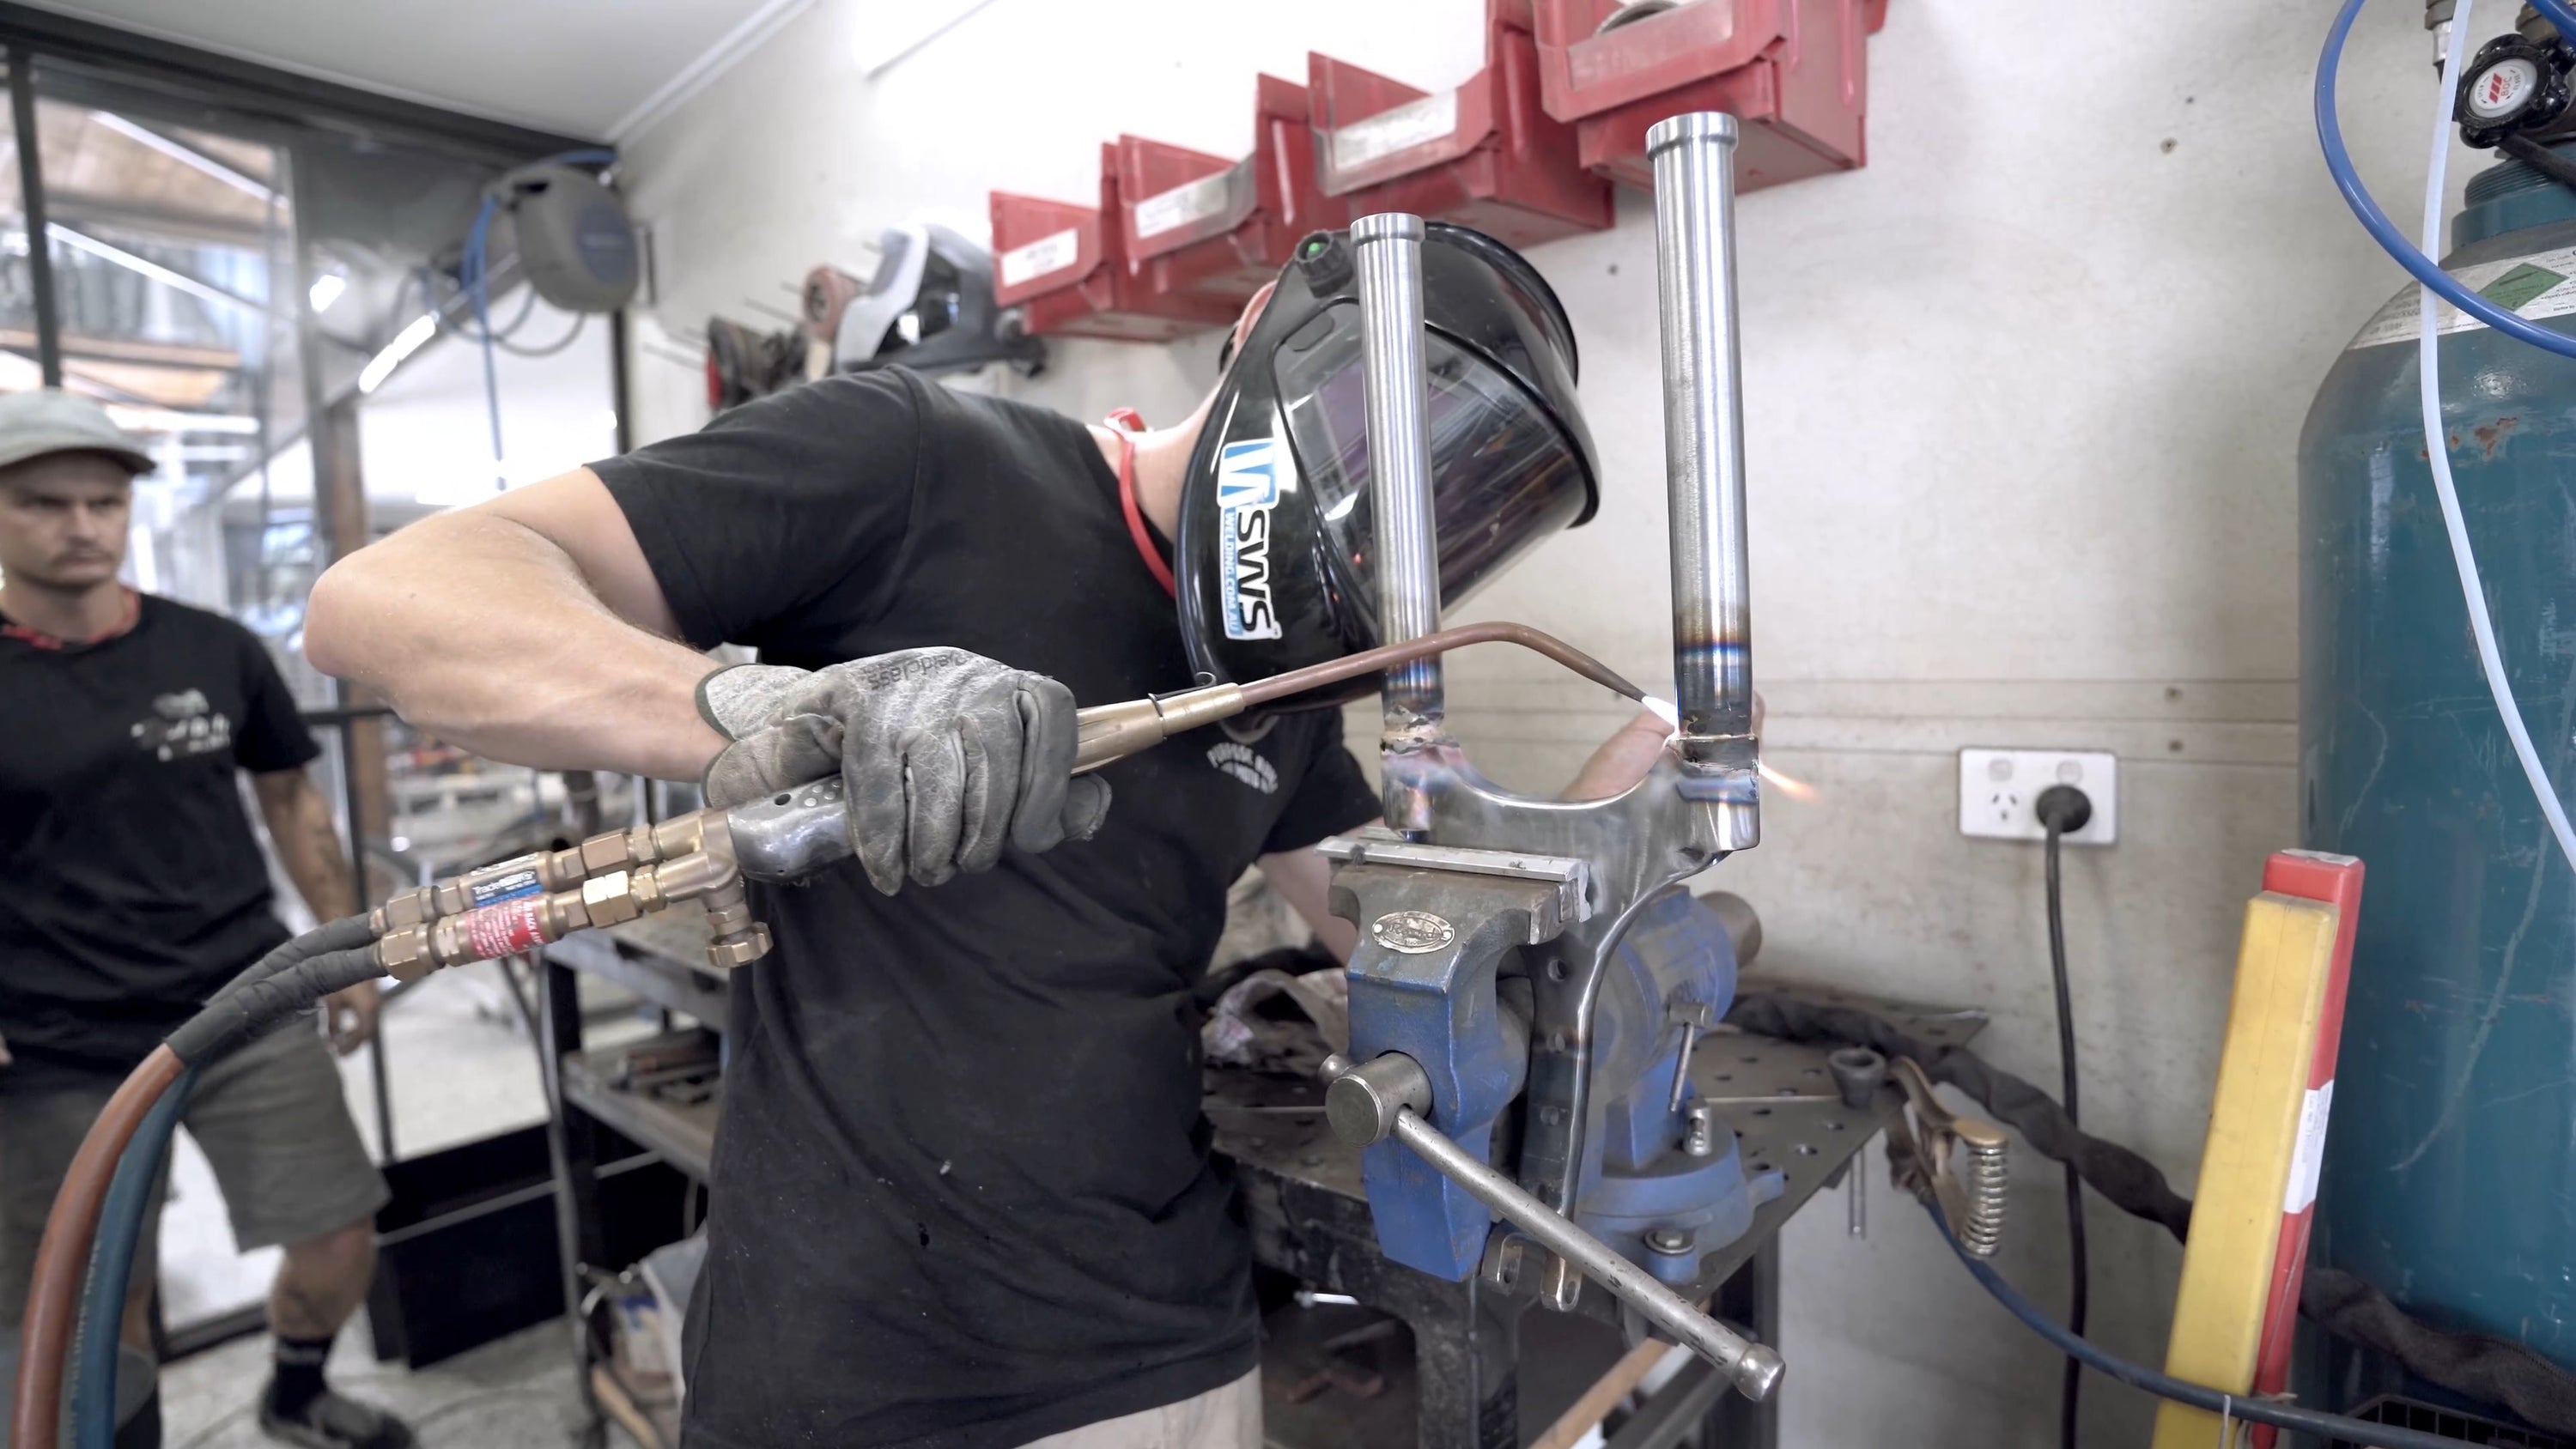
Final Assembly and Detailing: With all parts machined, bent, and detailed, we moved on to the final assembly. The fork legs were silver soldered and welded into the cross brace, which meant the fabrication part to the front end was done. Each component was hand-finished and smoothed, preparing for painting and finishing.
As we look forward to the next part of our speedway build, stay tuned for more updates while we dive into the nitty-gritty of designing the remaining parts of our speedway bike. Our journey is far from over, and we're excited to share every step with you.
If you want to have a go at fabricating your own motorcycle parts, check out our Fender Fabrication Kits!
WE BUILD BIKES WITH PURPOSE.
Purpose Built Moto is home for unique custom motorcycle builds. We offer a unique motorcycle customizing experience in the heart of the Gold Coast.
Join our email list and receive exclusive updates.
Latest Stories ALL STORIES
-
04/05/2026


2 comments
Can I get some idea of pricing for these front ends, thanks
Can you build a 50" over Springer Mike in Phoenix Arizona