


Taking a standard subframe and adding a tail hoop has to be the most common modification in the Café Racer/Scrambler/Tracker universe. Often overlooked (I’m guilty as well) is the Issue of rear wheel Suspension travel. For information about other cafe racer parts click here.
If you take a Subframe that looks like this:
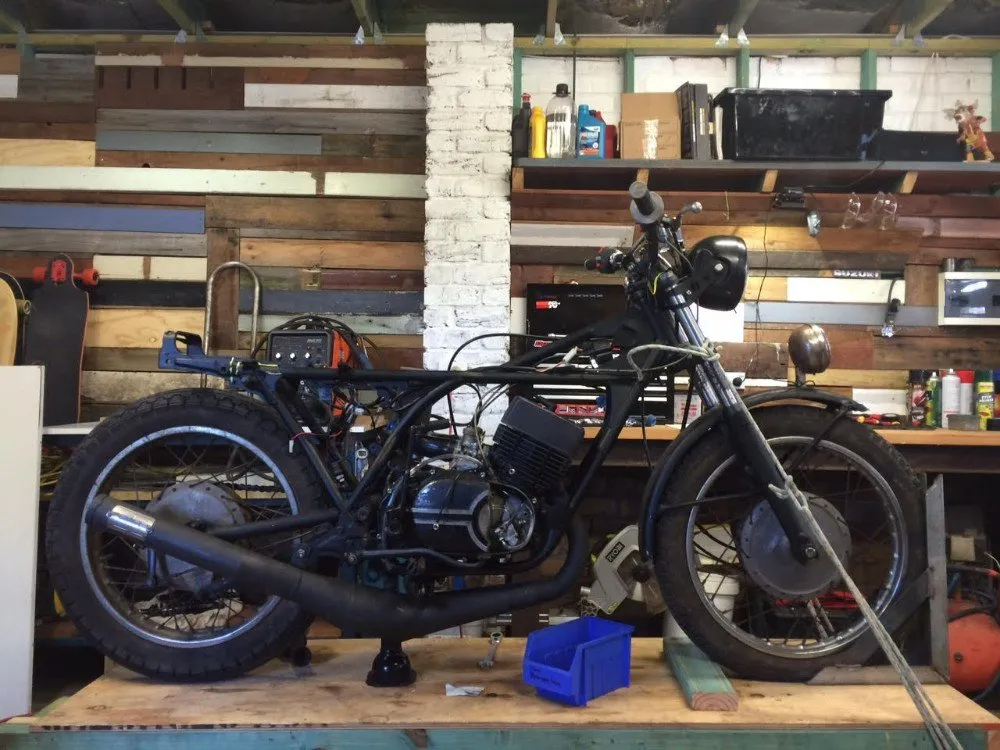
And add a straight tail hoop, you’re going to run into trouble first bump or pothole you hit. I’ve seen peoples tyres worn and popped as well as whole tail lights ripped out and busted, all on the first test ride. Unless you get lucky and weld a straight hoop on and have miraculously no work to do because your suspension travel is still perfect, you have 2 options as far as I can see:
- Modify your suspension; Adding longer bump stops, Longer shocks, increasing stiffness
- Get smart with your tail hoop mods; Use some slight of hand to get both the look you want and the performance out of your suspension that you need.
In this Article, I’ll look at both as well as the process for fitting your own Café Racer Tail hoop.
1. Modify Your suspension:
In my opinion this should be your second choice, let me explain why. When modifying your suspension to accommodate less wheel travel you’re playing with something that greatly effects your bikes performance on the road.
- Shortening your suspension travel with bump stops will have you bouncing all over your seat through bumpy rides.
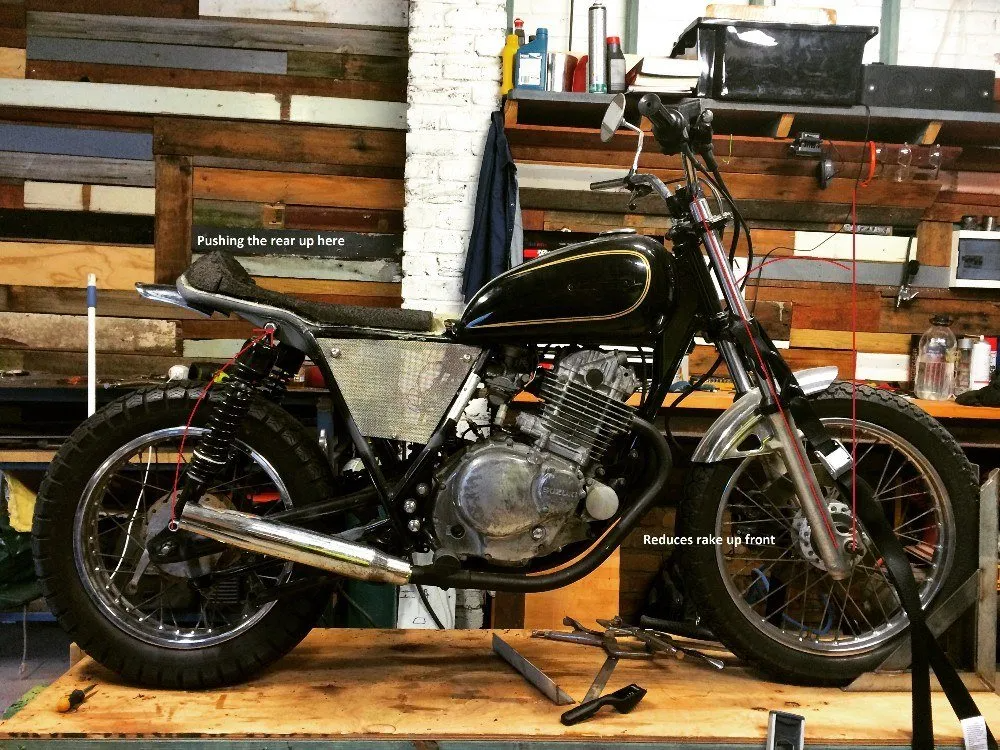
- Longer shocks on the rear will reduce your rake angle and effect trail on the front end.
- Increasing the stiffness enough may just have your bike handling like a bathtub on the road.
It can be done but keep in mind every mod you make here will effect another area of your bikes performance. One example I have done personally was A GN250 Scrambler. From standard the GN 250 has quite a relaxed rake (a lot of people build bobbers from them) so you can afford to raise the rear a bit without getting into dangerous territory up front.
2. Get Smart with your tail hoop.
A little thought can go a long way here, I’ll go into the tricks I use to try and reduce the impact on the bikes suspension travel if not remove the impact of adding a tail hoop completely. In general, I use 3 methods to avoid these issues
A) Positioning the hoop past the apex point on the wheel- using the suspension travel to your advantage.
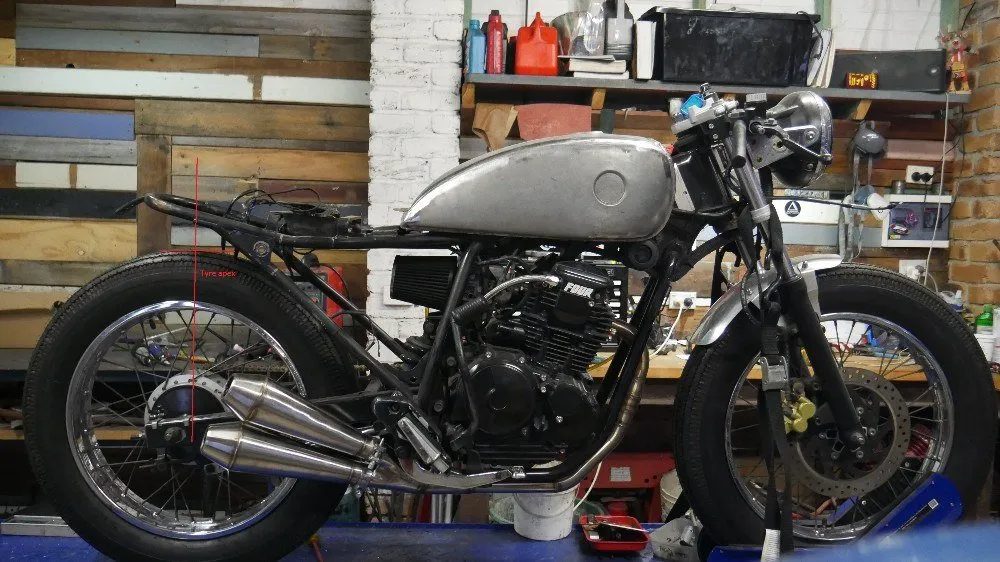
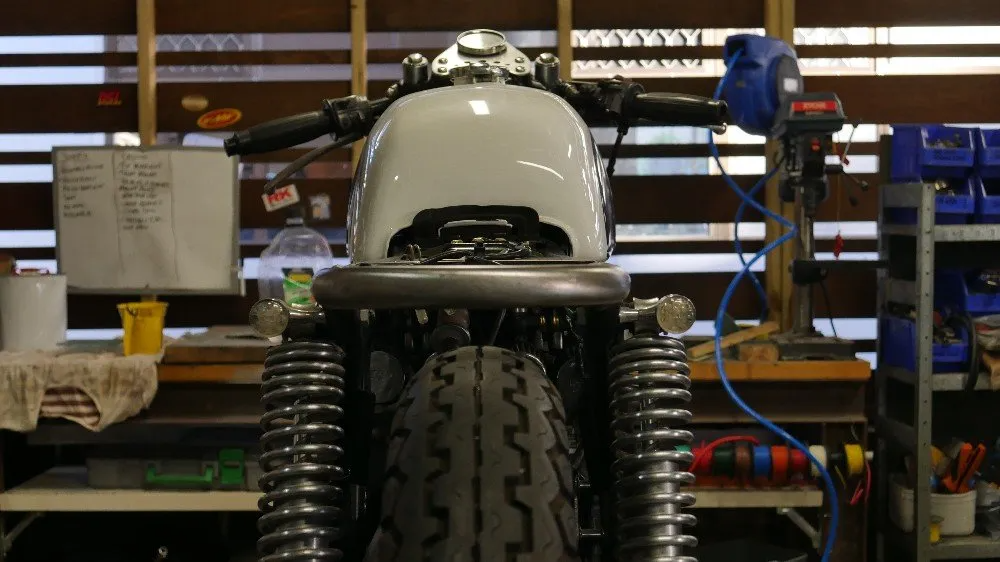
Positioning the Tail hoop right can allow your wheel to travel up inside the frame allowing better suspension actuation. Shown below this technique can be good when using a tail cowl but not s helpful when making a brat style seat. The sweet spot I’ve found is 1/2 way between the axle and rear of the tyre, it looks good and will allow enough room to have your tyre travel slightly up inside the hoop before you’re worrying about bottoming out. Remember your wheel moves radially not straight up and down when measuring this out and welding it on.
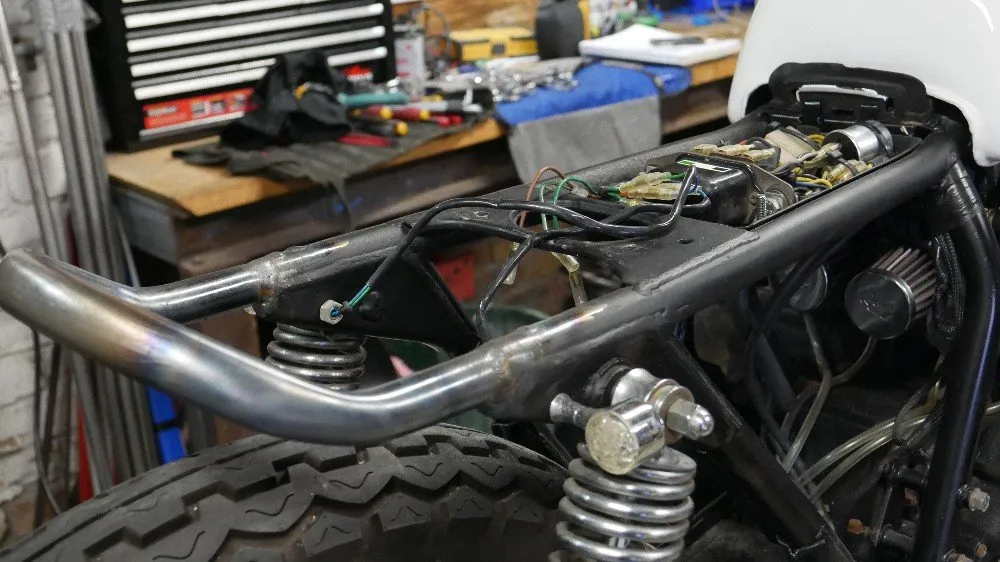
B) Sweeping the hoop up at the rear- whether it be manually bending or cutting and welding at an angle.
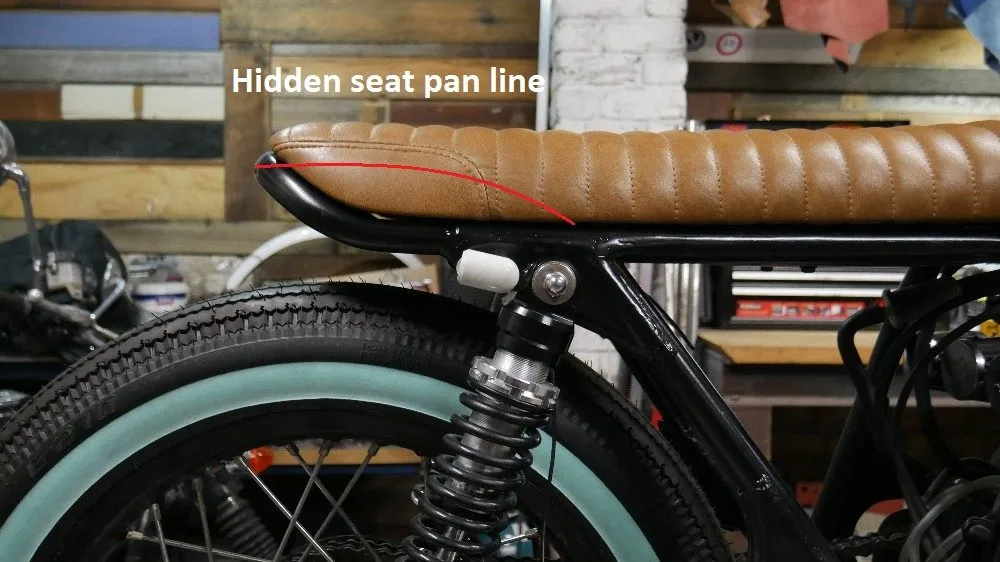
This one tends to be my weapon of choice on brat style seats. A nice swept bend can really set the seat off well. Having that up sweep on your cafe racer tail hoop allows more travel for every mm you raise the rear. In addition to sweeping the tail hoop up I will add a recess in the seat pan when fiberglassing to allow the wheel to travel up inside the frame while still keeping the straight line of the seat. the foam gets a little thinner but no one is siting back there anyway!
C) Not looping the tail at all! Using the tail cowl to create the line you want but allow the wheel to travel inside it.
I have never actually used this method, however have seen it done many times. Having 2 straight frame rails or even leaving the stock tail subframe and building the tail cowl around that. this allows you to achieve the look you want without modifying your bike frame at all. allowing you to keep your stock suspension travel and setup with no worry at all!
Assuming you’ve chosen to weld a tail hoop on (that’s why you’re reading I hope) here’s how I do the fabrication/welding side of it.
First cut the frame where you see fit, be aware around the suspension mounts as they are often re-inforced and will make fitting your slugs a little more difficult. once you’ve hacked your old tail off you’ll need to fit your frame slugs. These can be either solid round bar or thick walled tube that slides down inside your existing frame then into the new tail hoop. 80mm long is plenty long enough to do the job.
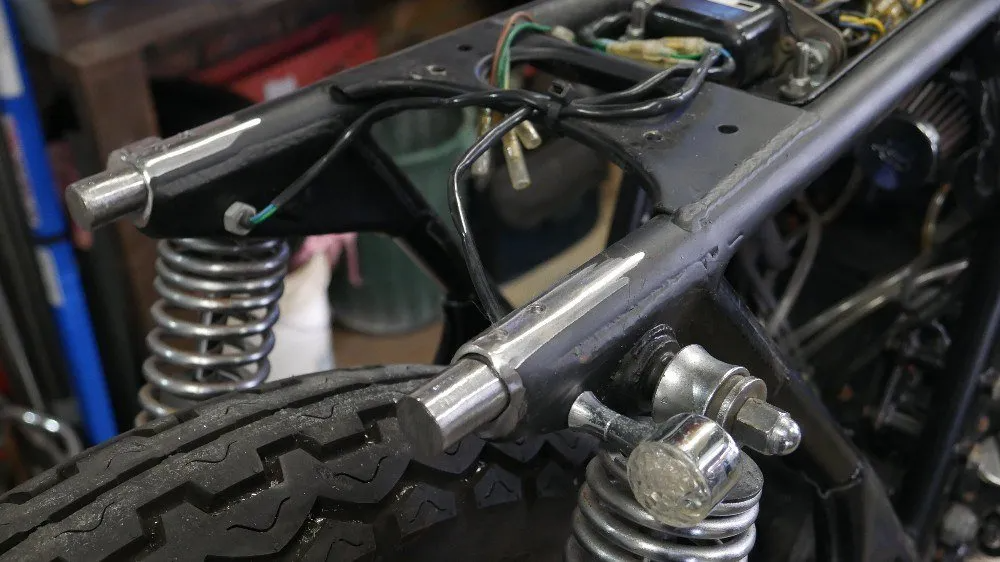
Next tack weld the slug in place and slide the new tail hoop on and drill a 6-8mm hole on either side of the weld join, these will be used to “plug weld” the slug in place and add strength. I will sometimes do one side and then the seam than the other plug welds depending on the hoop (that’s shown here). Get your tail hoop aligned and held in place (magnets, tape, chewing gum, whatever you got) and put your final few tack welds in place.
once that’s sorted go to town with your welder I start on the plug welds and leave the seam join until last. personal preference its up to you. finish it back with your grinder or belt sander and there you have it, a new subframe to base your custom seat and/or tail cowl off of.
WE BUILD BIKES WITH PURPOSE.
Purpose Built Moto is home for unique custom motorcycle builds. We offer a unique motorcycle customizing experience in the heart of the Gold Coast.


14 comments
Hi Ward,
We dont supply that sort of thing. Any steel supply place shoud be able to help you though.
If not solid bar, smaller heavey wall tube can also be used.
Hey Tom, I have a 1977 KZ Brat project. I have a 7/8 tube frame and a seat plus hoop. I’m looking for inserts to install the hoop.
do you carry any or have any suggestions? Thank you very much Ward
Thanks to the great guide
Hey Rick,
It’s a pretty common issue, why don’t you email me some pictures of the job I’d be happy to take a look and talk it over.
Tom@purposebuiltmoto@gmail.com
Thanks
Tom
I am having similar clearance issues on my 74 cb750 brat style build (flat seat) I like to use the original length shocks (13") but my rear tire rubs the after market oil tank located on my down tube. Going to a longer shock would compromise my ride. Any suggestions?
Cheers
Hey mate,
All welds were done with a 185a TIG welder.
Tom
What type of welder did you use for the seam weld?
Cheers!