
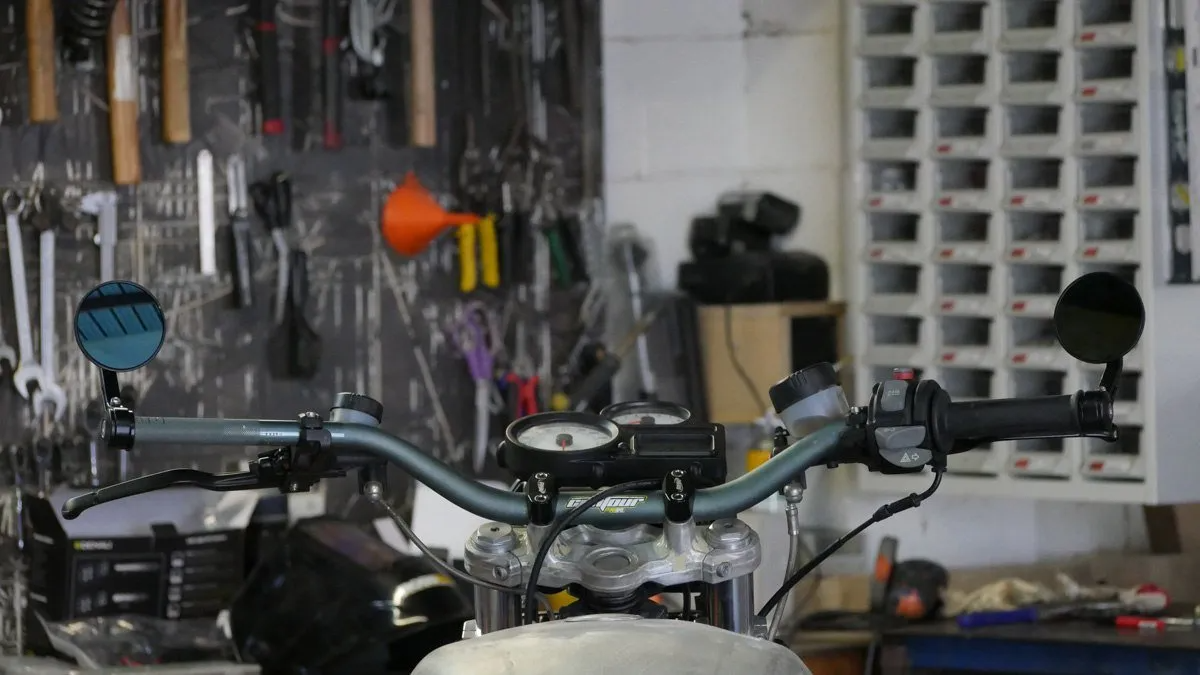
This one will be close to many peoples heart. Ever bought some bar end mirrors and had them either come loose or completely fall off during a ride? Me too, a lot. So I decided to re-think how their fitted in an attempt to better secure these things.
For me I want every rider that has a bike built in my garage to ride away feeling like they’ve gotten the best damn bike their ever going to own. But if something as simple as a bloody bar end mirror rattles loose, that magic can be short lived.
So from a quality stand point, I’ve written this short how-to article to show what I’ve figured to be the best way to fix your bar end mirrors and make sure they stay fixed
What you’ll need:
- Bar end mirrors
- 2 x M4 or M5 x 4mm grub screws
- M4 or M5 Tap
- M8 or M6 tap
- Allen keys
- Drill bit set
- Thread locker
- aluminium round bar stock around 20mm dia. (If you or your mates have a lathe)
- Lathe
OR
- Steel tube, that matches the internal Dia. Of your handlebars
- 2 x M8 or M6 nuts
- MIG or TIG Welder
Now I’ve used both techniques here and they work equally as well. The difference is the equipment that you have at your disposal.
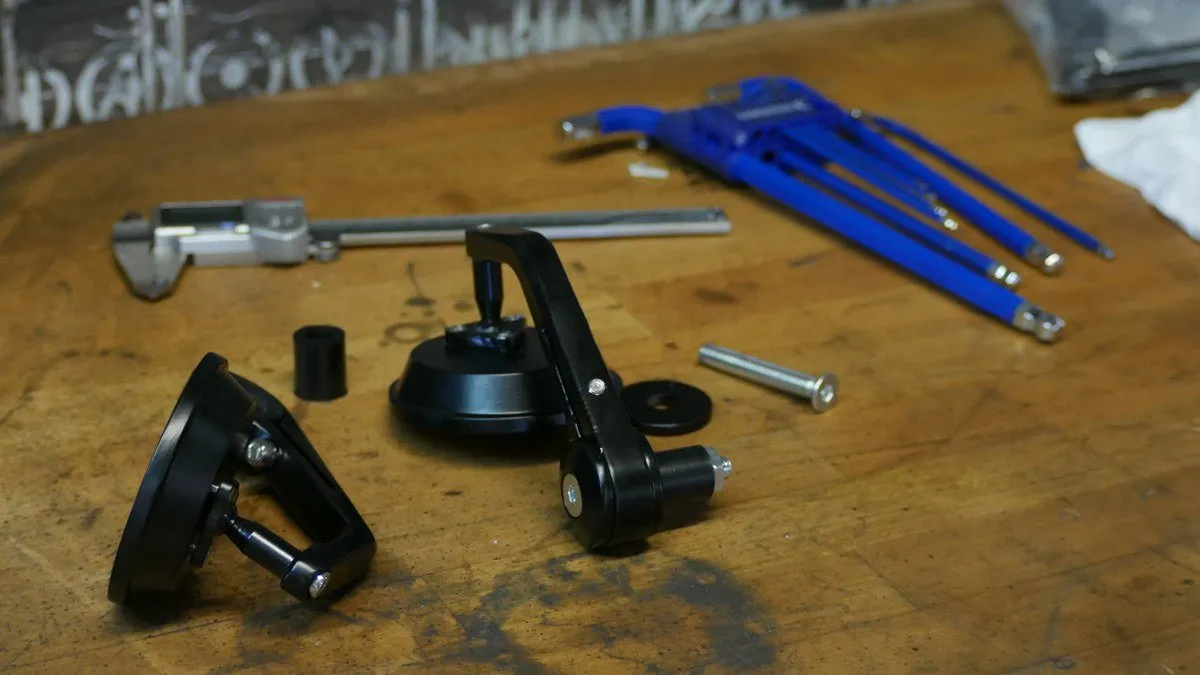
Shown here are some aluminium slugs I turned down and threaded, but I’ll include details on the steel tube method too.
1. Measure your bars and bar end mirror mounts.
What you need to check here is:
- Handle bar internal Diameter.
- Main mirror bolt thread size + length
Once you’ve got that do up a sketch of what your slugs will need to look like. Length, dia, thread size. Do away with the rubber grommets or aluminium expansion parts from your bar end mirrors and keep the main fixing bolt.

2. Make your slugs
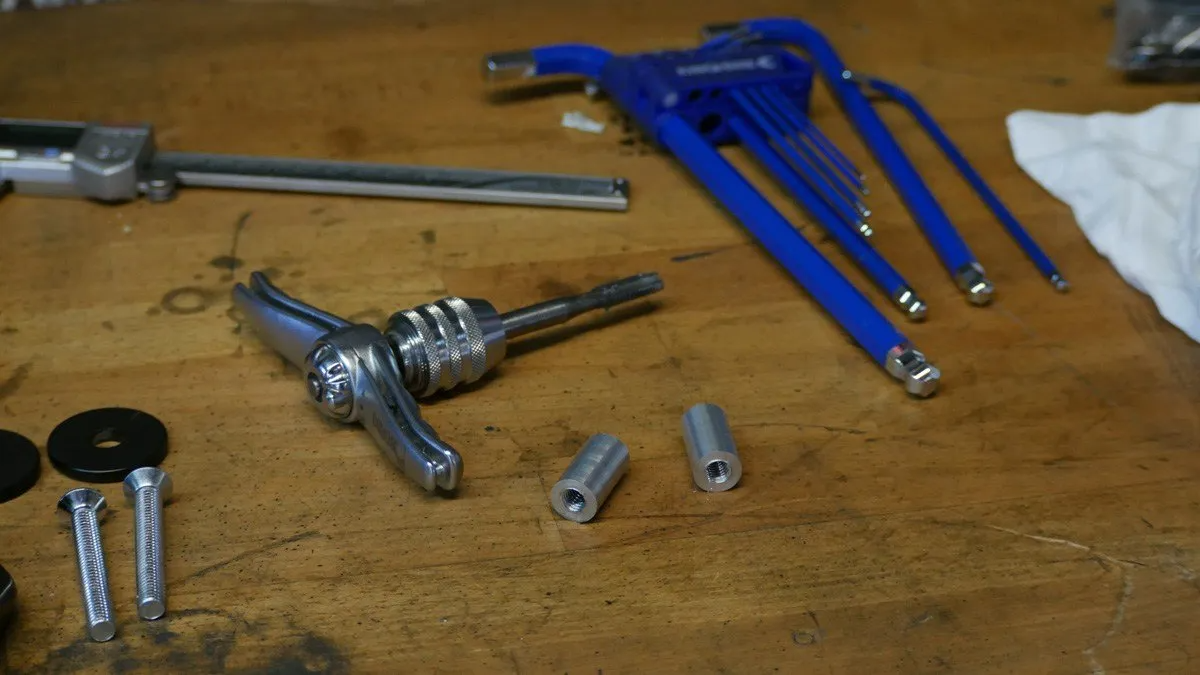
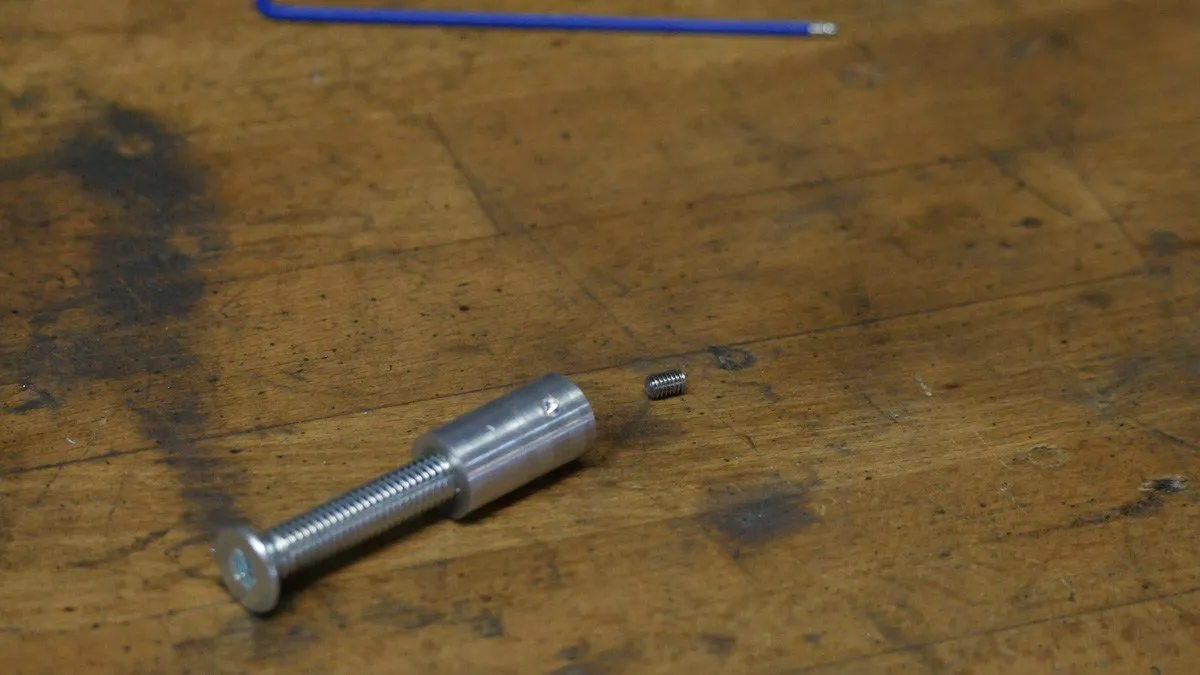
The aluminium bars + mirrors I was using required a 13.6mm dia slug, 30mm long with an M8 thread through the center. Drill and tap the center thread, turn down the stock to size, cut off the piece and repeat for the other side.
The length isn’t critical, I just want to make sure I have enough thread to tighten the mirrors down and not strip the thread out.
If you don’t have a lathe- once you have your measurements, go to a steel supplier and find a steel tube sized to fit inside your handle bar, get 50-80mm of it and 2 x M6 or M8 nuts depending on your mirror bolt thread.
Cut your tube in half and weld the nut in the end of the tube, finish it back nice and neat and you’re ready to fit the new mirror mounts to your bars.
3.Test fit the slugs for your bar end mirrors
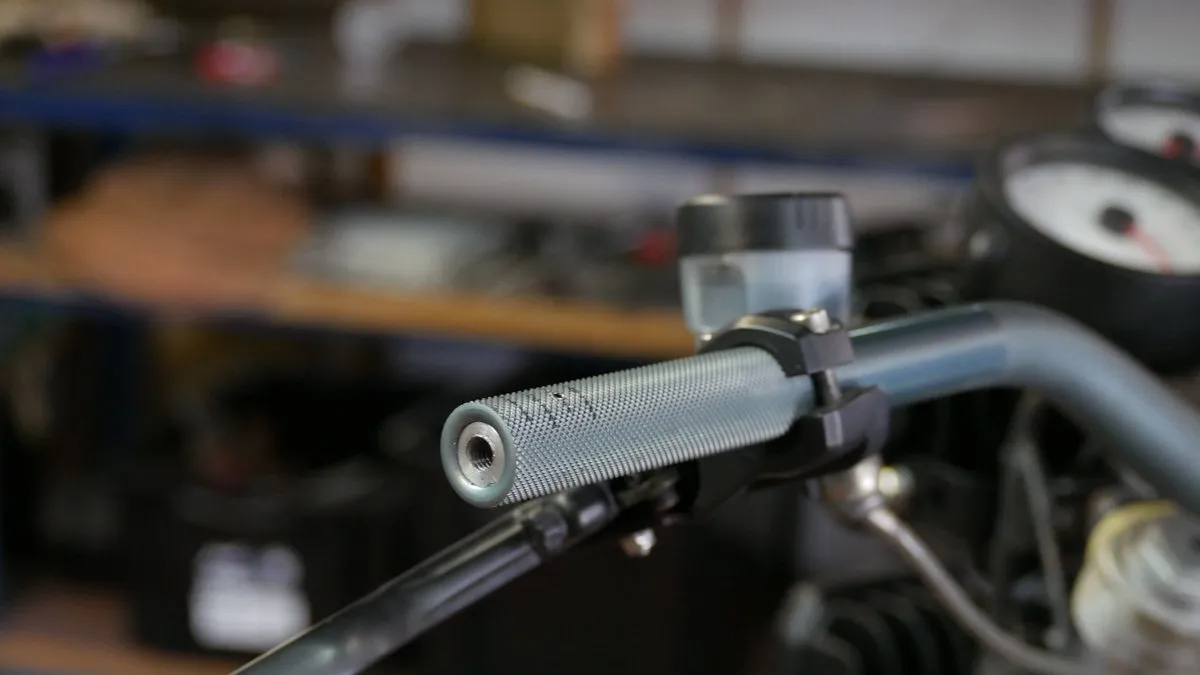
Fit the slugs inside the handlebars, they should be an easy press in fit. I will usually have them 1-2mm further inside than the end of the bars, this allows the mirrors to bind on the bar end which is a larger surface area than your slug. It just makes it a little more secure.
Once in there, make a mark 2/3 – ¾ of the length of the slug and drill the handlebar to be threaded for your grub screw. You want to drill through the wall of the handlebar and mark the slug slightly. Remove the slug and make sure the handlebar hole is cleared to tap the grub screw thread.
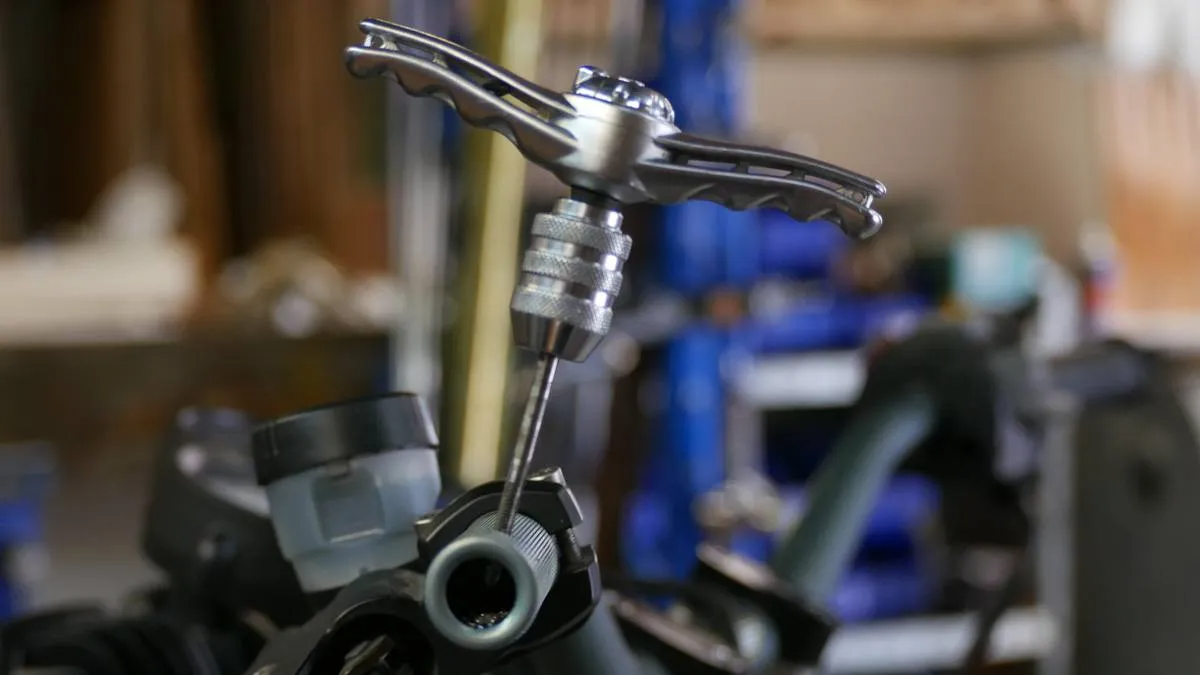
With the slug out of the handlebar, put it in a vice and drill the grub screw hole slightly into the surface, this will help the grub screw locate and hold the slug in place. M4 grub screw 4mm hole , M5 grub screw 5mm hole. Take care not to pierce right through into the internal thread.
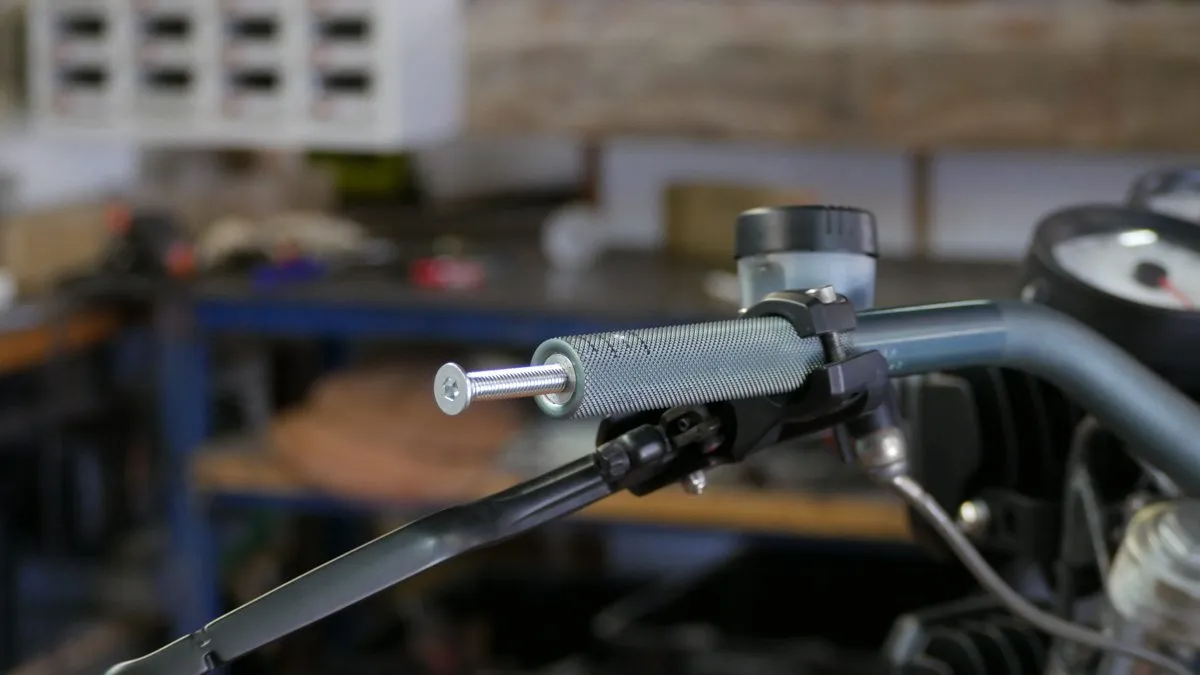
4. Fit the slugs and grub screw.
Last step before fitting your now, forever secure bar end mirrors is to fit your slugs, slide em in, put a dab of thread lock (low strength) onto the grub screw and tighten it down. The grub screw should finish flush with your handlebar surface to not impede on the grips or throttle tube.
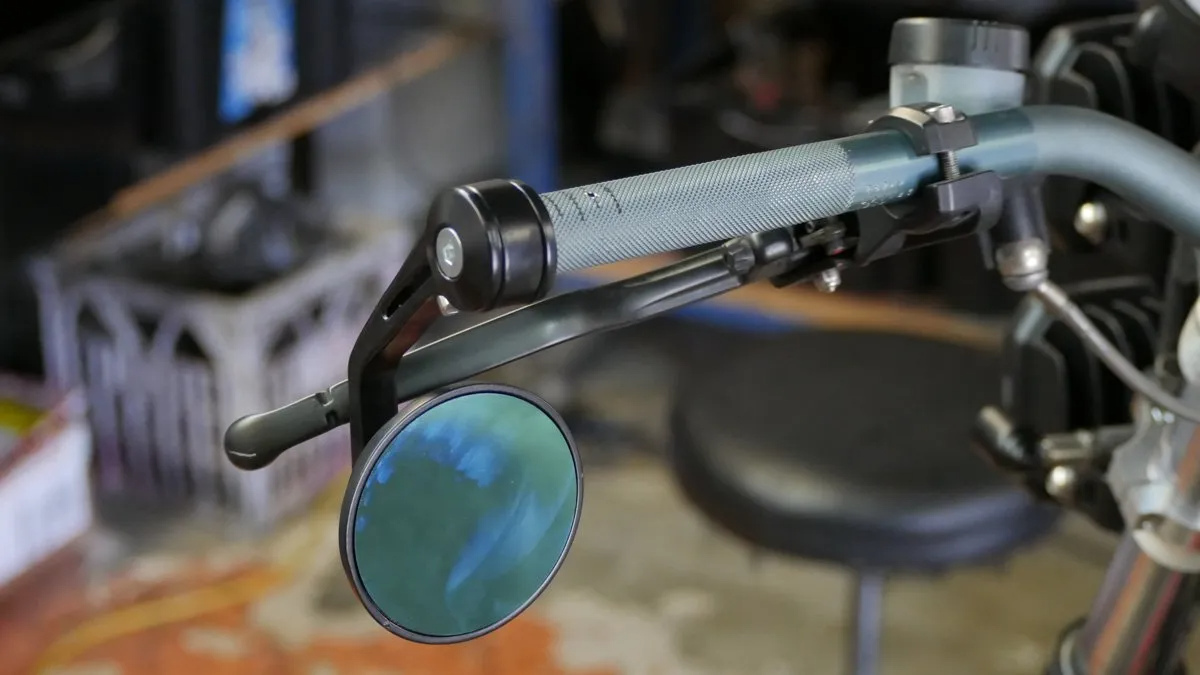
5. Fasten down your bar end mirrors
Fit your bar end mirrors in the required position, and use a little thread locker (low strength) on the main fixing bolt. The thread locker will help against the bolt loosening under vibration.
There you have it, a bullet proof way to mount your bar end mirrors. A little work for a lot of piece of mind. Special mention for this article goes out to my mate Jeff Lamb, whos always losing his fucking mirrors! No excuses now Lamby!
If you found this article helpful, share it around to your mates that ride or leave me a comment below, Thanks!
Check out my You Tube for tutorial + bike build videos Purpose Built Moto YouTube
Tom
WE BUILD BIKES WITH PURPOSE.
Purpose Built Moto is home for unique custom motorcycle builds. We offer a unique motorcycle customizing experience in the heart of the Gold Coast.


