


DIY LED Headlight + LED turn signal upgrade for Yamaha XSR700 and XSR900
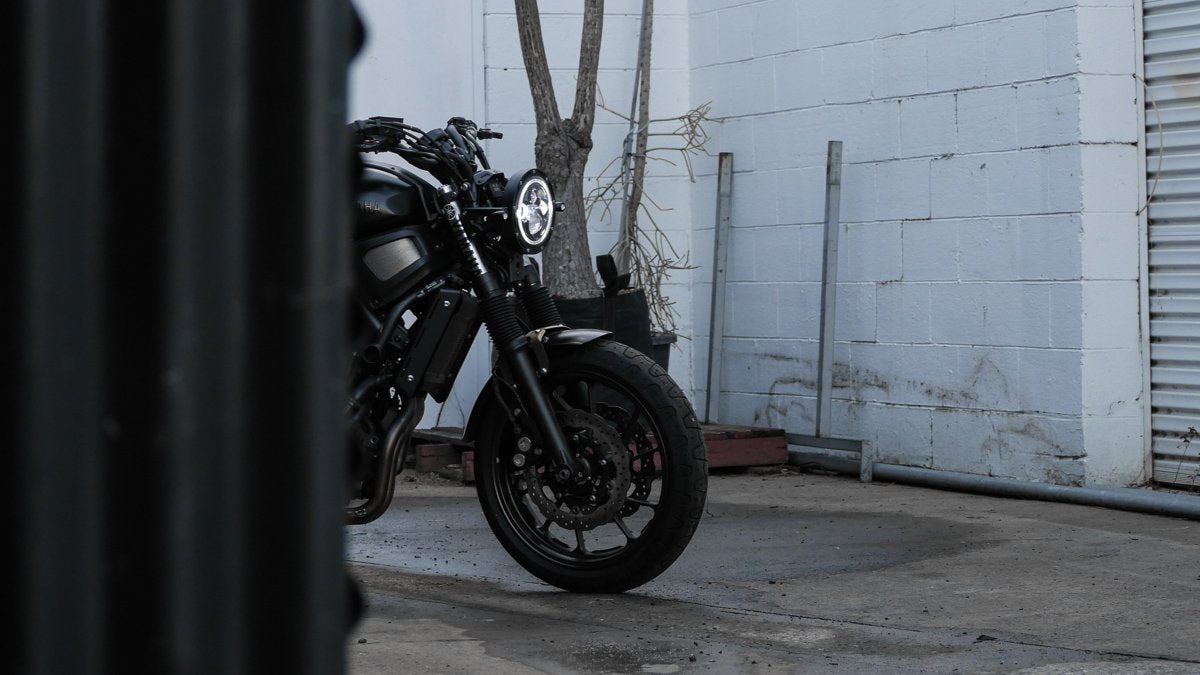
The extremely popular Yamaha XSR700 and XSR900 have become a favourite with garage builders to customise, and one of my most asked questions is will the Purpose Built Moto LED headlight work with the XSR700 headlight brackets?
The answer is yes, however Purpose Built Moto LED headlights are a universal fitment part. They will work on any motorcycle with a 12V system, only with a little work. In this article, I’ll walk you through exactly how to connect our LED headlight and 3 in 1 LED turn/brake/tail lights on the XSR700. I recently had one in the shop (for the first time) and took notes on my process so I could share it with all of you.
Tools you need:
- Spanners (wrenches for my American friends)
- Pliers + sidecutters
- Soldering iron
- Allen Keys
- Air hack saw or grinder with cutting disc.
- Hand file (optional)
- A good attitude
Materials you need:
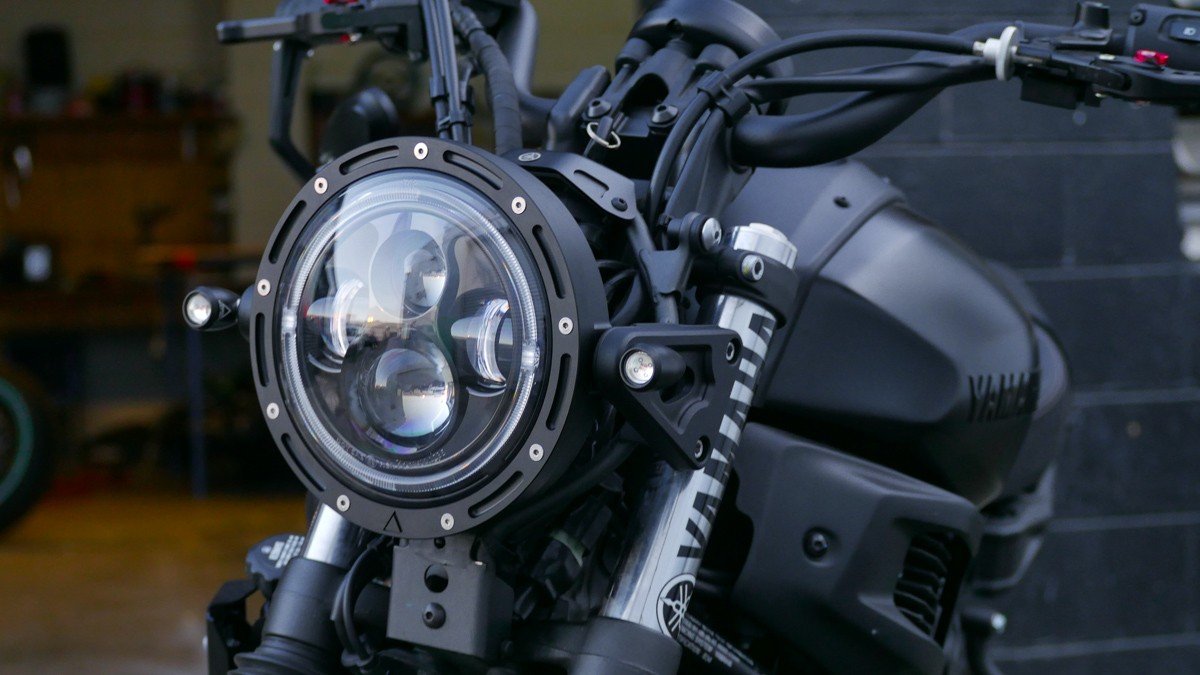
- 7” Flashpoint LED headlight (5.75” will work but requires spacers)
- 2 x pairs of Hollowtip or Dome 3 in 1 LED turn/brake/tail lights.
- 1 x number plate light of your choice
- 1 x LED compatible flasher relay
- Cable sheath (if you’re fancy) electrical tape will do if you’re in a pinch.
- Small heat shrink.
Replacing the flasher relay comes first, locate the relay under the seat and swap it like for like, then we get going on the fun stuff.
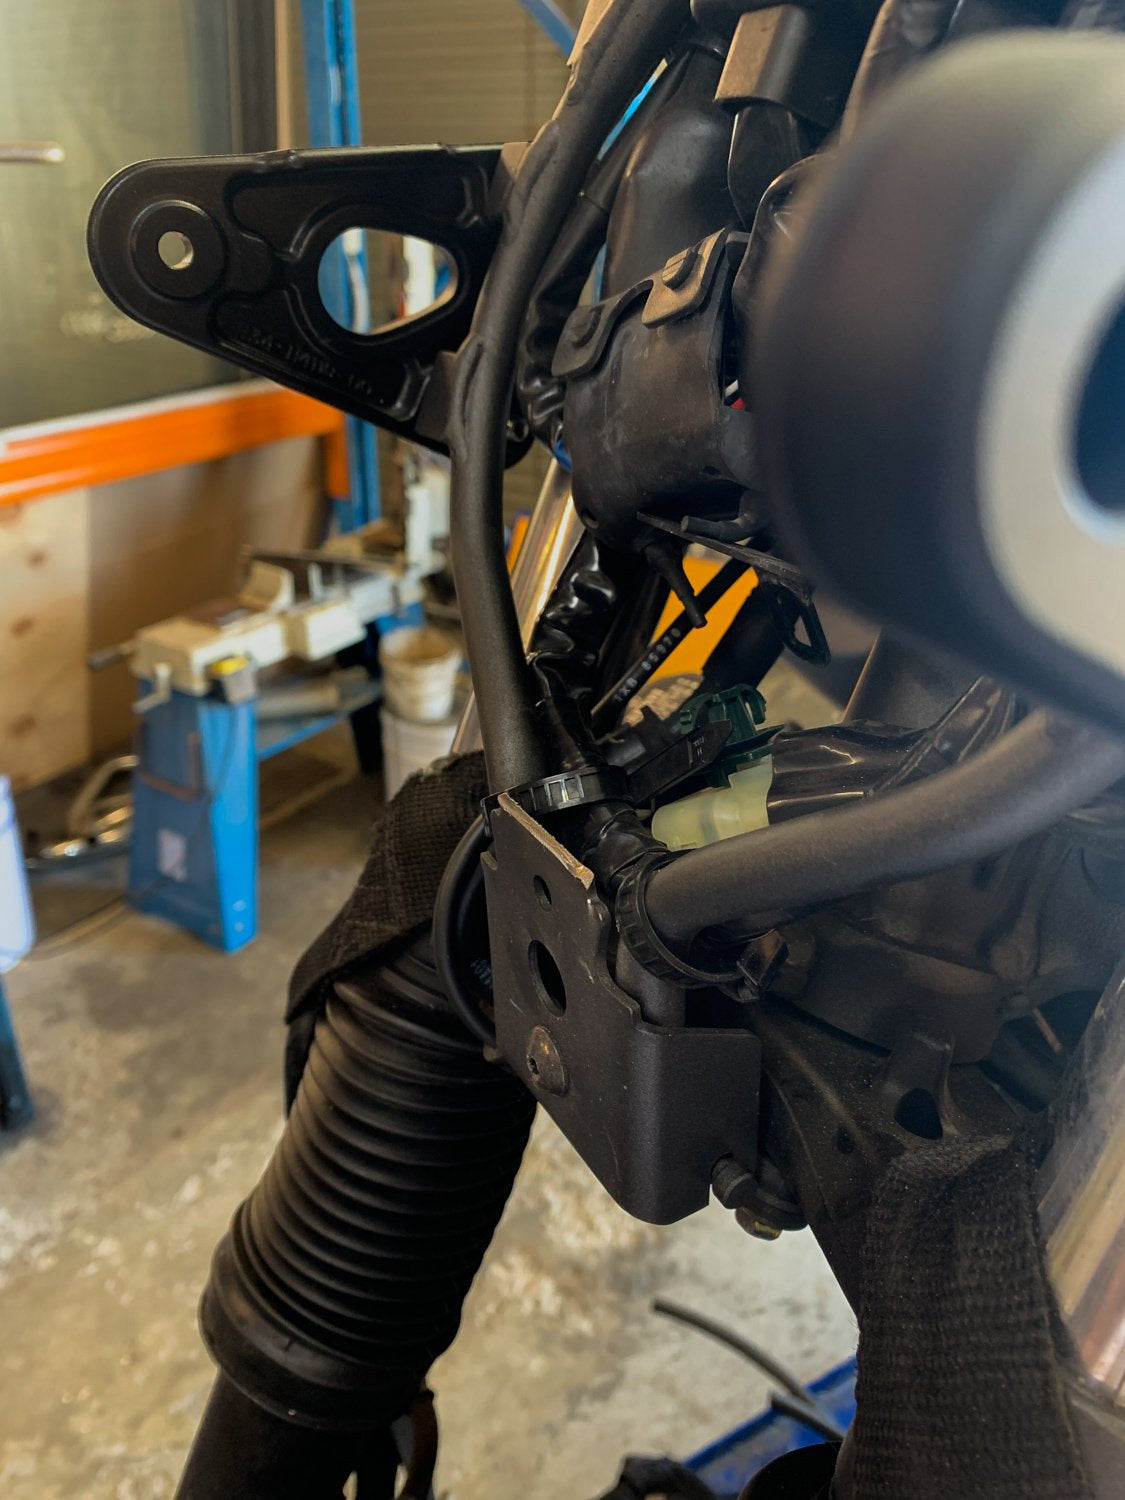
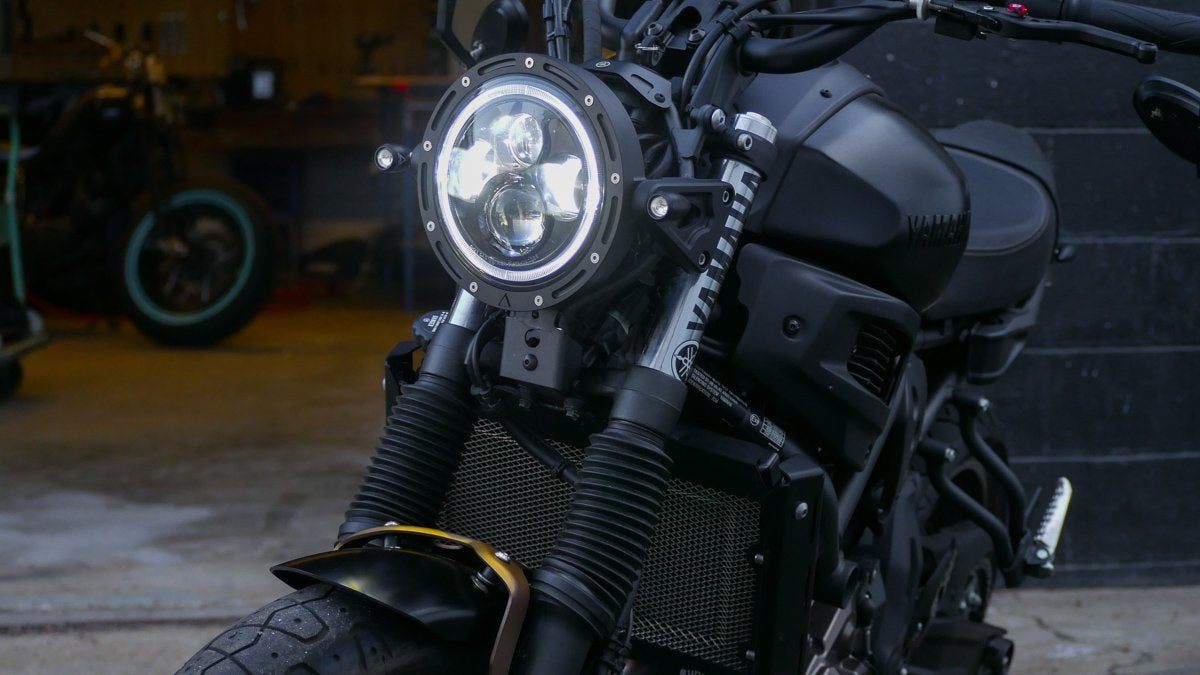
Let’s start on the front end. Begin by removing the headlight, and front turn signals on your XSR700. Unplug the connections and take note of what goes where in terms of left and right.
After that there’s a small tab that need to be removed from the bottom of the headlight bracket. Trim that off and finish back any burrs with a file. Give the bare metal a quick coat of paint before proceeding. All this can be done in situ on the bike just be careful and mask off nearby areas.

Once the bracket is prepped move onto the wiring of your new 7” LED headlight. There’s a few ways to easily do this:
- Use the plugs off your existing lights and solder onto the new lighting.
- Purchase some new crimp plugs and fit them to the lights
- Purchase standard bullet connectors and replace all existing plugs with them.
For this one we went with option 1. As it will be the most likely for anyone at home to be able to do.
It keeps things simple and save you buying anymore hardware to fit the lights.
-
7" Flashpoint Classic LED Headlight Black
From$330.00 -
7" Flashpoint LED Headlight Polished
From$320.00 -
7" Flashpoint Classic LED Headlight Polished
From$320.00 -
7" Flashpoint LED Headlight Black
From$320.00


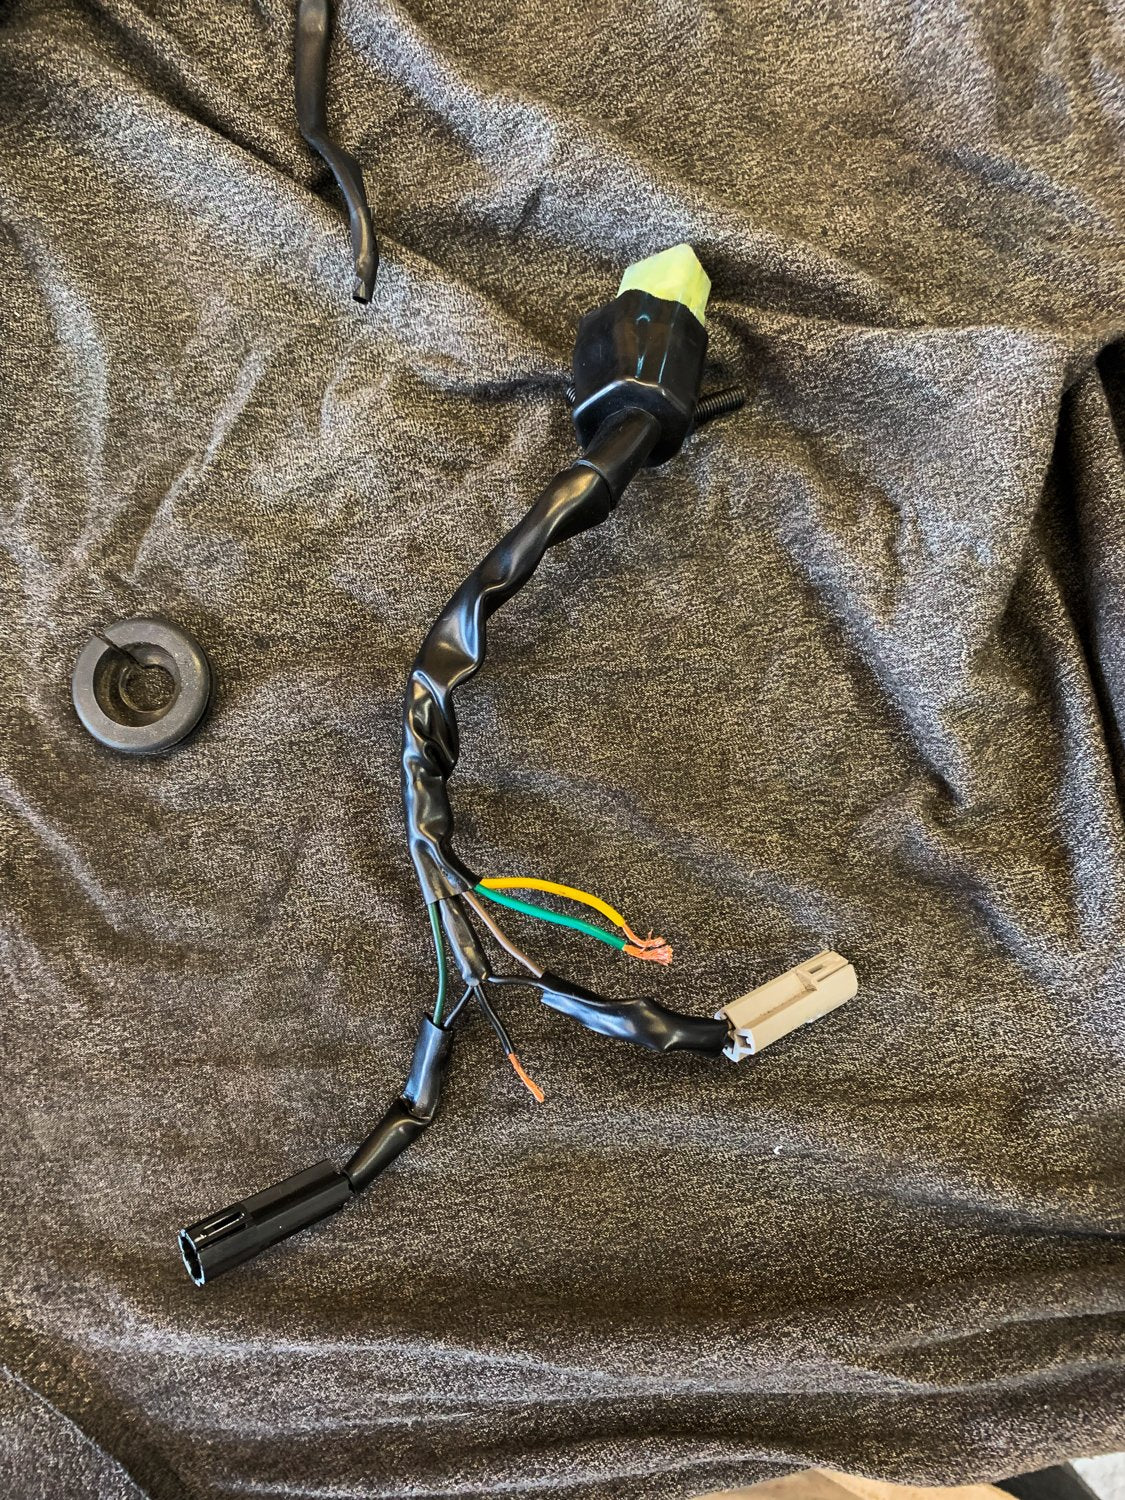
Start by trimming the plugs of the factory Yamaha XSR700 headlight and turn signals. Make sure you leave enough room for solder joins. Slide the heatshrink onto the cables to be joined + Strip the cables ready to solder then join them as shown below:
*note: this was done on an Australian model XSR700 2018. Your wire colouring may vary.
|
Function |
XSR wiring | PBM lights |
|
DRL Halo – |
Link to Low beam |
-Red |
|
Low Beam – |
Light Green | -White |
|
High Beam – |
Yellow |
-Yellow |
| Ground – | Black |
-Black |
|
Left turn – |
Green |
-Yellow |
| Right turn – | Brown |
-Yellow |
On this XSR700 we’ve used the Turn signals as our mounting bolts on the light, this is a good option with the 7” Flashpoint LED headlight as it removes unnecessary bolts and allows an even cleaner finish.
With the solder joins finished, and the heat shrink applied we can move onto mounting the LED headlight upgrade to the Yamaha. With the factory plugs fitted simply plug them back in and mount the headlight on the factory headlight brackets. If you’re using the PBM 3 in 1 LED turn/brake/tail lights as your mounting bolts, carefully run the cable and thread the lights into the headlight housing. using either a locking bolt to secure the turn signal ion the correct position or carefully shaving the turn signal spacer down so that the thread tightens in the exact spot needed to have it facing forward. We’ve used the spacer shaving method here as it’s a nice little touch on the front of your XSR700.
Plug the LED turn signals in and that’s your front end finished!

Now moving onto the back end and tail tidy. There are a number of aftermarket options available, some even come with our LED turn signals attached. For this one however we simple made it ourselves…. Because that’s what we do!
Using some flat bar, and a little creativity we came up with a simple bolt on tail tidy that housed the LED turn signals, number plate and a plate light in a tight and tidy location.
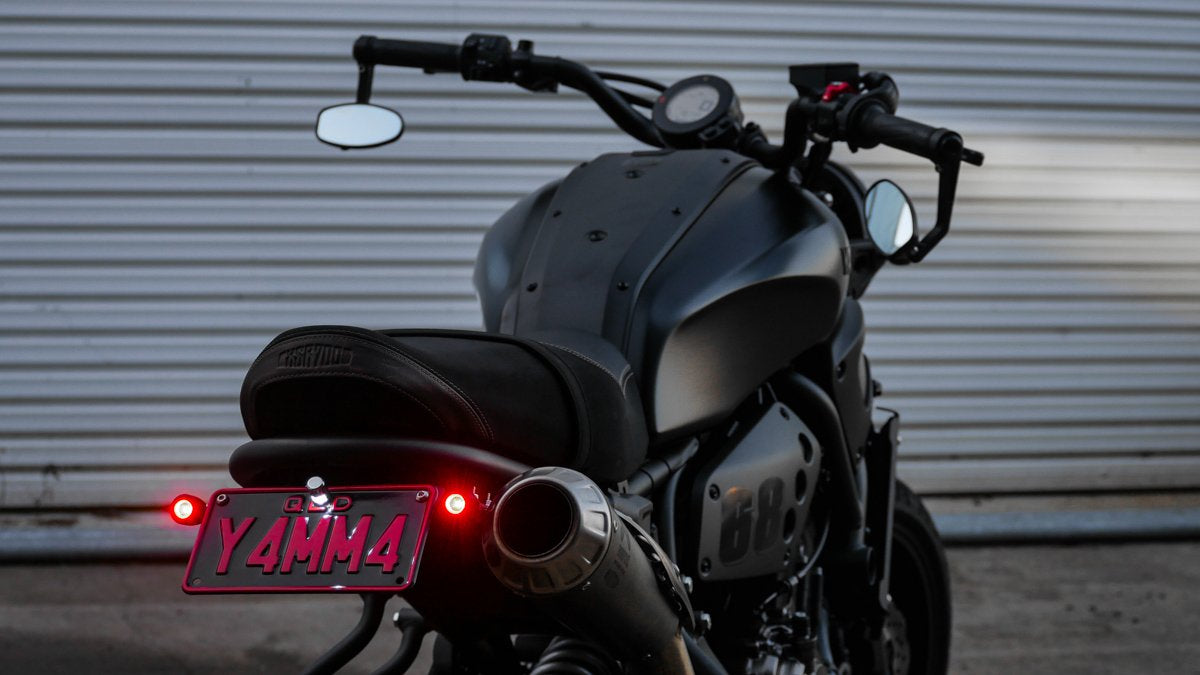
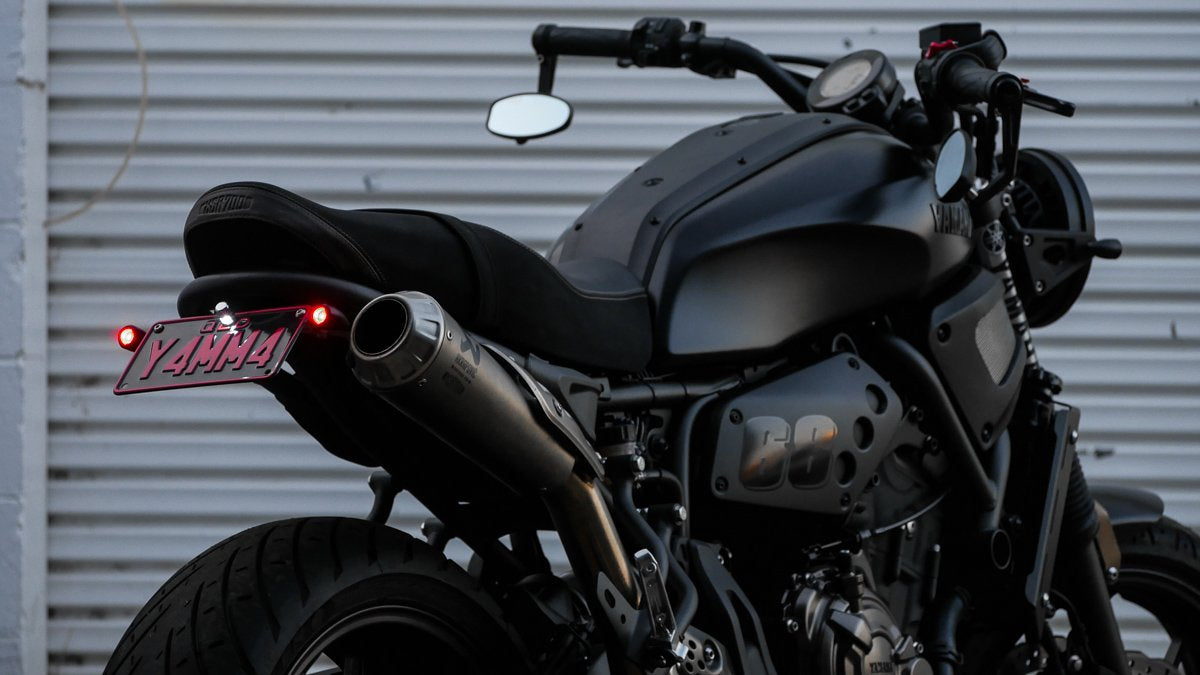
We won’t focus on the tail tidy though, find one you like and we will show you how to wire the lighting into it.
Using the same method described above, we snipped the plugs off the factory wiring and soldered them onto our lights. With the 3 in 1 LED turn/brake/tail lights, you also need a splitter, this allows the red LED to be used as a running and brake light.
below we will describe how to link all of this up to your XSR tail light wiring and remove the need for a bulky tail light.
Some however prefer a nice central tail light (so do I personally) so we’ve created the Orbit LED brake light.
Anyway, here’s the wiring table for the Link up of your rear lights on the XSR700.
|
Function |
XSR wiring | Tail/Brake Splitter in | Tail/Brake Splitter out | PBM LED 3 in 1 |
|
Brake |
Yellow – | Red | – Red – | Red left |
|
Tail + plate light |
Blue/red – | Yellow |
Red Right |
|
|
Left turn |
Green | – | – |
Yellow |
|
Right turn |
Brown | – | – |
Yellow |
| Ground | Black | – | – |
Black |
With the wired linked up as shown and any solder joins heat shrinked, if you’re a discerning electrical enthusiast time for the neat cable sheath to cover up the cabling nicely and run the cable out to your tail tidy.
Mount the 3 in 1 turn/brake/tail lights, your number plate and the plate light, connect the plugs and tie the new cables securely under the seat. Have a quick check of all your lighting to make sure everything’s working. Now take that fresh as fuck looking XSR700 out for a ride and make all your buddys jealous of your insanely bright LED lighting upgrade.
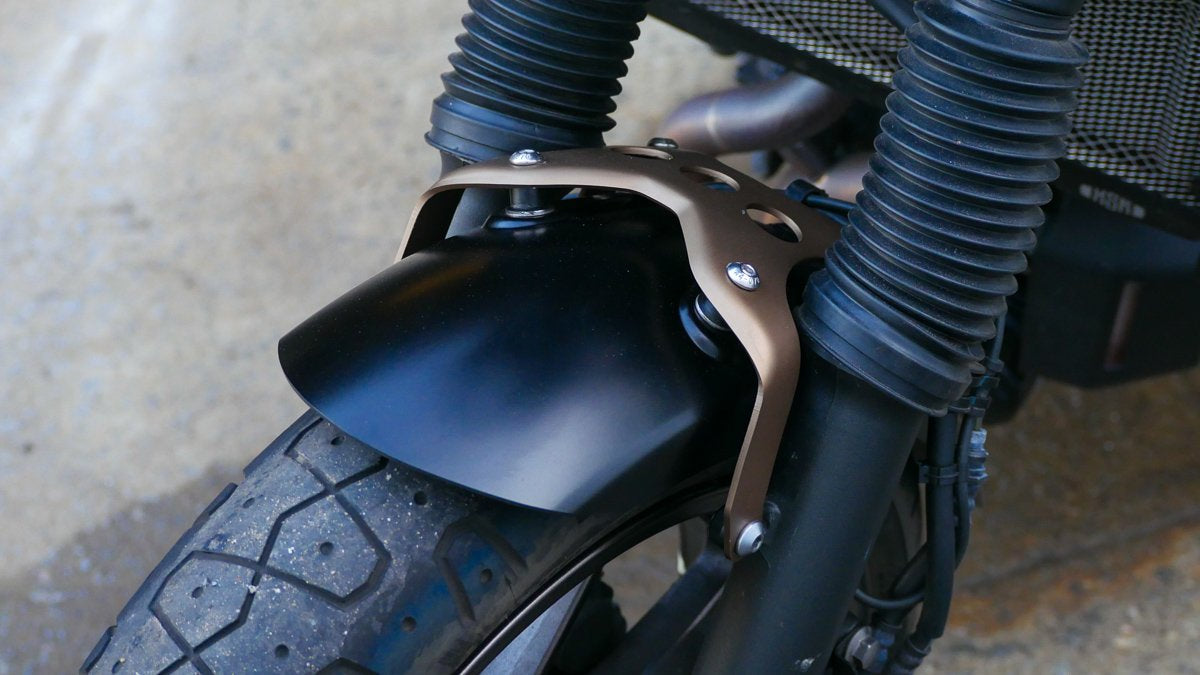
As a bonus we also noticed the factory fender was pretty unsightly, a bit too bulky for the sleek new look of this bike. We decided to trim the front fender, and lower it 20mm.This was done by using 4 x 20mm spacers, and 4 x longer mounting bolts.
Trimming 40mm off the front and shaping the rear to be a more rounded shape.
You can check out our fender trimming how-to article by clicking here
I hope that’s cleared up the process on your XSR700 LED headlight upgrade and made it simpler to fit and finish yourself. Custom motorcycles are about the DIY garage guys getting creative, if you can make it yourself why not!!
Have fun with it.
Tom
WE BUILD BIKES WITH PURPOSE.
Purpose Built Moto is home for unique custom motorcycle builds. We offer a unique motorcycle customizing experience in the heart of the Gold Coast.


11 comments
Hey Tore,
The bottom mount isn’t needed to stabilise and on 95% of our installs we use either the bottom mount or the side mounts. not both.
Its just another option to make the headlight more adaptable for custom uses.
Hi, I have done this headlight conversion with the 7" flashpoint several years ago on my XSR700. But have always wondered how you ensure it’s leveled correctly, and also if you are able to tighten it enough for it to not go out of position again (since the retaining bolt on the bottom for the original light has been cut away.
Buona sera, ho intenzione di acquistare il vostro faro per la mia xsr. Dovrò affrontare costi di dogana visto che dovrà essere spedito in Italia? Cordiali saluti Alberto
Hey Riccardo,
Yes that’s right, you need to make the hole 8mm.
The single cable can be linked to your running light, or low beam, whichever one you prefer.
Hi Tom,
I’ve finally received the headlight! It’s awesome.
I have a couple of questions:
1. Do I need to make the bracket hole bigger to fit the headlight bigger screw? In this tutorial it’s not shown.
2. I have the 3 pin connector attached, but what do I do with the single brown cable from the headlight? I see it’s for the two lateral LEDs but I don’t know where to plug it in.
Thank you!
Hi Riccardo,
I have seen a customer do this before, I dont know how he did it though.
it’s not necessary but if you like the look of it you can do it.
I’m about to buy this beautiful headlight for my XSR.
I was wondering if it could fit inside the original bucket by removing the ending black ring of the bucket. Thank you so much!