


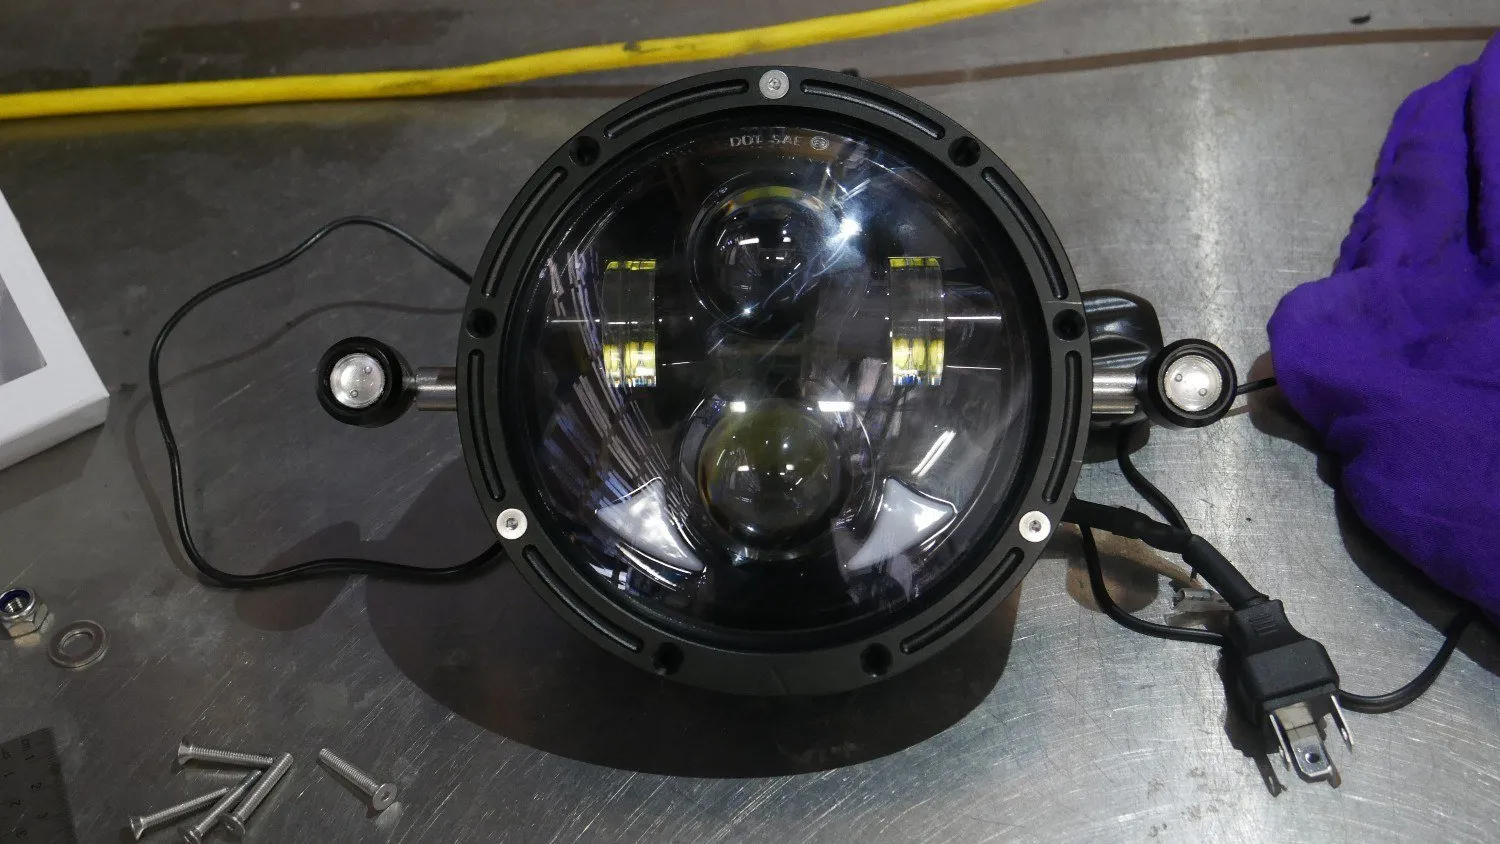
Installing the Flashpoint LED Headlight with integrated turn signals
Often not thought out until I get to the wiring is the mounting of the indicators/ turn signals on the front of the bike. With that, during the design of the Flashpoint LED headlight, I included matching threads and cable room for use with the Purpose Built Moto LED turn signals as mounting hardware with the headlight.
Here I’ll show you the quick and simple process for completing your entire front end lighting needs with 1 unit. No separate mounting brackets, no messy wiring, just clean, simple, and most importantly quick!
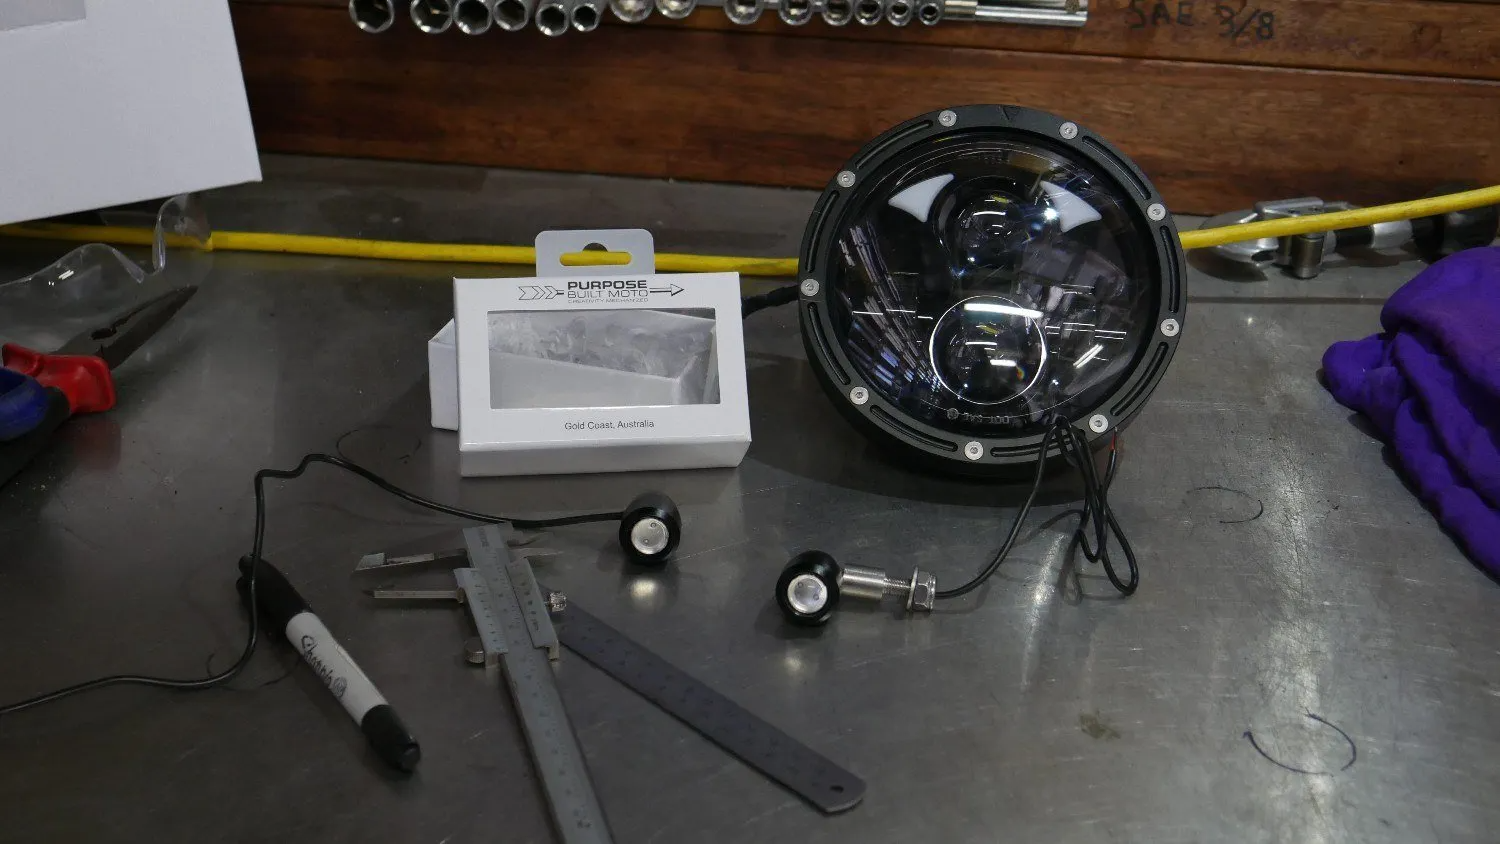
What you’ll need:
- Purpose Built Moto Flashpoint LED headlight
- Purpose Built Moto LED indicators / turn signals
- 3mm allen key
- 5mm allen key (if bottom mounting)
- Thread locker
- Ruler or verneer calipers
- Hacksaw or Grinder
- Flat + Rat tail file
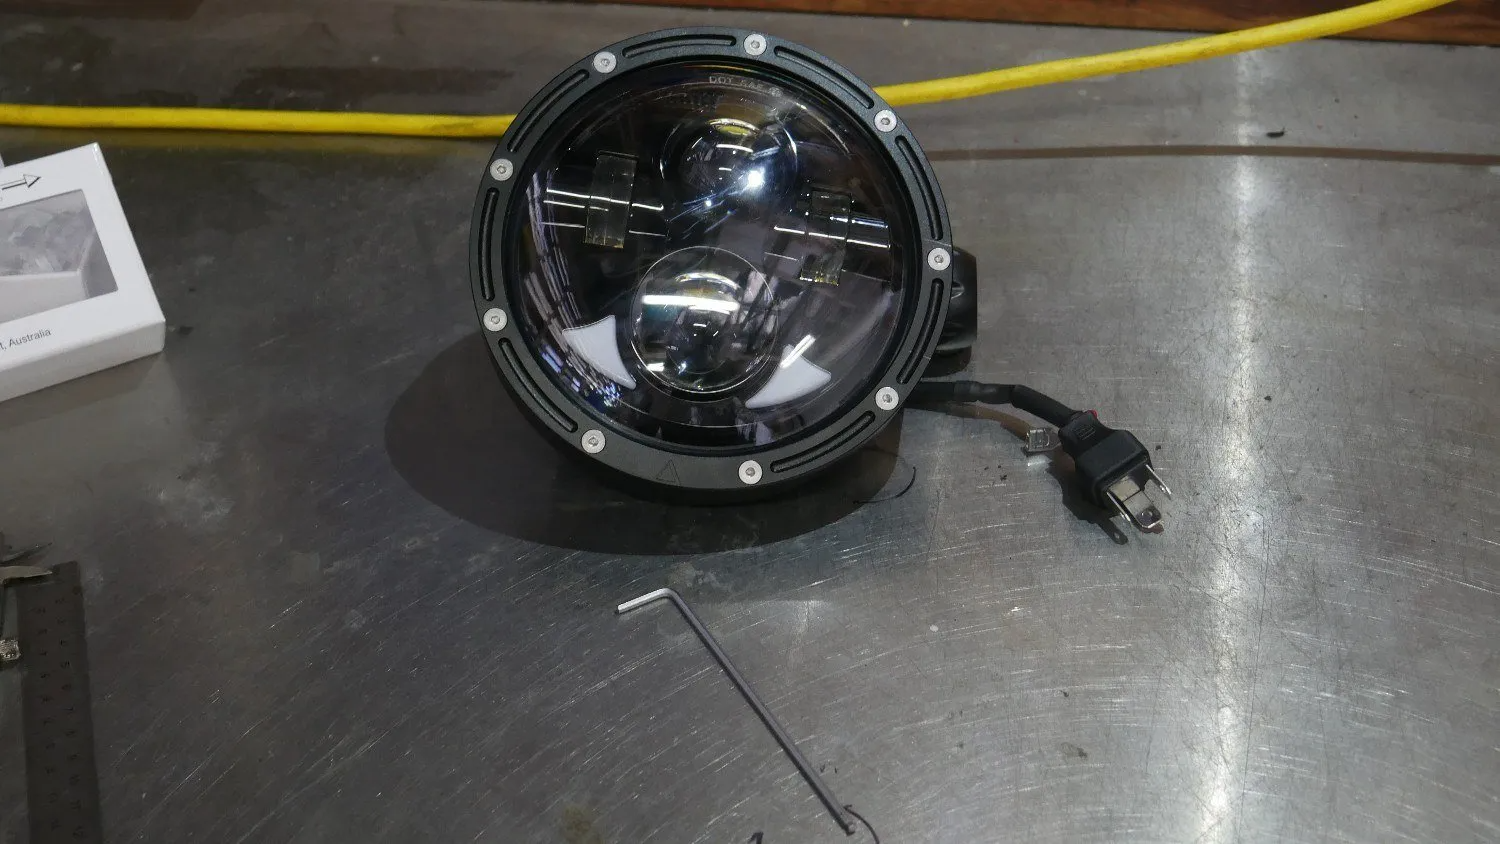
1. Fitting the LED headlight
Prepare your mounting brackets (fork mount or bottom mount). Unbox your Flashpoint LED headlight. If you have the 7” size, it’s ready to mount, if you have the 5.75” headlight dis-assemble the headlight bezel with your 3mm allen key and remove the rear section.
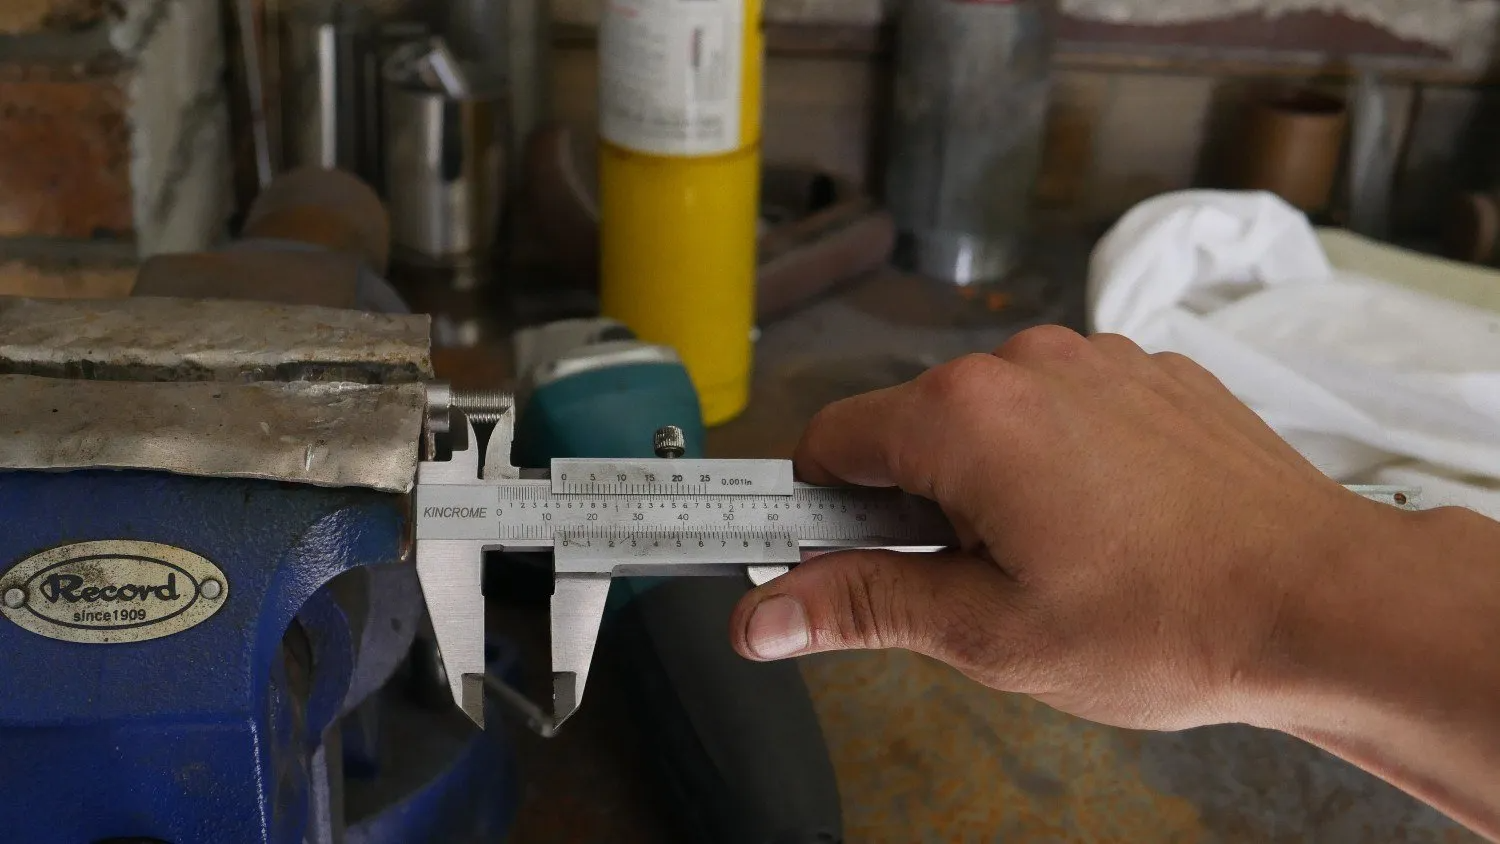
2. Trim the LED indicator threaded tube
This step only applies to the 5.75” Flashpoint LED headlight and ONLY if you’re not using locknuts to locate the lights correctly (see step 3). You will need to carefully remove the threaded tube from the light body, making sure not to twist the cable as you wind it out. Once removed the external thread (the longer one) will need to be trimmed to 13-14mm as shown. De-burr and Re-assemble the LED indicators when finished.
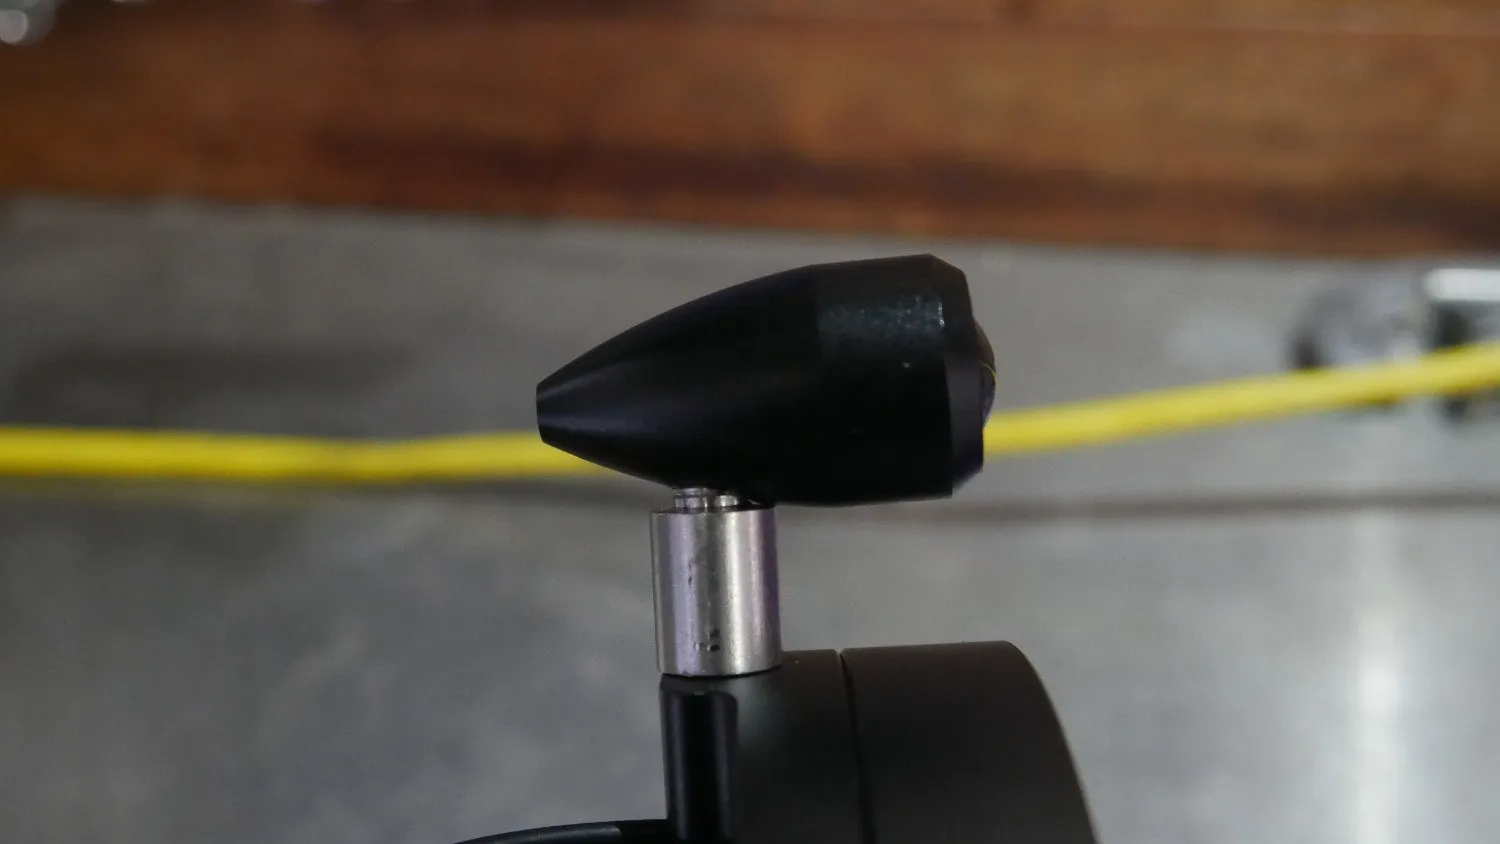
3. Fix the LED indicators / turn signals to the body.
With the 7” LED headlight the indicators will thread right in with plenty of room for the cable. As the 5.75” LED headlight is a little tighter, the rear section of the bezel needs to be separated before installing the LED indicators. The threaded tube on the indicator can be used 2 ways in mounting to the headlight body.
- Use the nut supplied as a lock nut to locate the indicator in the correct position
- Thread the indicator tube right in and if the indicator is not located properly adjust slightly on the indicator body and fix with high strength thread lock or a small drop of super glue.
Personal preference comes into play here, it’s up to you dependent on the finish you want. Personally, I prefer no lock nut and to fix the light at the right angle with thread lock. The pictures show this method.
4. Re-assemble the LED headlight
This step only applies to the 5.75” Flashpoint headlight, re-assemble the light bezel and be sure to route the cables carefully. Tighten down the countersunk screws on the light body evenly and using some light thread lock to avoid any screws vibrating loose.
5. Mount that thing!
Now your LED headlight and integrated indicator/turn signal setup is complete, you can mount and wire it all in! Be sure to take note of your tightening torque and not go above 20Nm on your M8 Thread.
Download the Connection diagram here

I hope that’s cleared up any questions you have, and please If there’s something I’ve overlooked please let me know in the comments and I’ll update the article.
Tom.

WE BUILD BIKES WITH PURPOSE.
Purpose Built Moto is home for unique custom motorcycle builds. We offer a unique motorcycle customizing experience in the heart of the Gold Coast.


5 comments
The XSR700 that I’ve worked on had a running light connection, but if you prefer you can just loop it into your low beam
For an XSR700 that does not have a separate “day running wire” where should the brown wire on the light be spliced into the setup?
It’s Illegal to do that in Aus.
Other countries i think its OK to do.
Was wondering, why didn’t you connect the turn signals to the Halo rings??..
Hi Tom
I have your Flashpoint LED Headlight 7″ and I’m just wondering what buckets can be used for these headlights? thanks
Kind rgerads,
Tom