


We’re on the home stretch with the Custom Husqvarna Vitpilen Street Tracker. Episode 4 will be our last build episode. All the puzzle pieces are coming together and over this 3 day episode you’ll see the Husky finished for a test ride. We also let slip that we will be running a give away on the Husqvarna, so read all the way to the end of this post to find out how!
If you haven’t watched the previous episodes of this Build Series yet, make sure you do here: Husqvarna Build Series.
In this episode we will cover off:
- Installing the custom graphics kit with Josh from Ride Design Co.
- Creating the MX style Gripper seat with Jamason from Timeless Auto trim
- The hand built rear LED brake light will be installed and fitted
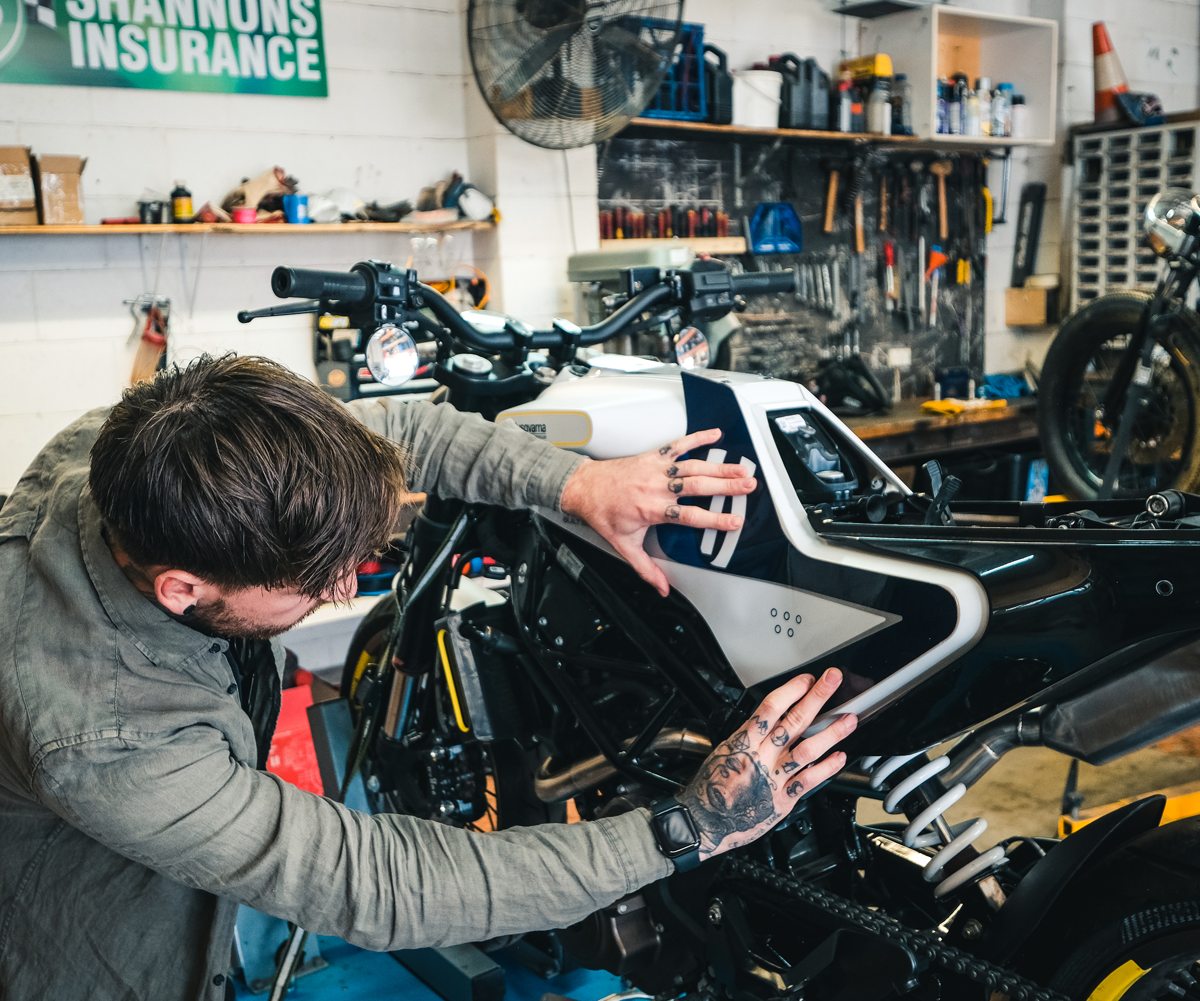
- We finish the wiring, install the custom paint pieces and start up the finished Vitpilen Street Tracker.
To start the episode one of the biggest changes to the Husqvarna Vitpilen’s overall look. A custom graphics kit designed by Ride Design Co. Taking a step away from our usual path of a custom paint job I was eager to see what Josh did with the few ideas I gave him. I was blown away with just how right the graphics came out. The Husky colours were all there, but void of any of the fluro yellow. Also working in the MX and Enduro inspired Logo idea that drives the 401 steadily into motard territory.
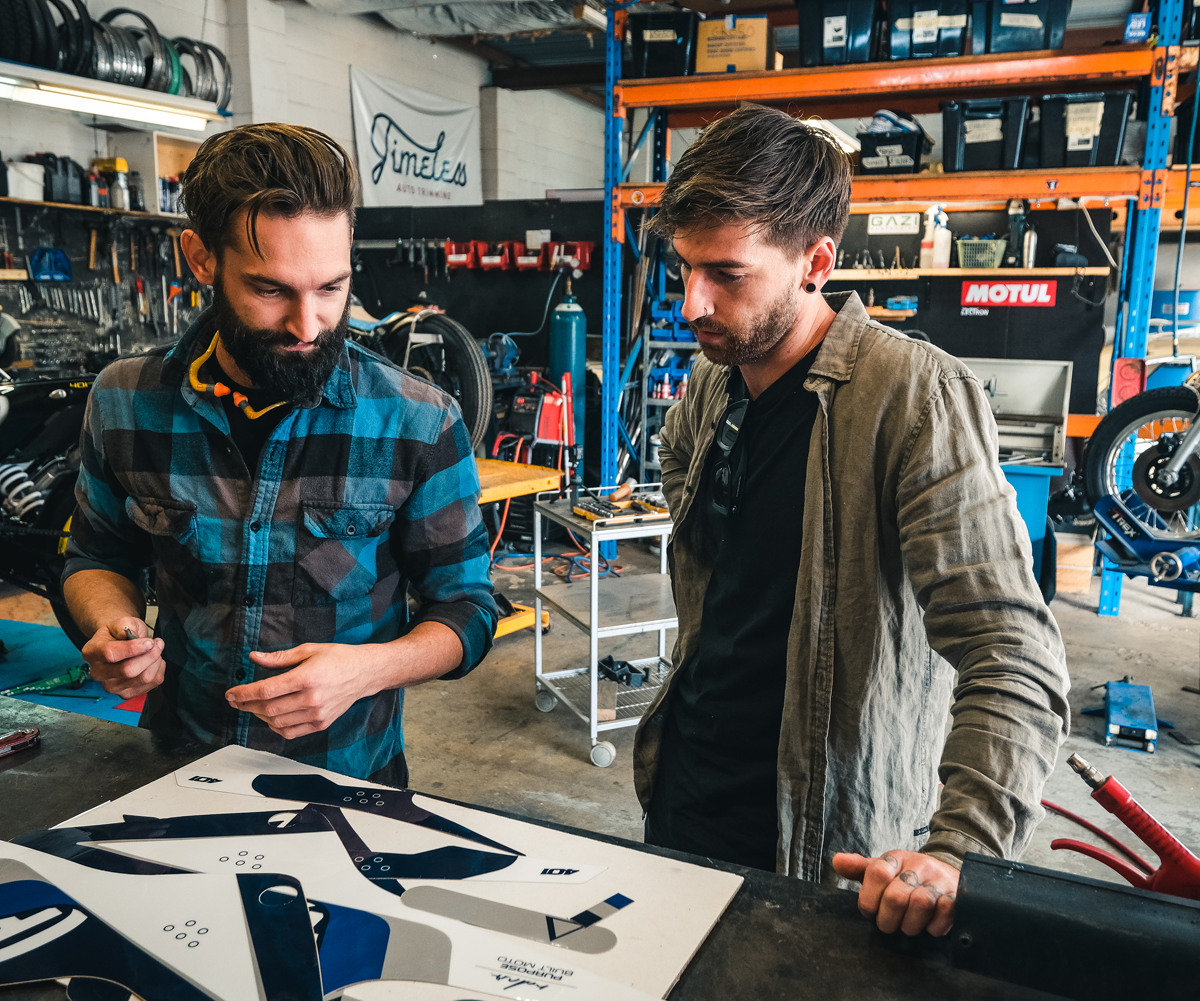
The install was relatively quick, with a few parts needing to be removed, and a clean down with our Motul Matte Surface cleaner before the stickers went on. Having 80% of the kit installed something seemed a little off, while we wanted the Husky blue represented well, the design differed from the real world layout, and the tank cover was trimmed on the fly to make sure the bike was looking 100% and Ride Design Co. was happy with the final piece.
Being able to see the finished bike in a digital format with definitely something new for me. All of my bikes are build without ever being put on paper. I’m always drawing small parts and plans for specific pieces, but the overall design is never shown until its in the metal. I do prefer my usual modus operandi, but a change like this, and trying something new was a good experience. And at the end of the day the trust we placed in Josh for the design was well worth it. What a result!!
In between Josh and Jamason, I grabbed a bit of time with the bike to sketch down my idea for the seat cover. I will always make some mark outs before going to see Jamo, it helps him with the idea that I want, and helps me communicate it and make sure were on the same page. After a quick conversation and some design changes suggested by Timeless Autotrim, we were set to get stitching.
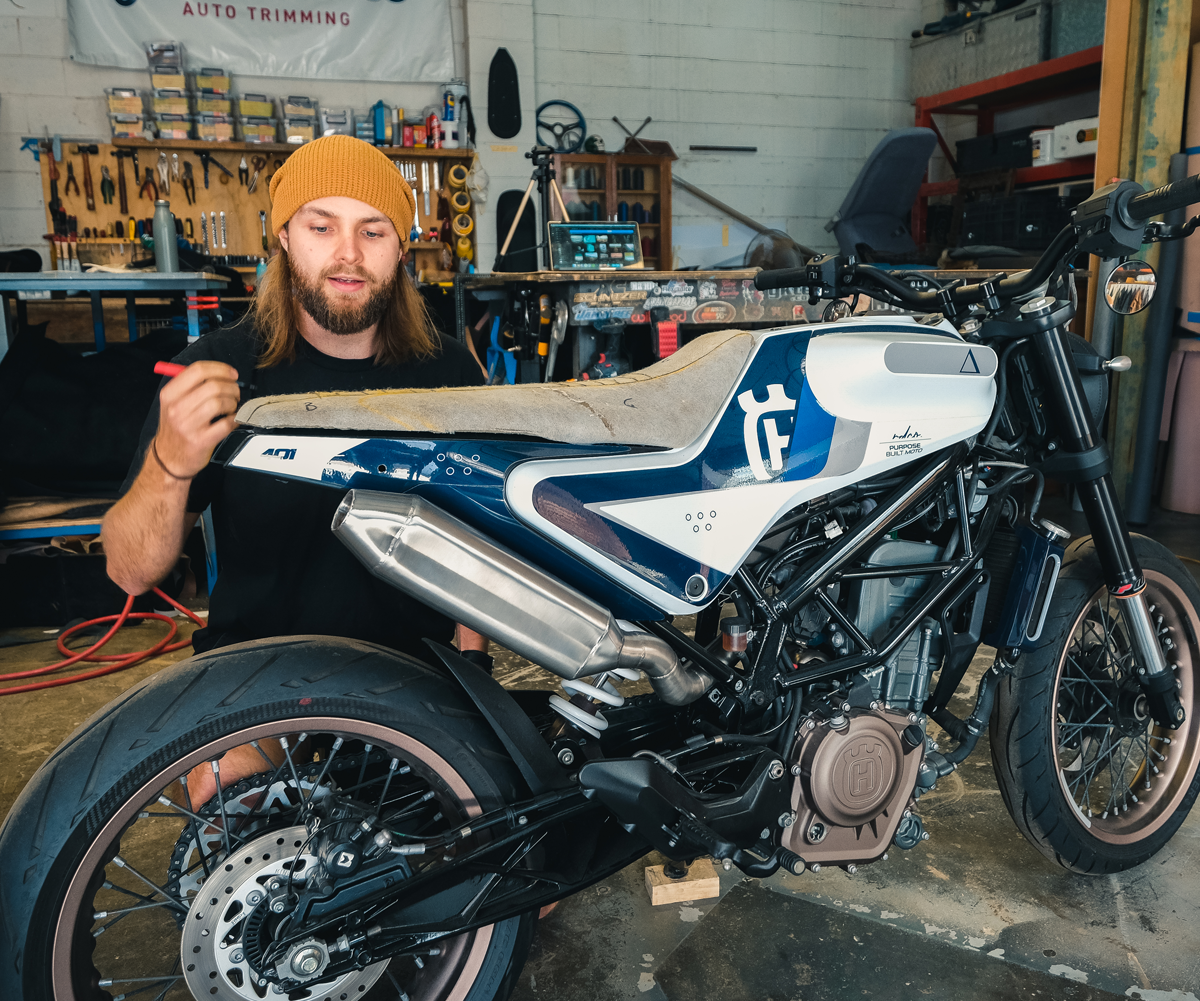
The design draws from an MX gripper seat, a simple grey cover detailed by some select Husky blue gripper bars and stitching. In the clip Jamason runs you through his process of final sketch out on the physical seat. That enables the pattern process to start with the use of some clear plastic and vinyl pieces.
Patterning gives the upholsterer a chance to check the fit, and make sure the shapes cut out are exactly right before ever cutting the actual seat material. A good pattern allows Jamason to precisely move on to final stitching and fitting work and removes all guess work. Transferring from the pattern onto the actual work piece, getting the gripper bars cut out and having the marks to start stitching it all together for test fit before final stapling onto the seat pan.
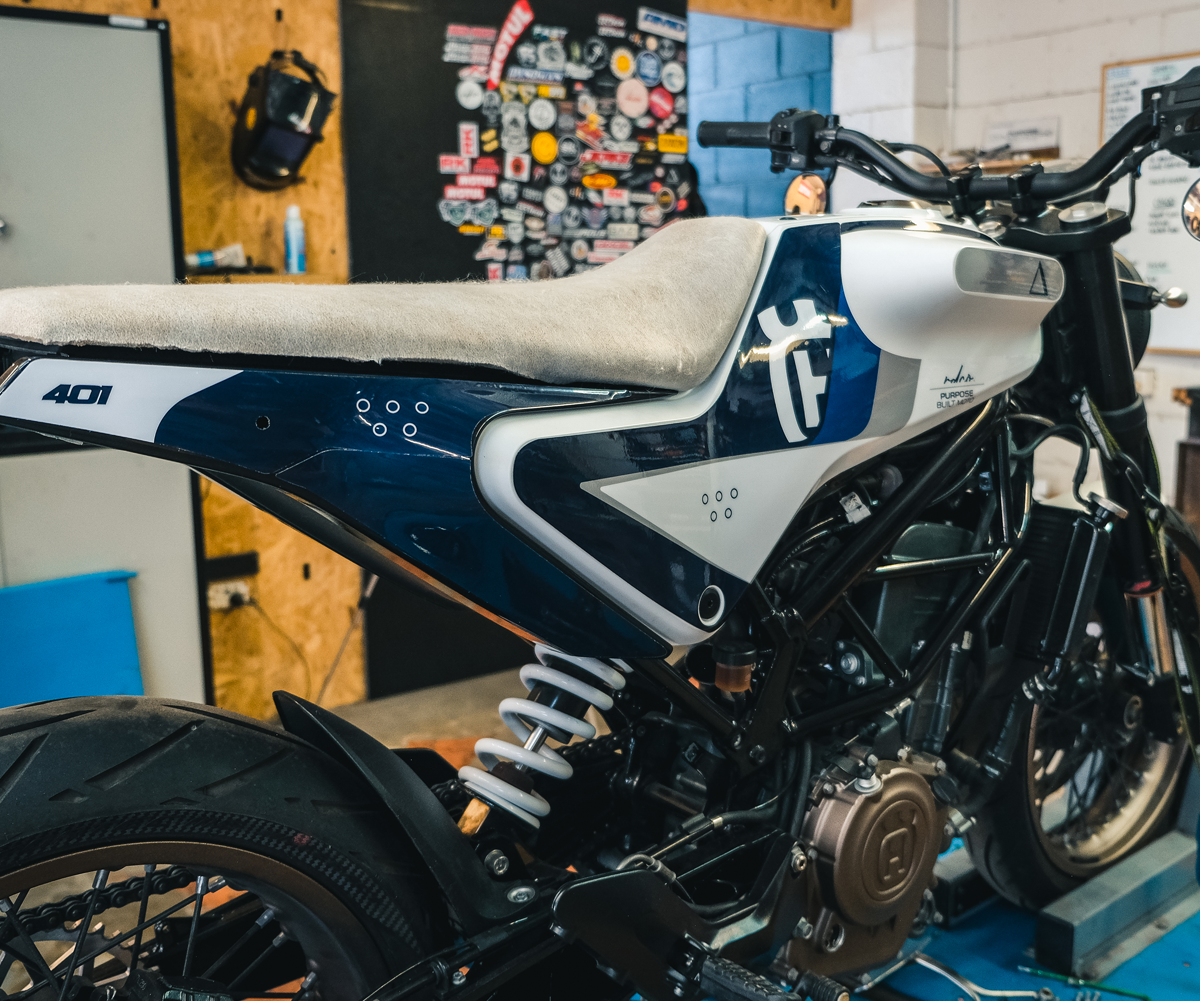
With the re-shaping we’ve done in episode 3 and Jamason’s skilful touch the seat is an absolute banger. The rider is front and center on this bike and the position gives an inspiring feeling of total control over the bike. Aside from the improved seating positing the design and shaping of the grey and blue gripper material ties our ideas for the husky together perfectly. A sharp and aggressive line from front to back, now uninhibited due to the removal of the seat hump on the stock seat.
The final piece and arguably the best custom touch for the Husqvarna Vitpilen is the brake light. I put a lot of time into the idea and design of the light, I wanted the LED brake light and acrylic lense to be a stand out feature of the project. We received the lense back and finished it in a fine grit sand paper to give an opaque look when the bikes off. Once the key is turned the red LED’s take charge and the tail glows a vibrant red.
The lense is sealed in place with a clear adhesive and so is the small aluminium detail piece that finished off the unit. We managed to retain the factory mounting holes for the new aluminium light housing and the fit over all is impeccable. The gaps to the stock body panels came out really well.
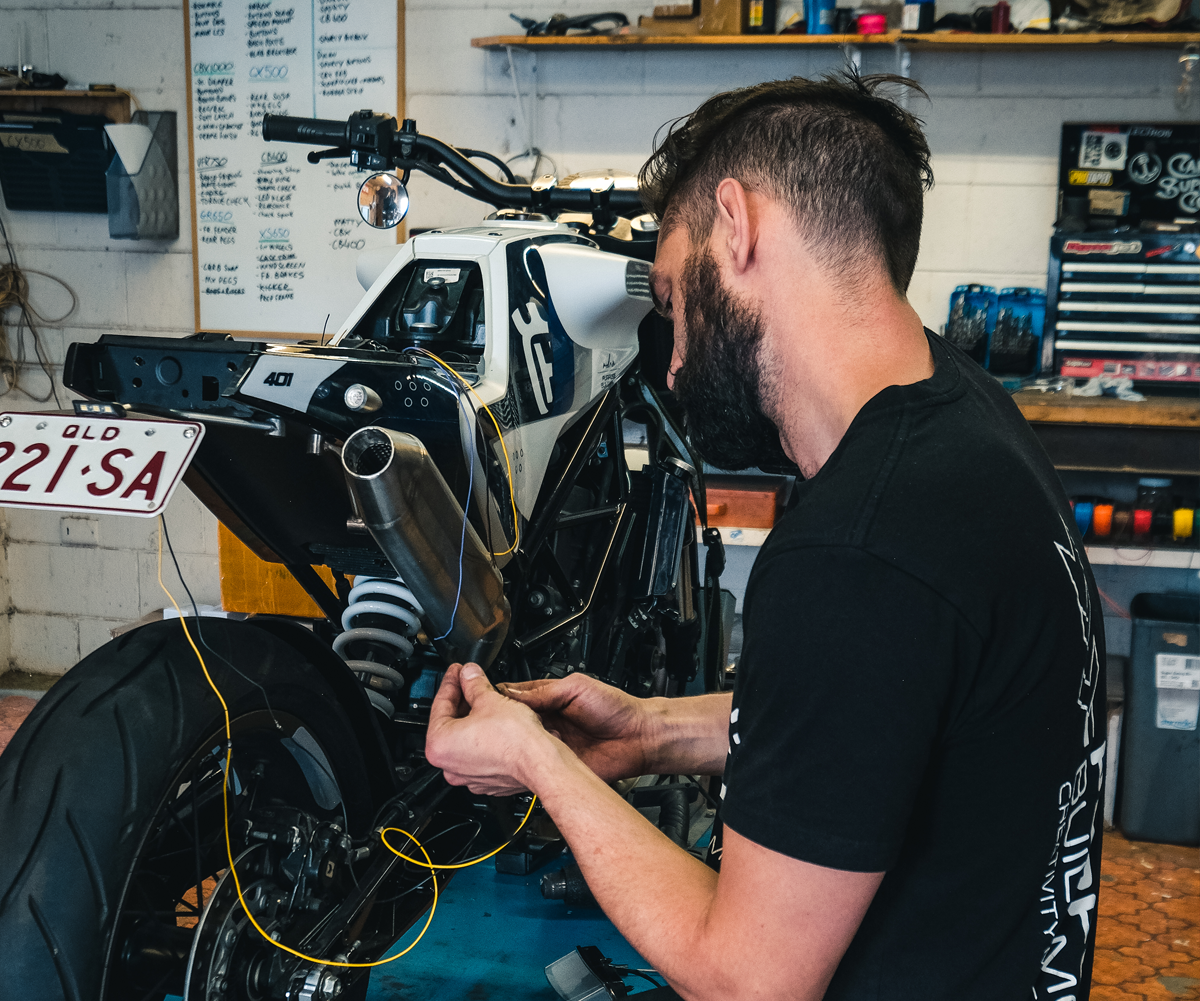
With that, our final few pieces of assembly and wiring are all that stands between me and my test ride. Linking in the new Hollowtip turn signals and brake light to the stock wiring was a simple task and the flasher worked fine without any additions. A quick torque check from front tot back and we are done…
Thanks to our sponsors for making this motorcycle build project possible: Makita Australia, Pipeburn, United Tools Burleigh, DNA Performance Filters, Motul Australia, and Ninefivers.
The cat is out the bag – You could WIN the Husky Street Tracker build! The winner will receive the completed Husqvarna Vitpilen, a killer maintenance kit supplied by Motul Australia, and a Makita tool kit and tote.
We have prepared these awesome Cartoon Husky stickers complimentary of Sticker Mule and their new design tools Trace, Upscale, and Redraw that make it easy to create your own custom stickers. All participants will be able to get a sticker pack as their entry to this massive giveaway. The sticker packs will be super limited so make sure you don’t miss out! We have released 75 Early Bird Sticker Packs, which means you can jump in early and make sure you guarantee your entry! More info on how to enter here.
WE BUILD BIKES WITH PURPOSE.
Purpose Built Moto is home for unique custom motorcycle builds. We offer a unique motorcycle customizing experience in the heart of the Gold Coast.


2 comments
Good luck in the comp mick! tickets are available via the link on the Youtube video
Gotta win the Husky!