
Everything you need to know about how we build custom sissy bars
Looking to mount a custom sissy bar for your chopper? Sissy Bars are a main stay on most custom choppers you see around. They can be for nothing more than a show piece or serve a great utility on your bike when heading away and needing to pack gear on your motorcycle. We has started to do more and more custom sissy bars so I figure I’d share a bit of what I’ve learnt and hopefully help you on your way with making your own.
In This article I’ll run you through a few ways I’ve made my own, the materials I use, and a couple of different styling cues to get your imagination going for your own custom sissy bar project.
I got told a story once at a Motosocial event that Sissy Bars actually came from early Scrambler bikes. The hoop around the back of the seat that could be used to pull the rear wheel out of a rut. Then in the U.S the government introduced a law that these were mandatory on motorcycles for a while. Bike builders being the ass holes they are started developing crazy designs and building them super high as a little “fuck you” to the lads in blue. Which sounds entirely accurate, taking into account most motorcyclists relationship with the law.
But enough bullshitting, lets get into some gritty details to set you on your way to chopper glory with your own custom sissy bar.
Tools you’ll need:
- General hand tools + Spanners
- Grinder
- Welder – I use an SWS Alumtig 200
- Scotchbrite
- Welding table
- Pipebender (optional)
- Oxy torch or Blow torch (optional)
You can cold bend your solid bar, but if you’re getting wild with your design heating the material to bend it is going to make your life a lot easier. Before I list the materials it’s worth mentioning the sky is the limit here. Unless you’re building your choppers sissy bar purely for utility, these things are a great form of self expression through the bike you build. Get creative, build a base from a solid material, then use whatever you want. There’s also a huge variety of ways to fix your sissy bar, so I’ll mention that below aswell.
Custom Sissy Bar Materials needed:
Mounting materials plate, or fabrication bungs (its your call)
8mm-14mm Stainless steel or mild steel rod – 3M
Or
30mm x 4mm up to 50mm x 5mm flat bar
Or Chain links, old motorcycle chain, Star pickets, WW2 bajonets, Daggers, swords, hand grenades, a medieval mace, I don’t give a shit anymore, steal your nannas vintage teapot as long as its period correct.
Mounting Types I commonly use:
Strut mount type:
commonly found on swing arm Harleys, or they’re more metric Japanese copies. This type utilises the rear fender mounting strut as the base for your sissy bar.
You can use a set of fabrication bungs for those, or a nicely cut out steel plate drilled to suit the existing mount holes. A lot of DIY Sissy bar kits will come with these. They’re not the best looking way to do it, but it makes life easy if you’re not the best welder (Or you are the best welder and you’ve have a few too many beers while hiding out in the shed).
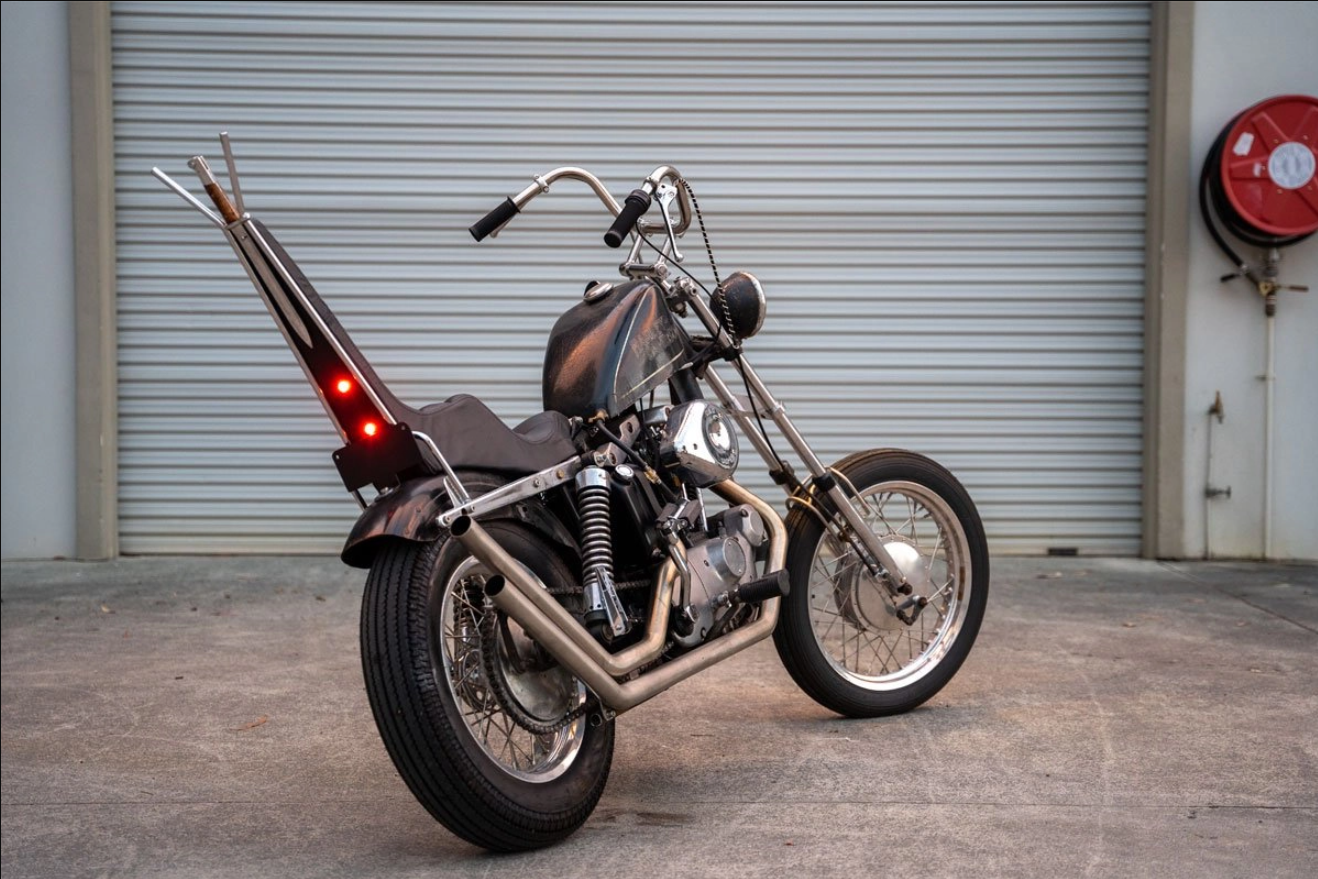
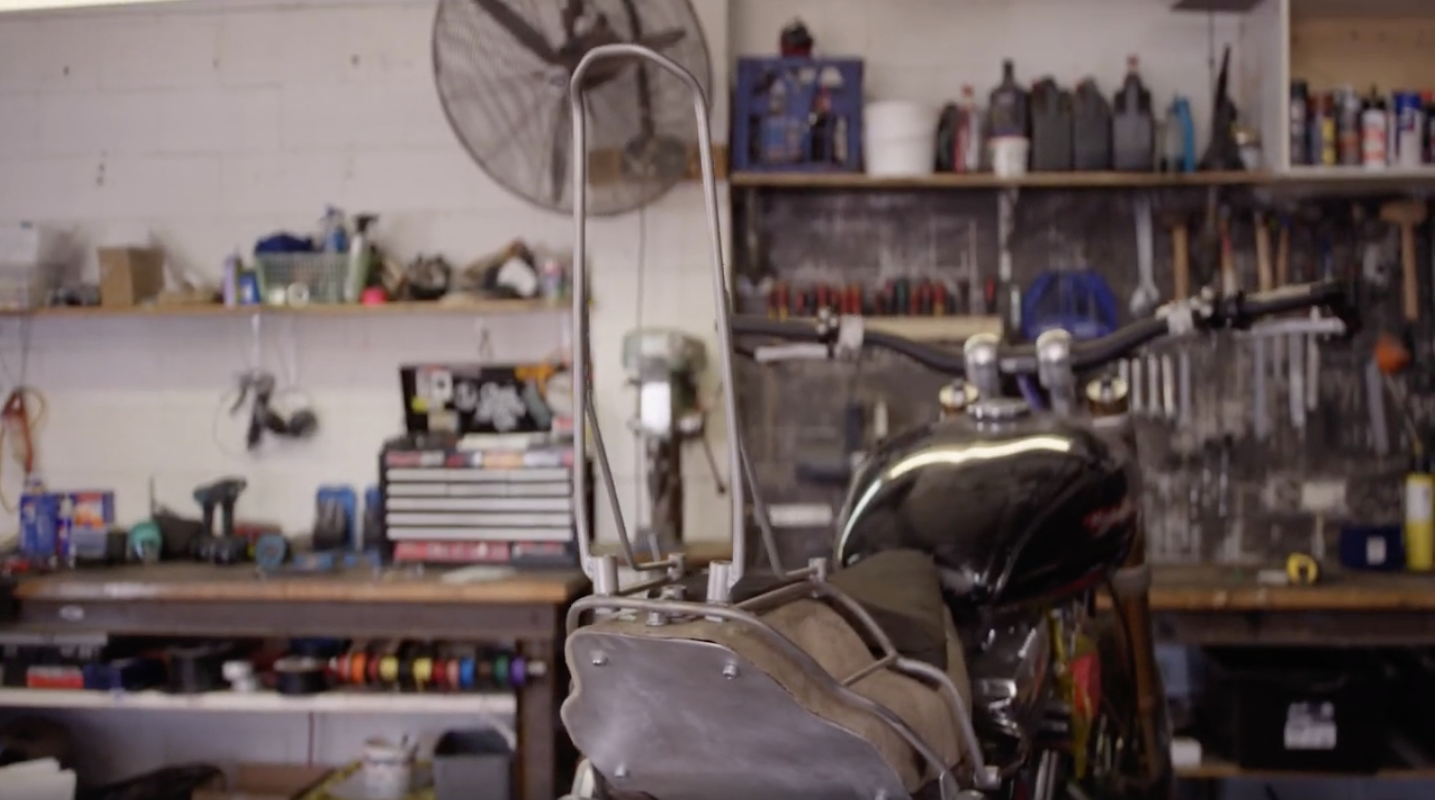
Shown here is a bar we made up on a 1972 Ironhead Sportster chopper. It was fabricated from a kit that came with pre-cut strut plates to use as the base of the sissy bar, completed in mild steel with an old Bajonet, chromed and I’ve hand made the timber knife handle sections and pinned them with some peined brass studs.
Swing Arm Mount:
I use this type on bikes with rear suspension where I want to get a nice tight rear fender gap. You use the sissy bar mounted to the swing arm so the rear fender moves with your suspension.
For this mount type you’ll need
– a mounting plate on the front of the fender (near the swing arm pivot)
– 4 x M8 threaded fabrication bungs to weld on your bolt points
– 4 x M8 counter bore fabrication bungs to make your bolt points pretty
– M8 SHCS bolts
You can use bigger fasteners but I wouldn’t go any smaller. Just build these things strong, the mounts can come under a lot of stress as they’re sitting under your suspension. They’ll cop as much vibration and bumps as it would on a hard tail.
Shown here is a recent job on an early 80’s Harley Davidson Softail Chopper. We built a high sissy bar, used our orbit brake light for a bit of jewellery and lighting on top of the stainless steel plate mount. The whole set up, including the passenger seat and fender moves with the rear wheel.

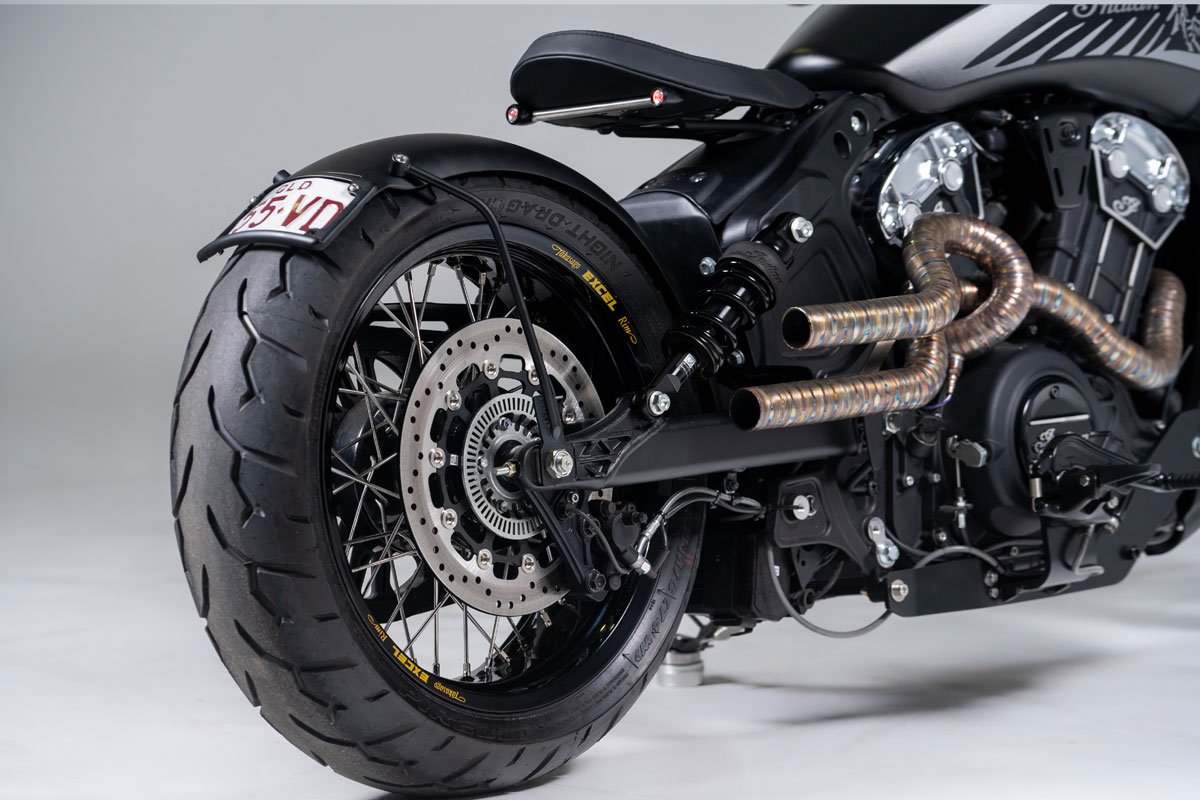
This is another example on an Indian Scout Bobber, its not a sissy bar, but you get the idea of how it works when being swing arm mounted. This set up is adjustable and will move as you tension the belt. Always keeping that perfect fender gap.
Hard tail sissy bar
Not nearly as many moving parts to worry about here, so you can get creative on your sissy bar build. With the base mounted near the rear axle, the Hard tail sissy bar will support your rear fender at the rear with the front of the fender usually lounted to a cross bar on the frame.
I’m going to figure out a way to have the rear fender move with the chain tensioners on our latest XS650 chopper build, I haven’t made it yet but I’ve got a plan in the works for it…. Stay tuned.
A note on gapping your fenders. I learnt the hard way on this CB900 chopper that you need at least 10-12mm between fender and tyre. I tried to get cheeky here and mount it really tight over the rear tyre. Leaving maybe 6-8mm, it worked fine, the test rides were great, until I headed out on the highway, at around 90 km/hr the tyre started rubbing. Not enough to effect the ride, but enough to get the fender super hot and burn the paint! I learnt the hard and expensive way, so you don’t have to.
Utility sissy bar
These are really no different to those mentioned above, I guess the only difference is a sissy bar purely build to either hold your girl, or your duffel bag on the back might not have the frills of something you slaved on for hours just to make it look pretty. You’ll have a tail light mounted, a spot to tie your gear on or alternatively a back pad for your pillion
I’ve made a few of these the most notable being the bar that went on the back of my Wide Of The Mark sportster. It’s no chopper, but it wears a sissy bar none the less.

Using a smaller bag rack to build this sissy bar off, the mistake I made here was I didn’t include any fixed tie down points. If I was to do it over the luggage sissy bar would have a few tie down loops to avoid my straps slipping when heading down off road tracks. It might not be an issue as much on the street, but healthy advice.
Styling your custom sissy bar
As I mentioned above, your imagination is the only real limit here (and maybe your fab skills). I always find myself intrigued by the heights builders use on their bars. Running super high, mid or low sissy bars in relation to where the bars and seat mount. I don’t think there’s any wrong way to do it.
Personally I prefer the lower line sissy bars, matched with low bars. But If you’re running high risers and apes, you sort of need that high sissy bar to make things look right. That’s to my eye.
Love this clean example from Kansai Giant in Sydney
You’ll have people tell you there’s one way to do it according to the bikes era but I’ve never subscribed to that. If I was building bikes in 1960 then I’d build a 1960’s bike, but I’m not. So do it your way, whichever way that may be.
One of my favourite things to check out on builders sissy bar jobs is the variation in materials and styling they use for all kinds of crazy set ups. Here’s a couple that really stuck out to me!


Great example on a Panhead CHopper from Prism Supply co.
Lighting your sissy bar.
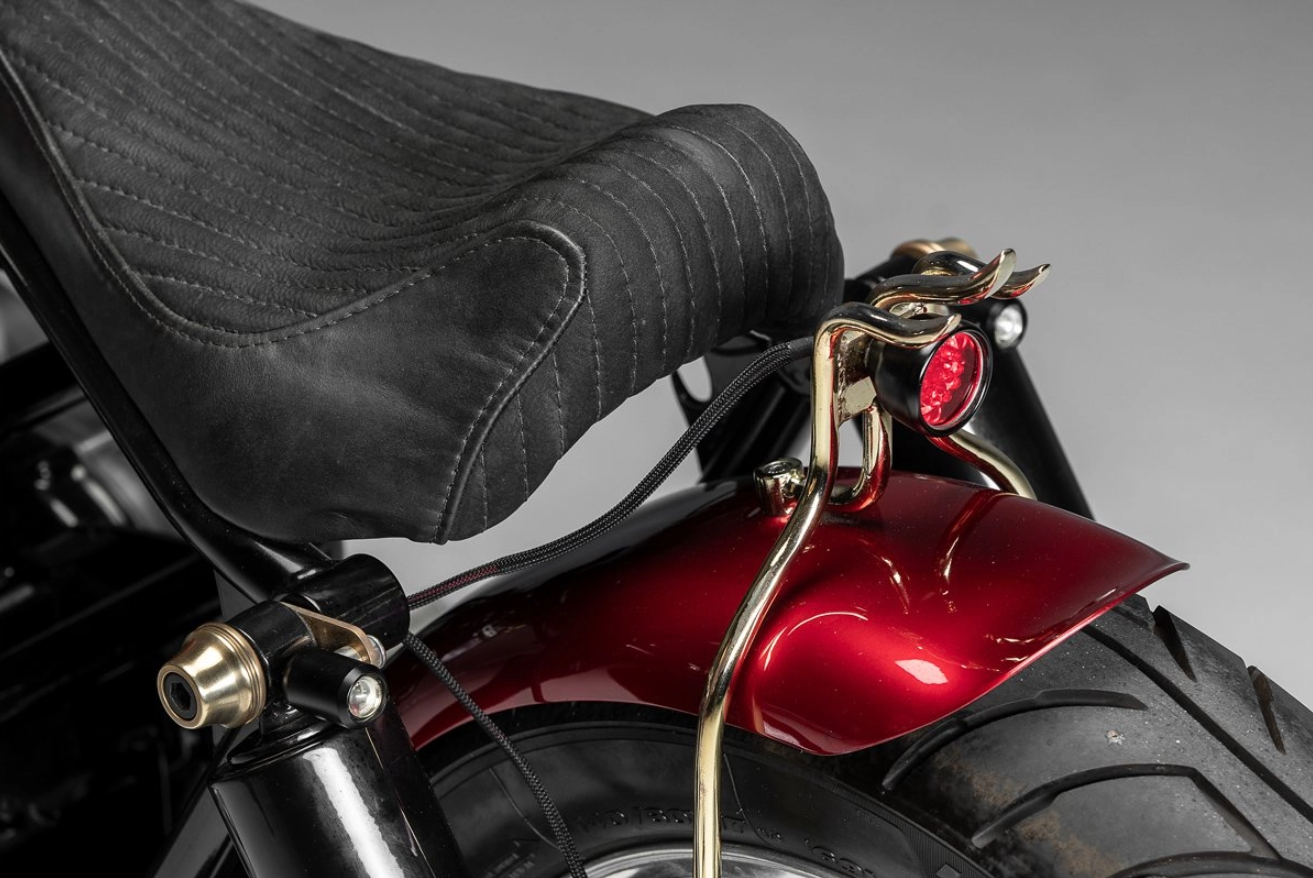
Brake lights on your sissy bar is an easy one, there’s no bad way to do it. I often use the Purpose Built Moto Orbit Tail light on our builds. It’s simple, bright and adaptable to a number of mount types. There are also thousands of replica vintage tail lights on the market depending on what you’re chasing after.
The hard part for me, and I still haven’t quite figured it out is mounting indicators on the sissy bar. Our LED turn signals are small, and usually look great wherever you put them, but something hasn’t clicked with me yet on how to mount them the best way possible. But each sissy bar we build I’m trying new things to get it figured out! I’ll update it here as we progress towards something worth writing about.
That will wrap it up for our how to guide on building a custom Sissy Bar how to, I hope that’s shed some light to get you started or inspired you to get working in the garage. Make sure you’re building it strong, and making it your own. Have fun with it!
WE BUILD BIKES WITH PURPOSE.
Purpose Built Moto is home for unique custom motorcycle builds. We offer a unique motorcycle customizing experience in the heart of the Gold Coast.


3 comments
Sounds like a fun project Mike, Just make sure you’re using a big enough size bar to support a back rest
2023-10-04 00:00:00 +1000
I’m looking to fab a sissybar around 24" so I can put a pad for my wife. I want it to be chrome and have a classy look like being chromed. I could send you pics of this bike to better show the style of it. I can fab1/2" steel for this and can get it chromed. What do you think?