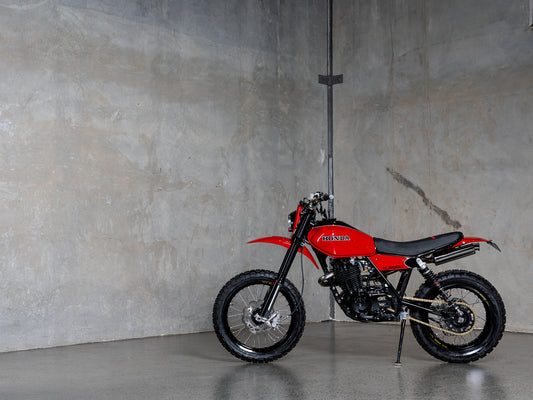
Back for round 2 of the Husqvarna Vitpilen 401 Tracker build. Episode one saw some pretty quick progress for the little husky, being stripped down, having the front end overhauled by the addition of some Renthal MX bars and Hollowtip LED turn signals. We also took the opportunity to better the riding style with some footpeg modifications that we’re mid way through.
In Episode 2 of the series we’ll get on with moving the footpegs forward, and the fabrication that comes with that and also the exhaust build. Also taking a bit of time to work on the custom tail light design and further develop the overall concept for the project.
Before we get dirty on EP 2 I had to quickly jet down to United Tools Burleigh and pick up some Fresh Makita gear. The guys had heard we were doing another build series and got in touch to support. These projects are done off our own back so having partners supporting the work we do is really helpful.
We have decided to give the Husky to a lucky punter at the end of the Build Series! So make sure you subscribe to the list using the form at the end of this post to keep updated!
As an added bonus, the lucky new owner of this bike will be receiving a pretty hefty prize pack as well!
Alright lets rip into episode 2 of our Husqvarna Vitpilen 401 Tracker Build. On the exhaust we wanted to do away with the weighty and whisper quiet stock set up, to make way for a more aggressive, lighter design that barked with each pop of the piston. Single cylinders can be hard to get sounding nice, in my experience short headers and small mufflers leave you with a bike that is ear piercingly loud and can distract from your enjoyment of riding the thing.
So we wanted to avoid that, and give the Husky 401 a nice long header and a decent size muffler to smooth out the note and give it that dirt bike crackle. Removing the stock exhaust was done, so I started on the oval muffler design. Using what I learned on the Harley Sportster build, the raw materials were cut, bent and started to be fabricated together for the muffler body.
Using a 2” stainless tube cut lengthways on top and a 1 5/8” tube on the bottom the 2 pieces are linked with some sheet metal to create an offset oval shape 280mm long. Next step is to create the core of the muffler that will be wrapped in our muffler packing. This one was simple, a 38mm perforated core cut to length now can be used to mock up and figure out the end cone and also the transfer cone from header to muffler.
Its quite difficult to get down in words just how do do all these finer parts on a muffler, but if you watch the video its explained a lot better. The muffler will be completed first along with its mounting bracket, so we can then start working from the header to that new fixed point.
The further we progress on this project the more it feels like the Husky is treading into a Supermoto tracker territory. With the MX bars, and modified pegs giving a more upright position, and now the high sided exhaust for the lumpy single cylinder. I start thinking about creating a streamlined version of a motard, driven by inspiration from the Super Moto world, but void of the sharp, off road style fenders and mudguards. Smoothing it all out and giving it that future moto feel.
With Dylan finished up on the Footpeg mods, we sent those out for anodising before being re-fitted on the bike. While that’s going on we’re going to finish up a few smaller touches on the Husqvarna street tracker in preparation for the completion of the build.
Job 1, swapping out the stock sprocket for a Motoproducts aluminium sprocket. These parts look awesome, save a bit of weight and add yet another custom touch to the project. Win, win, win.
Job 2 is swapping out the Stock Air filter for a new DNA Stage 2 performance set up. Supplied by our good mates all the way from Greece at DNA filters, this product was fresh off the press just as it was released. This unit replaces both the stock air filter, and the airbox cover with high performance filters. On paper these drastically improve the filtering efficiency and air flow. Which on the road means better throttle response, and more power. Giddy UP!!
Job 3 was taking off the swing arm for a bit of black out treatment. Stripping the swing arm off, and removing the bearings etc in preparation for a gloss black powdercoat treatment. A small mod, but will make a lot of difference to our end product over the standard grey colouring.
That’s all we’ve got for this instalment of the Husqvarna Vitpilen custom build. Episode 3 you’re going to hear this beast running through the new exhaust, and we’ll carry on pushing toward our end goal of a really unique Purpose Built Moto Husky 401 Super Moto.
Thanks to our sponsors for making this motorcycle build project possible: Makita Australia, Pipeburn, United Tools Burleigh, DNA Performance Filters, Motul Australia, and Ninefivers.
WE BUILD BIKES WITH PURPOSE.
Purpose Built Moto is home for unique custom motorcycle builds. We offer a unique motorcycle customizing experience in the heart of the Gold Coast.


