
Today, I’m walking you through our Fender Fabrication Kit, a versatile set of parts designed to help you mount a fender on nearly any bike.
Whether you’re building a custom ride or just looking to replace an old fender, this guide will show you how to get it done.
What’s in the Kit?
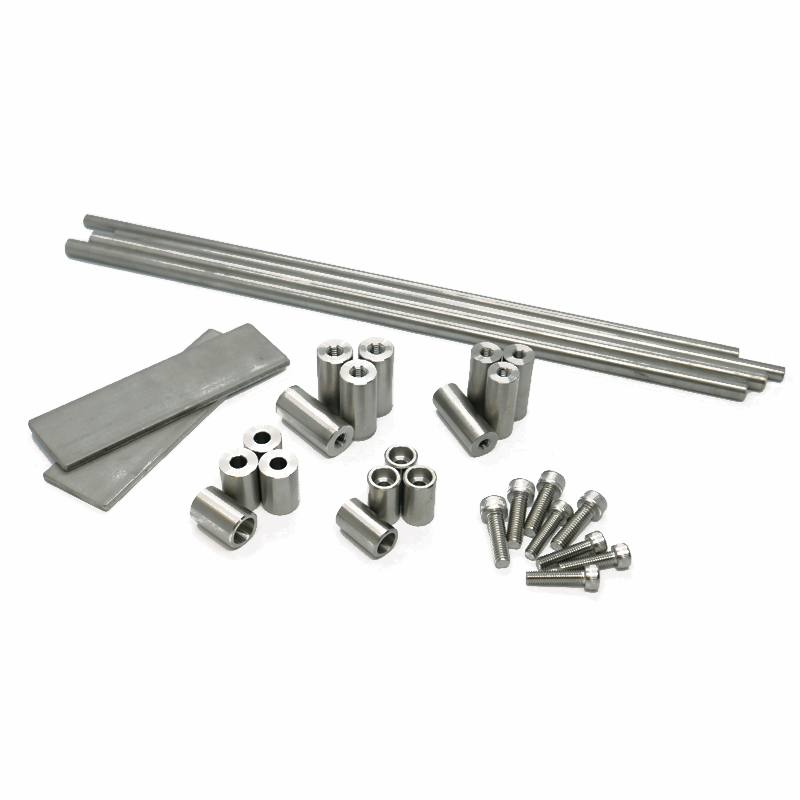
The Fender Fabrication Kit includes everything you need:
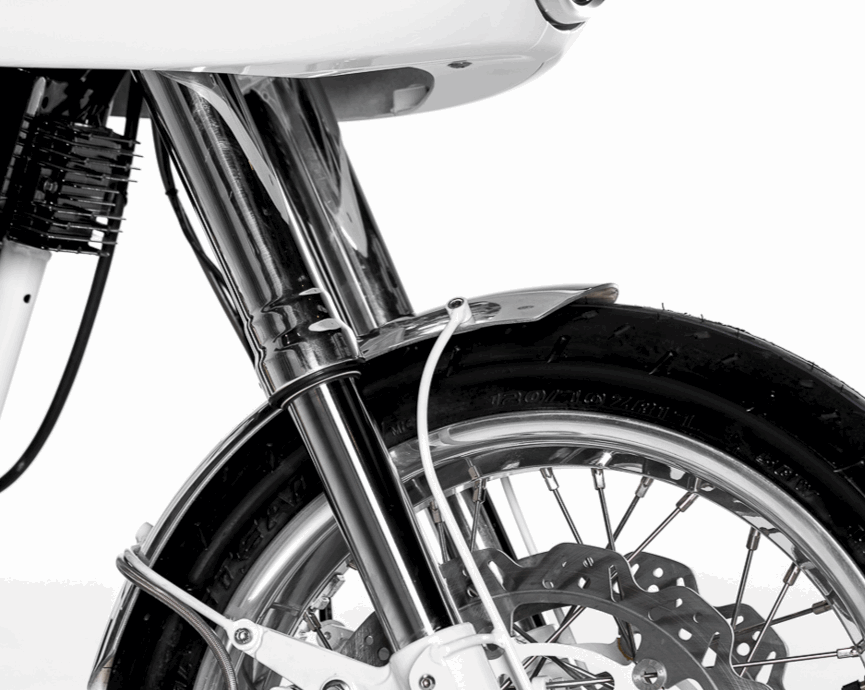
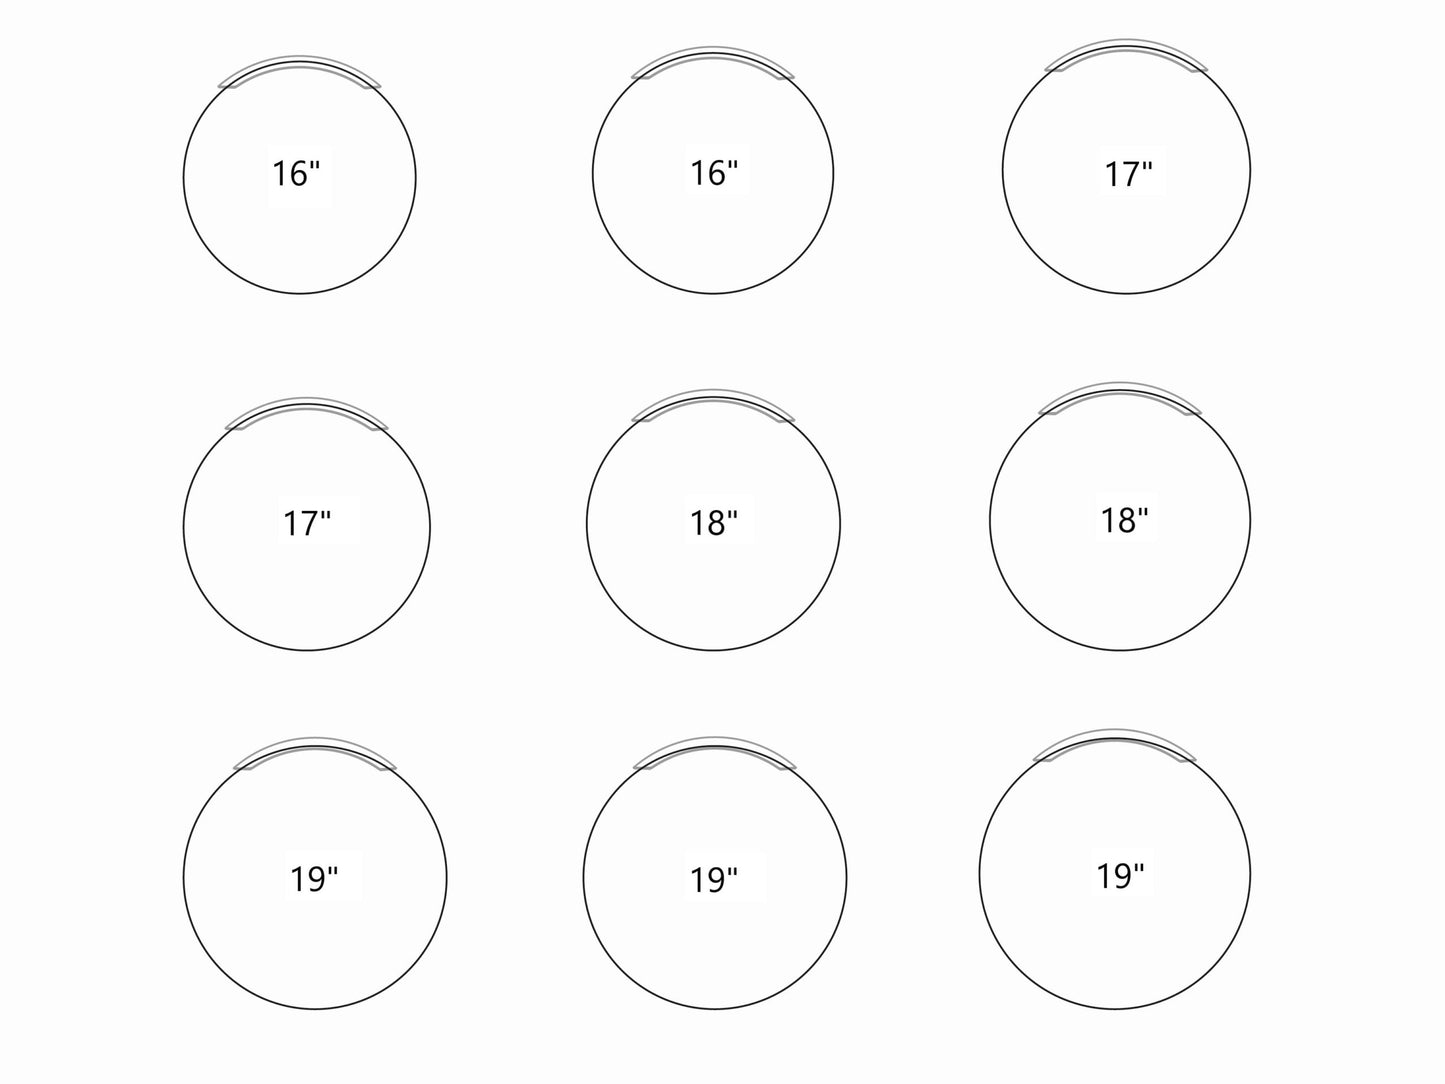
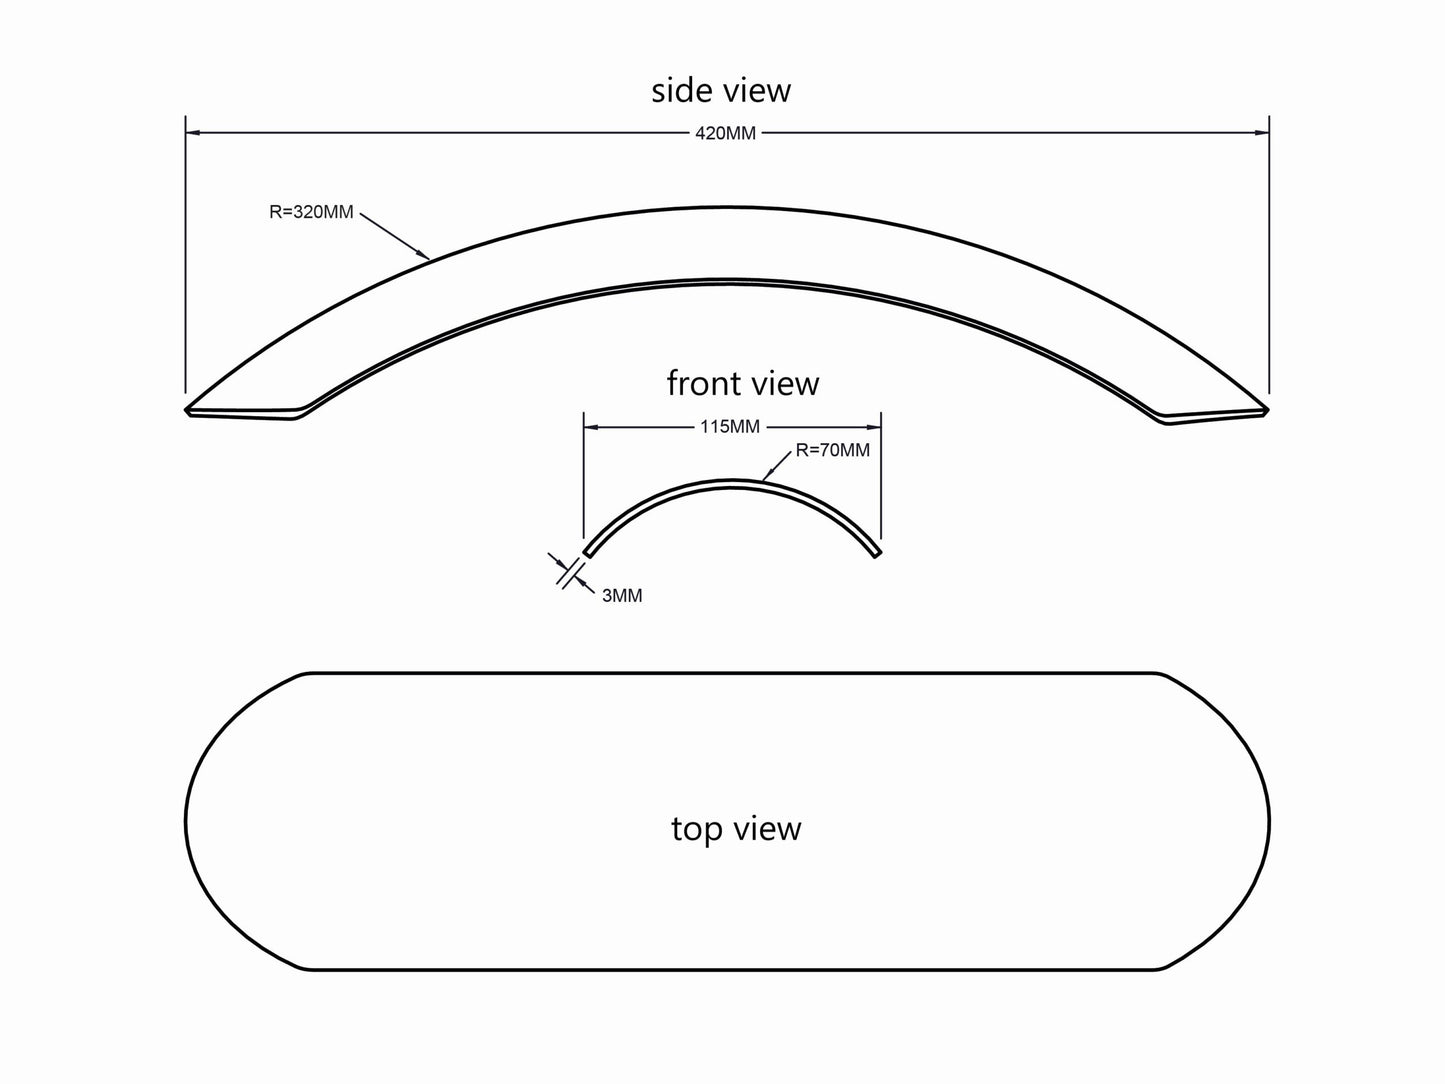
- Universal Aluminium Fender: Fits tires up to 130mm wide, with a radius that suits common sizes from 16 to 19 inches. Made from 3mm aluminium, it features mounting ribs for easier attachment and removal.
- Mounting Bungs and Screws:
- 4 counter sunk M6 bungs
- 4 counter sunk M5 bungs
- 4 threaded bungs (M5 and M6)
- 4 screws (M5, 30mm long)
- 4 screws (M6, 30mm long)
- Mounting Materials:
- 2 pieces of 30mm by 3mm flat bar, each 100mm long
- 2 pieces of 300mm 8mm bar
- 2 pieces of 300mm 6mm bar


Step-by-Step Installation
Prepare the Fender:
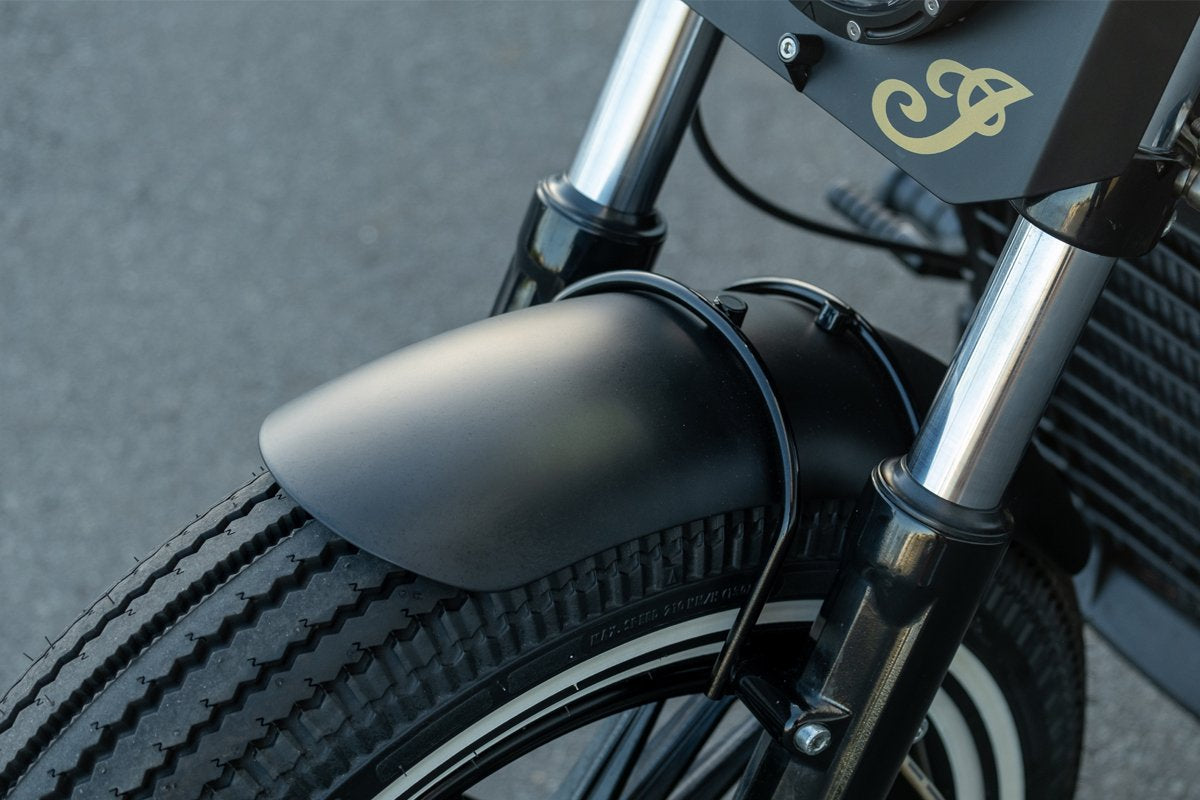
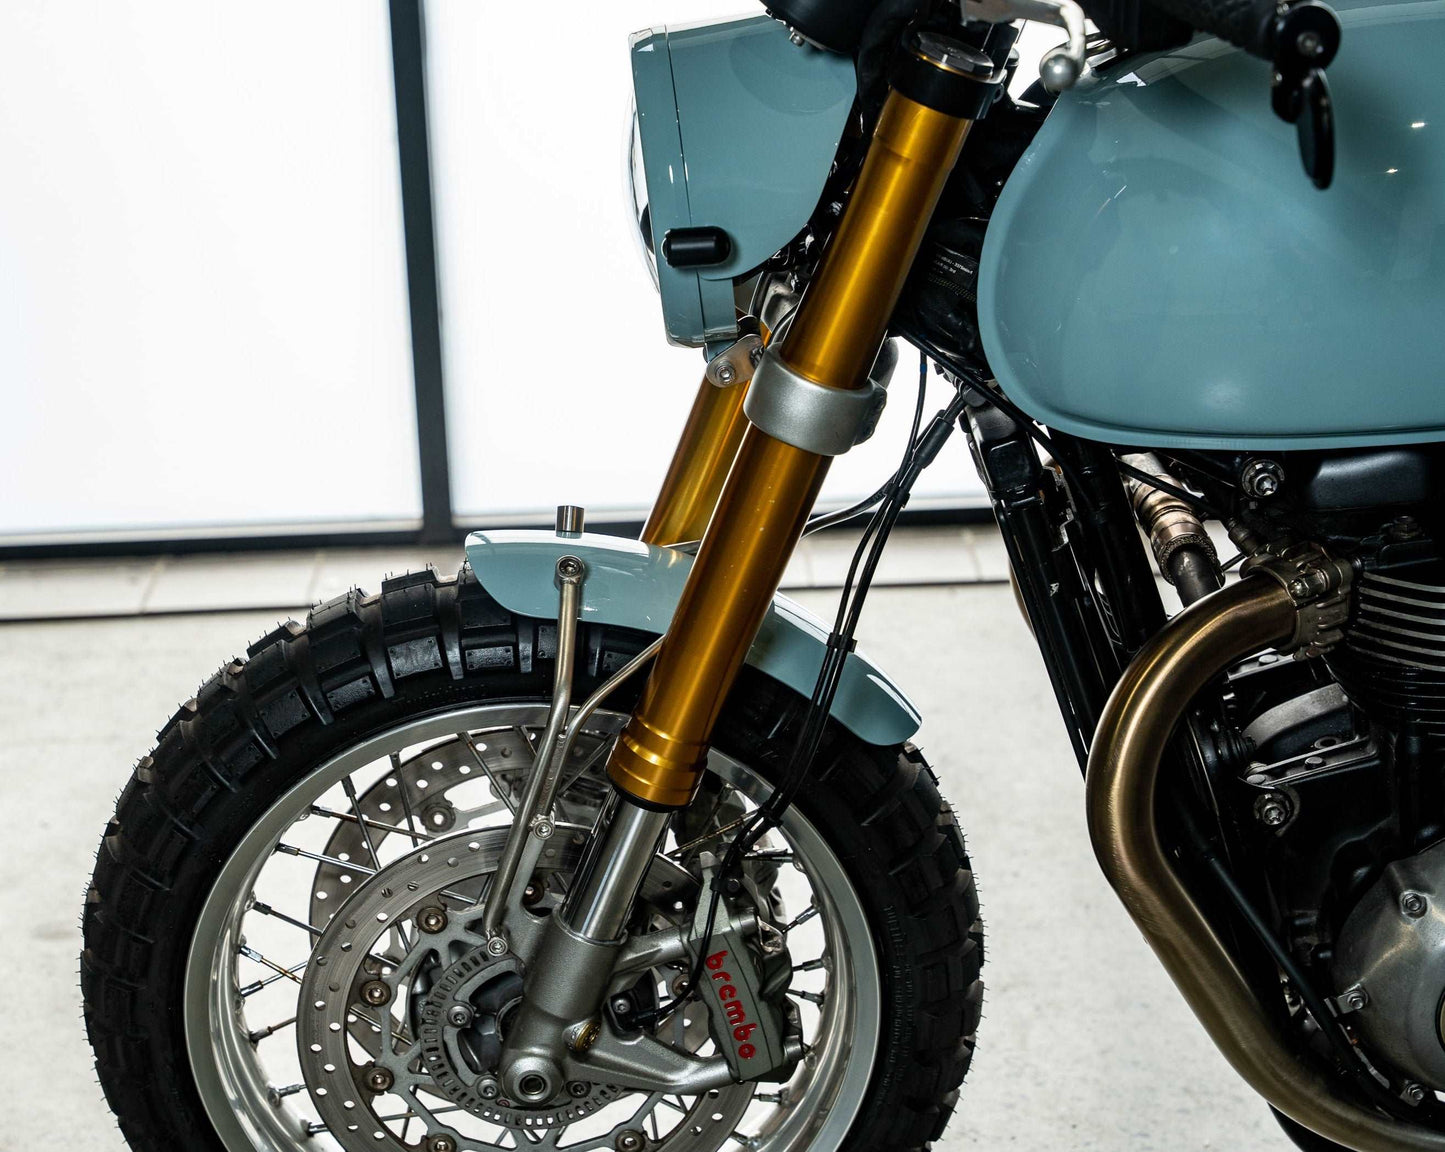
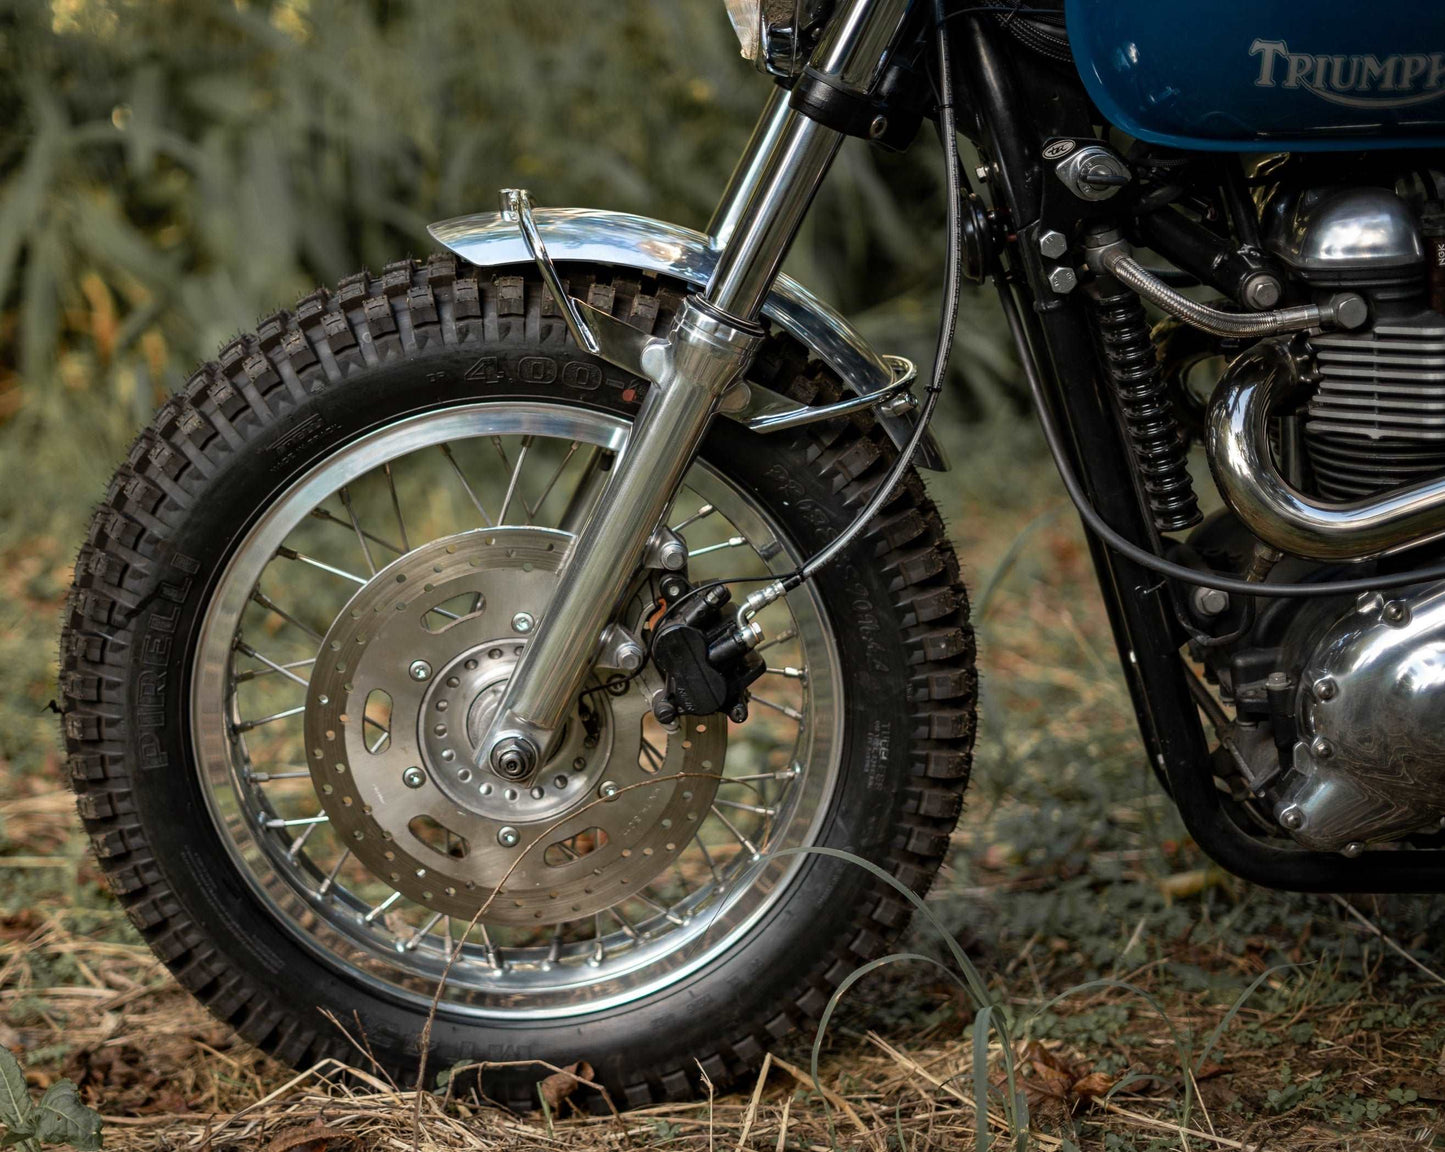
- Start with our Universal Aluminium Fender, which can cover a range of tire sizes. It’s designed to be durable and easy to work with, thanks to its mounting ribs.
- Measure and mark the points where you’ll drill for the mounting bungs. Use either M5 or M6 screws depending on your bike’s requirements.
Mount the Bungs:
- Drill and tap the holes according to the bung size you’re using. This setup allows you to easily attach and remove the fender without struggling to get a spanner between the tire and fender.
- Attach the bungs to the fender using the provided screws.


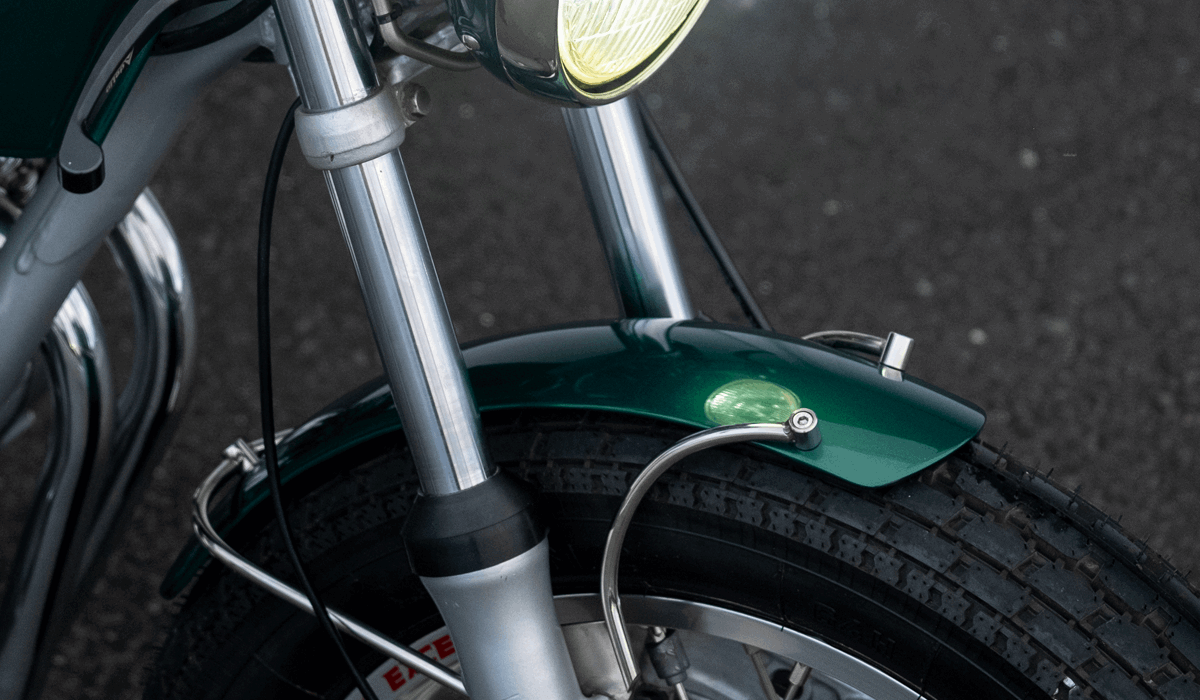
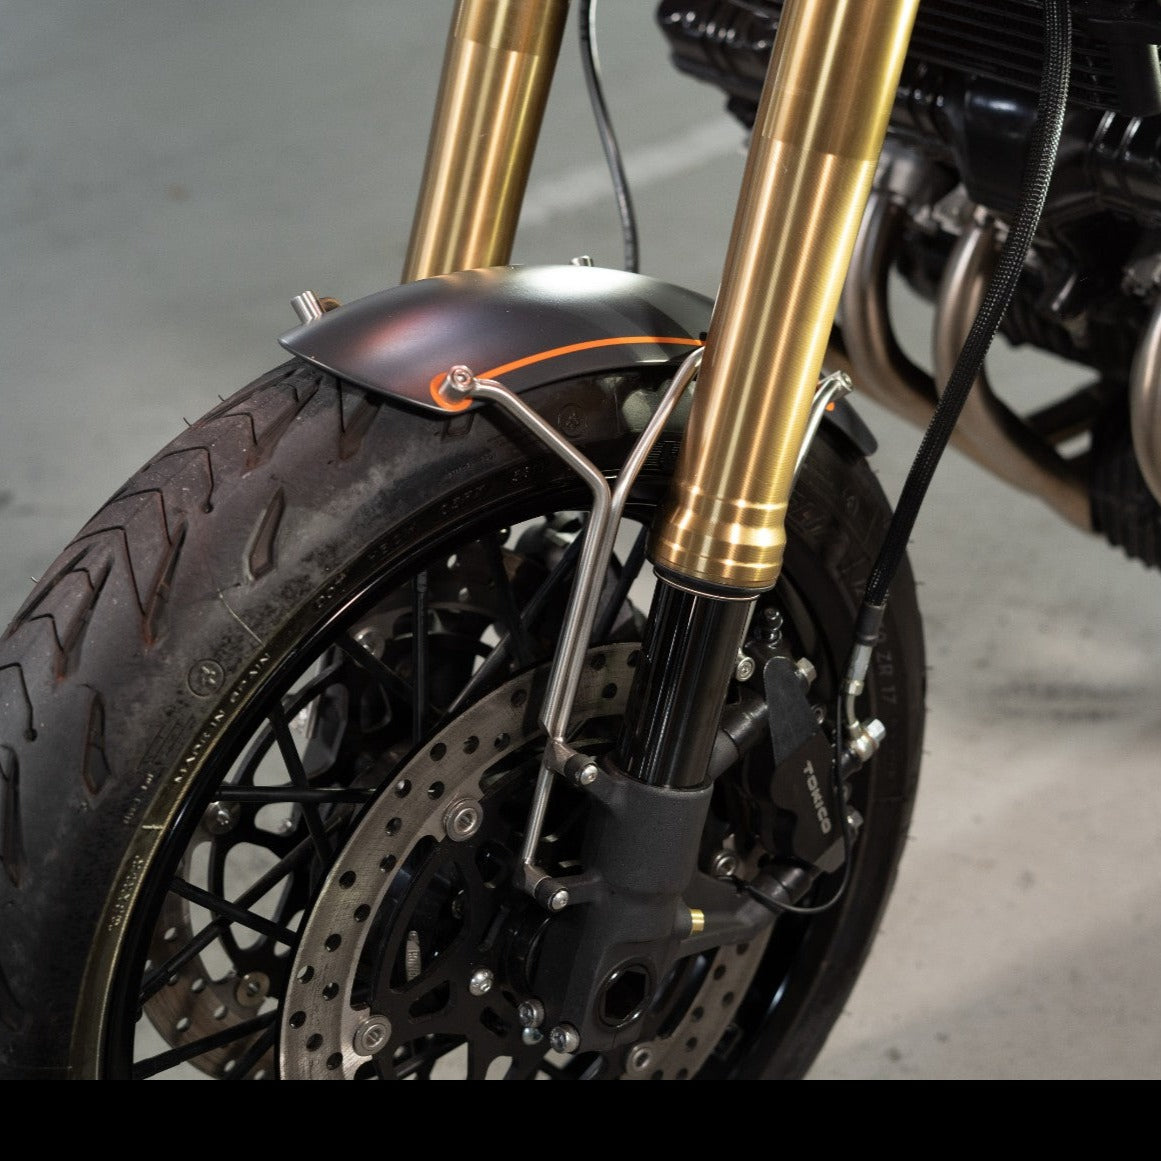
Attach the Flat Bars:
- For conventional fork mounts, use the 100mm flat bars. These will replace your old fender mounts.
- Position the bars and mark the spots where they will attach to the forks.
Build the Mounts:
- Use the 8mm and 6mm round bars to create the link between your fender bung, and the fork mount. Cut and shape these bars as needed to fit your specific bike.
- Once shaped, tack weld the round bar to the fender bung and the fork mount.
- On usd forks, you will usually use a second set of bungs on the fork, to replace the flat bar.
- Remove from the bike for final welding


Install the Fender:
- Once the mounting structure is ready, attach the fender using the screws. Make sure it’s securely fastened and sits evenly over the tire.
- Double check your clearance to the tire, as a rul of thumb it should be a minimum of 10mm-12mm to the closest point on the fender.
Additional Tips
- Customizing the Fit: If you prefer a shorter fender, you can trim it down. The fender has multiple mounting points to accommodate different lengths.
- Fork Brace: If you’re not running a front fender, you can use the kit to fabricate a fork brace. Thes can help to maintain stability, especially on longer forks.


Real-World Examples
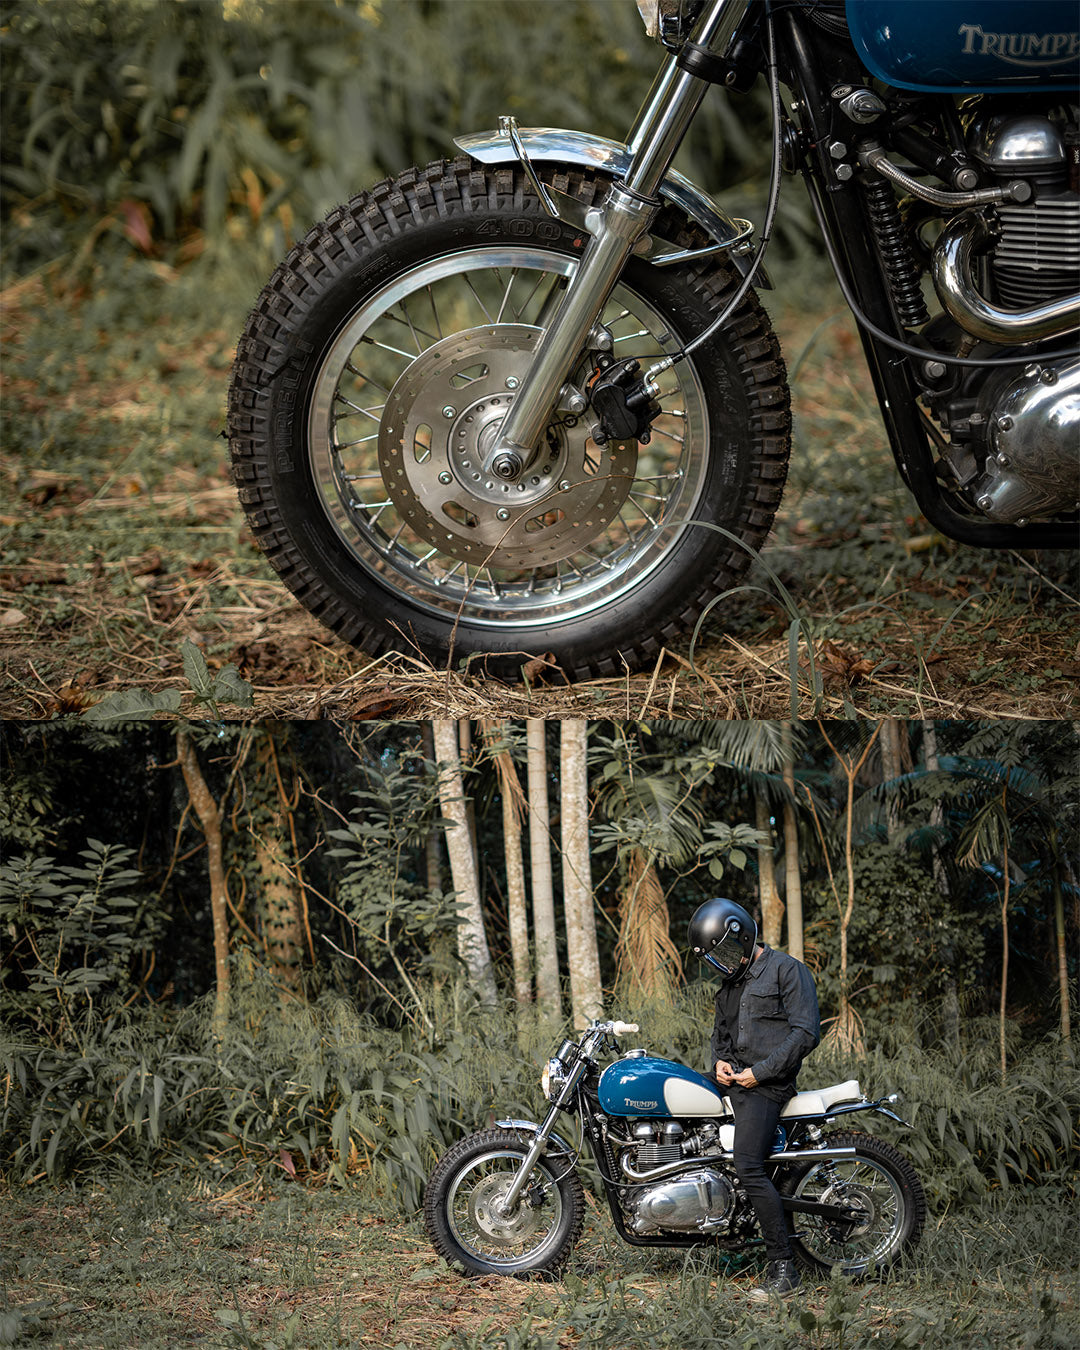
We’ve used this kit on various projects, like the 72 Ironhead and an Indian Bobber. For the Ironhead, we created a robust fork brace using the kit’s components, ensuring the bike handled well even without a front fender. On the Indian Bobber, we built a custom short fender, perfectly fitted and securely mounted using the M6 bungs.
Our Fender Fabrication Kit is designed to be versatile and easy to use, making it a valuable addition to any custom build. Whether you’re a seasoned builder or a DIY enthusiast, this kit provides the parts and flexibility you need to create a solid, stylish front fender mount. For more information and detailed diagrams, check out the product page on our website. Happy building!
Feel free to hit us up with any questions or to share your build using the kit. Ride safe and keep building.


Purpose Built Moto
Custom Front Fender Fabrication Pack
Normaalihinta
$220.00
Normaalihinta
$220.00
Alennushinta
$220.00
Yksikköhinta
kohti
Toimituskulut lasketaan kassalla.


WE BUILD BIKES WITH PURPOSE.
Purpose Built Moto is home for unique custom motorcycle builds. We offer a unique motorcycle customizing experience in the heart of the Gold Coast.


