A Beginner's Journey Through Motorcycle Rewiring:
A motorcycle rewire might seem overwhelming at first glance, but with a structured approach and a bit of patience, it’s entirely achievable for enthusiasts who are willing to learn. Whether your goal is to restore a vintage gem or to customise your daily ride to match your style, rewiring your bike provides a great learning opportunity to get familiar with the electrical intricacies of your motorcycle when getting those pretty lights going.
Drawing from a comprehensive rewire project on a 1978 XT 500, this guide aims to simplify the process into six approachable steps. We have published two different videos on the process of installing the revised version of the 2021 Black Box below. The blog will continue below.
Watch this video to see the long start to finish version where Tom covers off the whole process of installing a Black Box.
Watch this video for the crunched down Black Box Install and Testing.
1. Preparation and Loom Layout
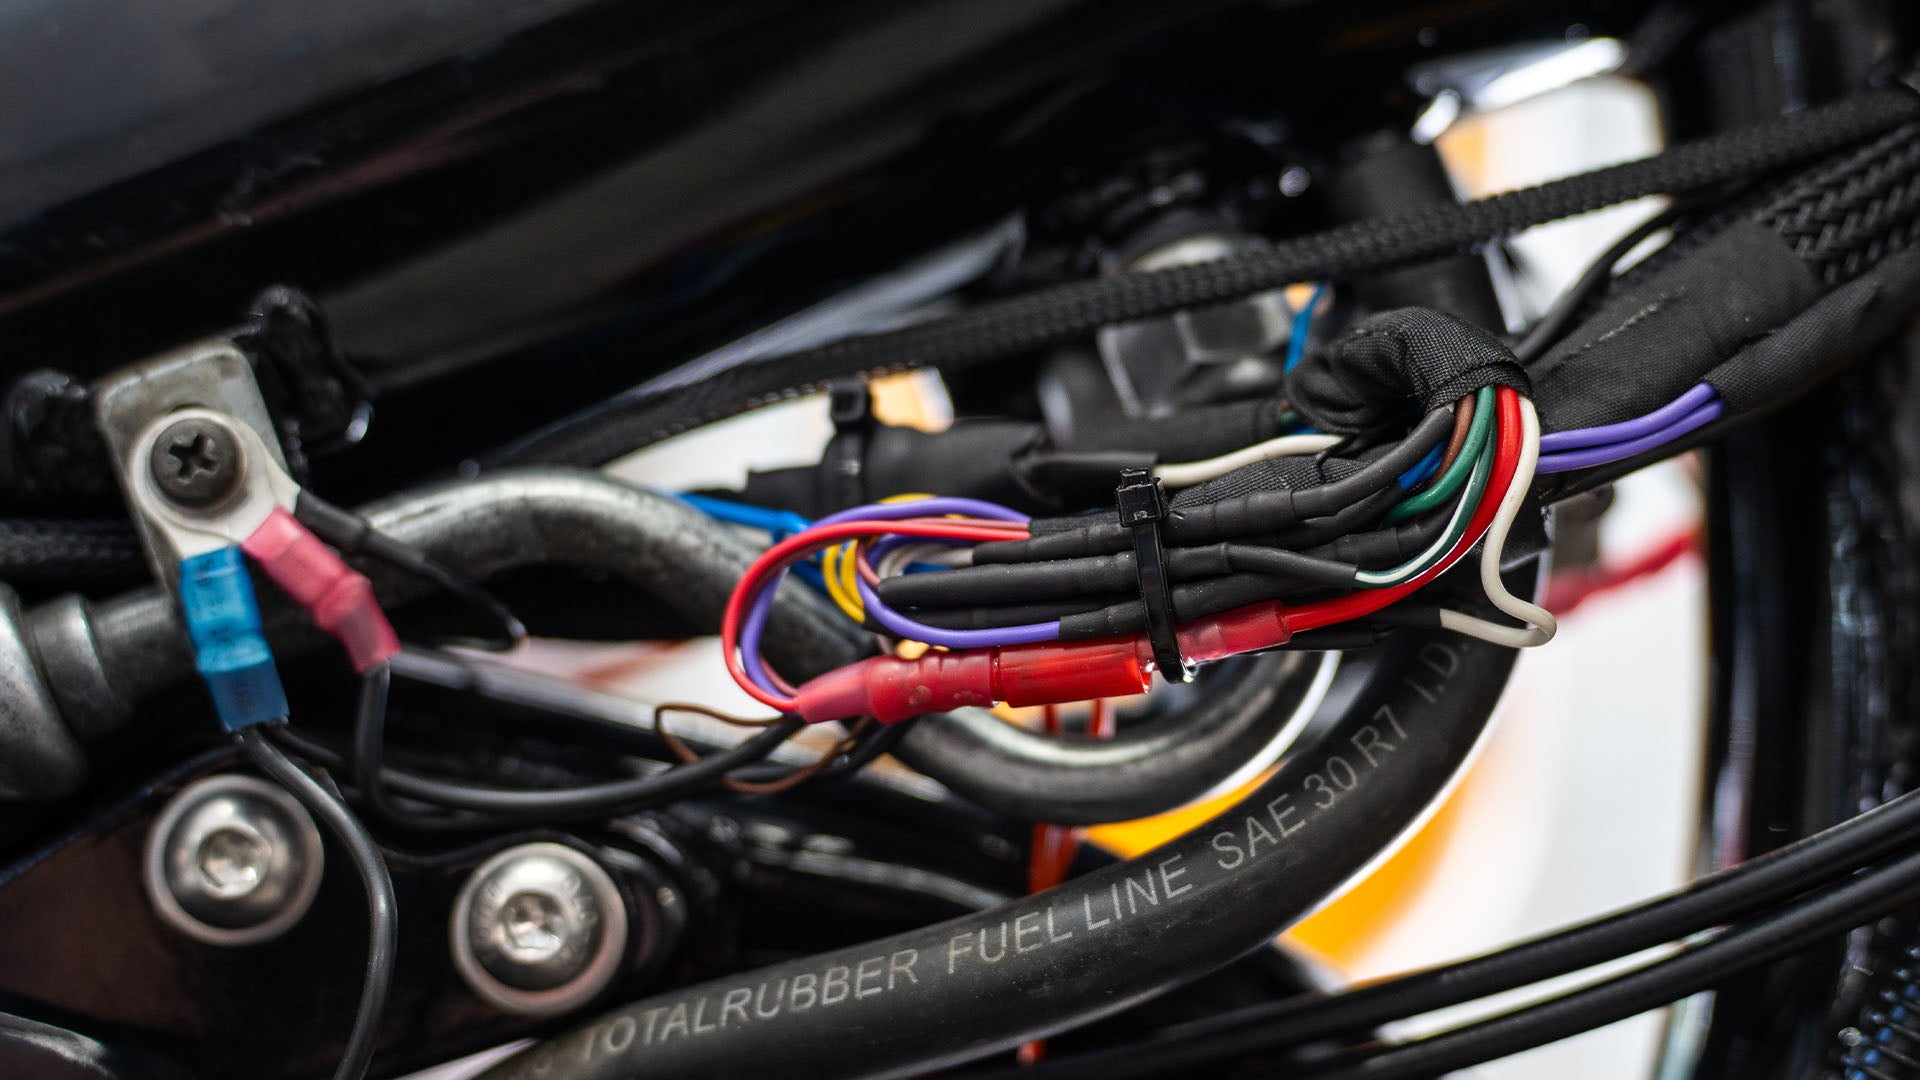
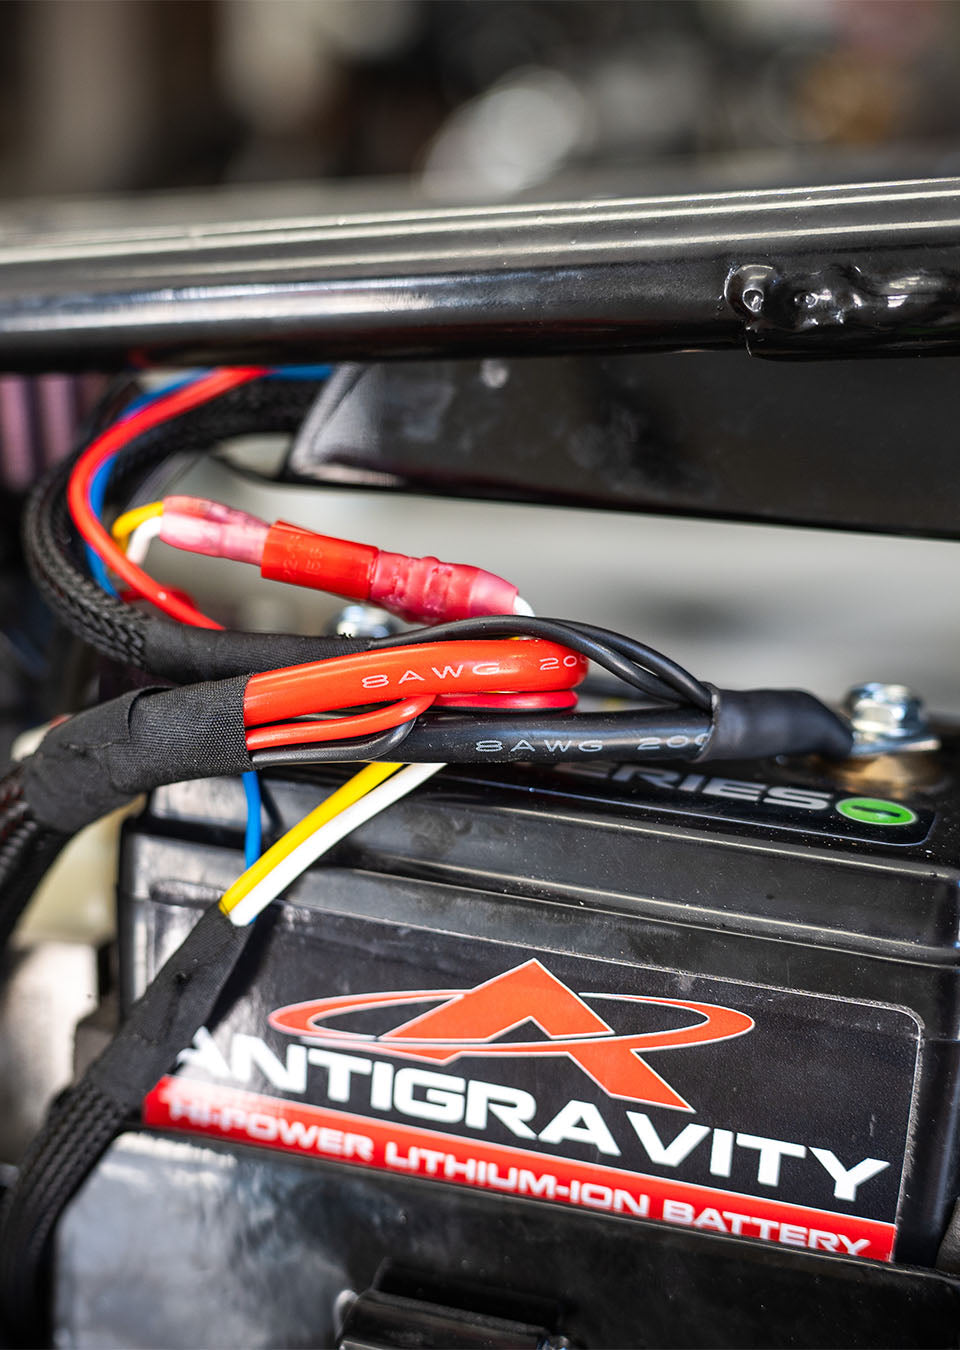
Set up for your install starts with the loom preparation. Make sure all connections you want to be making are run back to the battery tray or where the black box will go. Make sure to leave extra length in the wires you run to make it easy on yourself when neatly routing your cables.
The first step involves laying the groundwork for your rewire, especially focusing on routing all necessary cables towards the battery and electric tray areas. This stage is critical for setting up for the black box installation and involves identifying connection points for various components like speedometer, headlights, and indicators beneath the tank area.
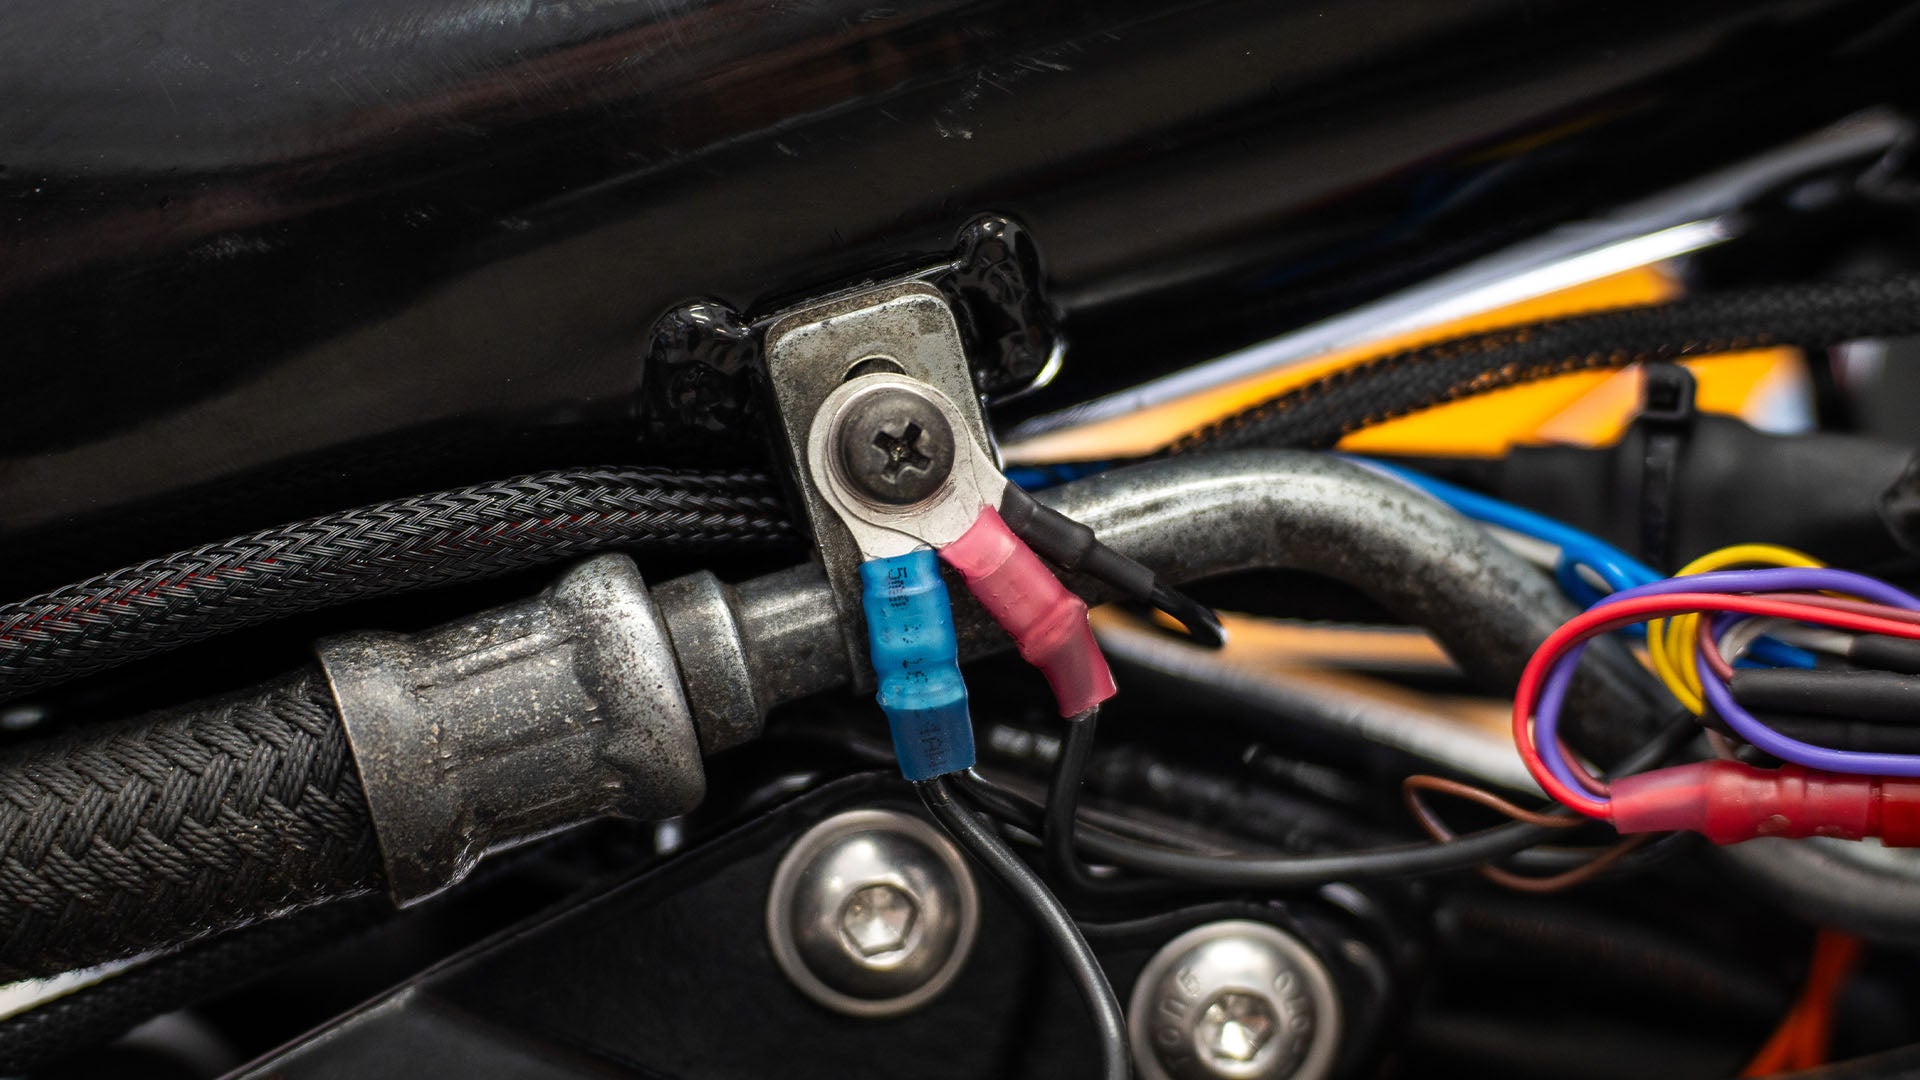
Make sure to sort out all ground wires associated with different components, a solid grounding system that forms the backbone of your motorcycle’s electrical health.
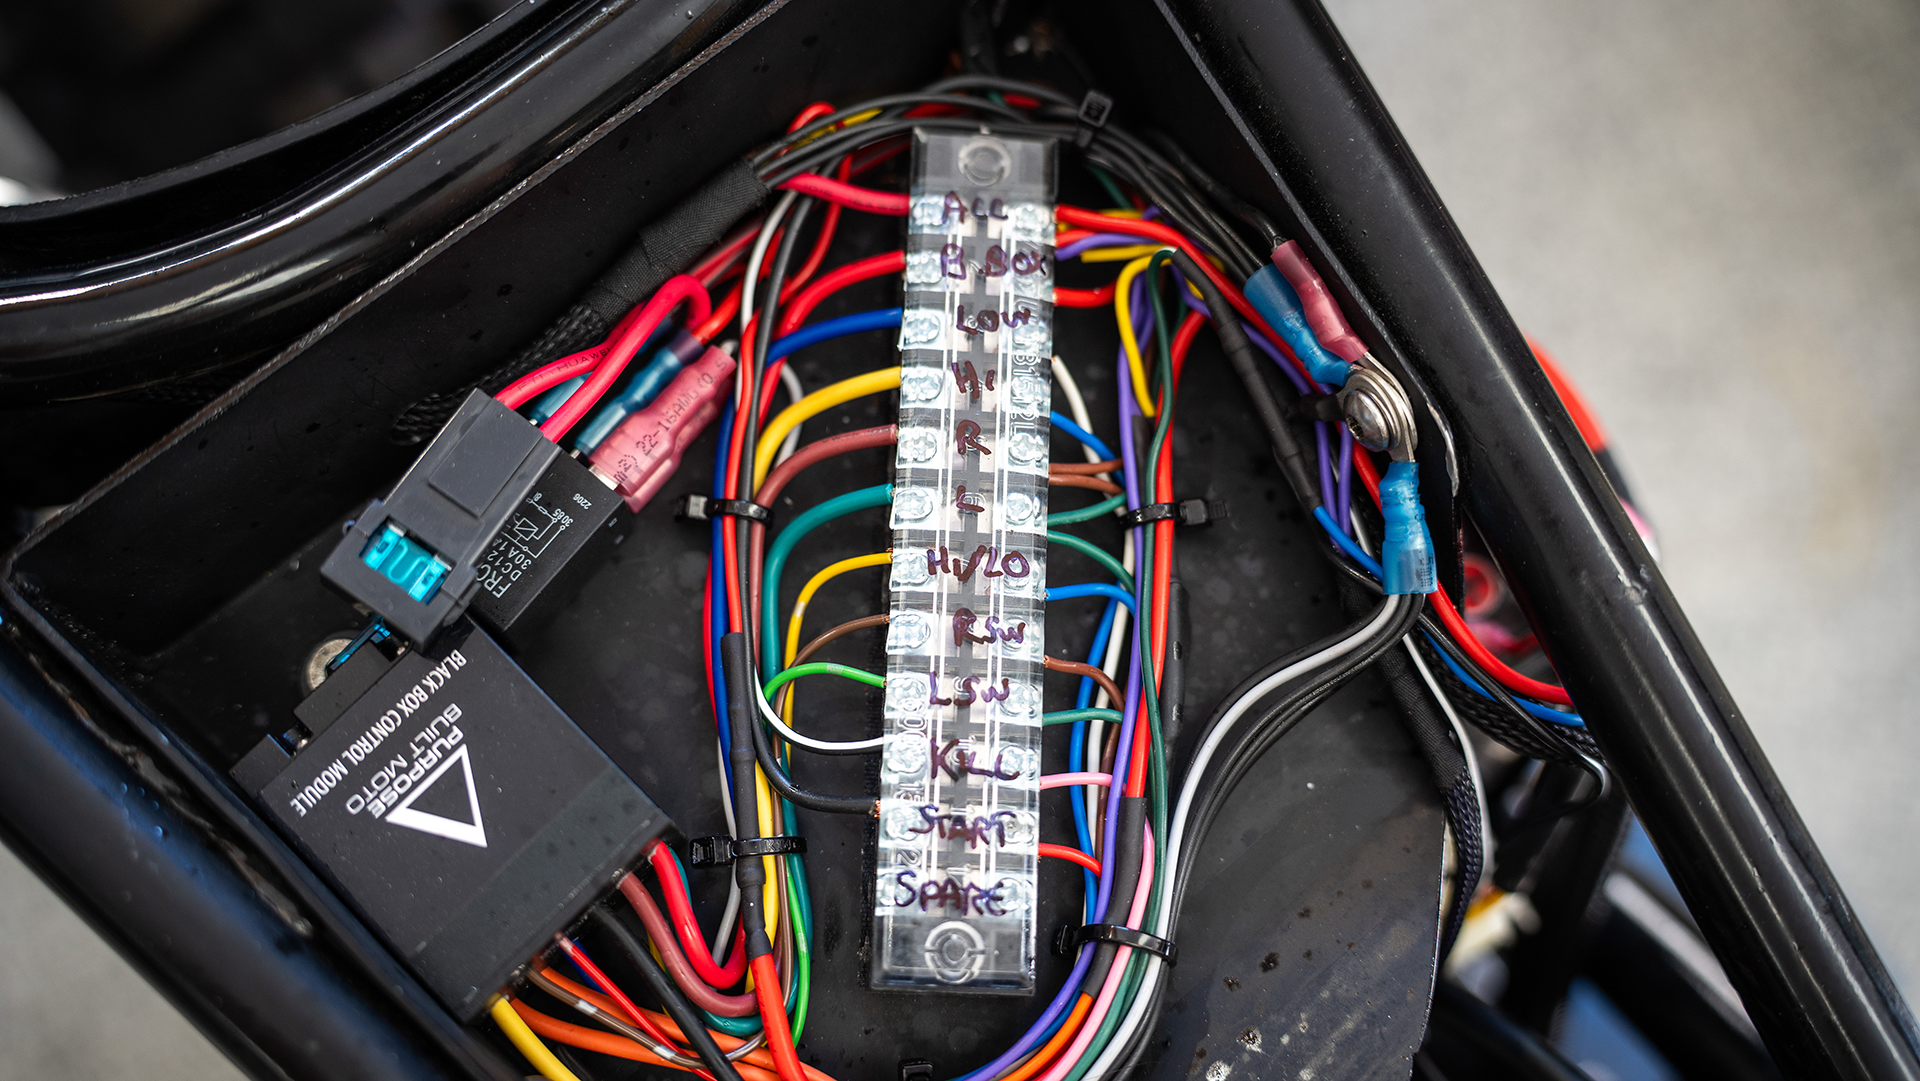
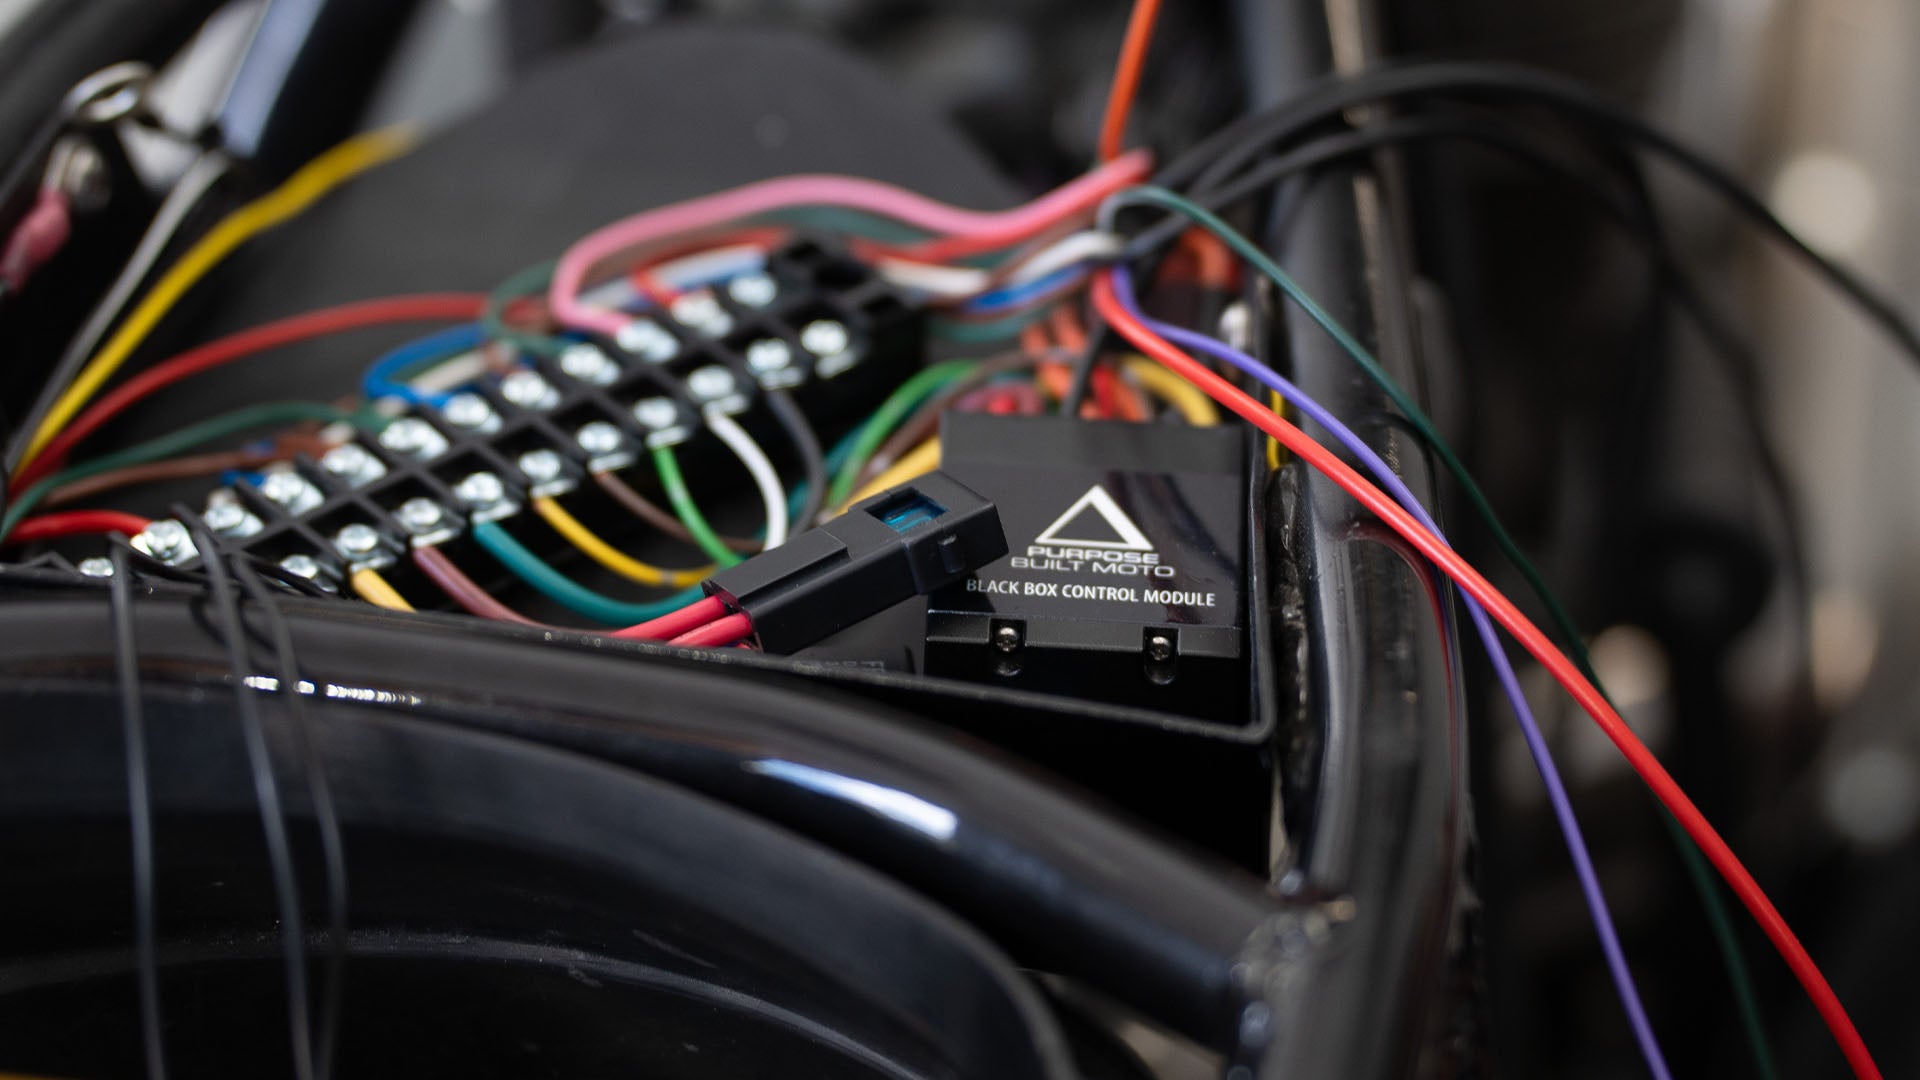
2. Terminal Strip Connection
After laying the groundwork, focus on connecting the Black Box wiring to the terminal strip. This simplifies the complex web of wires, making the process more manageable. Securing wires temporarily with zip ties can help in maintaining order during the process.
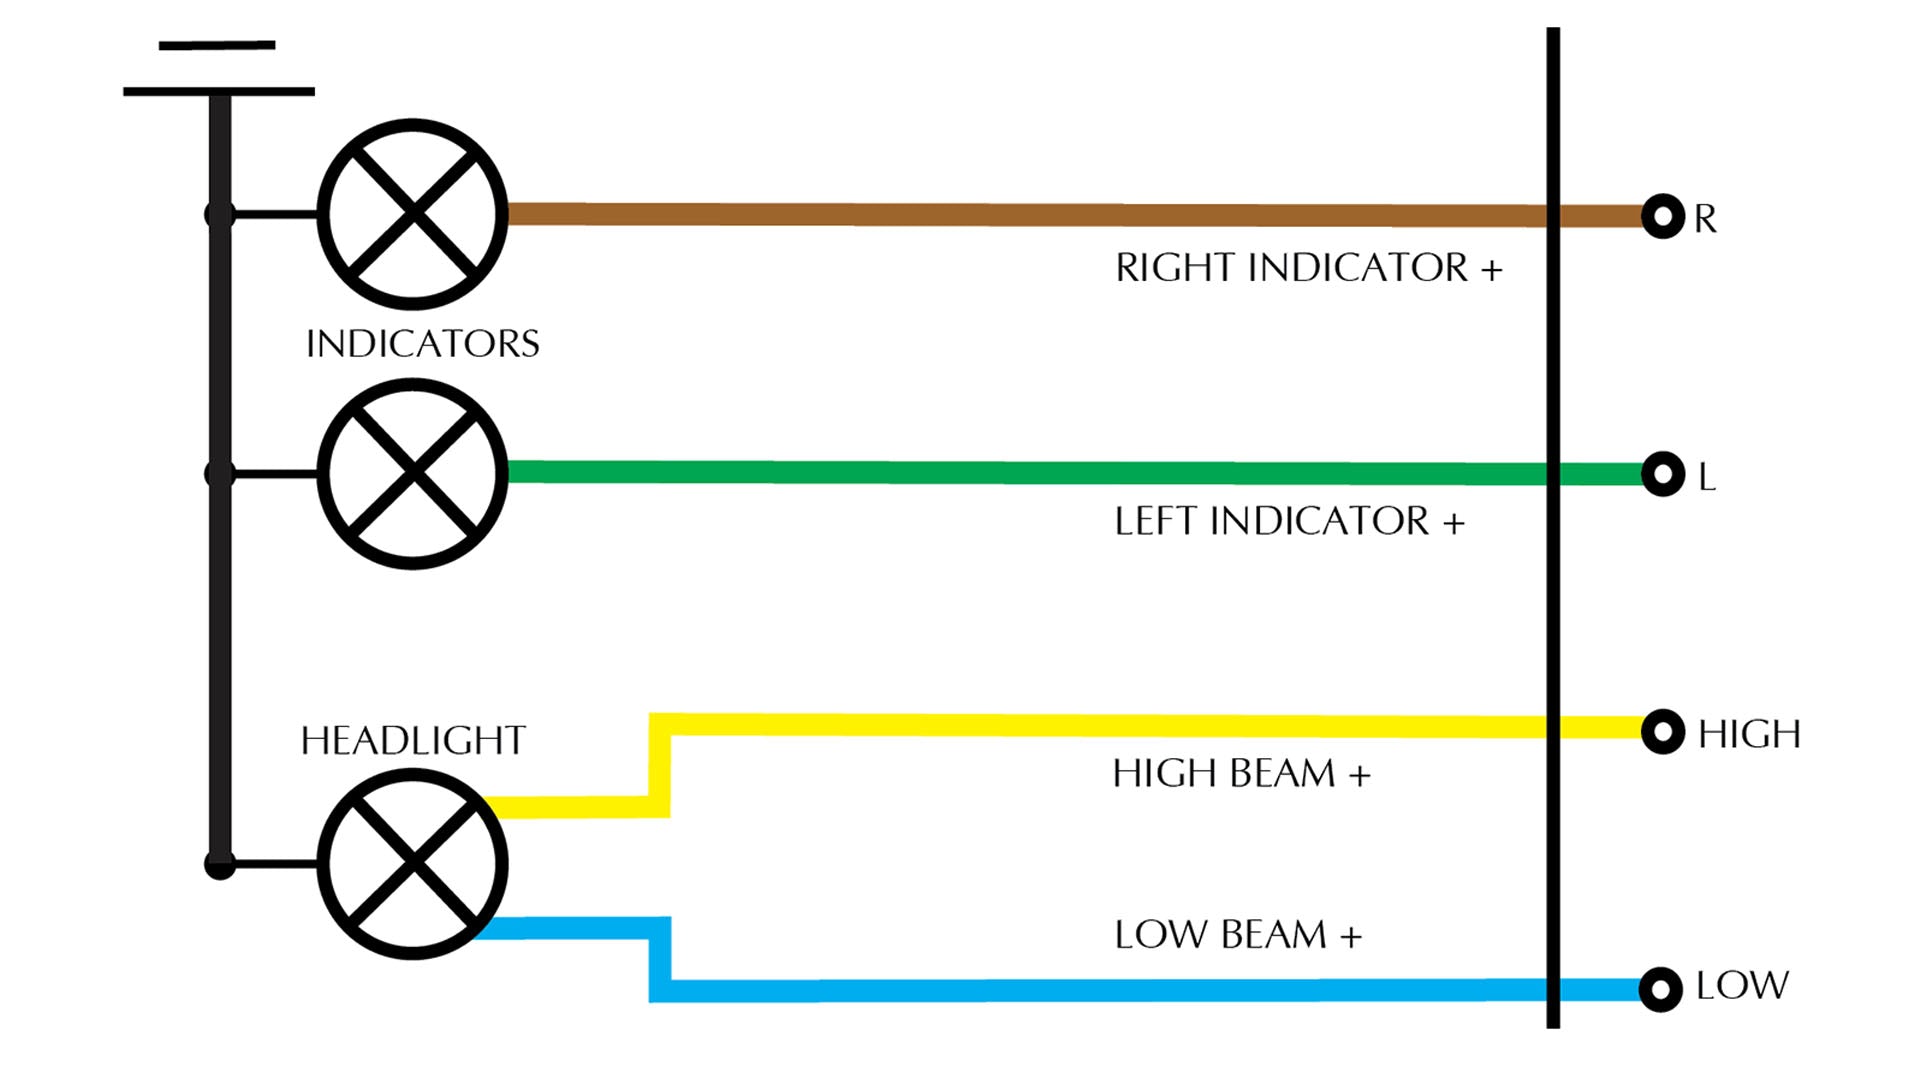

3. Lighting Connections
Next, start connecting your lighting circuits. Headlights, front and rear Indicators will come first. Then the brake light switch and brake light power cables including the splitter if you have one. Your number plate light will be connected later to Accessories circuit.

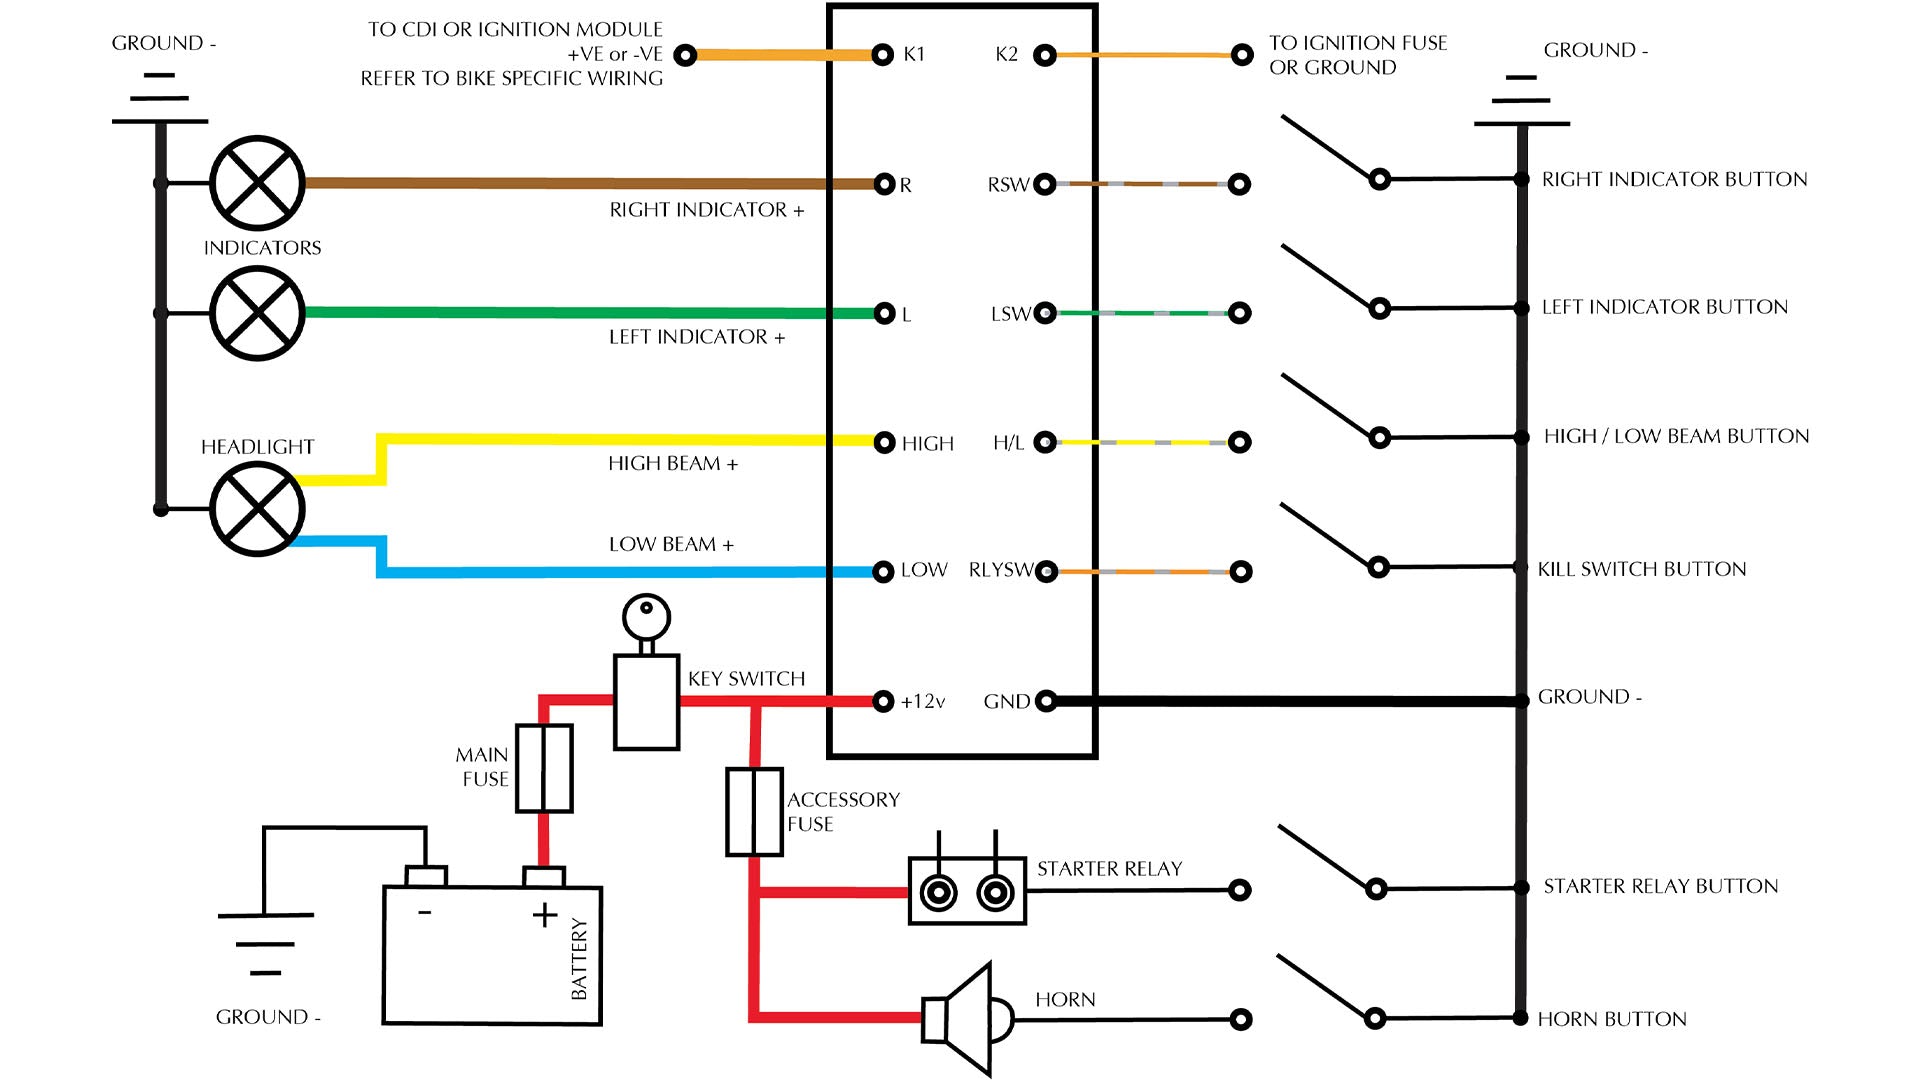
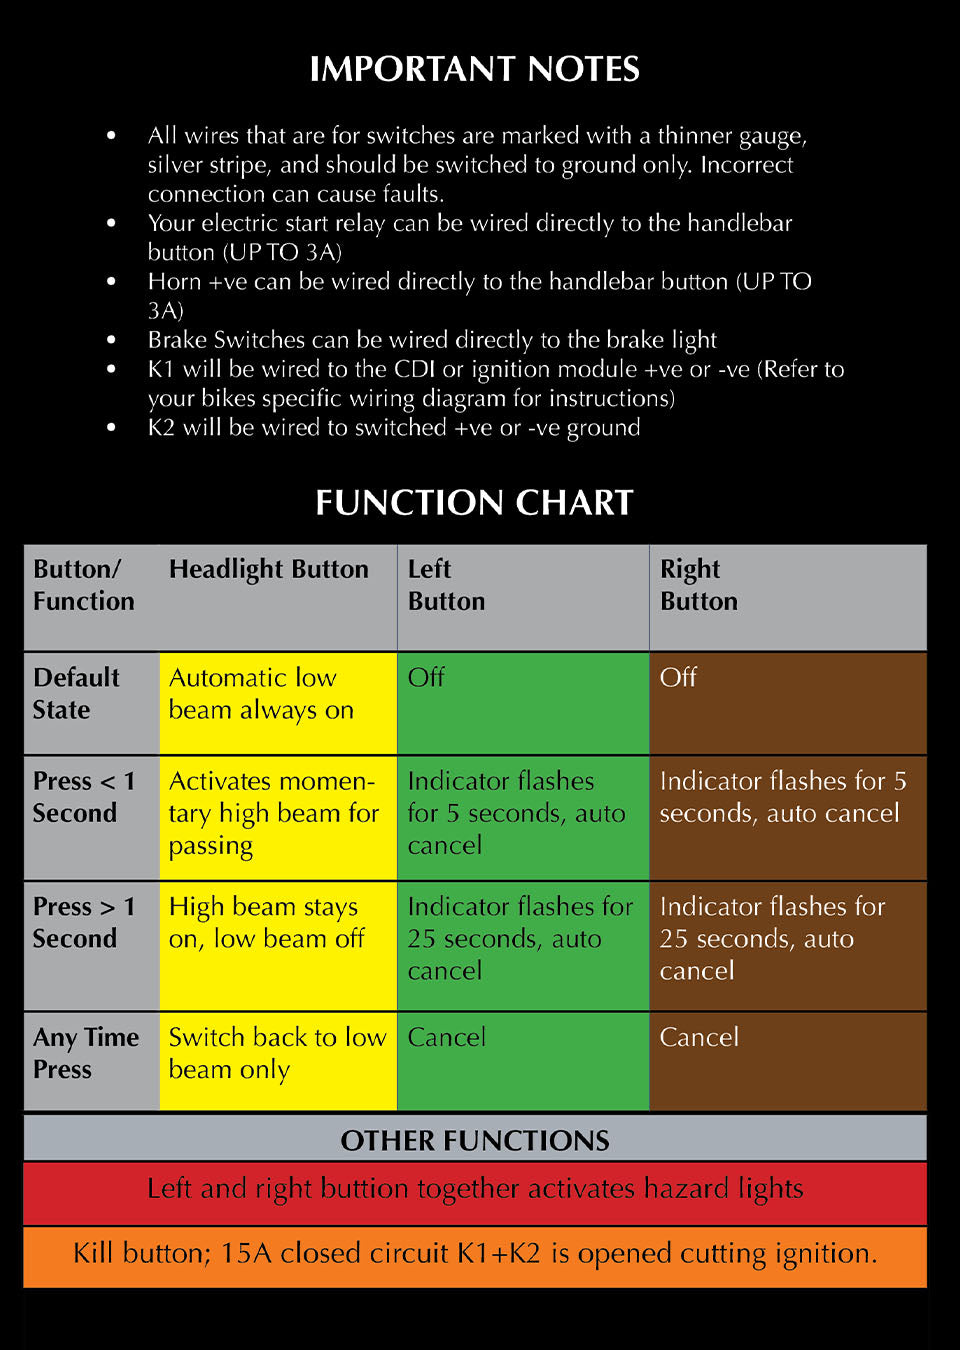
4. Switches
Connect all of your Handlebar switch outputs to the switch wires to the Black Box terminal strip. Make sure all of your handlebar switches switch to ground, switching to 12V +ve can damage your system.
5. Starter and Accessories
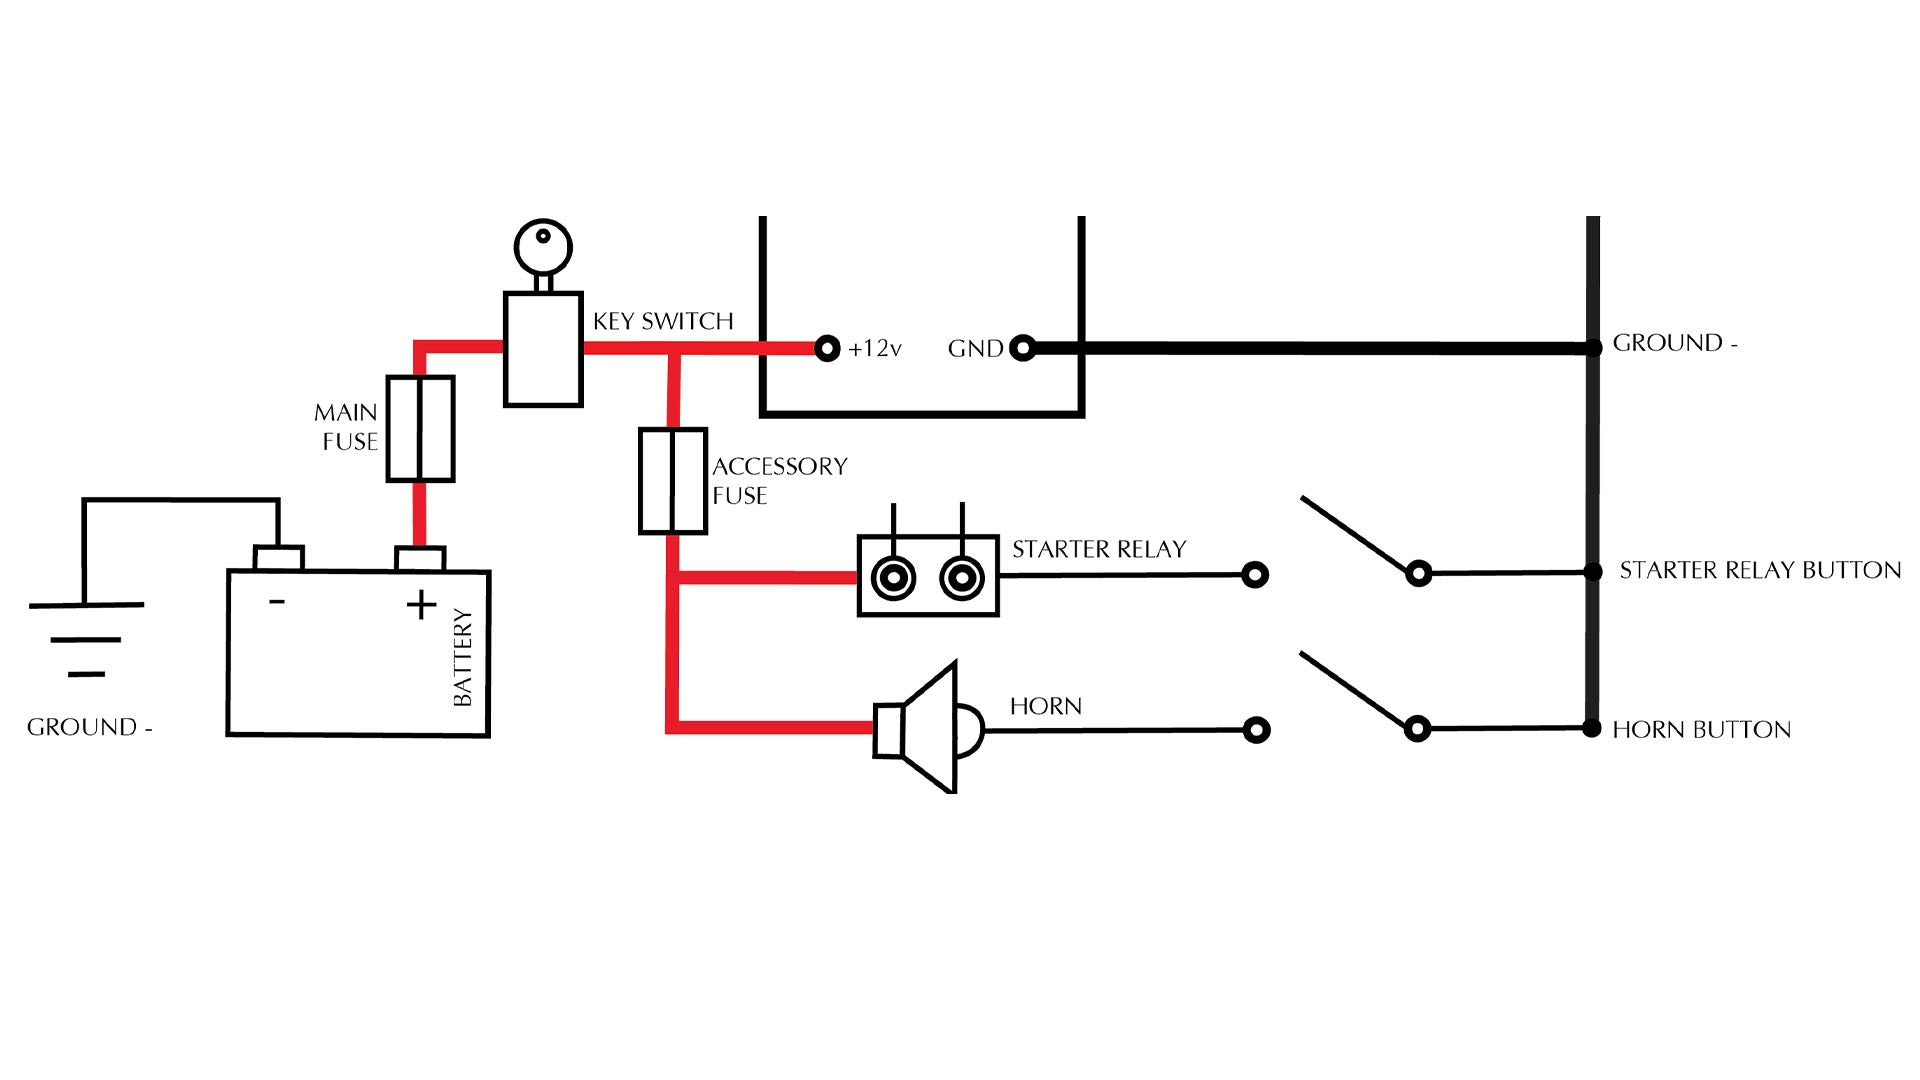
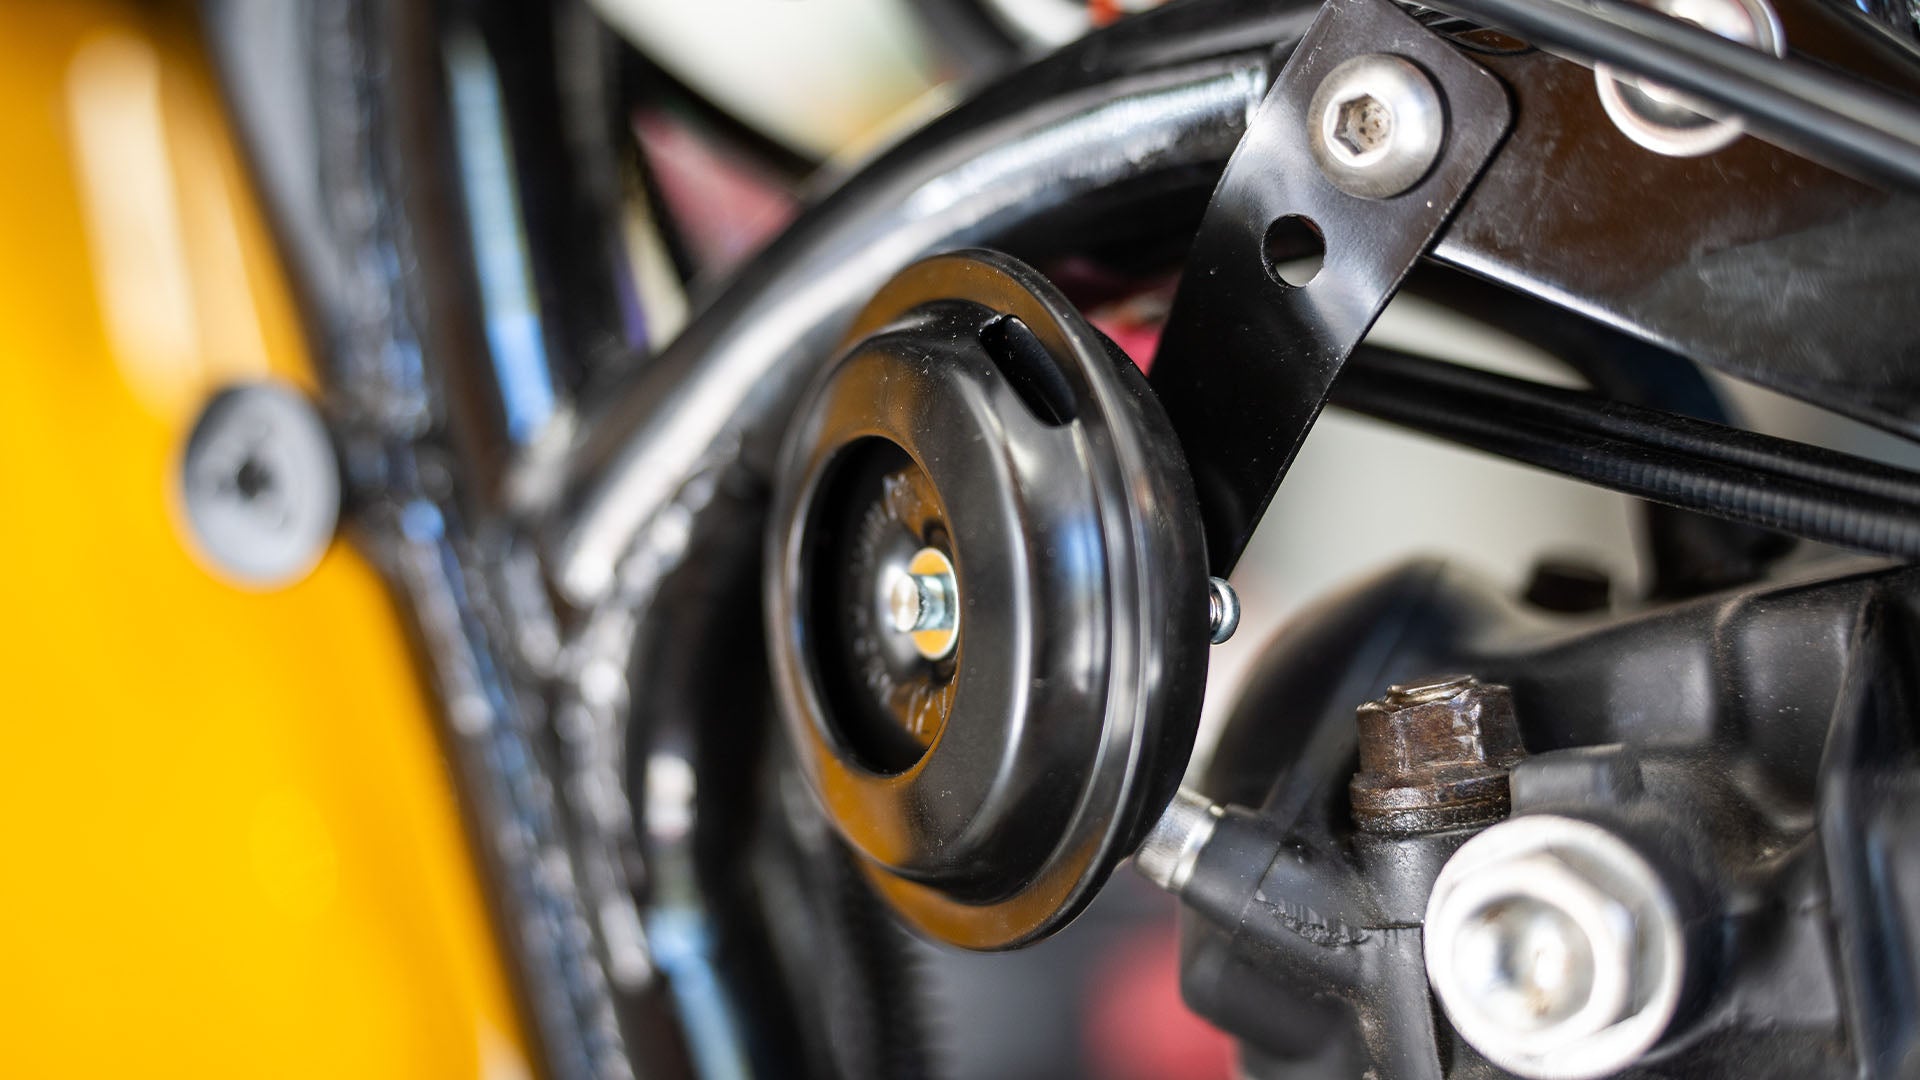
With the lights and switches ready, it’s time to wire up the starter motor circuit and accessories. The Accessories circuit powers components that arent run through the black box like the speedometer/dash, brake switches, number plate light and horn.
6. Testing
The final step, and arguably the most critical, involves thoroughly testing your rewire job. Break this down into manageable tasks:
6.1 Grounding and Continuity
- No Battery power
- Multimeter set to OHMS
- Confirm all ground connections are secure and offer minimal resistance.
- Perform continuity tests to ensure the integrity of your grounding system from end to end on your bike. Checking multiple points on the chassis and engine.
6.2 Inspecting Positive Circuits
- No Battery power
- Multimeter set to OHMS
- Carefully check that no positive wires on your terminal strip are shorting to ground. When using incandescent lighting you may find a high resistance connection to ground through the lamp.
- If using LED’s no ground connections should be present. If you find a low resistance reading to ground, check your wiring for damage or short circuits.
6.3 Handlebar switch function testing
- No Battery power
- Multimeter set to OHMS
- Test all switches they should all switch to ground at the correct corresponding switch wire on your terminal strip.
6.4 Applying Power and Final Checks
- Gradually apply power to the system through adding the fuses one at a time and checking they are feeding the correct circuits and components.
- Start with the accessory circuit first
- Conduct voltage checks and operational tests across all circuits
- Check function of your lighting, switches and accessories once power is applied.
Tackling a full motorcycle rewire is a challenge that not only enhances the reliability and functionality of your ride but also enriches your understanding of its electrical workings. Whether you're an experienced hand or a curious beginner, these steps and the Black Box offer an easy method to you through your next motorcycle rewire.
WE BUILD BIKES WITH PURPOSE.
Purpose Built Moto is home for unique custom motorcycle builds. We offer a unique motorcycle customizing experience in the heart of the Gold Coast.