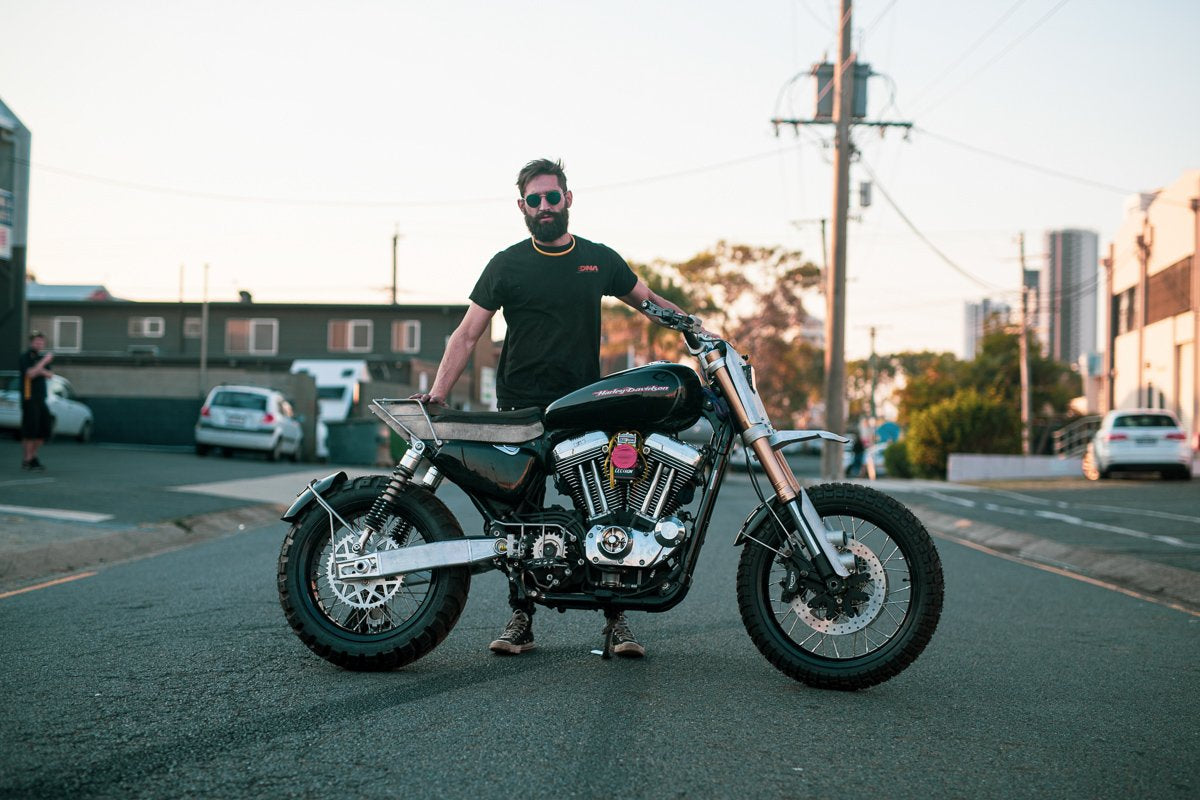
Signature Series 2006 Harley Sportster Scrambler.
The Ultimate Adventure Sportster Scrambler.
We always test our bikes, not just on the road, but for what we’ve built them for whatever that may be. However building a motorcycle, for the sole purpose of one of the most strenuous test rides you could ever throw at a bike is another story.
Enter our signature series Harley Sportster, built to do everything. Long range touring, mountain Twisties, off road logging tracks, tight single track trails, beach riding, and the occasional jump when the mood strikes. Sounds fun? Sounds like Wide of the Mark. Our latest film project collaboration with electric bubble.
Wide of the Mark is a film documentary about 6 riders on hand build bikes taking their machines through a huge and testing ride around Tasmania. We built 2 bikes for the task, but the one I’m riding is a 2006 sportster 1200C, a big heavy factory cruiser that I had to make light and nimble enough to handle anything Wide of the Mark would throw at it. There’s a whole build series on this bike on the Purpose Built Moto youtube, but for those short on time, heres a general summary of the build as a whole.
So where do you start converting a Harley Sportster into a Scrambler ready for adventure riding? I started with Shedding weight, and some beefed up suspension.

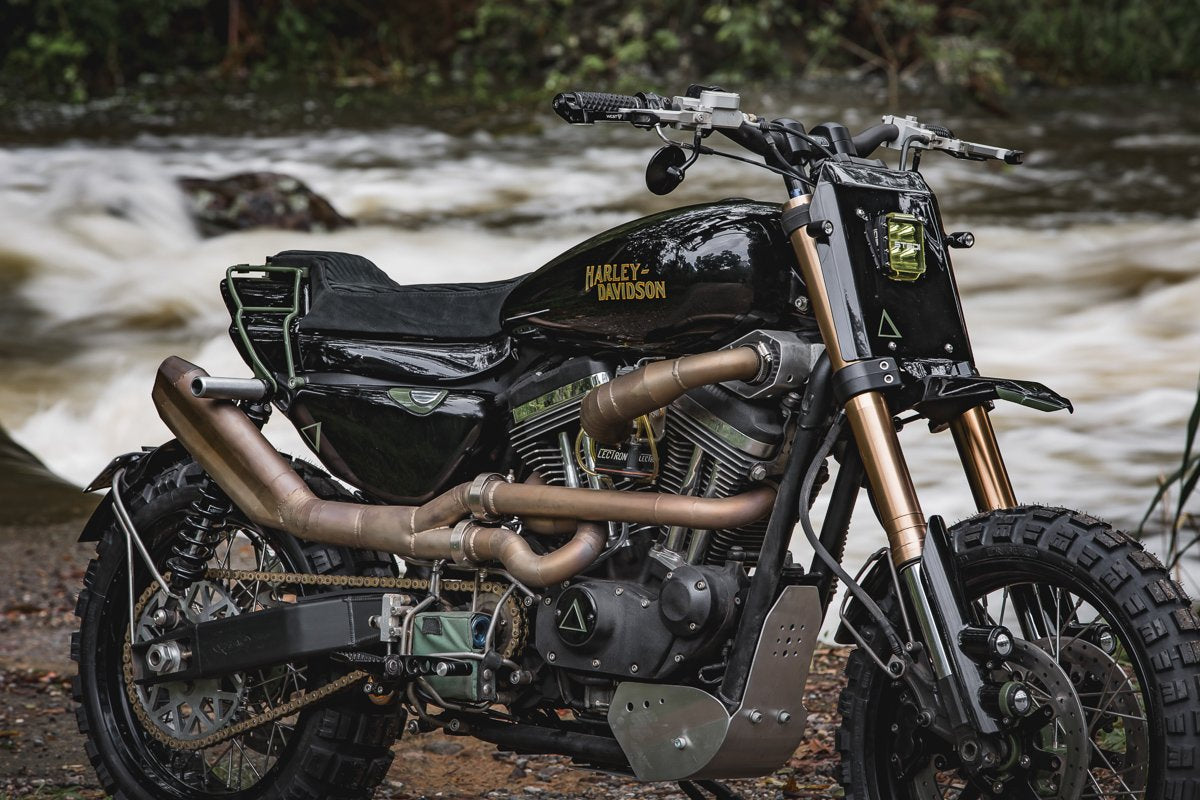
Stripping the bike to a frame, engine and wheels, the front end was torn off and replaced with a 2015 model Triumph Tiger front end. Using the complete fork set up and modifying the sportster head stem, I was able to gain better suspension, more travel and ground clearance, shed some weight and as a bonus got a braking upgrade aswell. With twin discs from Free spirits parts fitted to a 19” Alloy front wheel. The front wheel is wrapped in a 2 stage fender, the high fender has been hand built from sheet aluminium and the lower re-purposed and mounted from a spare fender I had at the shop.
These worked a treat with minimal rocks or spray coming off the front wheel. They look pretty trick as well I think.
Dressing up the front end with some custom fabrication, I made a set of fork guards that incorporate the Low beam headlights, a front headlight grill/number plate, that house Stedi LED lighting. Finishing up the front end is a set of Pro taper tracker bars, dressed with PBM 3 button switches, and ISR levers. The ISR levers were a great addition, making the clutch feather light and able to be used with 1 or 2 fingers, perfect for tight off-road riding that requires some clutch work.
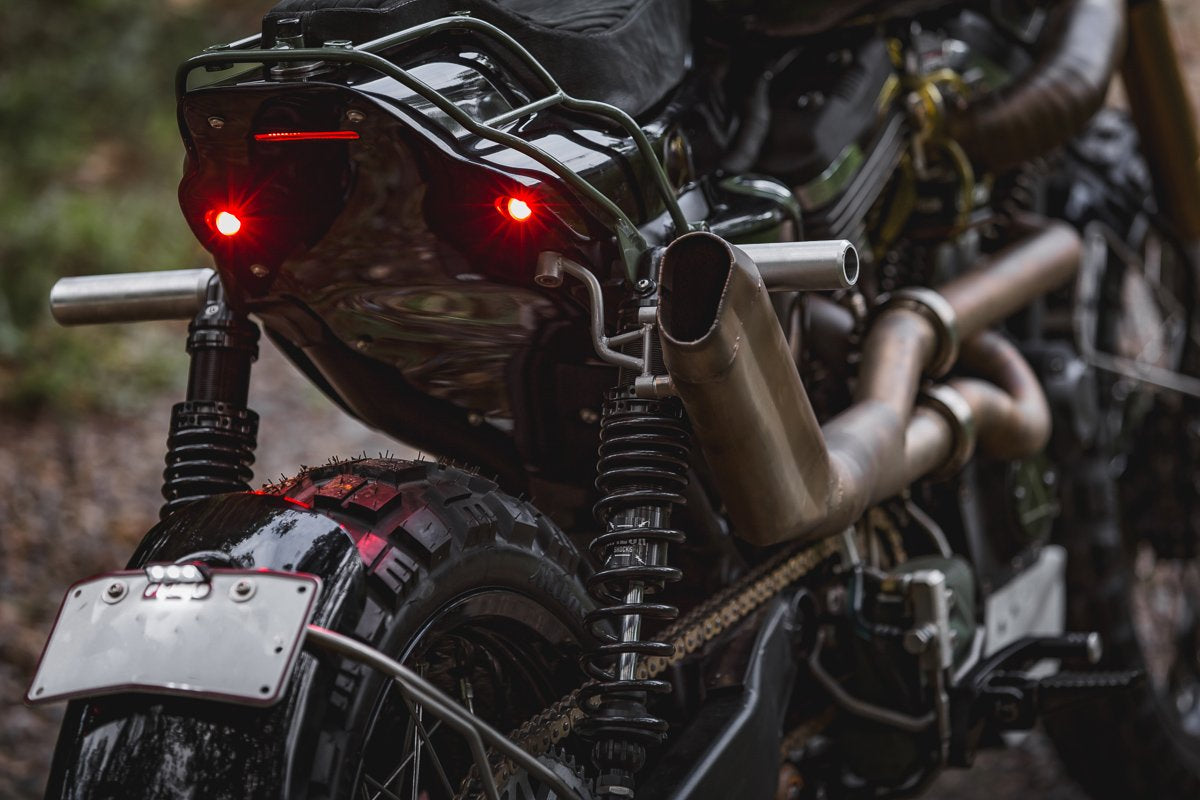
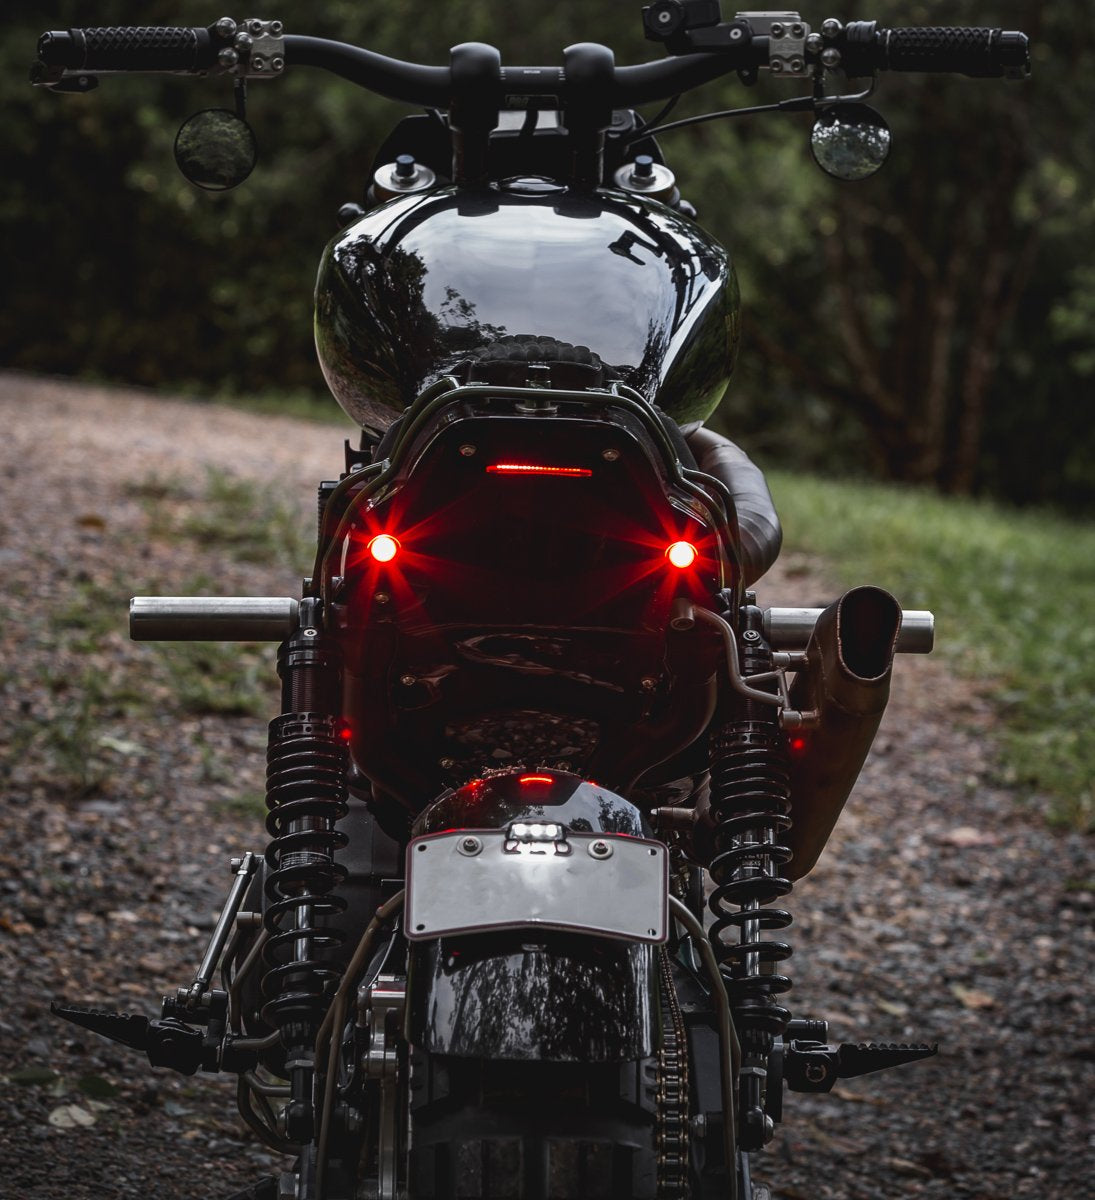
With the front end done, I set some dummy suspension on the rear while I waited for the 14.5” k-tech razor shocks so I could get moving on the styling of the sportster. In building an adventure driven scrambler I could take elements of any style I want. I wanted a practical tracker tail. It needed to look sharp, provide some storage, and enable bags to be mounted to it easily. My way of achieving this involved a sharp tracker tail design, and an exo-skeleton that would mount a bag rack, sissy bar and give enough storage under the seat for some camping gear.
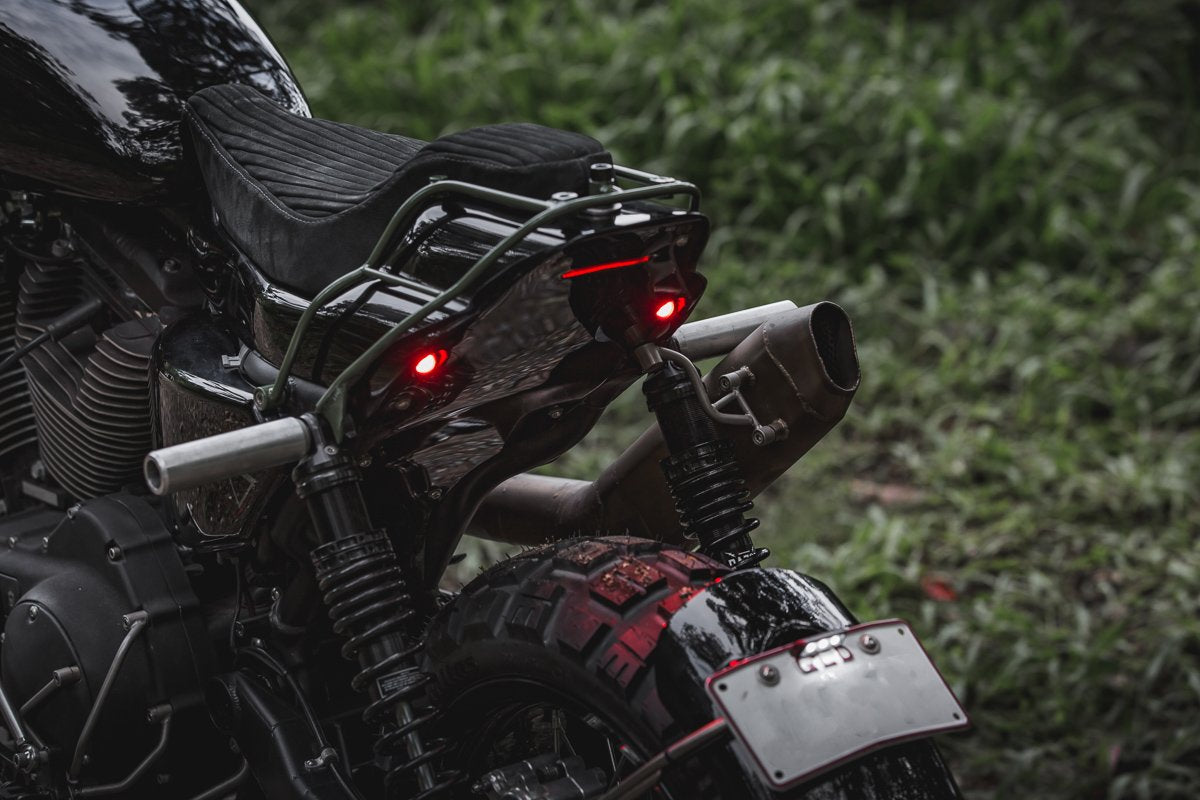
The finished tail gives enough storage under the seat for a bike rain cover or small tent and a tool kit.
I houses integrated PBM tail lights, and the exo-skeleton mounts a sissy bar, and small side bag, that corries my tools+ spares and gives tie down points for my larger backpack. The seat latches off with a cable latch, and flows nicely from the standard XL1200C sportster tank. Finished in a black nunuck leather. The choice of tank was aesthetic, but also functional giving me a range of about 330kms to a tank.
Another major upgrade is the aluminium swing arm, giving a good weight saving and extra rear height of about 35mm over the stock swing arm. Partnered with the K-tech rear shocks the sportster sits with a ground clearance of around 210mm loaded. Bettering that of the BMW + Triumph adventure tourers. Running a 17” x 5.50 aluminium rim laced to the stock sportster hub, a billet proof rear brake caliper assembly and a custom fabricated rear fender/plate mount. The tyres used for the Wide of the Mark trip are the Mitas E-10, which I was super impressed by, on and off road. Grippy in soft off road conditions and not noisy or lumpy on road, the only problem I had was in soft sand where the knobby tread pattern and weight of the sportster would simply dig the rear wheel a trench. That’s to be expected when you build a dirt bike out of a lump of American highway pig though. The sportster scrambler also runs a chain conversion, with slightly lower than standard gearing for our off road sections, sprockets supplied through Motoproducts.com.au. Sprockets used 22T front, 52T Rear.
That will get me a comfortable 100km/hr, and a 1st gear speed of 25-40ks off road, maybe a little to high still, but on an adventure tourer that’s about the best middle ground you could ask for.
Starting to work through the ergonomics the handlebars are mounted with a 100mm riser, and the footpegs have been custom mounted to sit just forward of the swing arm pivot. This allows a comfortable seating position but enables me to stand up and ride comfortably leaving room for weight shifting when needed.
The pegs are mounted using stainless bar work cages tailored to the shape of the bike. Mounted to the frame, and engine cases and linked to the shifters/brakes using custom linkage set ups.
In making the pegs symmetrical it left a bit of room on the chain side, inside the peg mount basket I was able to fit up an onboard air compressor you can see in the small green canvas bag. Come off the beach with 18 PSI in the tyres, leave the bike running and hit the compressor and you can ride away on bitumen at 30PSI no worries. It came in handy more than a few times during our trip and is always readily accessible.

The engine in the donor bike was relatively fresh with only 5000ks on it from new, so it was left as -is and upgraded with a high flow custom 2-1 exhaust, and alectron carburettor. Both I had a little fun with getting to work. The exhaust was fabricated high and tight, with a muffler made from scratch, it bellows a good note but is actually pretty quiet, which is perfect if youre in the saddle for 8 hours a day for 2 weeks straight!
Building my own bike I was allowed to get creative, as you saw with the exo-skeleton tail piece and cage style peg mounts, the exhaust was no different. Once the fabrication and finish welding was complete, the entire exhaust was bead blasted, cleaned and heat treated to gain a consistent straw gold colour in a matte finish. This is a first on any bike that I know of and the risk definitely paid off. One of my favourite features on the bike.
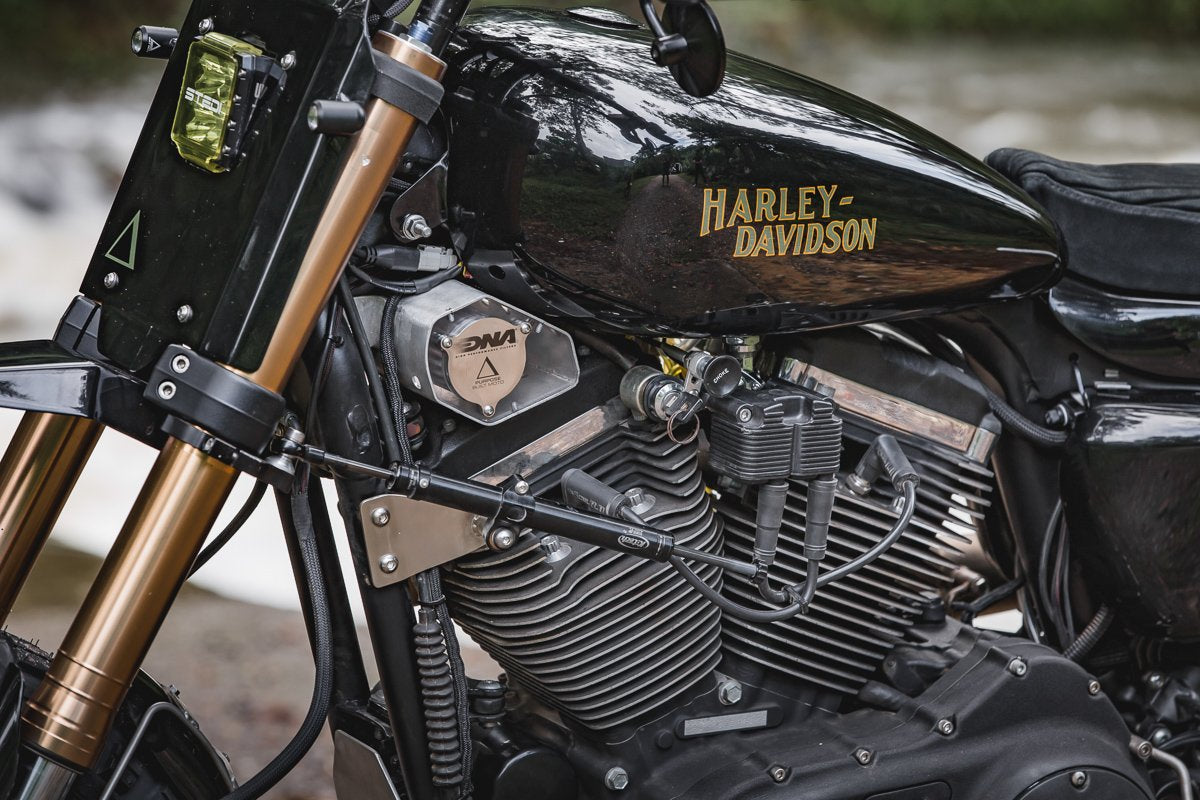
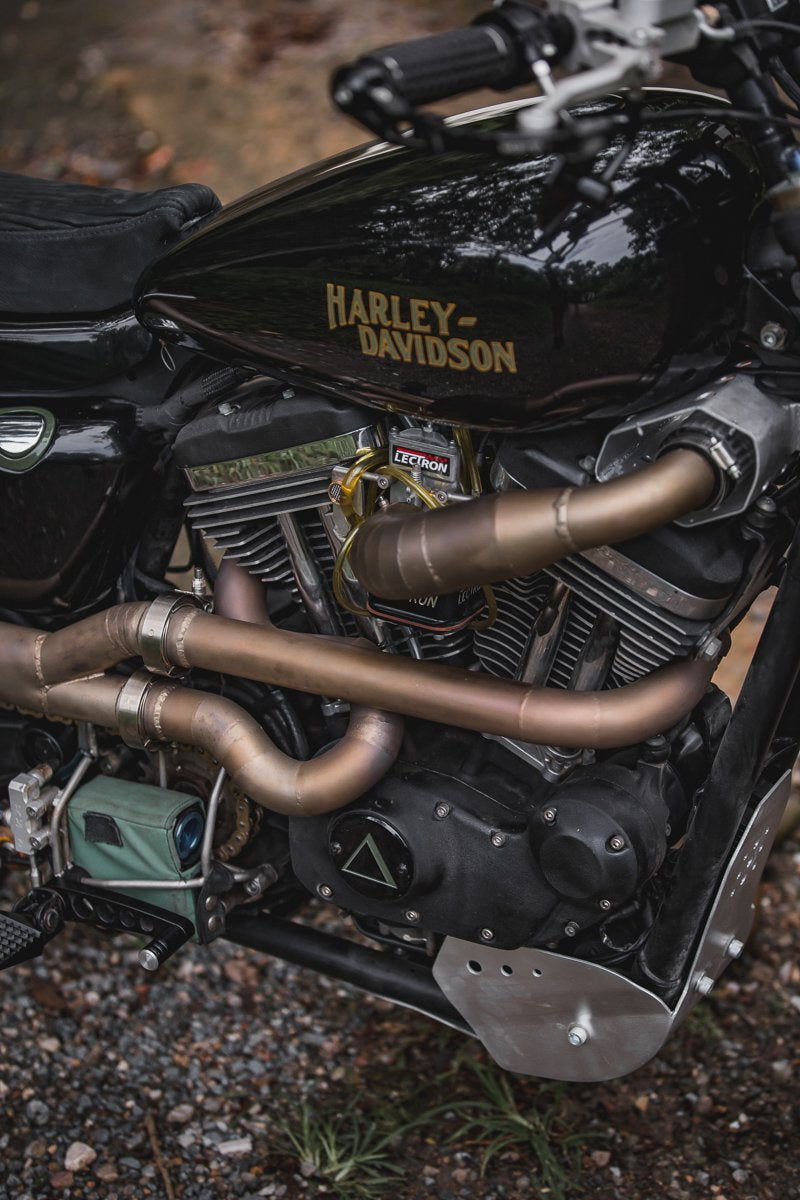
In mounting the lectron carb I needed an air box, no way on earth would I take an adventure bike out with the air box hanging out the side in the weather and dust. With the ignition coil re-mounted I was left a gap the perfect size for an airbox. Mounted behind the front headlight shroud and above the motor. Well protected from dust, mud, water crossings and rain. I had a filter made by DNA performance filters, built a protective air box from sheet metal and clear Perspex and linked it to the lectron carb via a Stainless steel manifold. The design inhibits air flow a little, but on the dyno we managed 64 HP with a pretty mild tune. On the road the Sportster scrambler air box design came into its own, while everyone was suffering from clogged pod filters or water ingress my sporty only needed 1 clean the entire 2 week trip and never let the bike choke in deep water crossings or heavy rain. If you’re interested in the set-up for your sportster project get in touch, I may do a small production run for like minded Harley Sportster off roaders.
Final fabrication on the Adventure Harleysportster was an aluminium bash plate, and a last minute side bag rack to mount a kreiga waterproof adventure bag.
Simple things that made all the difference. The side bag allowed me to keep my weight low on the bike, although if mounted too far forward would hit my leg when standing, be careful of that if you’re doing it yourself, always sit and stand on the bike to check you’ve left enough room.
The finished product is a blend of styles, perfectly suited to what I think a sportster scrambler should look like. Tracker styling, but with some completely functional mods that make it a manageable, and enjoyable ride off road. Managing to strip 30kg off the bike leaving it sitting at 225KG wet, putting out 65Hp and with 180mm front wheel travel.

The Adventure Harley Sportster scrambler proved itself time and time again on the Wide of the Mark film trip. Handling just about any terrain. The only time I really struggled was in really soft sand, but that could be put down to my skills as a rider too.
building a bike like this has taught me a lot, and riding it for 2 weeks straight as soon as I finished it taught me even more.
As my second ever signature series bike, I’m proud of what I’ve achieved here and the Harley Sportster is a great snapshot of the skills I was able to put to use in 2019. Agressively styled, capable in harsh terrain and more fun than I could ever ask for in a bike. Shes just a tad heavy for my 70kg frame!

If you want to know more about the adventure Harley Sportster or Wide of the Mark movie, head to our YouTube and watch the entire build series on this bike!
WE BUILD BIKES WITH PURPOSE.
Purpose Built Moto is home for unique custom motorcycle builds. We offer a unique motorcycle customizing experience in the heart of the Gold Coast.


2 条评论
Very cool man! I’ve got a 2012 Switchback and considered building a Sportster scrambler too, but ended up with a CRF250L. So cool to see how well it works! I still want to build one.
I Love your Bike.
I am building one very similar.
Interested the Buying the air intake and exhaust.