We’re nearing the home stretch of the Nemesis 400 Scrambler build, there’s some important work to finish before this bad boy rolls out of the garage, then the real adventure begins.
In this episode, I’ll be running through some final touches of fabrication which will include…
- Mounting an airbox filter guard
- Securing bag mounts
- Taking the bike apart to get ready for paint and powder-coat
- First important steps when putting a bike back together
Before we get into this episode, make sure you go follow @wideofthemark on Instagram to see what we have in store for this off-road machine, and the Harley Sportster we’ve been building along with it. We appreciate all the support we’re getting and I’m excited to show you all what we have planned.

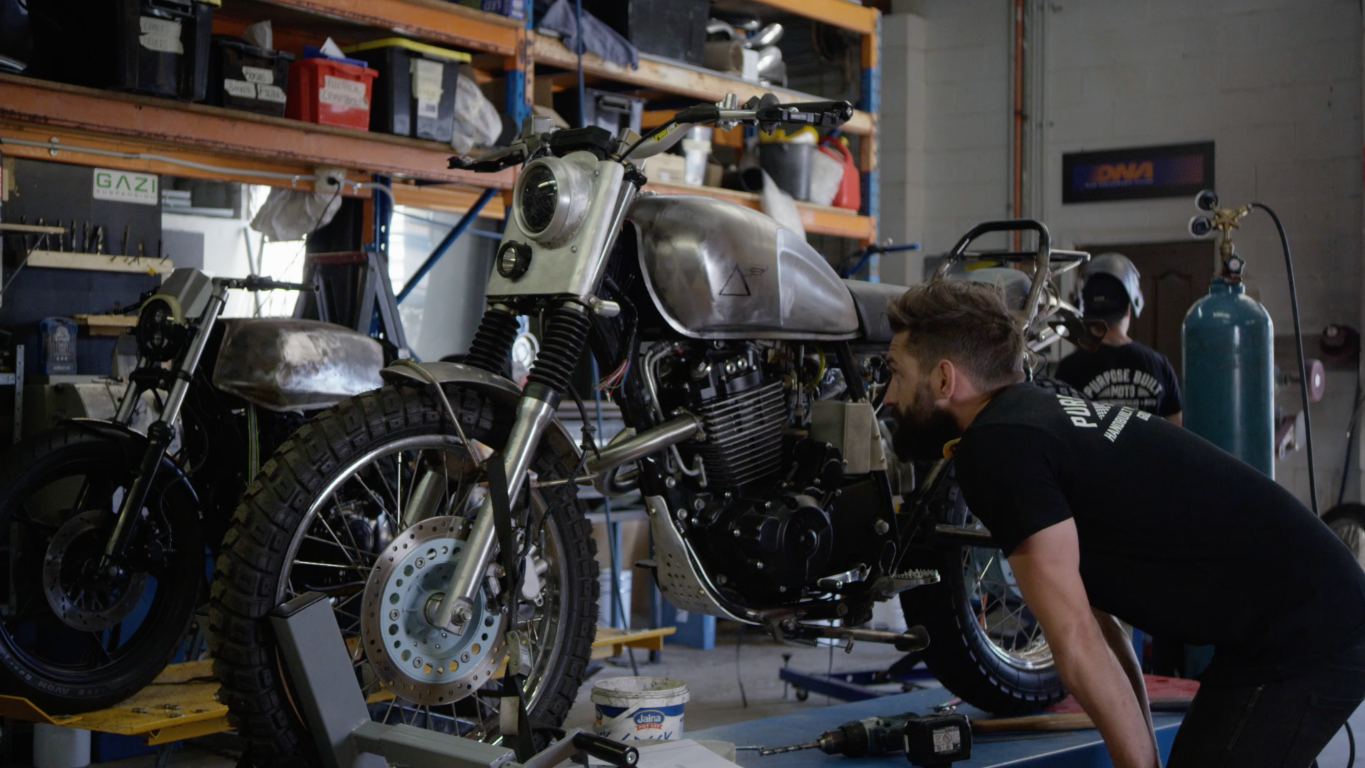
Starting in on the airbox guard, I used a piece of cardboard to cut and pattern a small piece of aluminum backed with stainless-steel mesh that will be fixed to the frame in front of the airbox. I don’t want anything flying in so I think this is a good precaution to avoid any headaches on the road.
Something I’ve picked up over the years when it comes to bag mounts is that most designs tend to flap in the wind, and riders get really annoyed about it. So when I build a bag rack on a bike these days, I’ll put a sheet of aluminum inside the bag. Layering the skin with a sheet of aluminum is a lot more sturdy when attaching it to the frame so it won’t flap around.

At this stage of the build, we’ve finished all the fabrication. That’s it! Finished! I’m going to take a moment to look back on all the fabrication work we did for this bike because it was a BIG job.
- Building a scrambler headlight plate
- Desert sled style front fender mount
- Stainless Steel rear tail hoop
- Custom brake light mount
- Digital dashboard bracket
- Custom seat pan and leather upholstery
- Engine wrapped headers linking to the muffler
- Bag racks
- Dirt bike pegs
- Mounting a battery box
In addition to all the electrics and handlebars, it’s been a fun build, to say the least.
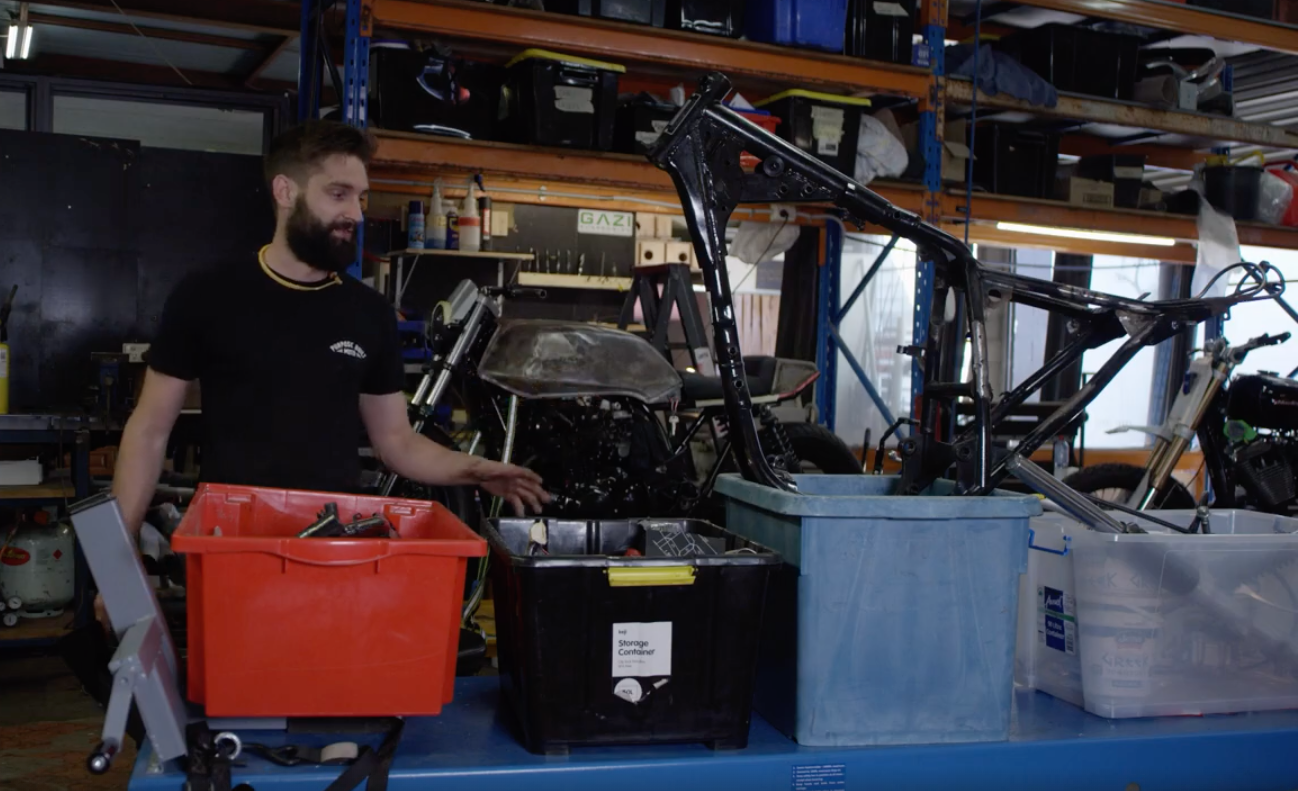
Before I move on and start taking the bike apart to send it off to powder coat and paint, I always take a moment to look at what still has to be done to the frame before reassembly. I always make a very detailed list of every little job I still need to do to the frame before putting it back together again. The last thing you want is to be halfway through reassembly before you realise you forgot to do one tiny job that requires you to disassemble the whole thing again. I’ve learned that lesson the hard way once, and that’s all it took – so remember, make a list.
When I start taking parts off of a bike I always separate them into four boxes…
- Parts to go off for paint and powder coat
- Untouched parts ready to go back on (Shocks, grips, exhausts, etc.)
- Polished and brushed bare metal parts
- Suspension, handlebars, nuts & bolts
It’s also a good idea if it’s your first time to take notes and photos of where you put your parts.
We sent the frame off for powder coat and decided to go with a dull silver colour. I’ve started forming the colour scheme and other style details in my head, but I’ll save that for the next episode.
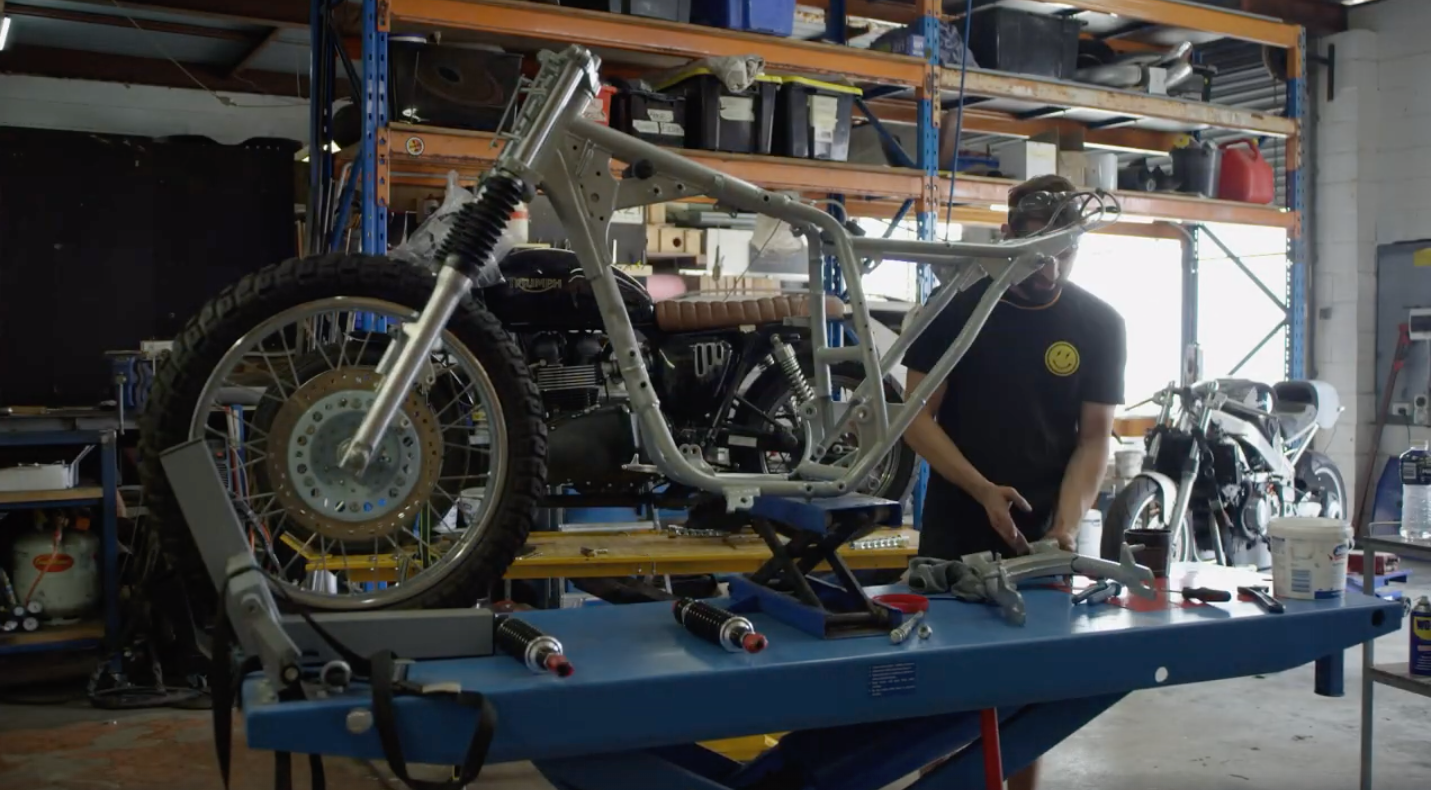
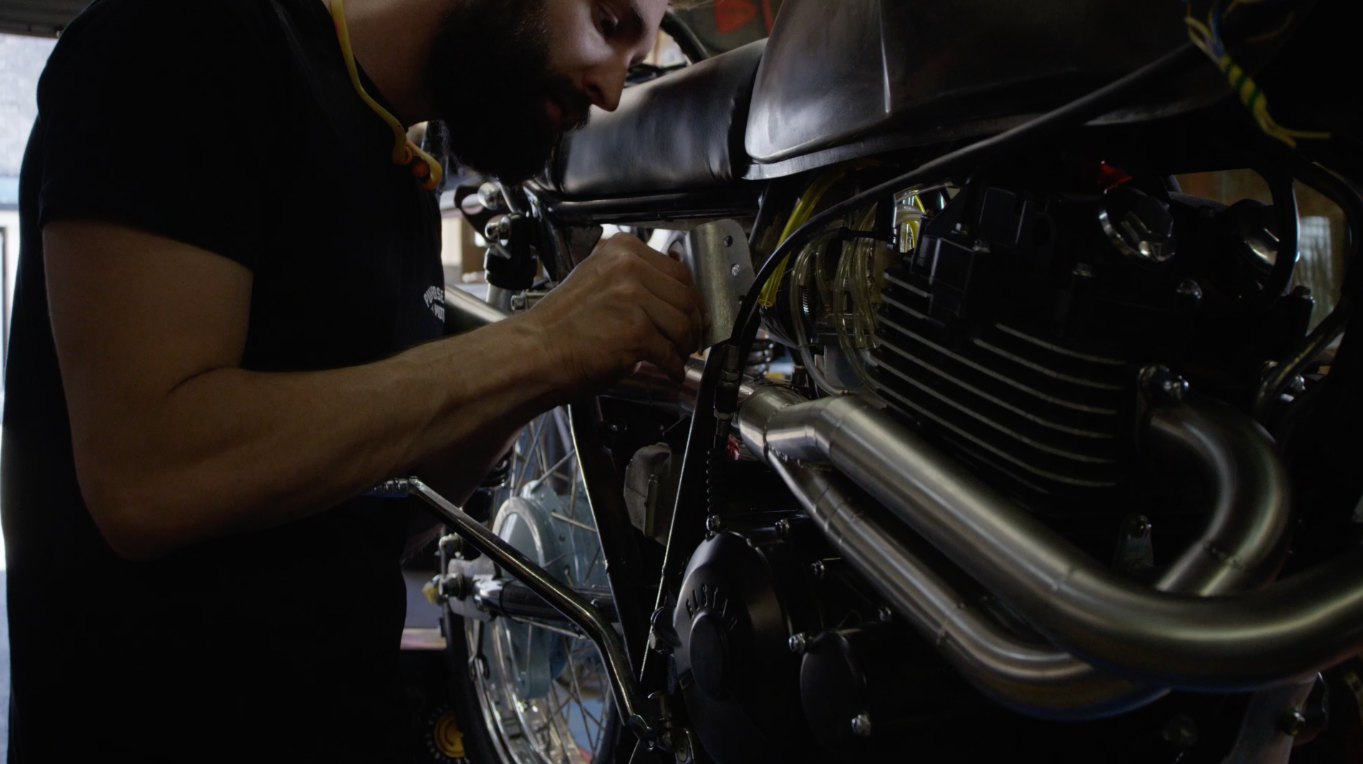
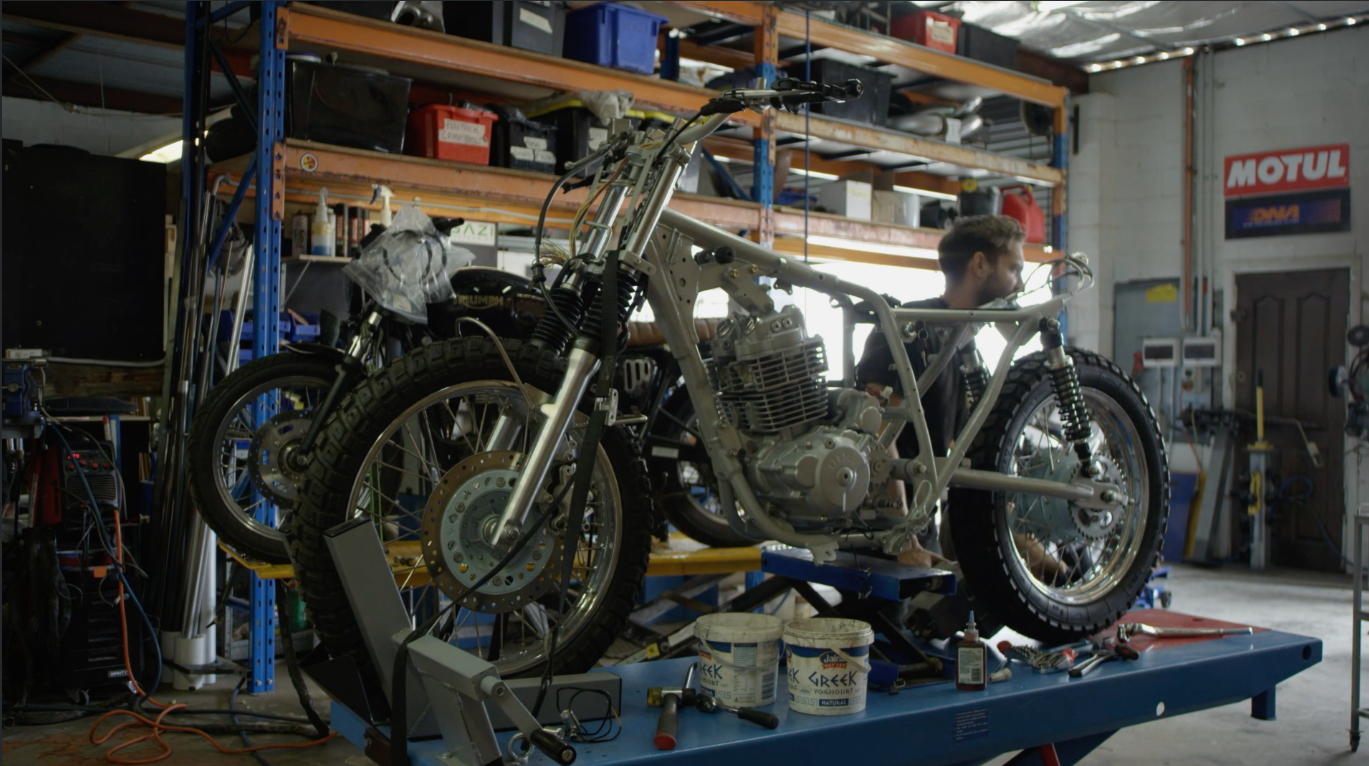
Time to start reassembly. During my time as an electrician building switchgear, I had very intricate jobs that had to be 100% checked and torqued. One thing I picked up working on these jobs is that it’s best not to trust yourself to do this little by little at a time. I’ve found the best way to tackle a job like this is to assemble the bike, finger tighten everything and then work your way from one end to the other and torque everything.
For this build, the first parts I assembled were the engine, suspension, wheels, handlebars, and brakes. Then I worked my way from front to back with my torque wrench and a list that tells me the torque things need to be tightened to.
That’s it for the penultimate episode of the nemesis 400 scrambler build. In the final episode, we’ll be finishing reassembly, going through the colour scheme and style accents.
Thanks for following me on this project, I’m psyched for next episodes wrap up of the project.
WE BUILD BIKES WITH PURPOSE.
Purpose Built Moto is home for unique custom motorcycle builds. We offer a unique motorcycle customizing experience in the heart of the Gold Coast.