Sol Invictus Nemesis 400 Adventure Bike – How to build an adventure Bike Ep3
Headfirst into episode 3 of the Sol Invictus 400 Adventure bike build. Mounting a heap of accessories on the Nemesis Scrambler to help the Mini Adventure bike really start to take shape. These steps show a lot of helpful information for garage builders on techniques with mounting lights and aftermarket accessories.
In this episode of the Nemesis Adventure bike build we show you:
- Mounting front and rear blinkers
- Getting creative with the tail light
- Fitting the Pro-taper MX bars
- Fabricating a digital dashboard bracket
Episode 2 on the Nemesis adventure bike covered a lot of the major fabrication, LED headlight, tail hoop and the aluminium fenders. The next steps to cover are about getting some smaller jobs sorted out to enable a better vision of the finished motorcycle.
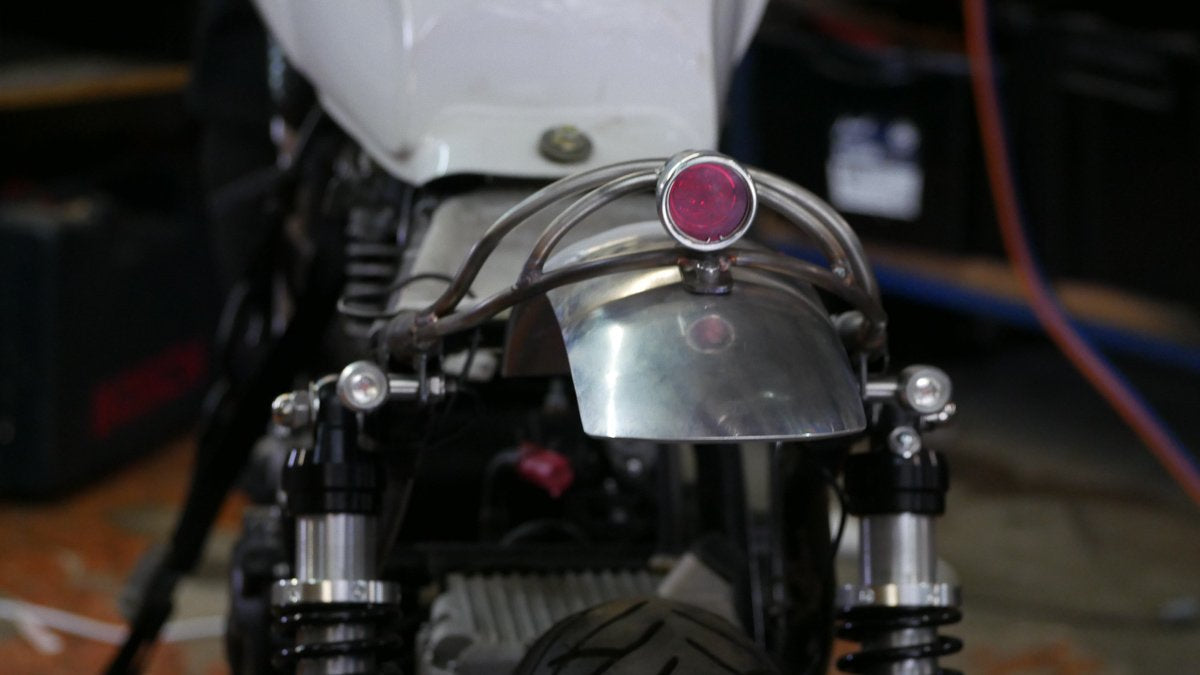
No matter how good your imagination is nothing compares to seeing it in the metal. So first thing I want to do is get the brake light sorted out.
Matching in with the intricate stainless bar work on the tail hoop and grab rail, I want to add a fitting brake light mount for the Chrome Orbit tail light.
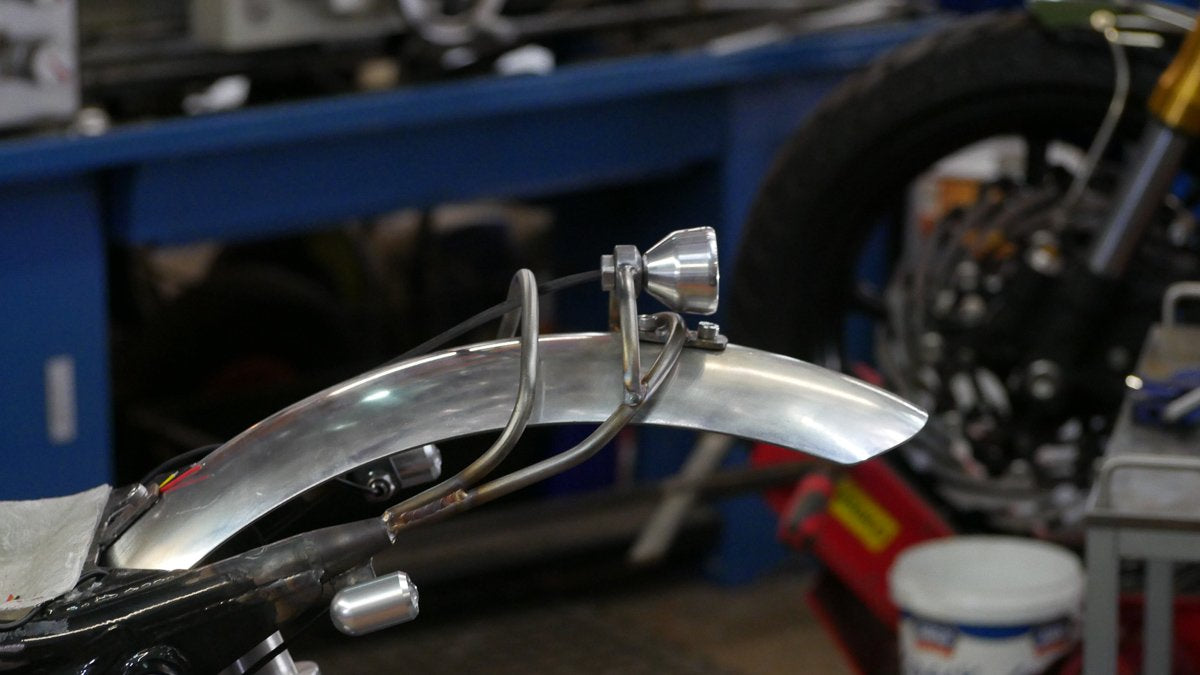
I turn up a mounting slug, and hand shape some 8mm stainless bar. I recently had a conversation with a mate and fellow bike builder Keeley Pritchett about the process of hand bending stainless bar and whether to heat or cold bend it.
To be honest I don’t have a right or wrong answer for the bar work. Its dependant on a bunch of variables. My answer to keeley was to just practice, the more you do the better and faster you can get at it. Making symmetrical bends, and even curves is a matter of hand, eye and experience.
With my small hoop bent up, Tack welded and eyed up for straight with a few TIG welds the Orbit brake light was mounted. Having a single centered brake light was an important feature of my desert sled idea. I think these simple LED lights have enough of a classic taste to fit in with my style set but keep things truly PBM driven.
Building a custom adventure bike or scrambler that actually scramble requires a little bit of thought. Namely mounting things out of the firing line when off road. With these bikes I try to keep everything tucked in tight to the bike. Limiting the exposure to having things ripped off or damaged by tree branches or if the bike get binned! Which brings me to my rear indicator mounts.
Welding a section of flat bar to the under side of the frame and keeping them wide enough to be street legal, but not too wide that they protrude out into the danger zone. I’ve taken a bit of time to jot down a bunch of techniques I use in mounting my lights, its something I do nearly every day. If you’re building your own bike go take a look and get some ideas for your own project.
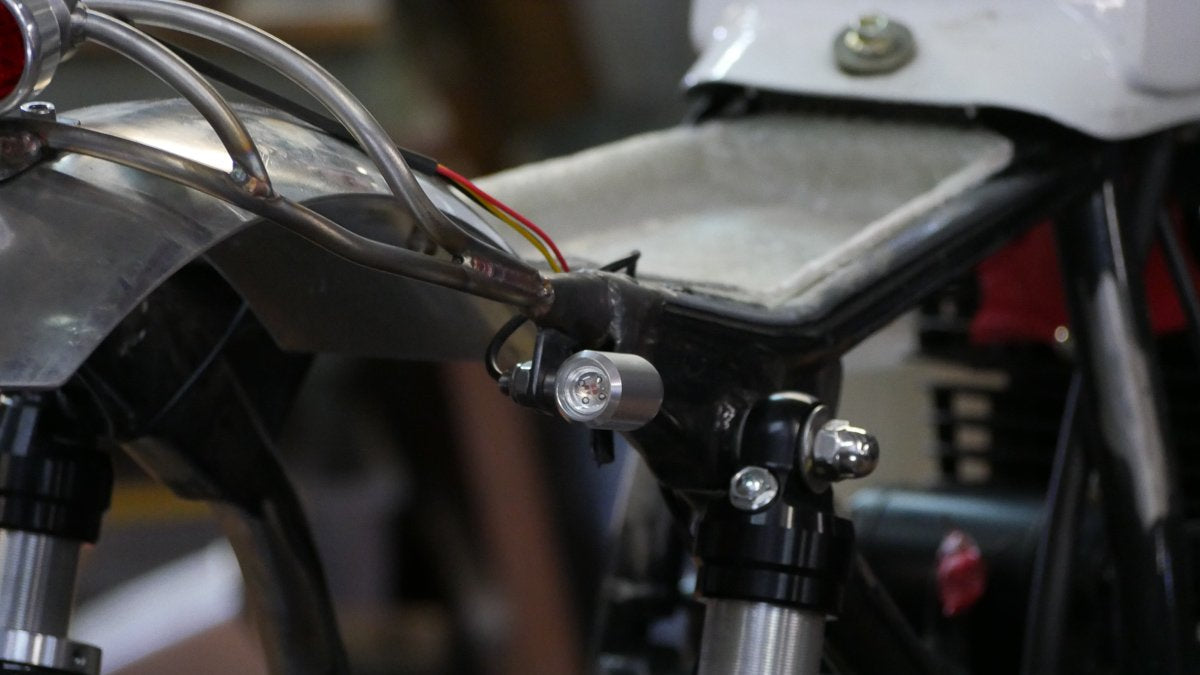
Moving to the front LED indicators the nemesis had a pretty easy solution. Picking up the clamp bolt and an M6 thread that the factory reflector usually mounts to. A quick and easy removable bracket bent up from some steel flat bar mounts the front LED turn signals. 20 minute job that looks the part and tucks the Lights away nicely.

To further reduce the distance these lights stick out, the spacers are made removable. That means if you really want to get slim with them they can be cut down to almost nothing. Making the LED lights fully customisable and perfect for the bike builder who has to make everything their own (like most of us).
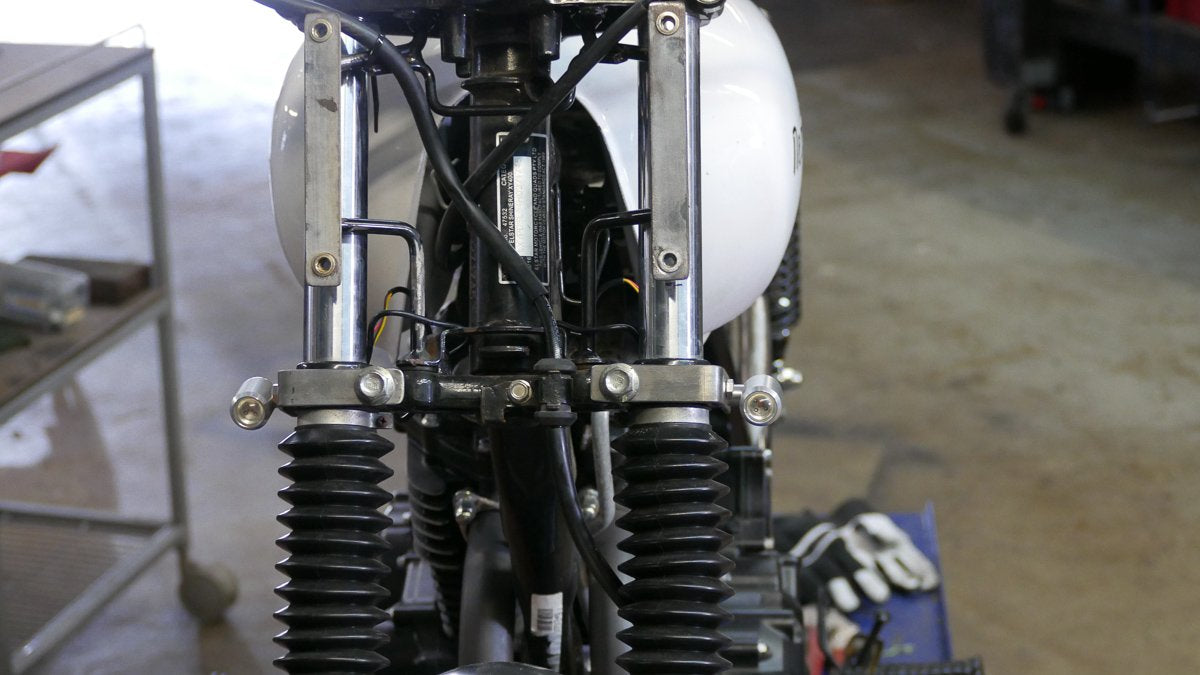
If you follow the Purpose Built Moto garage closely, you’ll notice nearly all of our scrambler bars wear a set of pro-taper handlebars. Something that’s stayed with me since I was a kid riding motocross bikes. Loyalty dies hard here. Using a set of conversion risers and some mid bend pro-tapers I swap these out quickly before moving on with mounting the speedo.
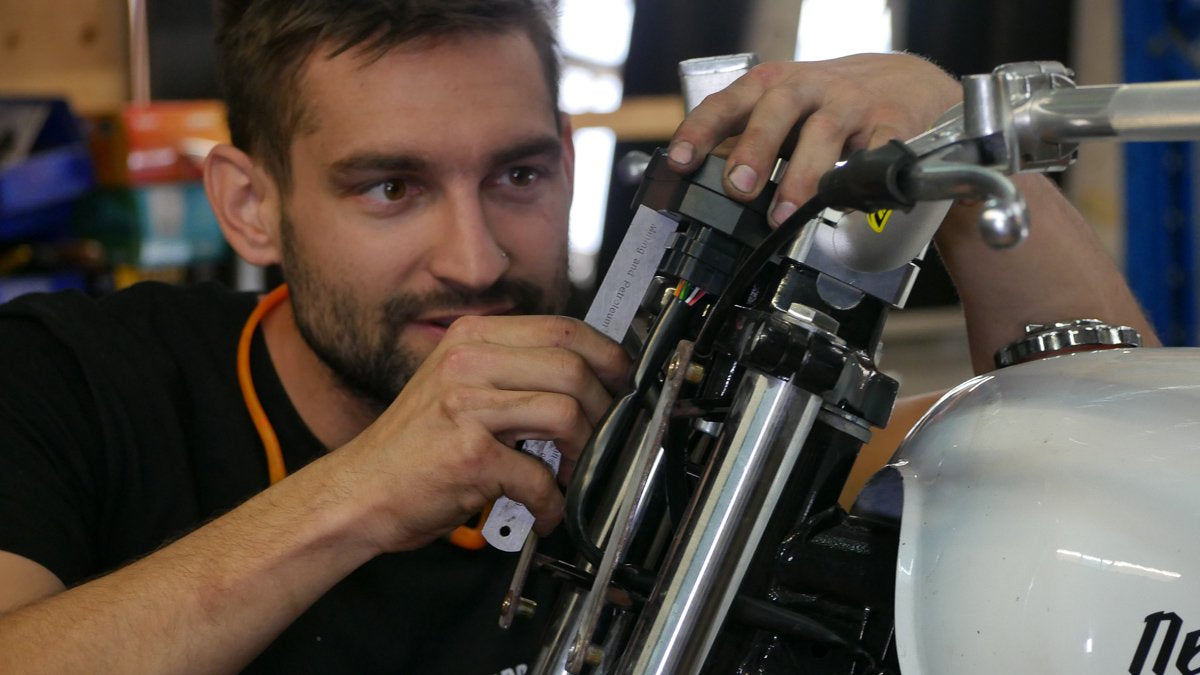
Last job on the list for this episode is mounting the all in one Koso digital gauge. I’m using the same one for both of the Wide of the Mark adventure bike builds. That’s my Adventure sportster and this Sol Invictus Nemesis 400.
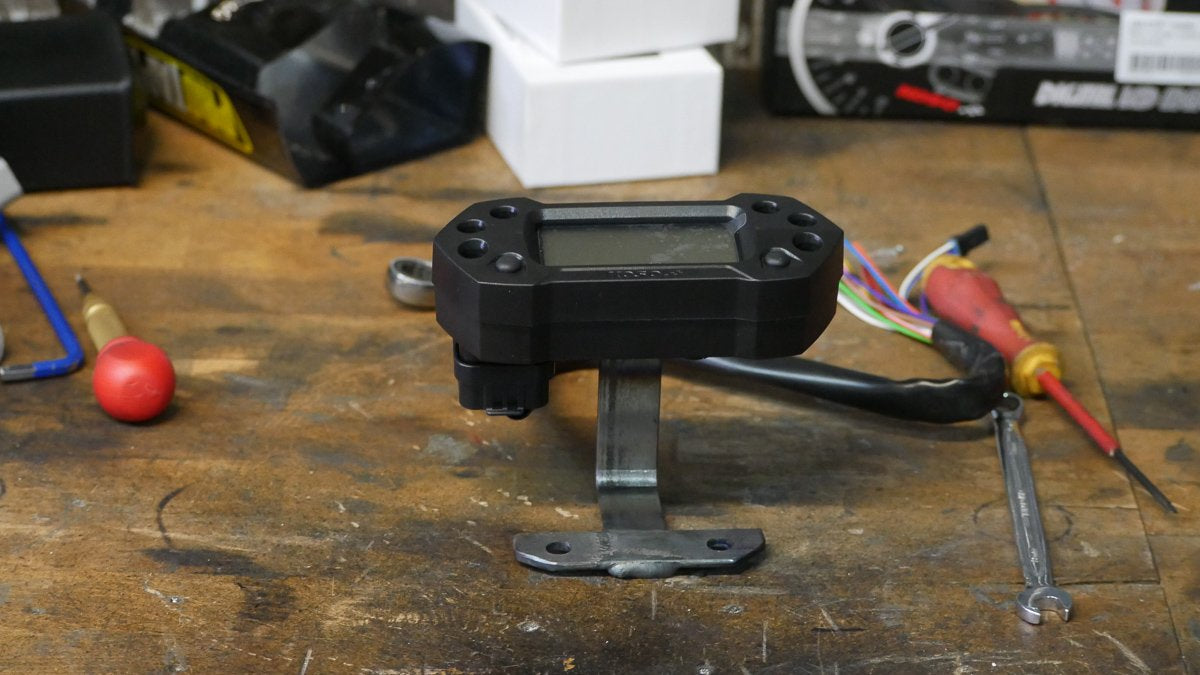
Using the old ignition key mounts, a simple bracket using that trusty steel flat bar was bent up to secure the digital dash just in front of the pro taper handlebars. These Koso gauges are pretty good but the plastic mounting points can be a little weak so be careful with screwing them together as they can be prone to cracking.
With the bracket now holding to digital dash in place I hit a bit of trouble, an oversight on my part the bracket fouls on the headlight plate. A simple fix by stepping the bracket with a 45 deg section instead of a 90 deg bend. A little extra welding and the job is sorted and were able to mount it all up.
A quick little episode this time but getting some important fabrication out of the way. These little jobs can pile up fast so it’s good to get moving on them early. Next episode on the Sol Invictus adventure bike I’ll be handing the reigns over to Jamason at Timeless Auto Trim to run you through building a seat pan, doing the foam and planning out the upholstery.
Make sure you jump on and watch the full episode on our YouTube below and leave us a comment on what you’re loving!

WE BUILD BIKES WITH PURPOSE.
Purpose Built Moto is home for unique custom motorcycle builds. We offer a unique motorcycle customizing experience in the heart of the Gold Coast.