Harley Sportster Scrambler 1200 Build Episode 3– The Purpose Built Moto YouTube series
In this episode of the Sportster scrambler build we show you:
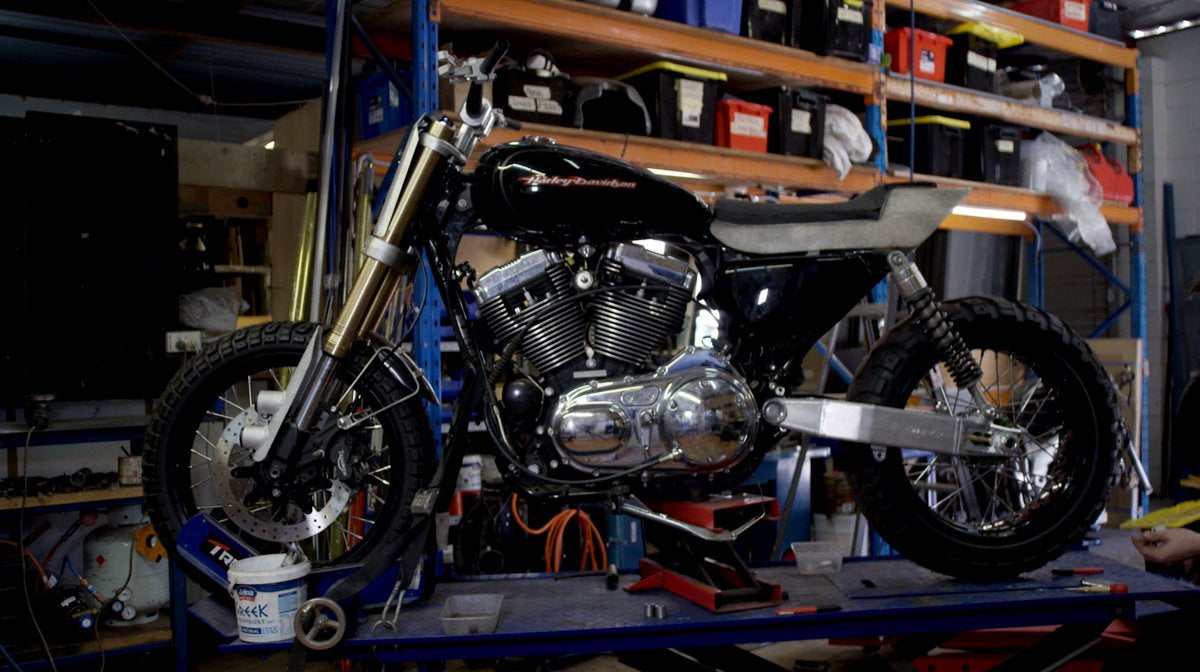
– Making the Sportster tracker tail functional
– Building the Tail tidy/plate mount
– Off-road peg position + ergonomics
– Sportster Air filter prototype – YEP! I’m going to try building an airbox!
– Handlebar switches + West Sliders
It’s a difficult thing building a bike in front of a camera, but bear with me as we stumble through!
If You’ve been paying close attention to my Instagram, you will have seen a few cheeky posts about our project. The official Instagram for the film is now live @wideofthemarkmovie. After the great success of our the first film produced in collaboration with Electric Bubble “Handcrafted” we’ve decided to go bigger, better and way fucking out there. Keep your eyes out for more details as they come on what will be an unforgettable film. The 2 bikes I’m Building for Wide of the Mark will be this 2006 Harley Sportster Scrambler 1200 and a Sol Invictus Nemesis 400cc. The rider for the Nemesis 400 Scrambler will be announced in the coming weeks.
Enough about the future, lets rip in to what happening with that sporty scrambler.
Tracker tails are usually for 2 things. Looks and weight saving. This one however, I’ve put a practical twist on it. As well as looking amazing on this sportster build and being a light alternative to the heavy stock fender it will also support my baggage strapped to the back and house a good amount of storage under the seat. I’ve achieved this by lifting the seat from the frame about 40mm, and boxing in the tail section at the rear. It’s a nicer finish than leaving it all open and will give me a heap of low down, central storage on the bike.
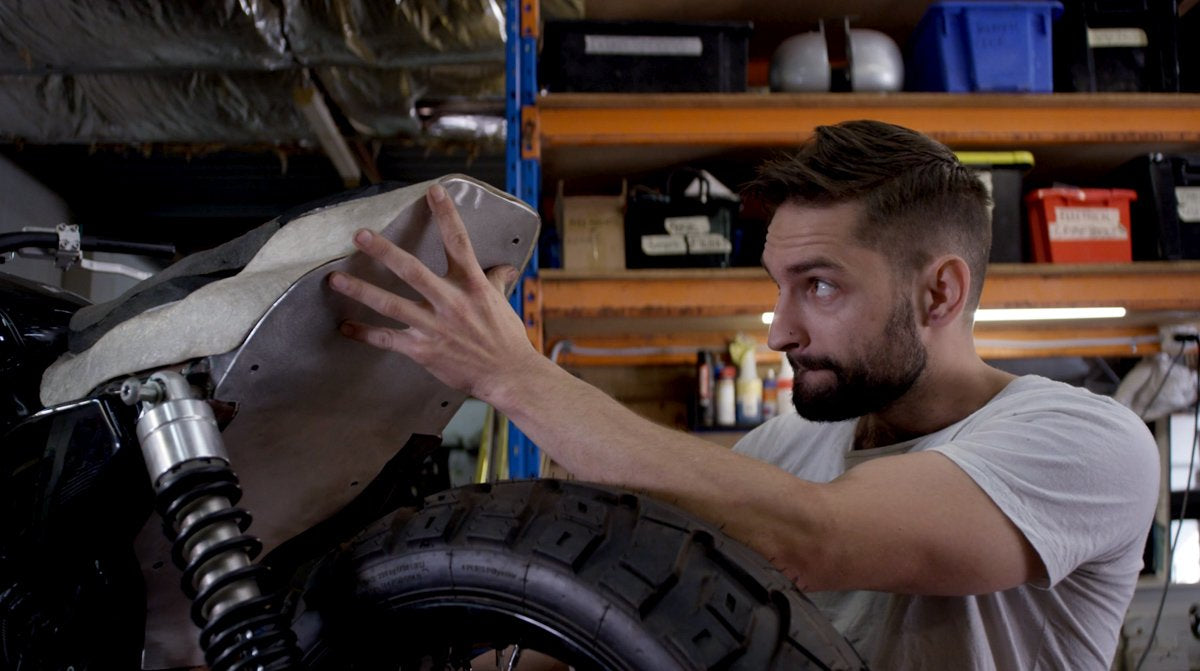
Building a subframe to support the rear of the tail from round bar, and using some mild steel tabs with nut-serts welded to the inside of the 2 rear frame rails. With the mount points done I templated first in cardboard, made sure the fit was right and got the mounting holes sorted, then transferred to aluminium sheet 2.5mm thick and trimmed/shaped it to near perfect fit. The rest will be done once the tail is body filled and painted.
Next job is building my tail tidy/ number plate mount from the Trac Dynamics Aluminium Swingarm. The Ally swing arm was on the list for its weight saving, and to be honest, I just love the way it looks! Nothing says I’m building a Dirt Bike quite like a fat aluminium swing arm bolted to a heavy American V-twin. The swing arm provides sufficient mounting points for the plate mount so all I needed to do was firstly cut out and fix the plates I was going to use, set them in place and start to mock up my design out of welding filler rod. This lets me check the mount will clear the chain and Motoproducts aluminium sprocket.
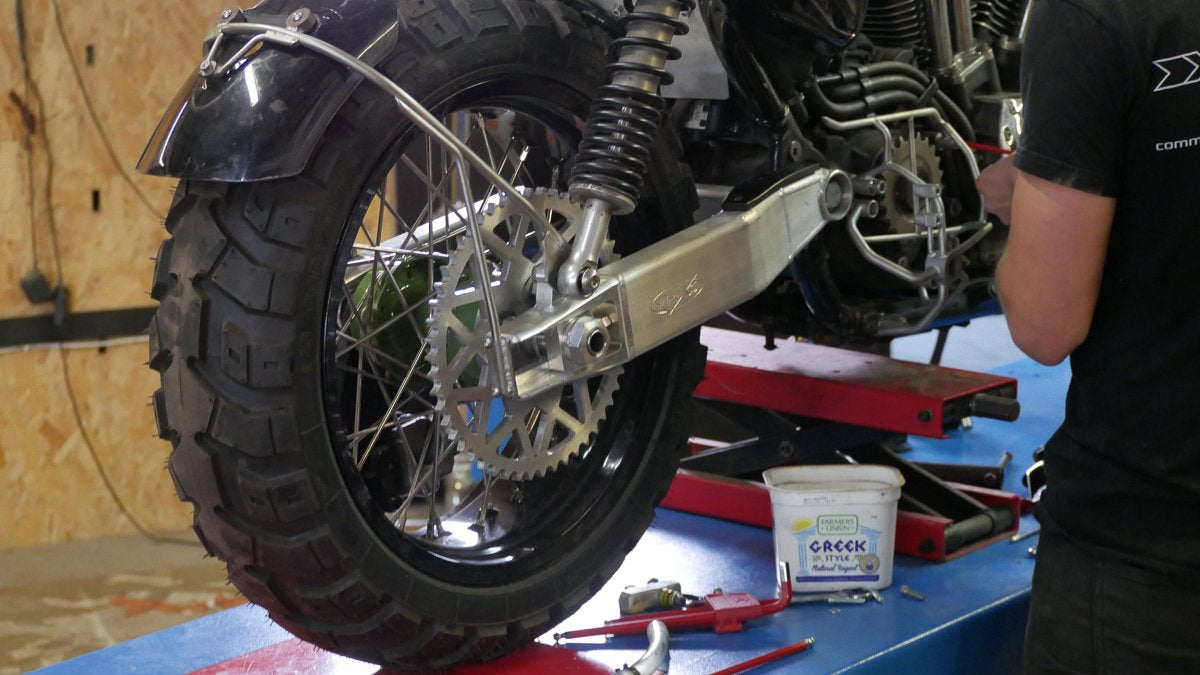
I’ve written quite a lengthy article on just how to go about making these swing arm mounted licence plate brackets, and I cover a number of mounting options and types. This one I need it strong and to house a small fender to stop roost from hitting my ride buddies when I crack open that Lectron carb that the sportster will be breathing through. Because I’m a bloody nice guy, that’s why. The rear guard was fabricated with the use of my TIG welder, a cheap and super handy tube bender bought online and my oxy set to shape a few sharp bends into the hoop. Shaped out of 8mm stainless round bar, and housing an offcut of a Triumph Bonneville rear guard the plate mount adds a good bit of practicality without taking anything away from how the bike looks. Ontop of that it keeps the tail section completely clean.
Finishing touch on the plate mount is to shape the fender I’ve used to suit the wheel. Using a template to match the radius on the opposite end, I’ve also written a how to blog on this method that you can use for trimming any fender up. You can read that HERE.

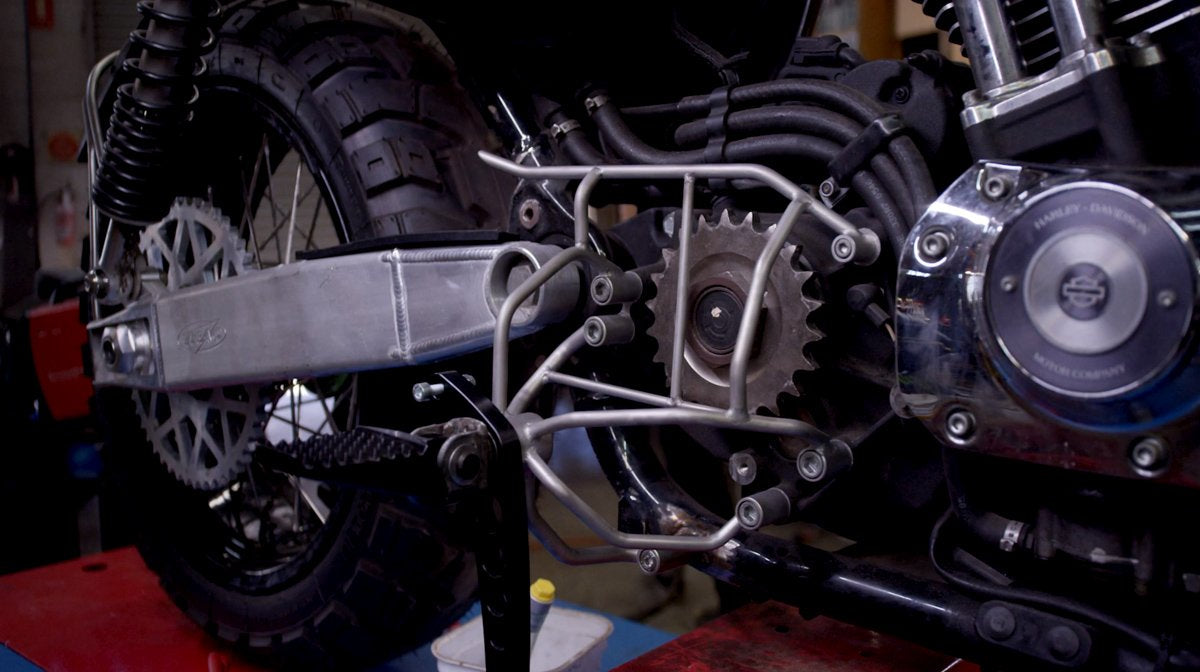
Next job in the episode is fabricating a set of footpeg mounts. I have a few different sets of parts im building with there. My PBM Stainless steel fabrication slugs, a set of Free Spirits parts shift and brake levers and some British customs off road pegs. I used the lathe to turn up my footpeg mount bosses, and modified some triumph foot peg brackets I had in the shop to mount my off road pegs. With those done I mounted a few of the PBM fabrication bungs on to the clutch case and old sprocket cover mounts. Set my footpeg height on the clutch side first so it felt comfortable to ride and stand on (I did this by testing it with jacks on the bike table) tacked my first bar in place and set to work making what can only be described as the footpeg mount version of the demogorgan from stranger things. Regardless of how you think it looks, I reckon its rad, and its strong as fuck. So there ya go.
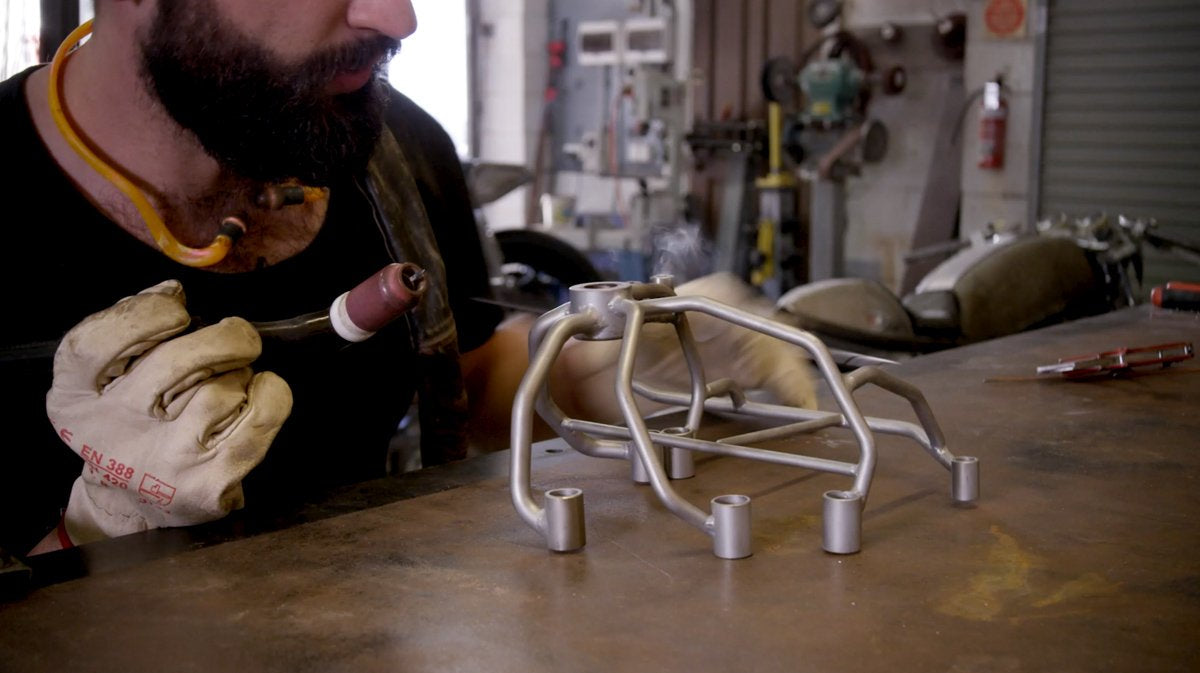
Building the sprocket side I used the same method but measured the offset from the centreline of the bike, because this side of the sporty is a lot slimmer I matched the offset and built to that. That left a pretty hefty gap between the sprocket and peg mount but I’m going to fill that with an adventure bike gadget that I’ll reveal in a later episode. That sorted, I have a thousand small tidy up jobs to do.
Welding a set of threads to the frame for bag racks/sissy bar mount, re-locating the coil and fitting up the Lectron carburettor to start dreaming about the airbox idea I’ve been toying with. Having the air filter sat out the side of the motor I’ve seen a heap of offroad sportsters having issues getting instantly clogged up on the intake. My idea to help that situation is to fabricate an airbox that will sit where the old coil mount was. Its well protected from weather and dust tucked away in there, so I worked with Lectron Carbs and DNA filters to best figure a way to make this happen. What I came up with was a box that houses a long cylindrical DNA filter and will be linked to the Carb by a stainless steel manifold.
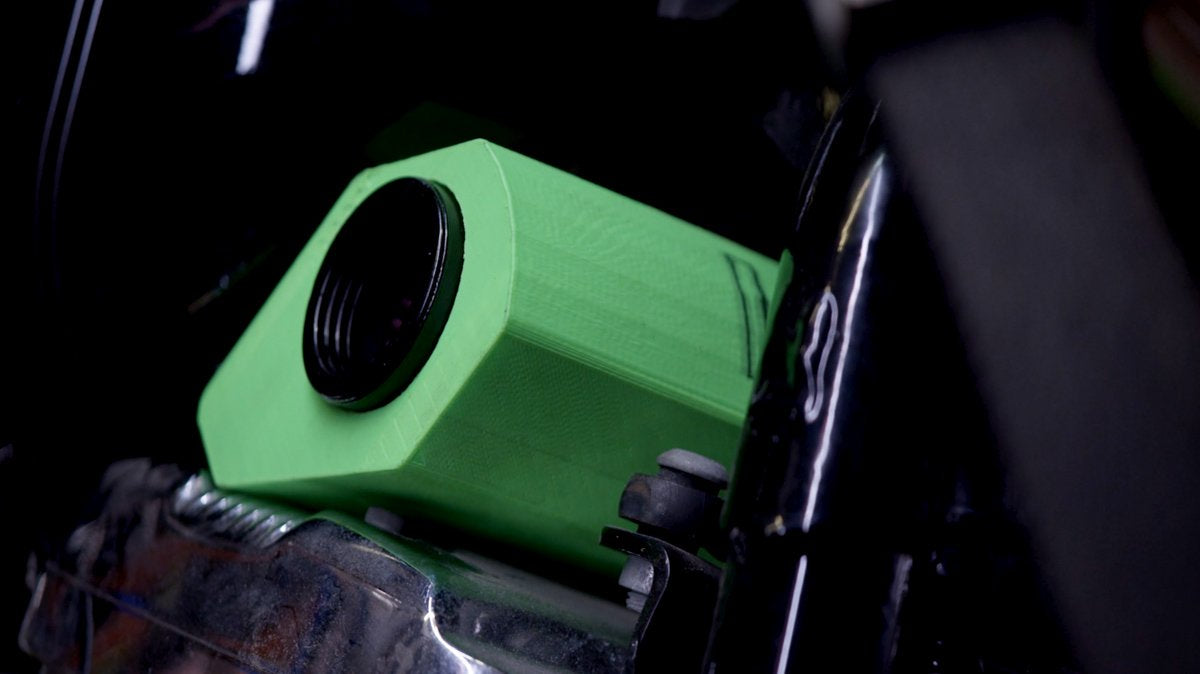
This may not be the best thing for high HP motors, but it’s a start and to be honest longevity and minimal trip maintenance is more important to me than huge power gains. At least for now. As a Beta idea, I’ll start here, and work out the problems on the road. Then if there is any major issue I’ll address those and iterate. Its how dreams are made. A big thanks to my Mates at DNA performance filters for putting up with my stupid ideas and always enabling me to chase them down.
Last job for the Sportster scrambler is fitting a bit of jewellery to my Pro Taper Outlaw tracker bars. ISR master cylinders and Clutch lever, a pair of 3 button Purpose Built Moto switches and a set of a great little product I recently found. West Slider lever protectors. These are used by racers to stop bar clashes from bumping your levers on the track. I’m going to see how they go at protecting my levers when I bin the sporty off road. They’re a strong looking billet designed part that I’m hoping will limit the damage done to my levers when I drop the bike.
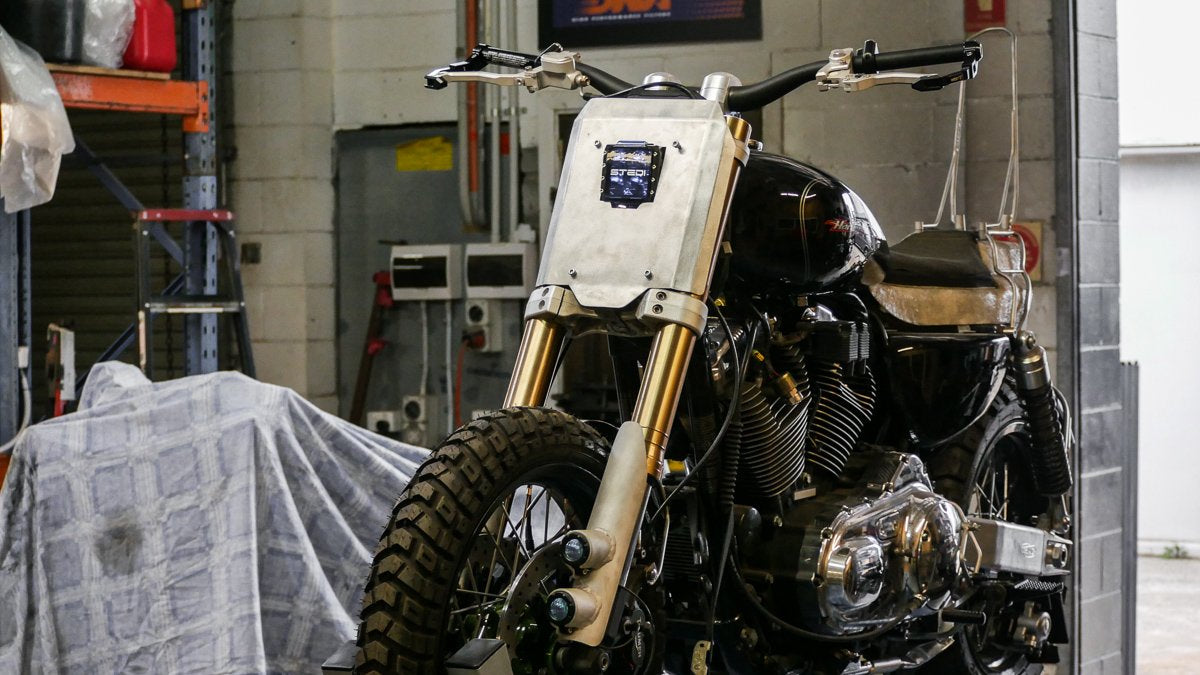
That will finish up episode 3 on the adventure Sportster scrambler! Thanks for taking a minute to get the lowdown on the second ever personal build I’ve done. Next episode we will be covering:
– Exhaust Fabrication
– Aluminium front fender
– Bag rack fabrication and sissy bar
– Bit more ground on the air box.
– New K-tech suspension
Make sure you hit the link below to watch the full episode of the Sportster Scrambler build and subscribe with notifications for a reminder when we have something new to show you.
Tom
WE BUILD BIKES WITH PURPOSE.
Purpose Built Moto is home for unique custom motorcycle builds. We offer a unique motorcycle customizing experience in the heart of the Gold Coast.


