Harley Sportster Scrambler 1200 in the build– The Purpose Built Moto YouTube series
In this Installment of the Harley Davidson Sportster Scrambler – In the Build series you’re going to see:
- Motocross style Fork Guards, with integrated lighting
- LED headlight mounting
- Fabrication of Scrambler headlight grill / plate
- Mounting the digital speedometer
Come with me every step of the way as I do my best to show you every little detail in a Purpose Built Moto build.
I’m currently in the build on a number of projects, 2 of which I’m going to be walking you through step by step and producing a build series on each of them. A 2006 Harley Davidson Sportster 1200C and a Sol Invictus Nemesis 400. These 2 bikes will be used on new film project we have coming up with some of Australia’s most exciting motorcycle personalities. For now though I’m focussing my energy on preparing and building these bikes to be taken to the end of the earth.
So lets get down to details on episode 2 of the Harley Davidson Sportster Scrambler build.
First up on the front end is an idea I’ve had sitting waiting for the right project. The great thing about building bikes for yourself is that I don’t have to deal with anyones expectations, I do exactly what I want and how I want it.
So here’s the first in a long list of stupid idea’s I have for my Adventure Sportster…. Motocross fork guards, with integrated lighting.
Taking a length of 3” aluminium tube, I split it in half down the middle. Using each half for one side of the forks. I started with about 400mm in length. The triumph front end has a mounting point that was originally for the fender, that was exactly where I needed it. The tube was annealed and let cool then a short 100mm section was bent in and hammered flat to accept the 2 x M6 mounting bolts.


That process has my 2 fork guards set in position. Now I move onto trimming and shaping them up. Curving the tops and cutting them the right length for my fork tubes and travel. That done the fork braces we’re given a clean and prepped for the fabrication of the light housings. I’m using a set of tiny STEDI led spot lights, the brightest and smallest diameter lights I could find. I had a length of aluminium tube that the LED lights fit nicely inside, the tubes were notched to accept the spot lights (2 on each side) and a tab welded on to bolt them in place.
The hardest part of this process is notching the tube on the right angle for the lights to point onto the road. It takes a little practice but doing it by hand isn’t so bad once you get the hang of it.
I’ve had a shitty experience with tube notchers so I learnt to do it by hand. That way all I need to rely on is my grinder.
Once the LED housings had been welded onto my fork guards I moved onto the high beam, which is located on the top triple clamp. But before that happened I had to stop and gaze at the fork guards for a minute. I can garuantee you’ve never seen anything like that before! So stoked on the outcome here, I have a feeling it might be quickly copied

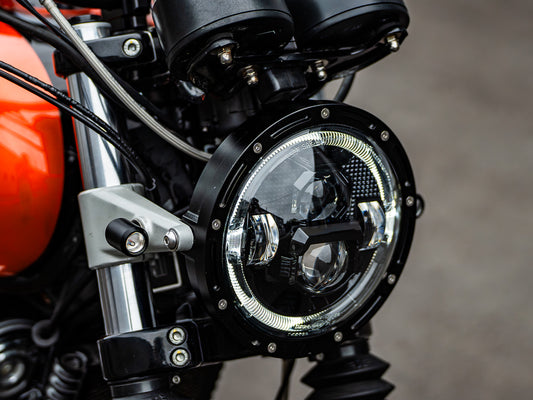
Moving on, mounting my high beam up on the USD fork conversion. The triumph clamps have a good few mounting points, so I used a couple of the threads to build my steel mounting bracket.
This one top bracket would house the high beam, my scrambler light / number plate and the digital speedo.
There’s also another steel bracket that will later mount the bottom of the scrambler plate, and my high mount fender that I’ll build. The Highbeam is another STEDI LED, a great square unit that comes with a range of clip on lenses. Extra cool points but not much practical use. But it’s a fucking Harley adventure bike, no one is going to be expecting too much practicality here. With the Stedi LED mounted up, I start to pattern my Aluminium headlight shroud. Explained in the video, you can measure and measure and still mess it up.
What I do is get a centre point and measurement on the light, cut out a smaller hole then fit and check it. Once I’m sure my marks are right, ill take it out with an air saw and file until its perfect. Then file out the little recess for the lenses to clip on and off and I was in business.
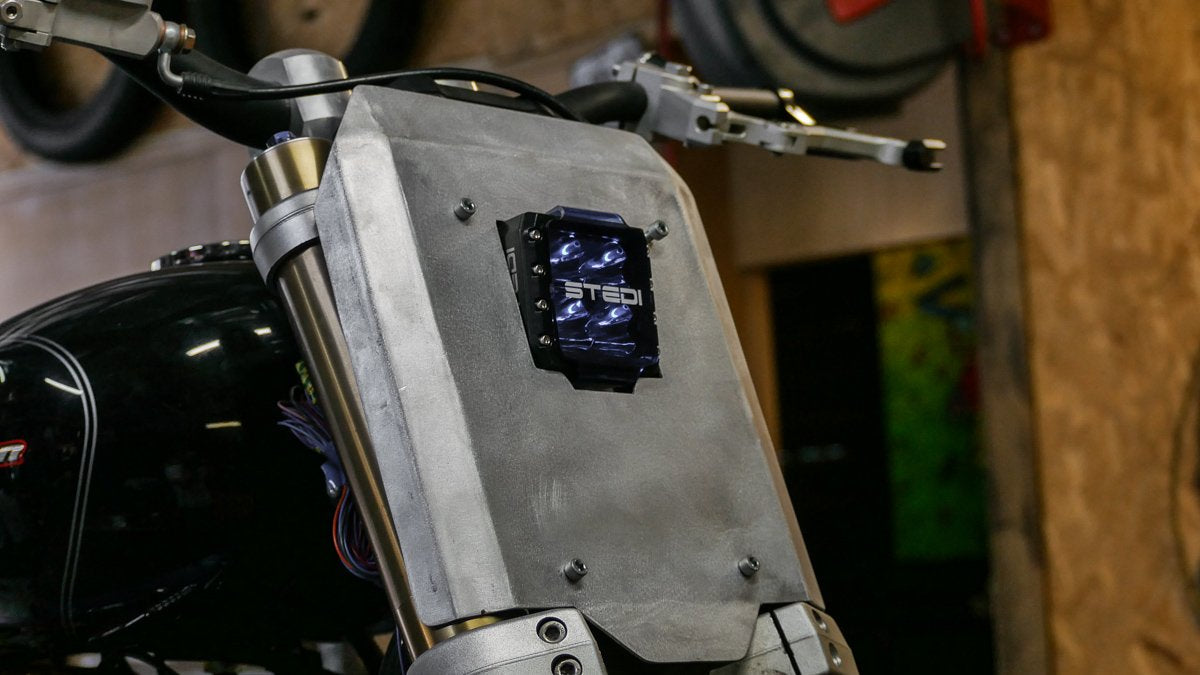
With the plate on I put a few angled bends to have the headlight shroud curve around the forks, and trimmed/welded up the top. What’s left is a pretty unique front set up that I hope will provide plenty of light on the ride, room for a small bag mounted on the front and look bad ass while doing it.
The Koso digital speedo I’m running on both the sportster and the 400 scrambler build was chosen because its compact, functional and easy to install. I used the factory supplied speedo mount, modified it and tied it into the front bracket that is bolted to the top triple clamp. The wiring on the sportser will come much later so that’s it for now on the speedo.

Last job on the list for episode 2 is the first part of my fender. I wanted a 2 piece fender set up on the front of my sportster scrambler. Just because.
So from the rear mount points supplied on the forks I’ve fabricated a set of fender stays, using some M6 stainless steel bungs, some stainless plate and 6mm round bar. I space the fender with hose, tape it to the wheel and bend a dummy fender stay out of tig filler wire. Once I have the shape I want, I’ll sketch it on my welding table and make a simple jig to bend the bar around, this will make sure both sides are exactly the same when I repeat the process.
Once the round bar is bent, all parts are tacked in place and the fender mount points marked.

The assembly is then removed and welded on my table, finished in the blaster and mounted on the bike as mock up waiting for the rest of the fabrication to be finished.
That’s Episode 2 dusted on the Sportster Scrambler – in the build series.
More creative fabrication to come in episode 3 as we start to shape the more adventure style aspects of the build. Making a subframe for the tail and bag rack, building footpeg mounts with correct ergonomics for adventure riding and losing some more weight on the bike. Make sure you hit subscribe to our YouTube Channel to get involved!
you can also get on our e-newsletter for updates on everything PBM.

WE BUILD BIKES WITH PURPOSE.
Purpose Built Moto is home for unique custom motorcycle builds. We offer a unique motorcycle customizing experience in the heart of the Gold Coast.