
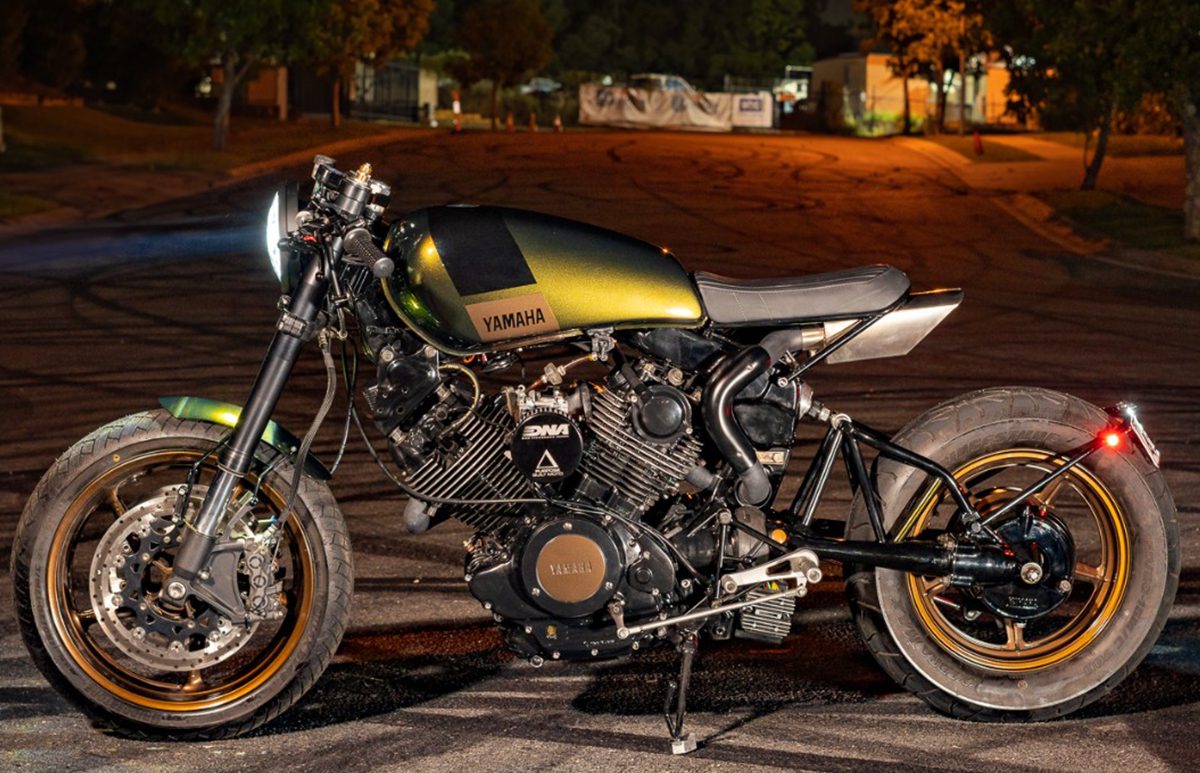
Talk about an inside out upgrade. We made so many performance upgrades on this Yamaha XV750 its basically a brand new bike inside. With a sharp, modern design brief, I wasn’t the most excited to get started on this build, but I’m stoked at the end result, and so is the rider
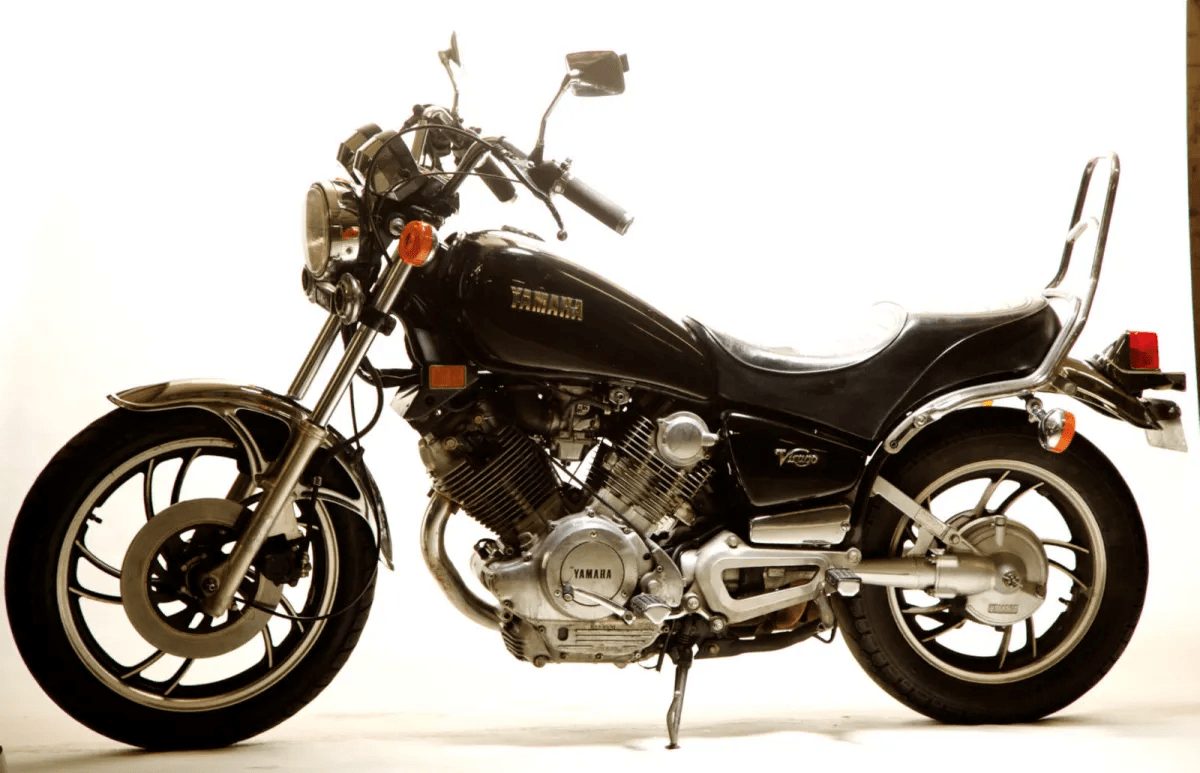
When approached by Guy – Our rider I wasn’t sure if we would take on this build. The Yamaha XV750 isn’t one of my favourite bikes to work on, that’s no secret. I find them over saturated in the custom world, and often undercooked. Guy however convinced me, just by being a good bloke. He was passionate, and super keen to have a Purpose Built machine, and had his heart set on his XV750 midnight special.

He’d already started sourcing parts and doing a few modifications, and from this I could tell he wanted the job done properly. With an R1 front end, and Cognito triple clamp, and having done the research to find a somewhat matching rear wheel of another model XV guy wasn’t the type to cut corners. Being a follower of the shop he knew the drill and was soon at our front door with his bike on the trailer and a box of parts.
After out initial meeting and chat through the design we got to work. The XV had to satisfy a few key markers.
- Better performance and handling
- Under tail exhaust
- Sharp and modern disposition
The build came with a few specific requests so we let that be the start point. “Fix that ugly swing arm” was what I had written down. Out came the grinder. Having done these XV builds before I referred back to the custom rear shock we got last time around from Ride Dynamics. Using those measurements I welded up a mock rear shock and started building the swing arm. Using some chromoly and my tube bender we’ve shaped up a nice trellis shock support that does away with the roughly welded square tube that comes from factory.
Guy also requested that we smooth out and mould the frame section that usually carries the breather tubes for the in frame airbox, another nice tought that you don’t often see on custom XV’s.
During this time we also lifted the front end. Straight swapping the Yamaha XV750 with an R1 makes it far too low. It looks great, but one speed bump a little too quick and you’re left with a total loss of your oil system. No Bueno. We’ve raised the front shocks around 50mm, and set the rear shock length to retain a good steering geometry and provide clearance under the belly of the beast.
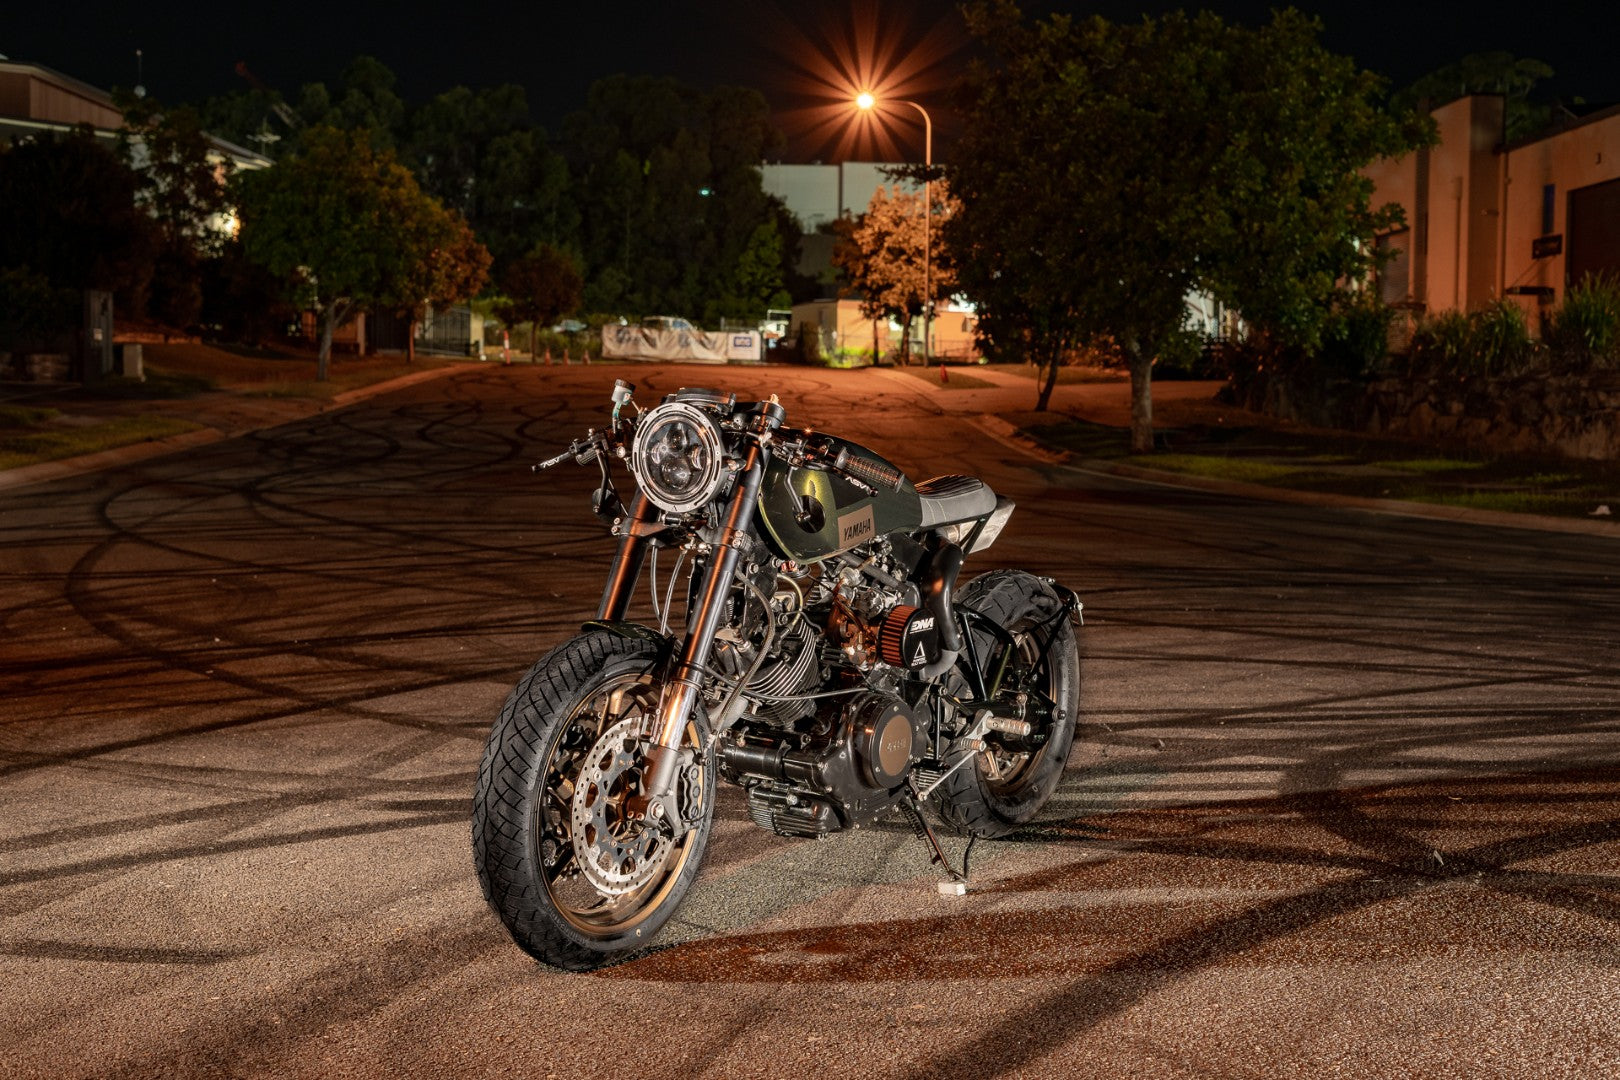
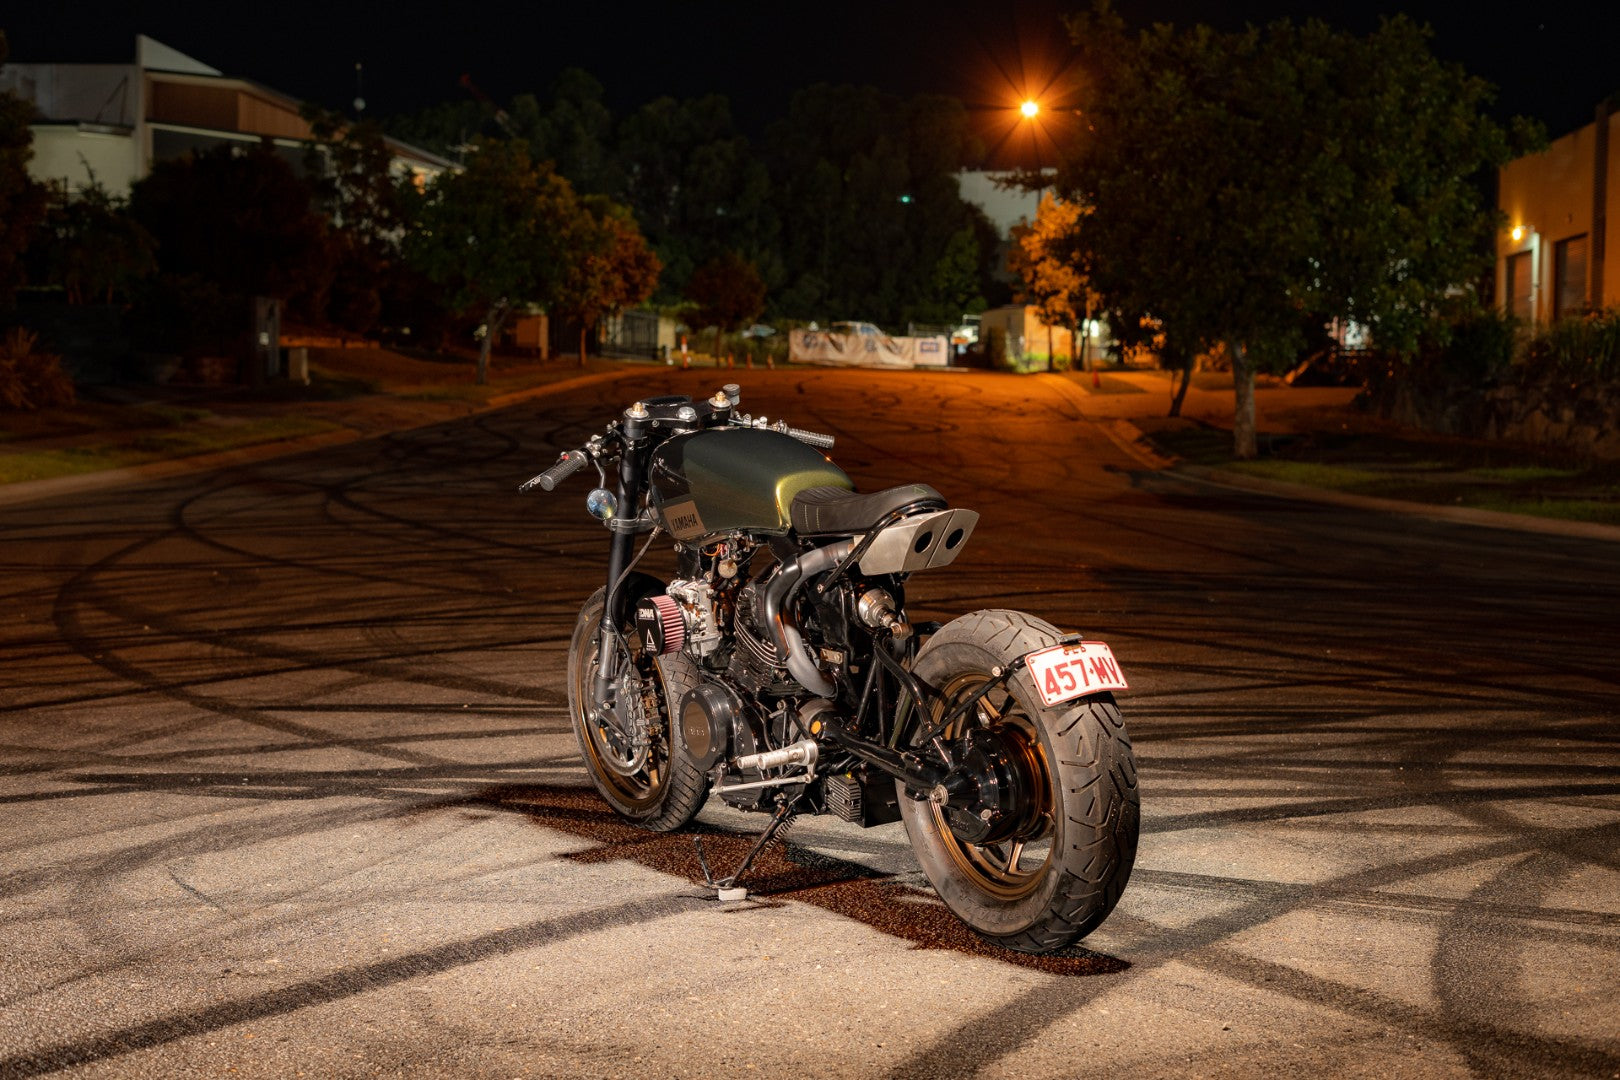
With our ride height set we could start on the subframe and exhaust. Again Guy, wanted something pretty wild in an undertail exhaust. To fit this in, we needed to modify the rear engine mount to allow the passage of the header thorough it. We’ve hollowed out a section and re-braced the mount so the rear cylinder can exit out the left side of the bike and snake its way up under the tail.
We’d mocked up the headers and before they were finalised built the subframe and seat section allowing enough clearance for the rear tyre once the planned mufflers were to be built and mounted underneath. Now we had an end point for our exhaust we could finish up the fab work. With the stainless steel headers working there way under the seat frame and into a set of hand built muffler boxes, shaped to fit snug under the seat and dull the bark of what was going to be one of the most worked XV750 engines out there.
Out comes the donk and onto the bench with Purpose Built Performance. The engine building arm of PBM. The XV750 is a very lack lustre ride. With a ticketed stock crank horsepower of 50HP, that means at the rear wheel you could expect 35 to 40HP if you’re lucky. The bike was astronomically over braked with the new R1 front end, so we decided to level that out a bit.
Stripping the tired old motor down there was a lot of meat to play with in the barrel, so Jesse dove into the books and found some bigger high comp pitons and new conrods that would give us a capacity of around 1050, with a compression ration of 10.5:1. This means it’s gonna go a lot faster. This coupled with porting of the heads and oversize valves gave us some serious gains. Once the machining work was done and the new pots were mocked up on the crank some checks showed the pistons needed to be relieved a little for the larger valves to have clearance. This was pretty much the only hurdle we faced until the bike hit the dyno and started blowing through clutches.
On the Dyno with my mate Jamie at Dynomite moto the bike would reach 45-50HP at the rear wheel and start to spin the clutch. We’d already upgraded to a new set of plates and performance springs but evidently that wasn’t enough. The solution was to use some Barnett plates and springs suited for a stage 2 Harley sportster that allowed the XV750 (now 1050) to put its power down to the road. With a new rear wheel horsepower of 78HP and 70nm of torque you’re almost in disbelief that you’re sitting on an Yamaha XV750.
The power upgrade is reflected in the sound of the engine too, with most XV’s sounding poppy and hollow this bike has a nasty bark closer to a cammed sportster than anything else. Safe to say the check box on performance upgrades was well and truly ticked. One change I would make would be the removal of the single carb manifold, this was a supplied part that isn’t a great fit or design.
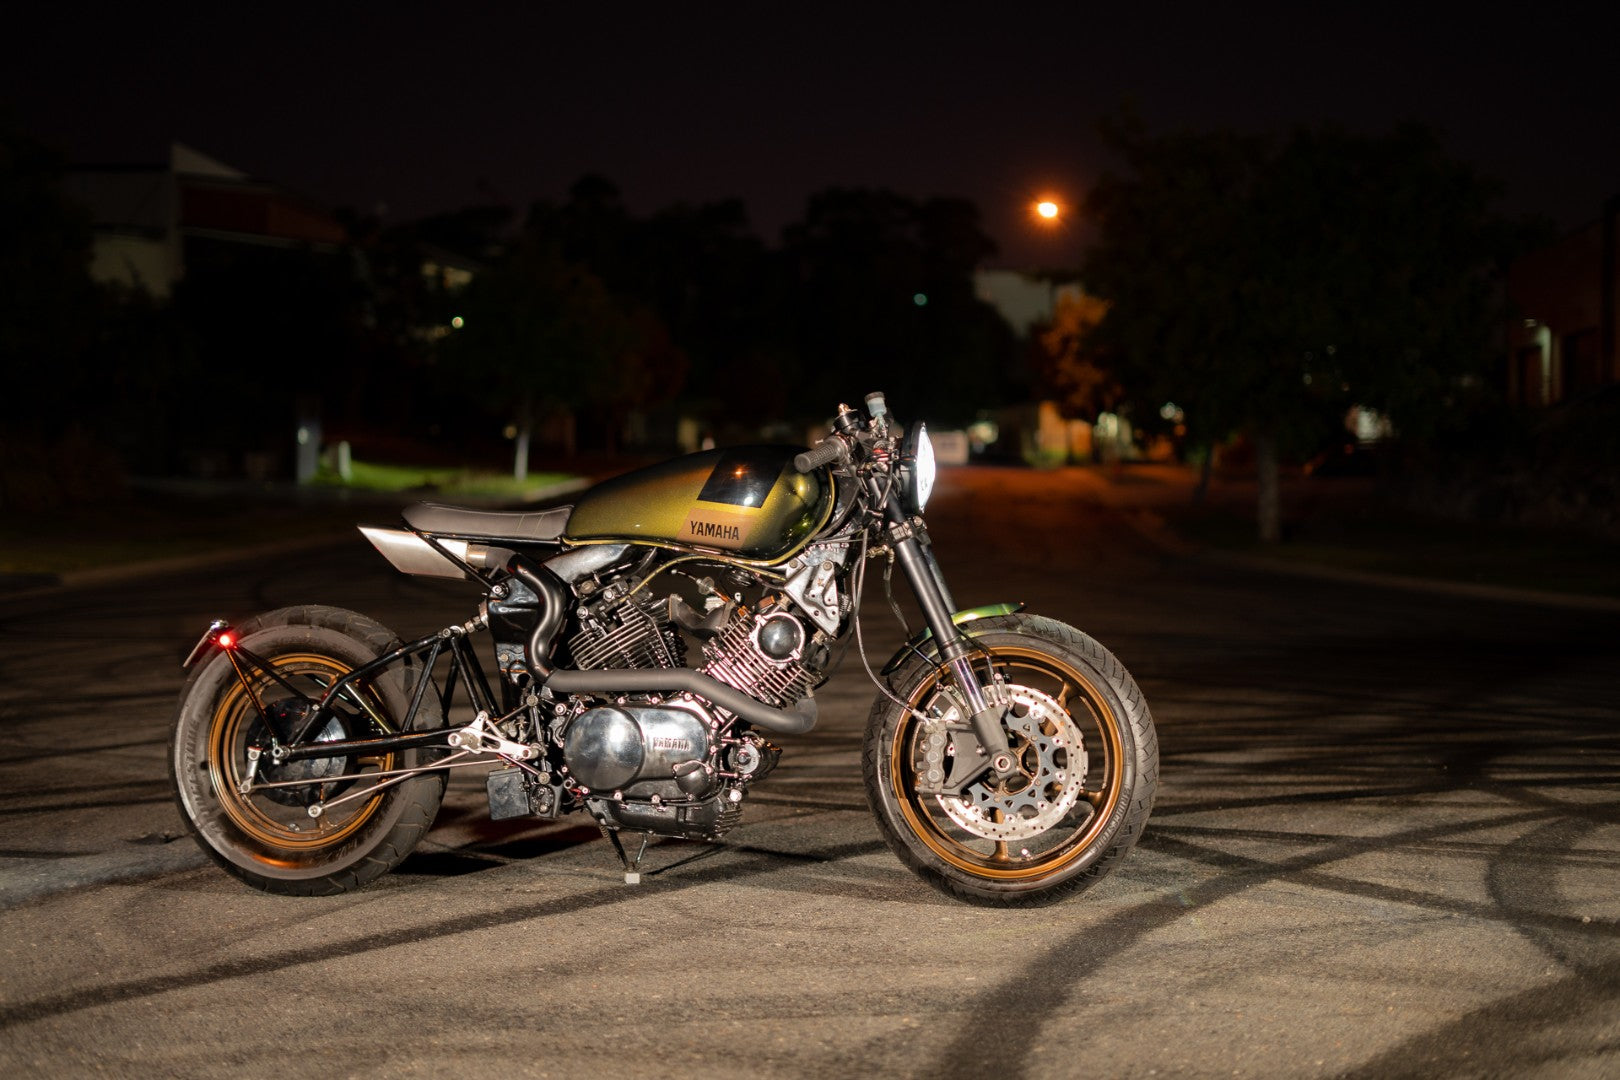
Dyno results showed the rear cylinder has to run quite rich in order to have the front cylinder run at the correct fuel/air ratio. The XV750 isn’t designed to run a single carb, so I’d bet with a twin mikuni set up we could safely milk even more power out of the upgraded engine.When it cam time for styling, the stage was set with fabrication and the bike was sitting in raw metal.The engine, exhaust and moulded frame would be blacked out. The hard part was choosing the colour for the tins. We’d received the wheels already powdercoated in a really nice bronze colour so we needed to find something that matched. The rider and myself went back and forth on a few colours, red, black, and eventually settled on a metallic olive green that caught his eye.Justing from Popbang classics laid this colour down with a simple blocked detail design over the tank and hand built front fender. A stellar job as always from justin that allowed assembly to start.
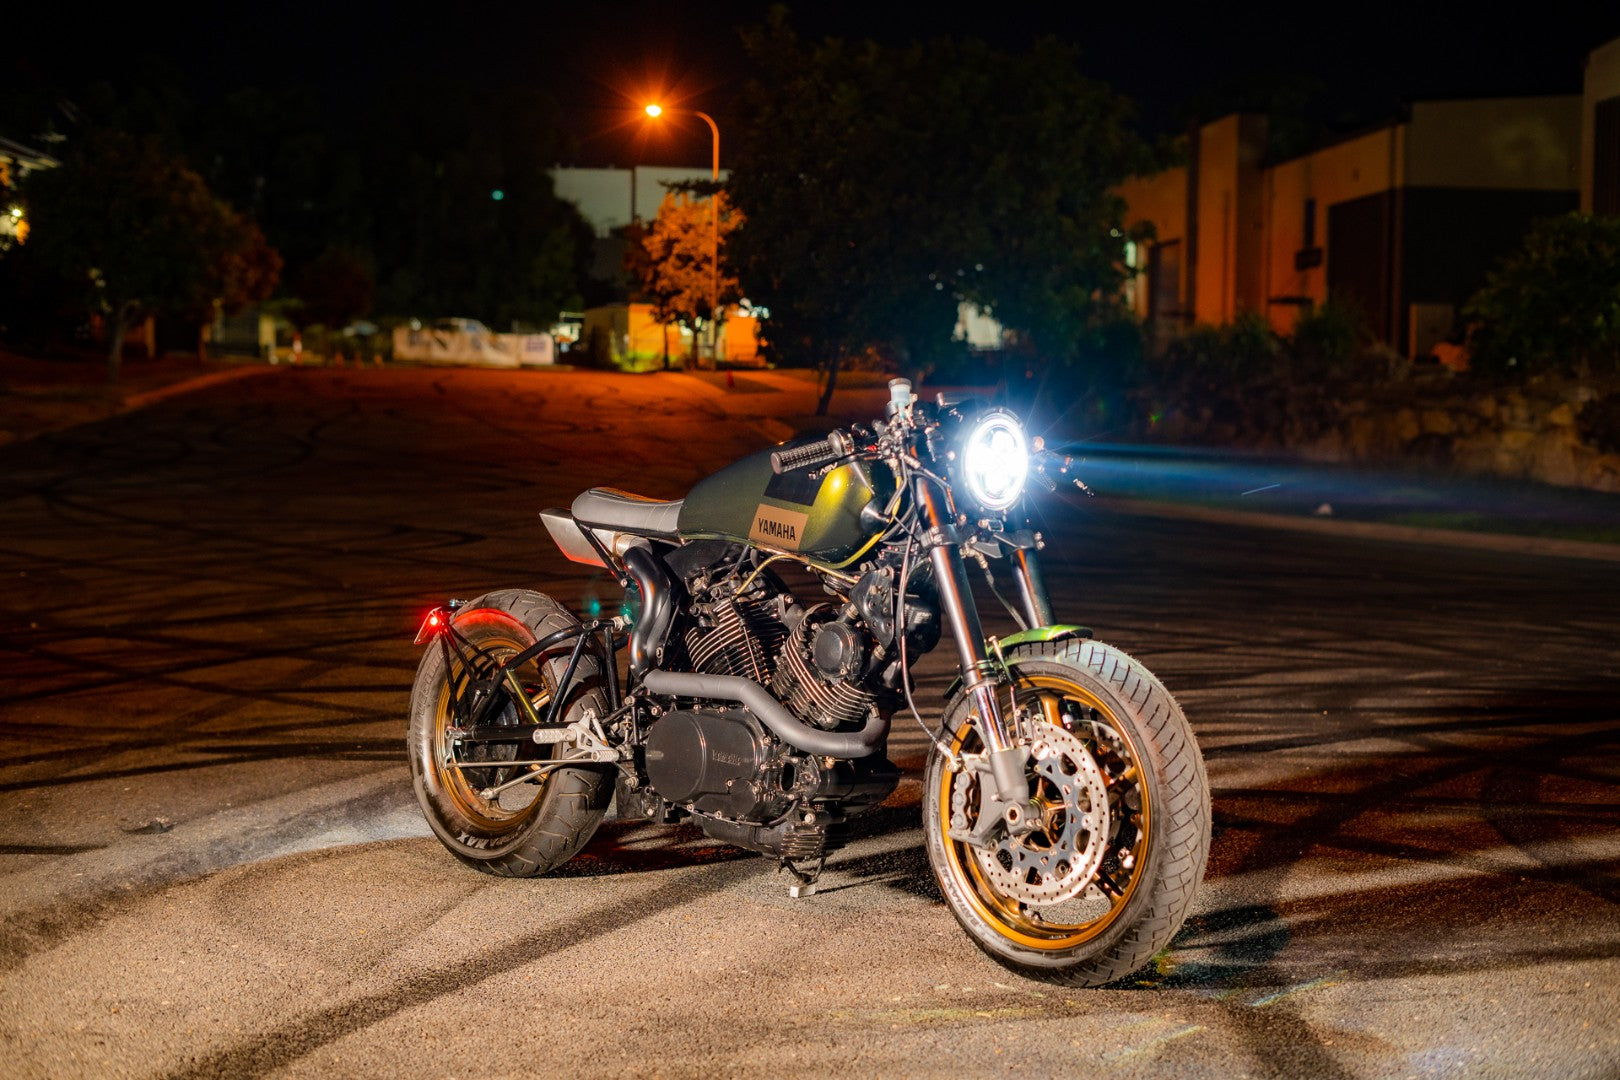
The XV is styled out with a 7” flashpoint headlight, indicators and push buttons with all the electronics controlled by the PBM Black box module. On the rear we’ve utilised a swing arm mount plate holder that houses some of our brand new omni lights. A 3 in 1 LED and brake light we’ve been working on and road testing that will be out soon. Something I’ve developed for those strange applications whether its in frame, under a fairing or as shown here on a rear plate mount I needed something (and you guessed it) Omni directional that would work well wherever you mounted it. More details on this as we get closer to release.
Lets talk about the test ride. As we ran in the bike before dyno I could tell the work we’d done had made a beast out of this house cat. The power was incredible, matched with the custom suspension provided by Joe at Ride Dynamics made the ride all the more enjoyable. We’ve really made some huge improvements on this bike. Once run in it was time to stretch its legs on the test ride and as you’ll see in our YouTube clip it did not disappoint. Power wherever you need it in the rev range, just rip the throttle and go. I was having a blast on some back roads when I went to take off with a bit of gusto on the throttle that front wheel lifted right up and held up until I changed for second. One of the only XV750 front wheels to ever leave the road I thought..

WE BUILD BIKES WITH PURPOSE.
Purpose Built Moto is home for unique custom motorcycle builds. We offer a unique motorcycle customizing experience in the heart of the Gold Coast.


1 comentario
Why is there no power figures? Wtf?