License plate bracket swingarm mounted – An 8 Step how to
I’ve made a lot of these swing arm mounted license plate bracket lately. Like all of these articles I write, I’ll wait until I’m happy enough with my own method to share it with all of you.
It takes a few goes to get these things to a stage where I’m happy with them. Every single license plate bracket I’ve made has ended up on a bike, and more importantly they function well. But improvements come in leaps and bounds when making the first few. This particular license plate mount was built for an adventure bike project.
The mount will both hold a rear fender and the license plate, allowing me to style the tail without the hinderance of a number plate. There are a number of reasons one would choose this style license plate holder over the traditional fender mount or under tail tidy. Whatever that reason is, here’s my 8 step guide on building your own.

Tools you will need:
- General hand tools + Spanners
- Grinder
- Welder (I use a BOC TIG185)
- Scotchbrite
- Welding table
- Pipebender (optional)
Before I list out the materials, a few notes. You can use a variety of round or square bar sizes to get the job done. My pick for Aesthetic and strength reasons is an 8 or 10mm Stainless round bar.
You can use mild steel, or a smaller or larger size. In my experience, 6mm mild or stainless has a little too much flex in it, and requires too much bracing. You can do it (and I have) if you want a really minimal plate mount just be aware of how it will behave and adjust your design accordingly.
Same goes for the 3mm thick sheet or counterbore slugs
Materials:
- 6mm – 12mm Mild or stainless steel rod x 2m
- 200 x 200 x 4mm Mild or stainless plate
- Counter bore M6 or M8 Slugs (optional)
This sort of work can go wrong quickly and you’ll be left with a horrible mess of a plate mount, and never be able to gain those precious hours back. So make sure you think it through for your project. If it’s worth doing it’s worth doing right. Now all you have to do is not fuck it up!
Gather everything you need, clear some space in the shed and let’s get into it.
Step 1: Prepare the bike for fabrication
I had a really old neighbour growing up, and he always used to say to me “Tom you’re a dick head.” He also once said “prior preparation prevents piss poor performance” Both have validity, only one of them is relevant here.
Prep work, do it.
Apart from your usual fabrication prep of cleaning etc. most importantly you need to move the rear wheel as far back as you can, if you fabricate this brace with the chain tensioners wound in, when you adjust that rear wheel to tighten the chain, it’s going to hit. You’ll be pissed + I’ll be getting angry emails. So there’s your warning.
Step 2: Pick your mounting license plate bracket mounting points.
It’s always best to start with the things you can’t change. With anything you’re building, find that as your starting point.
For this task, our static point is the swing arm. Its already there, and you can’t change that.
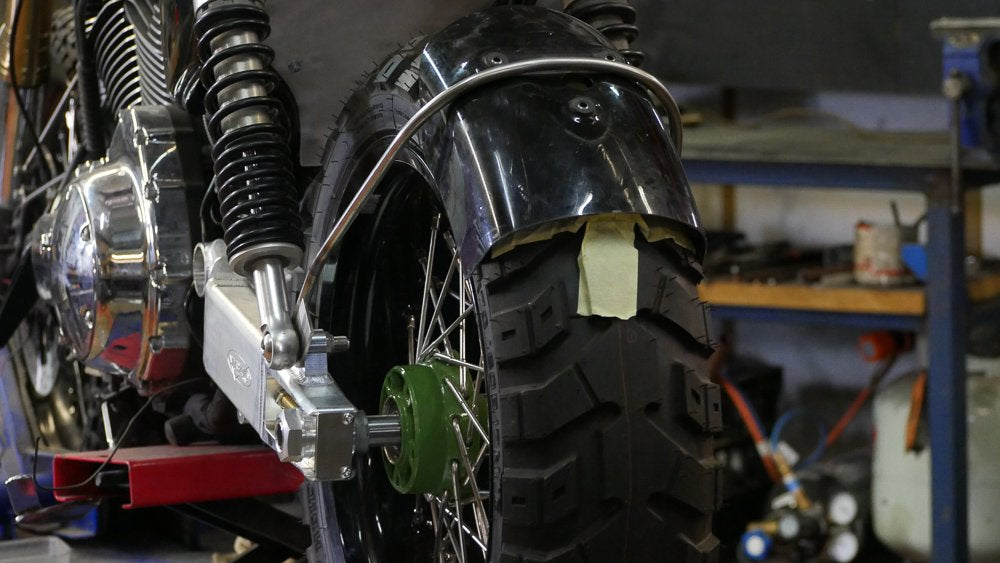
So, figure out how you want to mount it. Shown below is a few ways I’ve done it, each swing arm has its own fixing points and if you have a shaft drive bike that can be especially challenging. Its not impossible though.
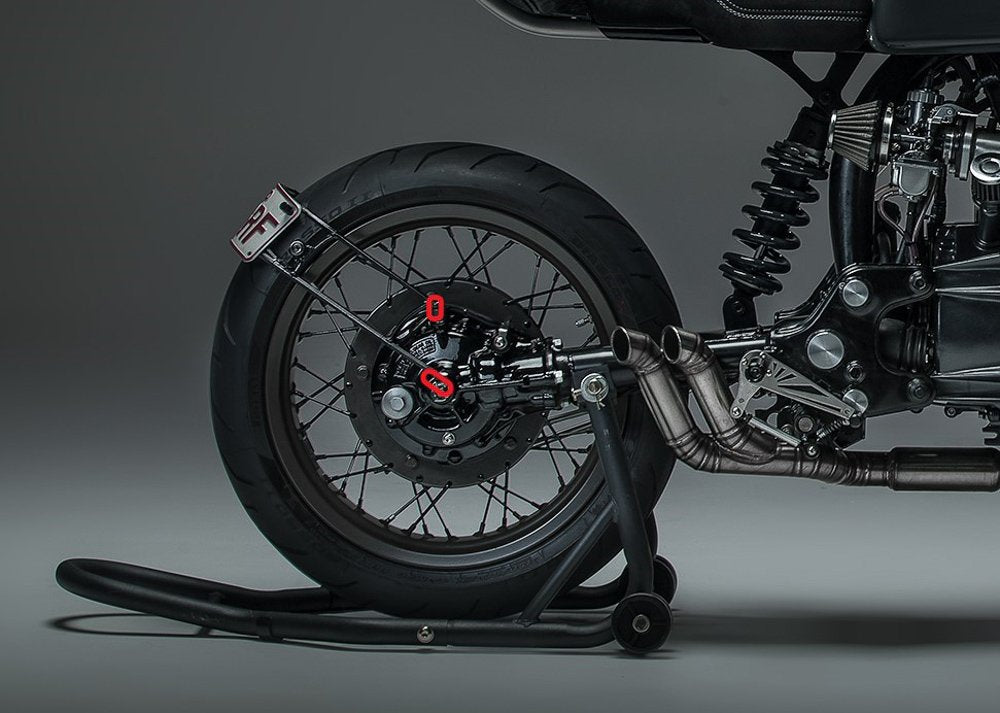
The first is to demonstrate a Shaft drive mount, with these I find its easiest to use existing fixing points rather than welding your own on The cast ally drive casing often is difficult to fabricate on, but will usually have 2 or 3 fixing point threads that you can use. The bike was the Signature series CX500. A single sided license plate mount, built out of mild steel rod.
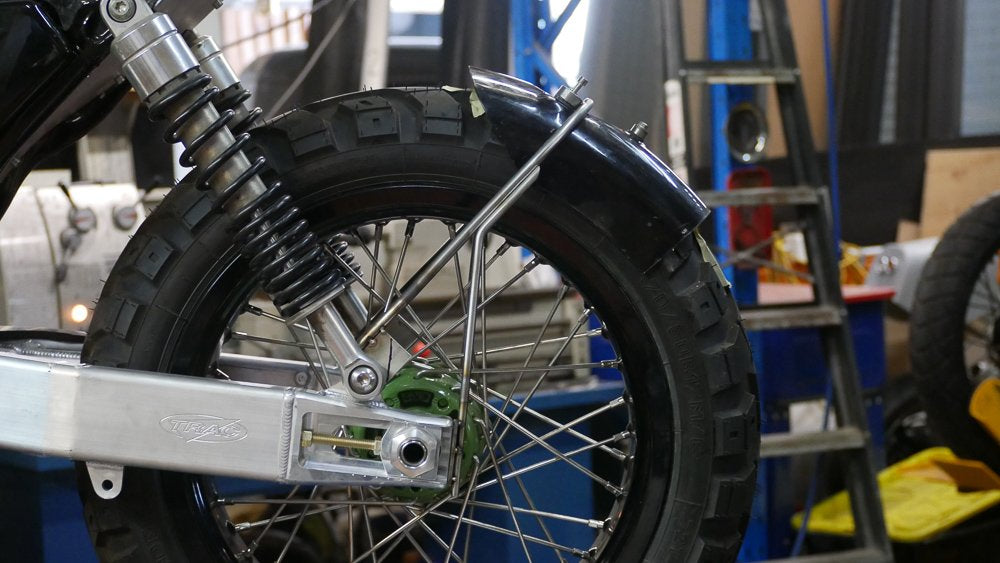
Above is a design using the bottom shock mount and tapping 2 threads into the billet end piece of the swing arm. You can also adapt this fixing type to use the threaded chain adjuster if your bike has that.
Third design uses 2 threaded bungs on either side where the swing arm is drilled and the bungs welded in. I use this on steel swing arms if the shock mounts allow for it. For this swing arm though there wasn’t enough room.

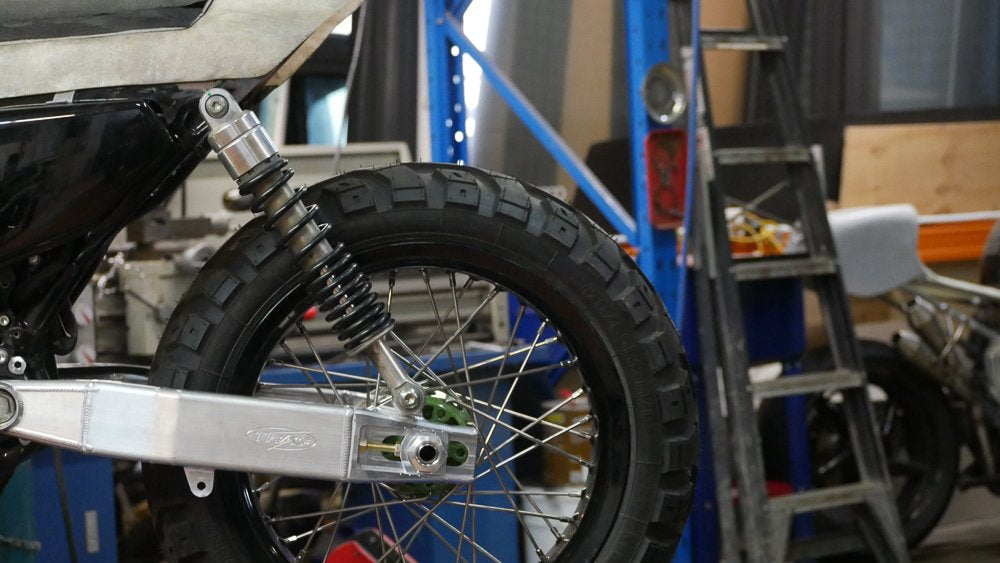
Last and my most used is the Counterbore slugs on top of the swingarm with threads welded onto the swing arm. Its simple, looks great and tends to make it easy to line up once you start fabricating the arms.
Most importantly the mounts are a good distance apart, having 2 fixing points approx. 80mm apart gives you a decent amount of room to brace off each other. Use a bit of common sense here and you’ll soon figure out what works for you.
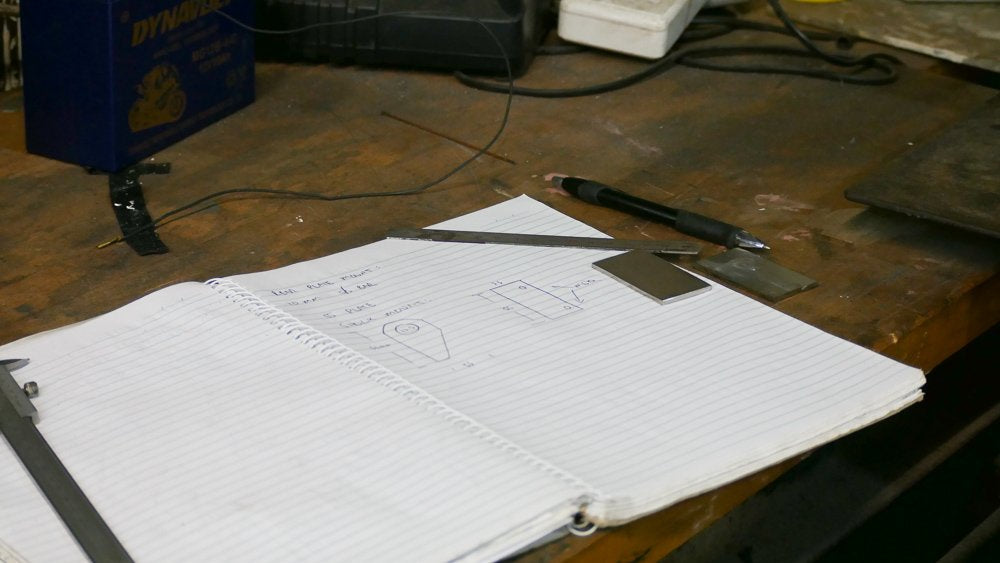
Step 3: Mark + Cut the fixing points
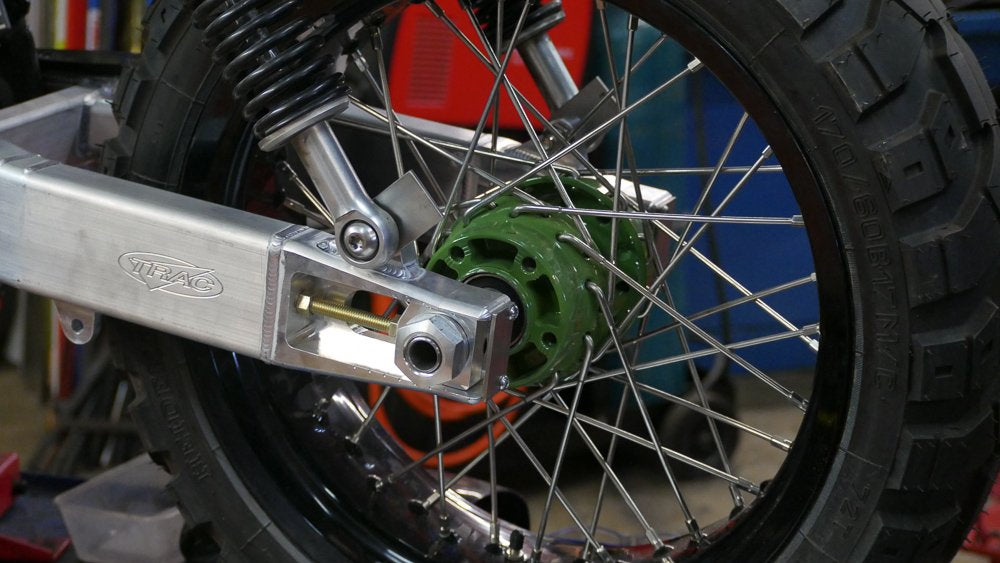
Once you’re decided on mounting options for the license plate bracket. Measure, mark and cut your plate out (or counterbore bungs). This design required 2 x plates on either side of the swing arm. Here I cut a little larger than I needed and was able to trim back later. One plate was fixed to the bottom shock bolt, the other I had to tap 2 x M6 threads at the back of the swing arm.
Drilling and finishing the stainless plate clean I fix these parts in place. This gives me the base I need to start building the swingarm mount tail tidy
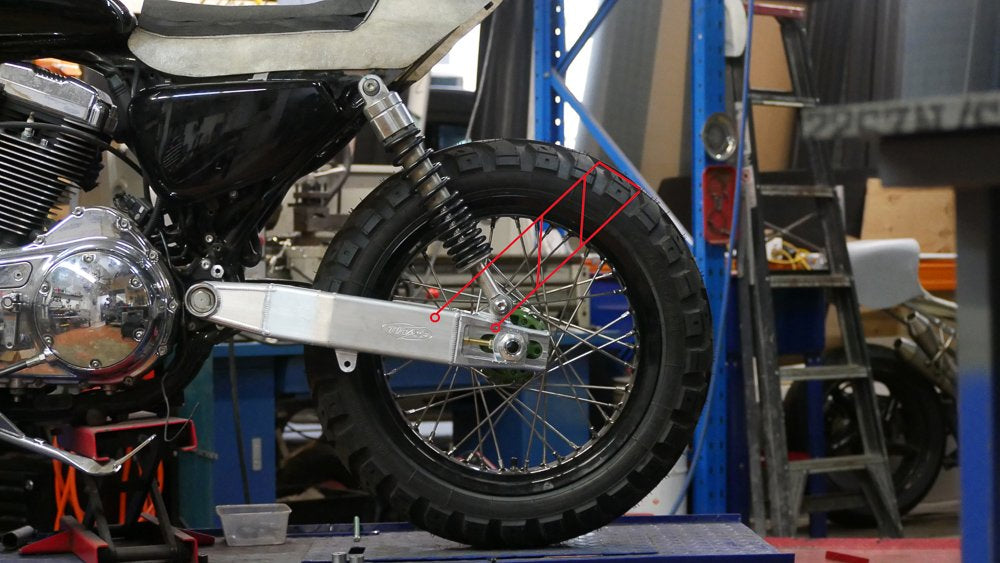
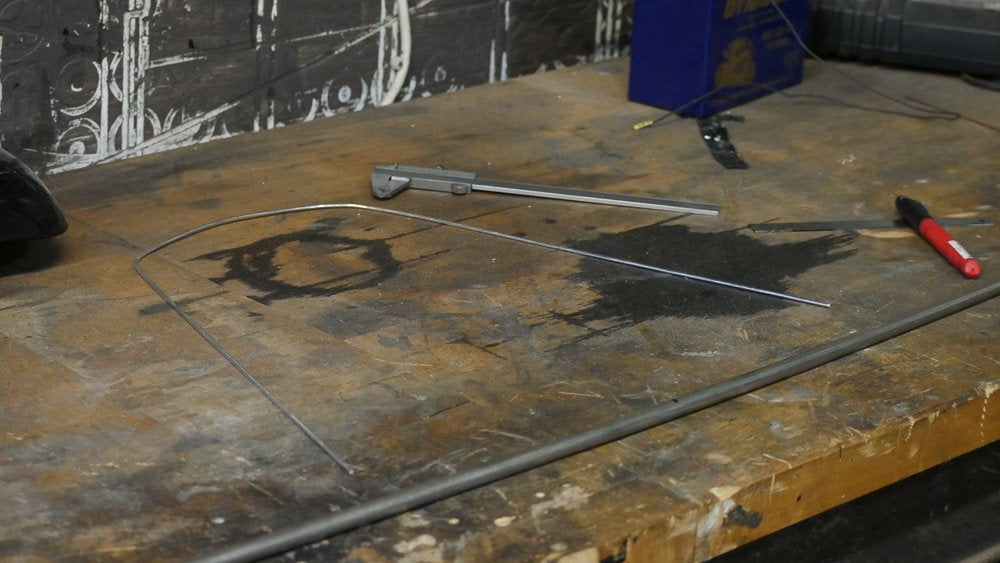
Step 4: Measure for the hoops.
Depending on your design, measure and mock up the round bar hoops. With the license plate mount shown It’s fixed on both sides, The tyre is 170mm wide and the 2 fixing points on the swingarm are 305mm wide.
With these measurements I picked a die on my manual bender and bent the bar up. If you don’t have a bender, I use a piece of wire to mock up the shape of the hoop, mark it on my welding table and weld up a quick jig on the table to bend it. You can check out the method on the “how to make a fork brace” article.
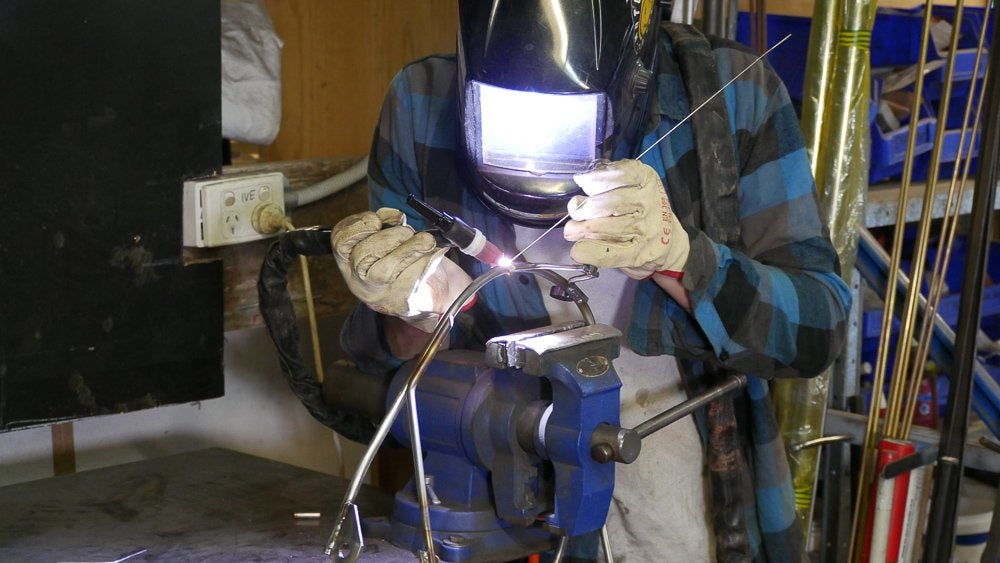
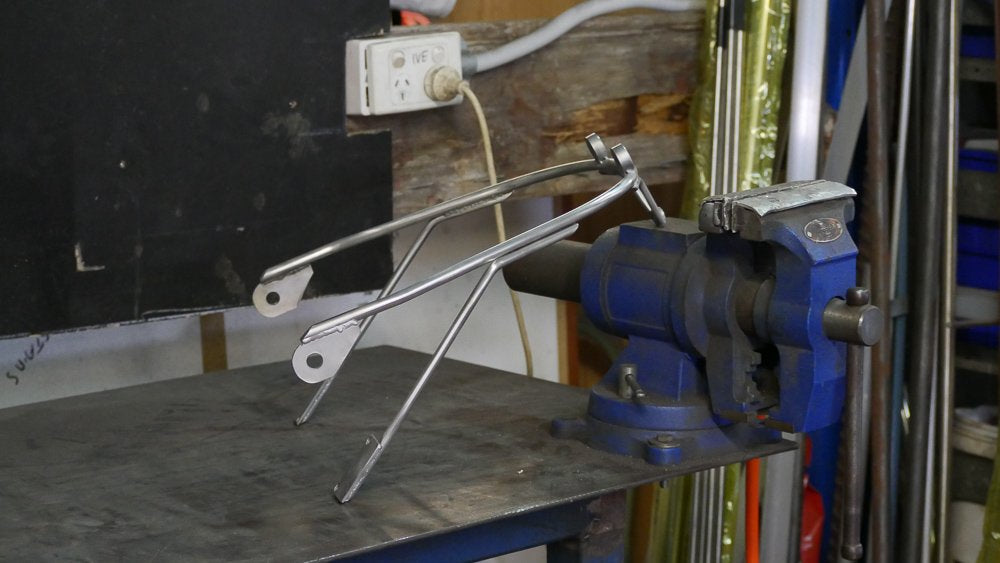
Step 5: Fabricating the license plate bracket
Using the method I mention above, I shape a piece of wire to check my length of rod needed for the hoop on the license plate bracket. That done it was cut, shoved in my bender and rounded to make the top hoop.
The way I build is a little different to most, I just start making it and the design comes together as I fabricate. With this swingarm plate bracket, the most important thing to my eye was matching the frame angle of the tail, so I tack welded the top hoop on, and set it at the angle I wanted.
Step 6: Bracing the License plate mount
With my top line set, I worked out the best way to brace it with the mounts I had. A single bend, and a nice chamfered end to the round bar. That hardest part about all this is making the decision, theres a million ways to go about it. I’m luckily very decisive by nature, I make a choice and that’s it.
You do whatever makes you happy.
The brace was again shaped in some wire, checked for length, cut from round bar and bent to suit.
My braces ready for the license plate swing arm mount I tacked it all in place. I lay down a fair few tacks on each join, so when the plate mount is removed for final welding the movement is minimal.
Step 7: Making the tail tidy
Now you have the hoop complete and tacked in place, we need to make sure you can mount your plate, fender (and lights if you want) on the bracket. Use the plate steel to make tabs and tack them onto the bracket. This design as it’s holding a fender too I triangulated the mounts. 2 on top, one on the bottom, all using M6 bolts for fasteners. These will hold the license plate and fender in place…. It kinda looks good that way too.
An easy alternative here is to simply shape some flat bar to suit, drill the mount holes and weld it onto the hoop. It pays to have a number plate on hand to help with measurements here.
I’ve often used the swing arm mount tail tidy to house the rear LED indicators too, it’s something different that can look really nice if done well.

Step 8: Finish welding
With all the provisions made for mounting points and any extra tabs needed for lighting tacked in place, remove the brace, and get yourself set up to finish weld the plate bracket.
Give the piece a final clean and once over witch scotchbrite before welding and take your time, letting the job cool down if need be in between welds.
Once the jobs cooled off, slap it on for a test fit and gaze at your mastery of the metallic elements. Or if you skimmed the blog and didn’t really take much in, it could be a dogs breakfast… either way, be proud of yourself. At least you made it.
As always I hope me spending an hour or two to write this down has been insightful and helped you on your way to building a better bike! Have fun with it
Tom
WE BUILD BIKES WITH PURPOSE.
Purpose Built Moto is home for unique custom motorcycle builds. We offer a unique motorcycle customizing experience in the heart of the Gold Coast.