
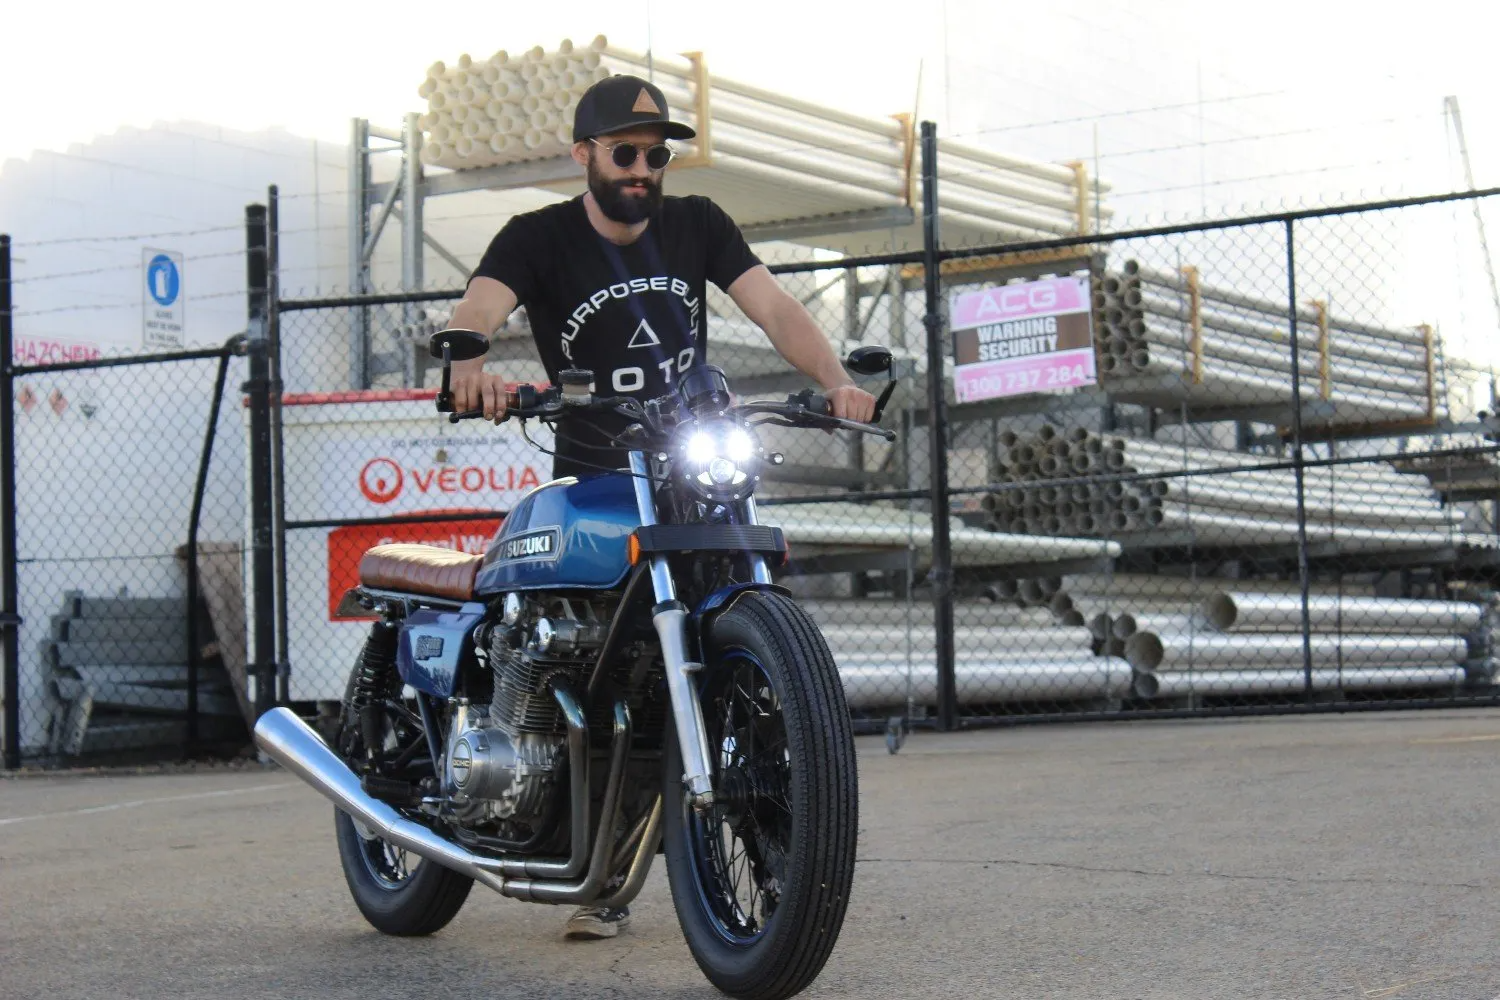
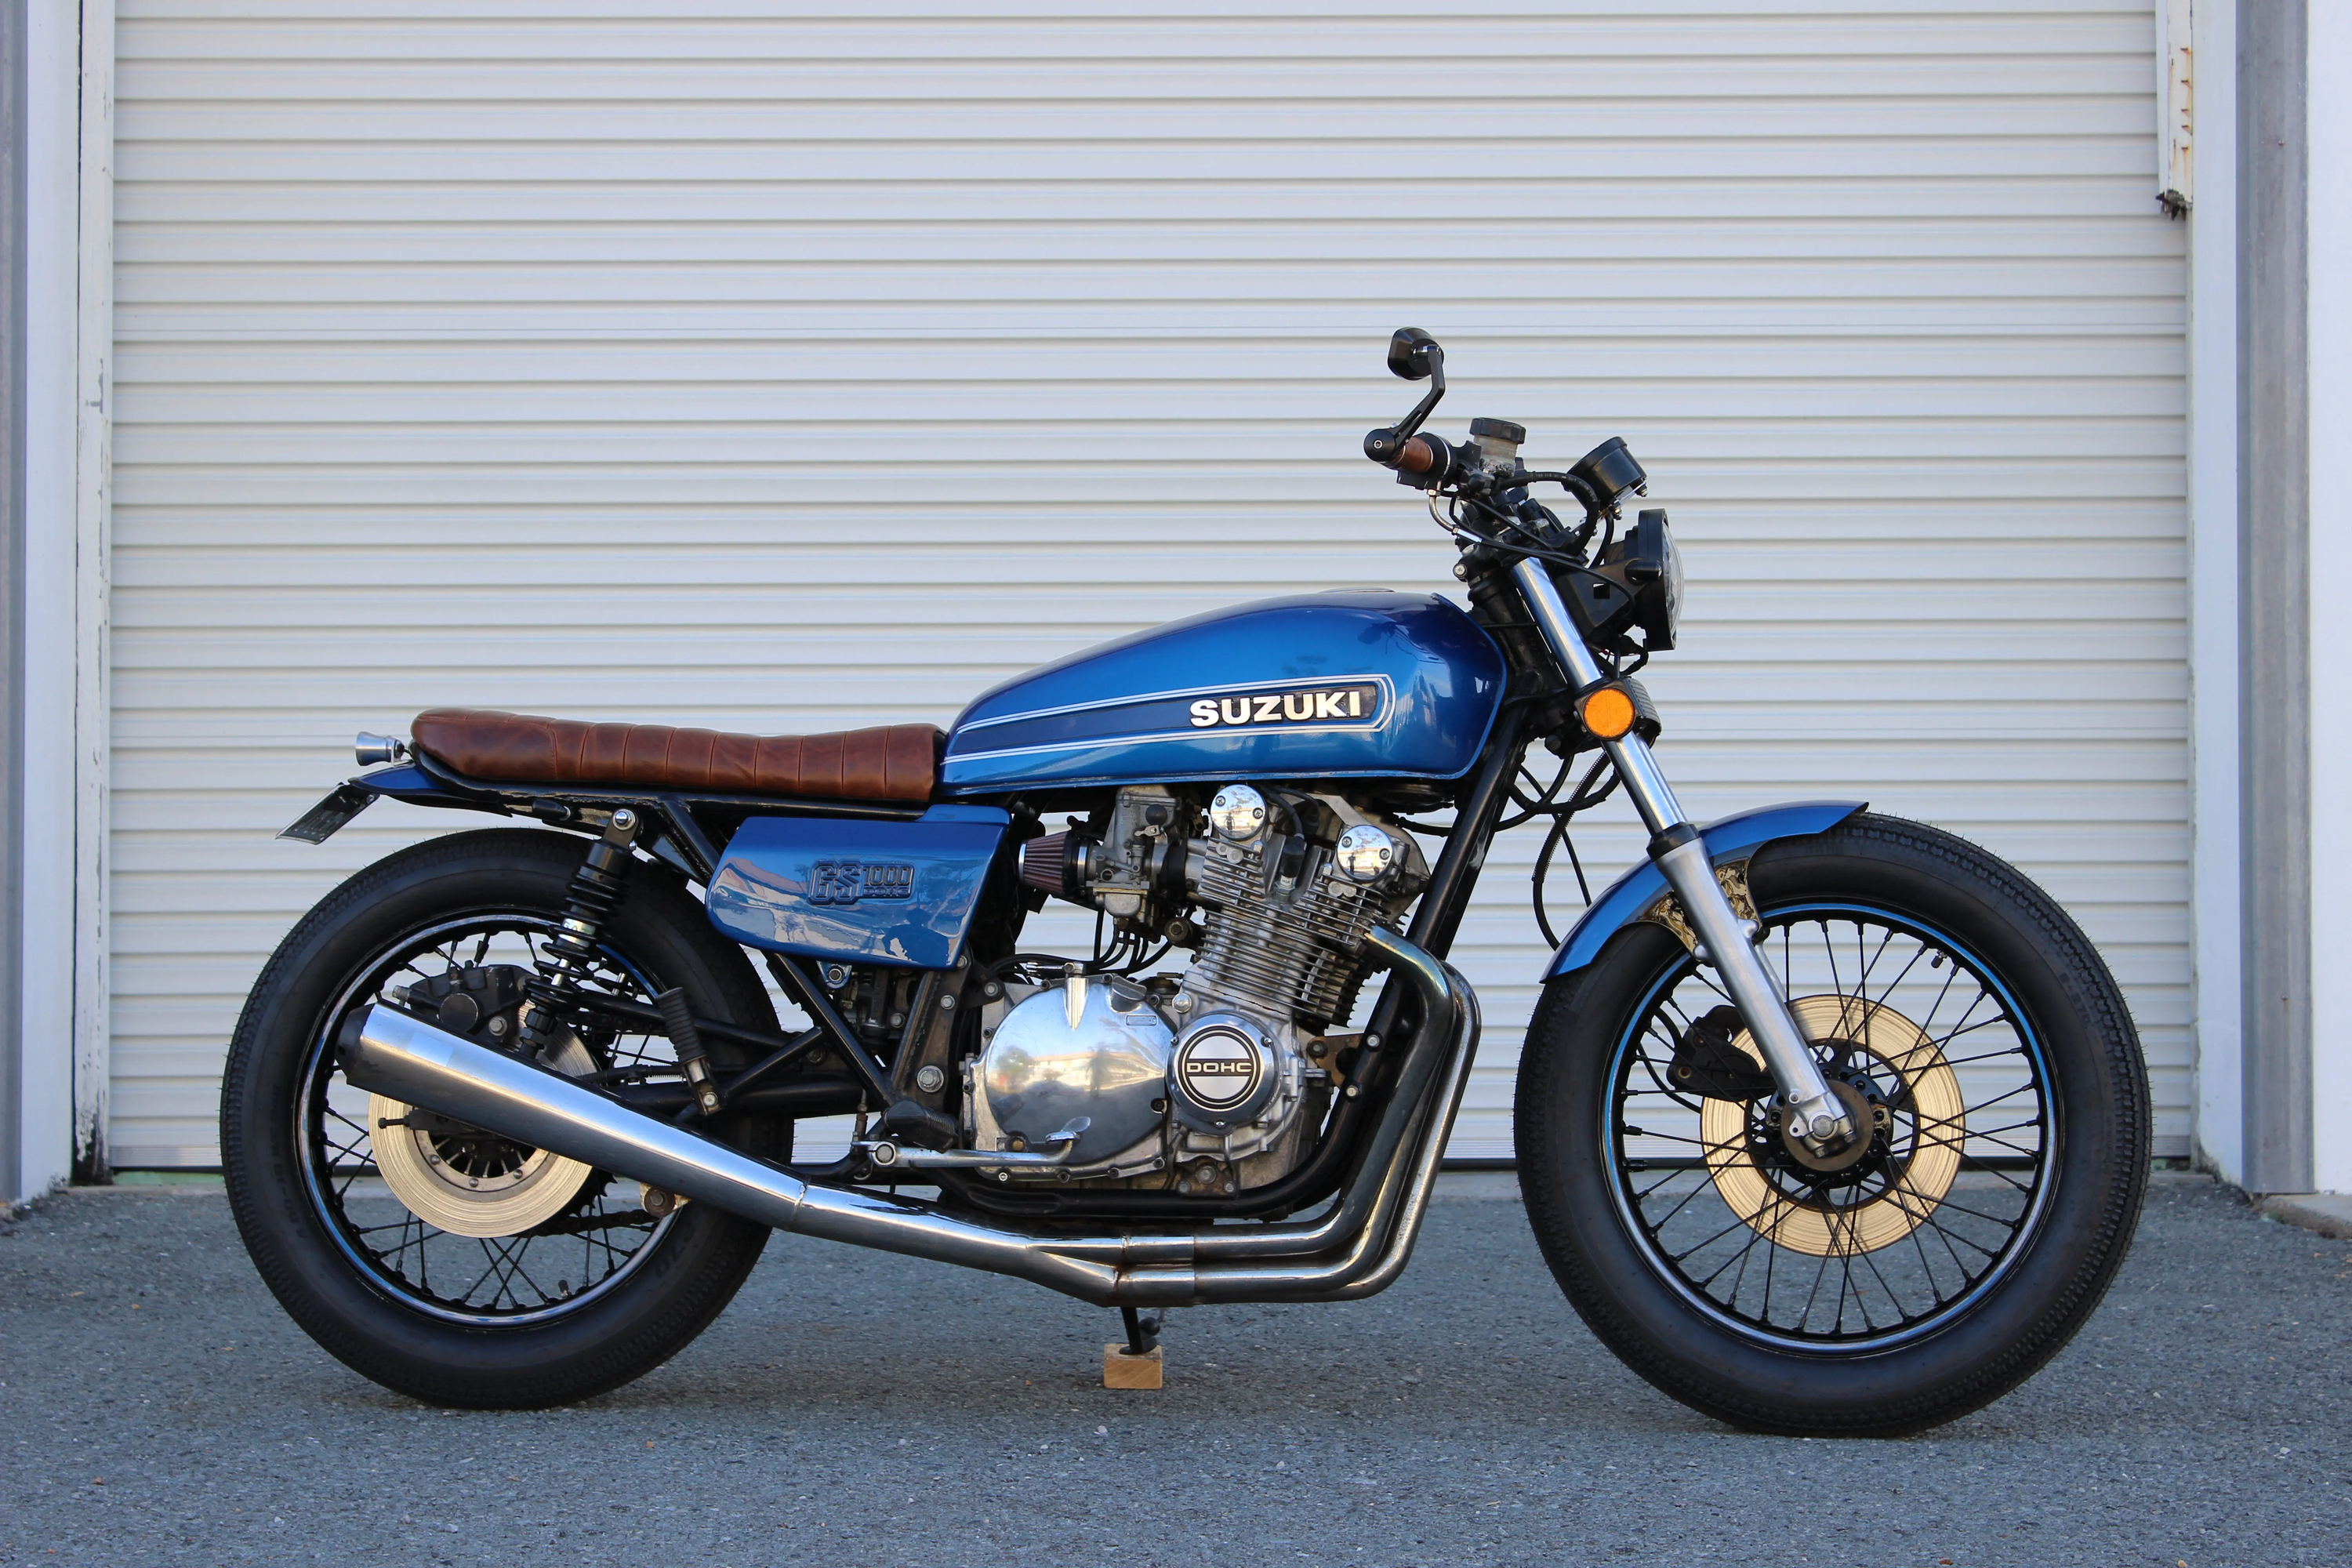
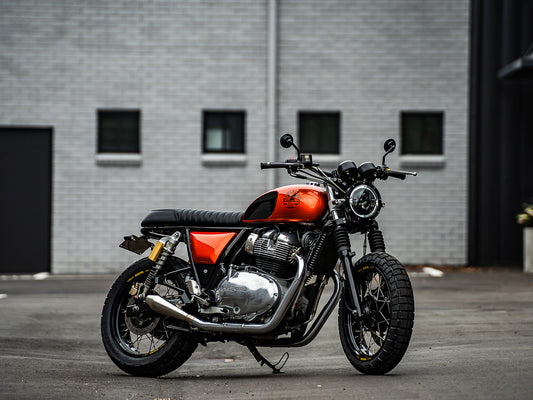
I have a real soft spot for the Suzuki GS series, The GS550 was my first ever bike project and I still ride it to this day. The motors sound great and they’re a simply layed out and great riding bike with a strong engine. When the rider of this 1978 GS1000 got in touch for a custom seat and tail I had to jump at the chance.
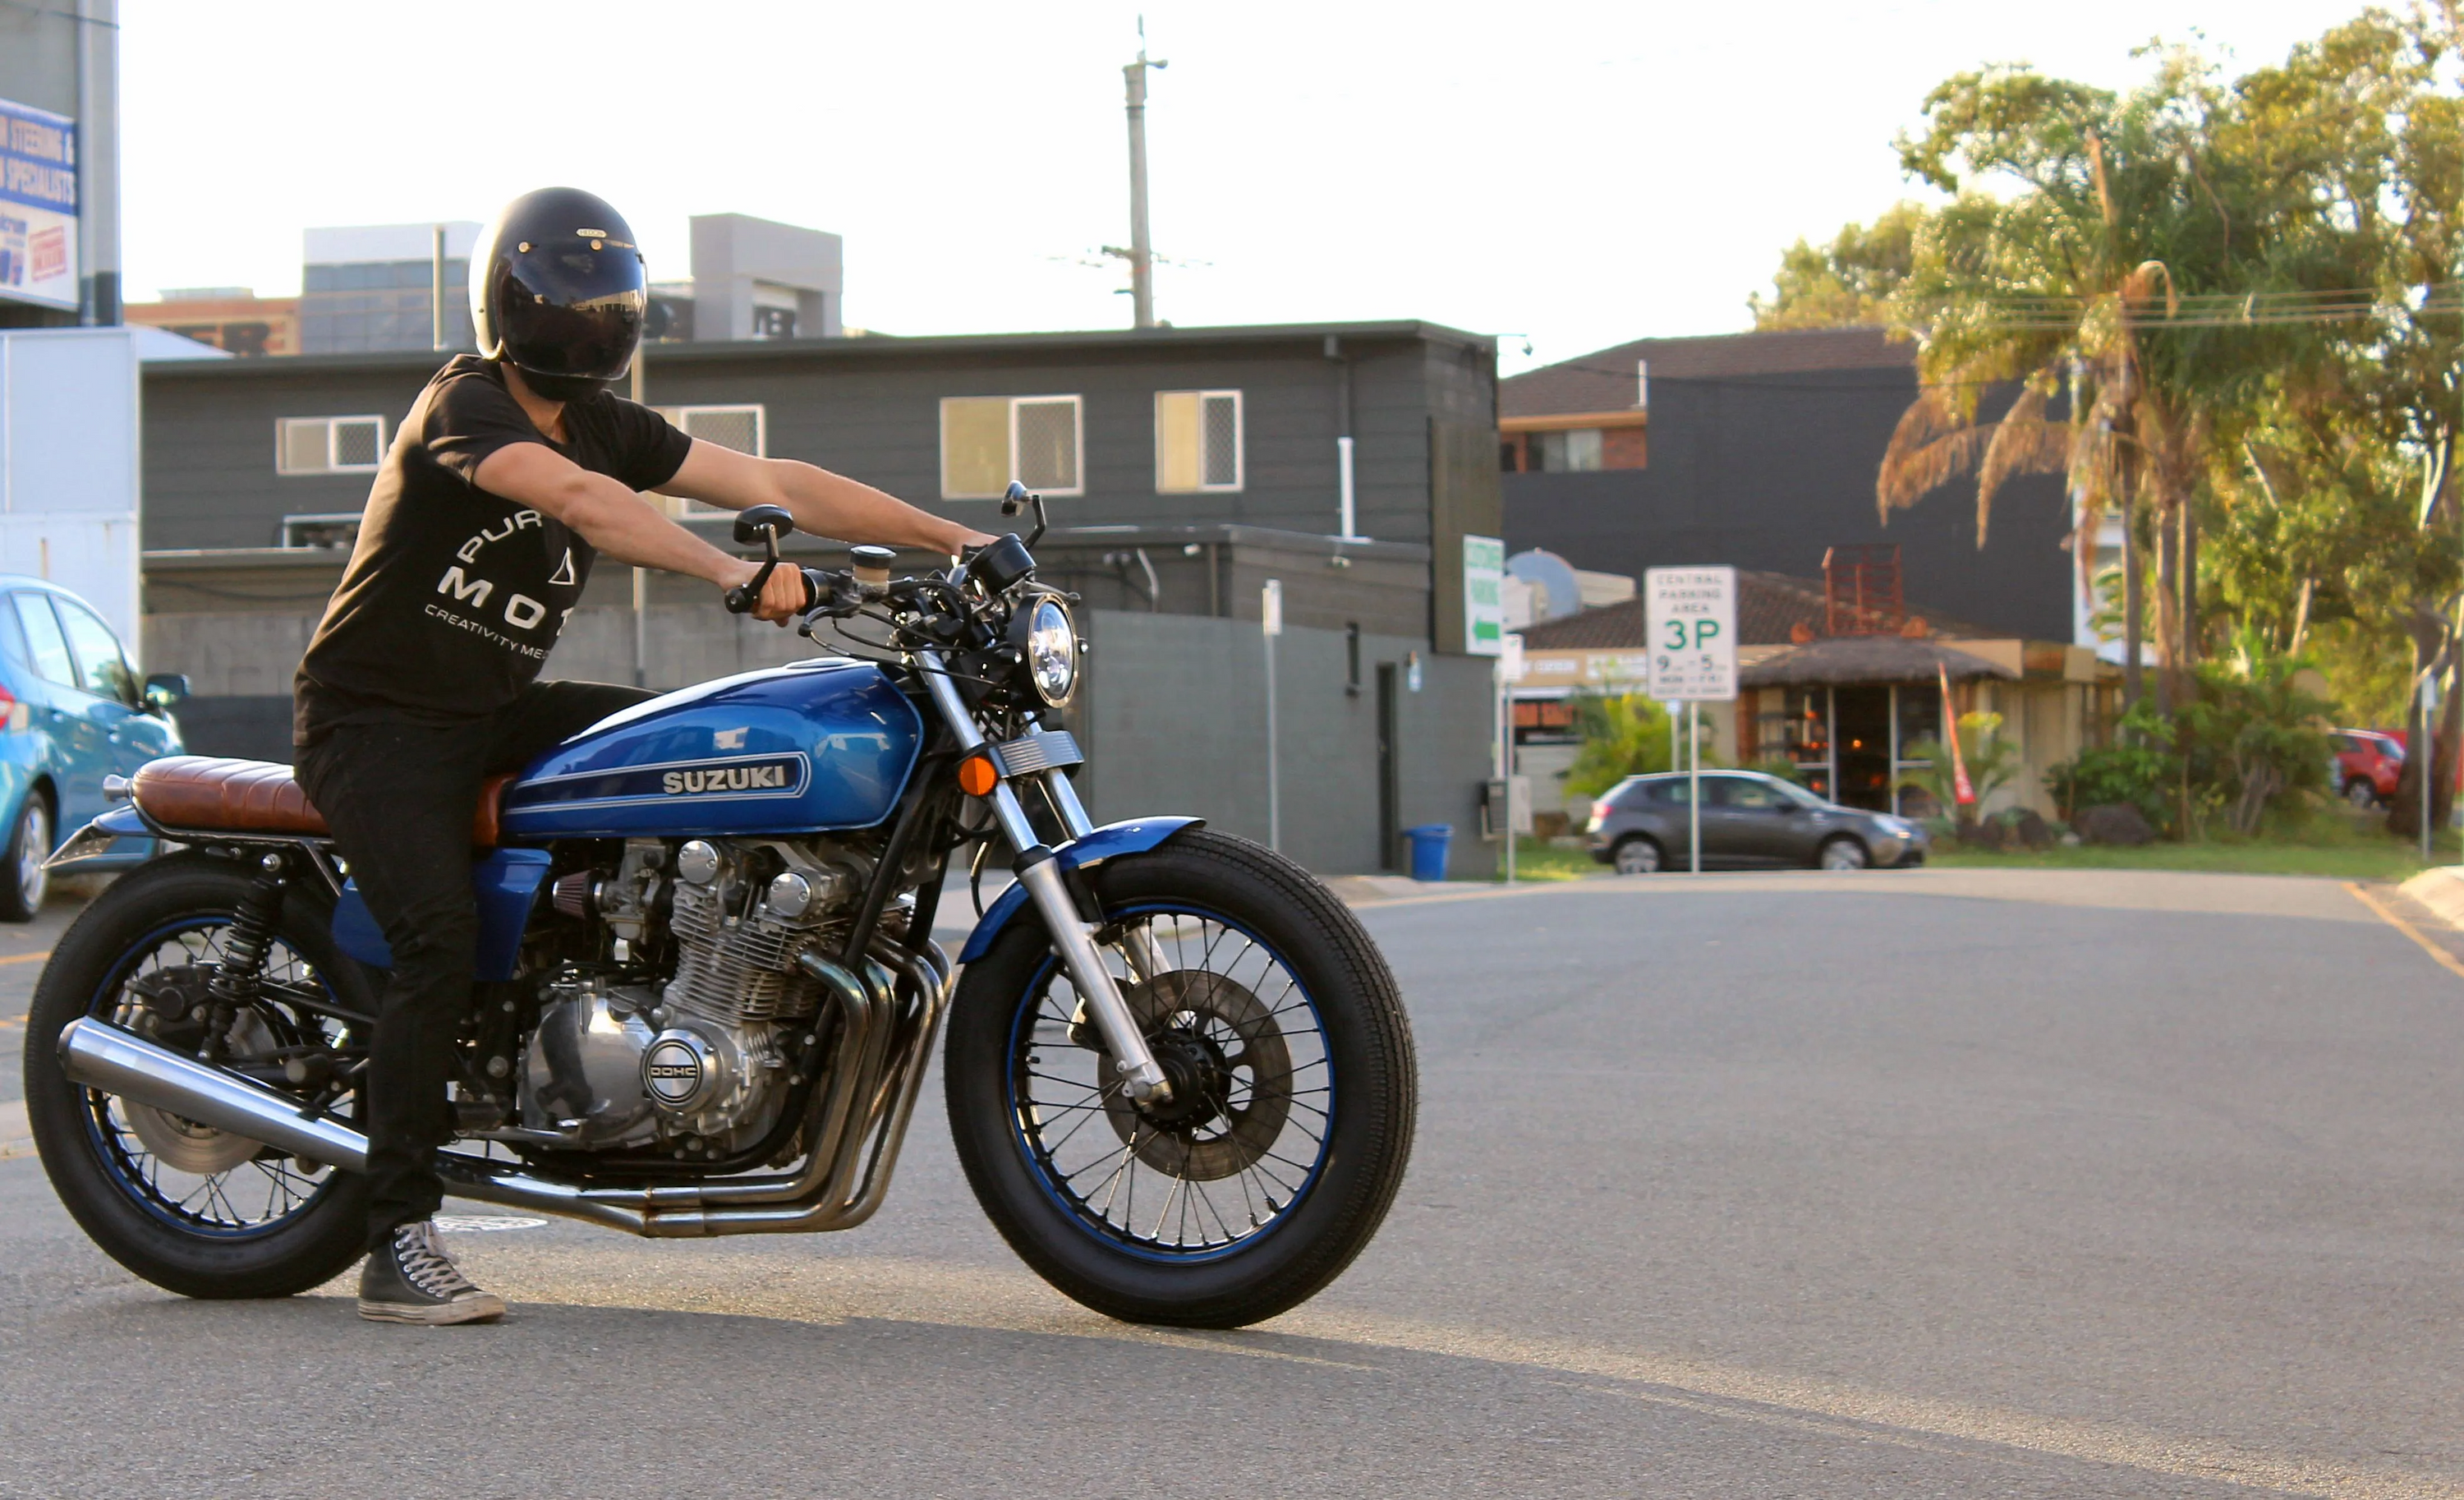
I’m a small guy so to me riding something as big as an early litre bike feels like straddling a bathtub that you can wrestle around corners. That said when you open up the quad carb bank on an open road it’s easy to see why someone would pick this big old thing as their weapon of choice. A smaller and simpler job in terms of the check list of modifications we completed but as you’ll see these small changes yielded some big results. The brief between myself and the rider, Kane was fairly simple:
- Classically styled brat seat + tail
- Updated LED lighting all round
- Keep the historical wear and tear on the bike
The rider was adamant we had to keep the battered tank and aged look of the motor. Everything else was up for some refreshing. The bike was torn down one Sunday morning after a quick Motosocial ride so I had some welcome distraction in the shed with the guys stopping by to talk shop(read; talk shit).
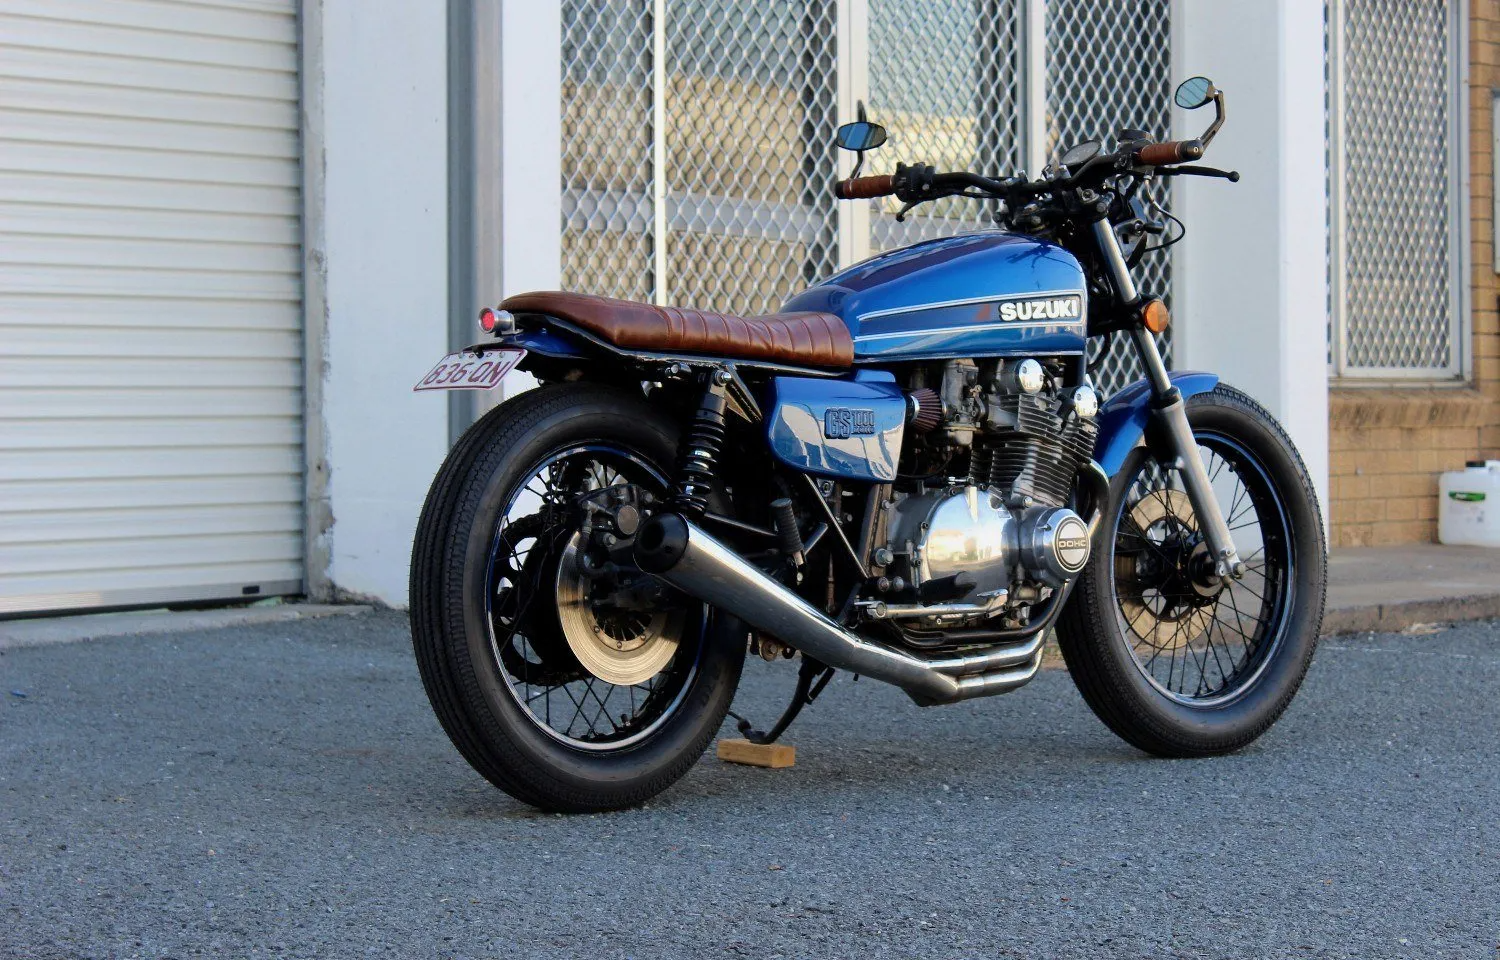
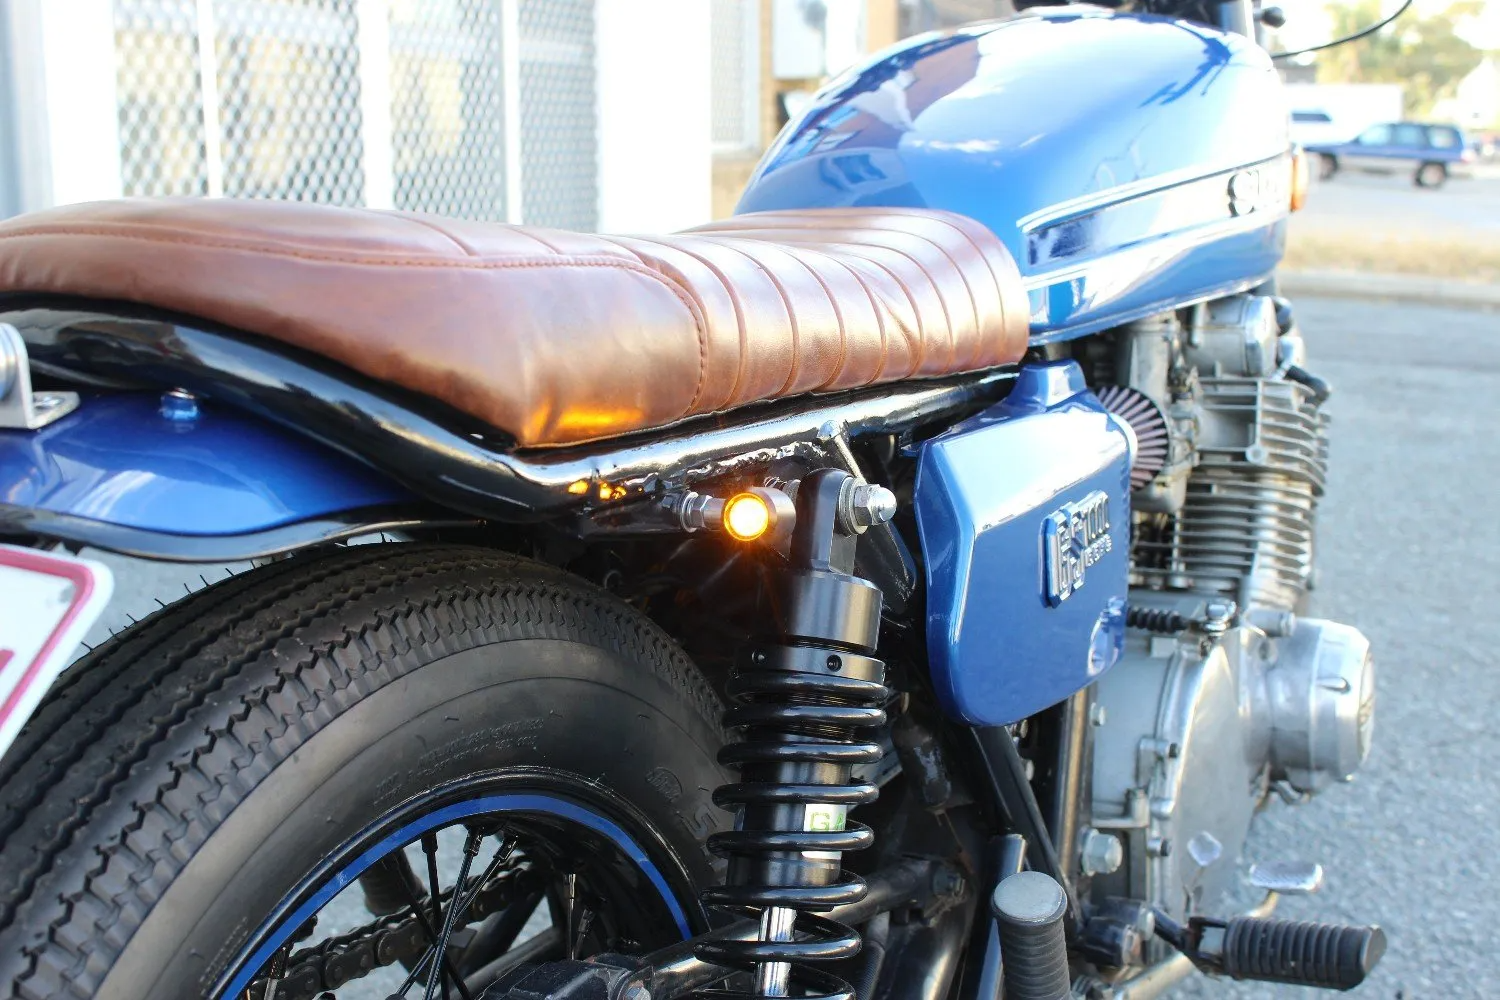
The original seat and tail are of epic proportions, with a few select cuts I’d bet you could turn the original tail cowl into a pretty good 6 pack esky, it’s that fucking big. Once it was stripped out, the excess tabs, hinges, and anything else deemed unnecessary was chopped and a new tail hoop fabricated including seat mounts. Using our experience from the CB350F build, Jamason and I made the seat pan to accommodate good wheel travel while keeping a slim profile over the frame. Foamed up and finished by our talented upholsterer Jamason with a bottom sewn roll stitch in an oil pull up Whiskey brown leather.
To house the tail lights and number plate a small rear fender was fitted by way of a few threads in the frame and some welded on spacers to keep it snug onto the upswept rear hoop.
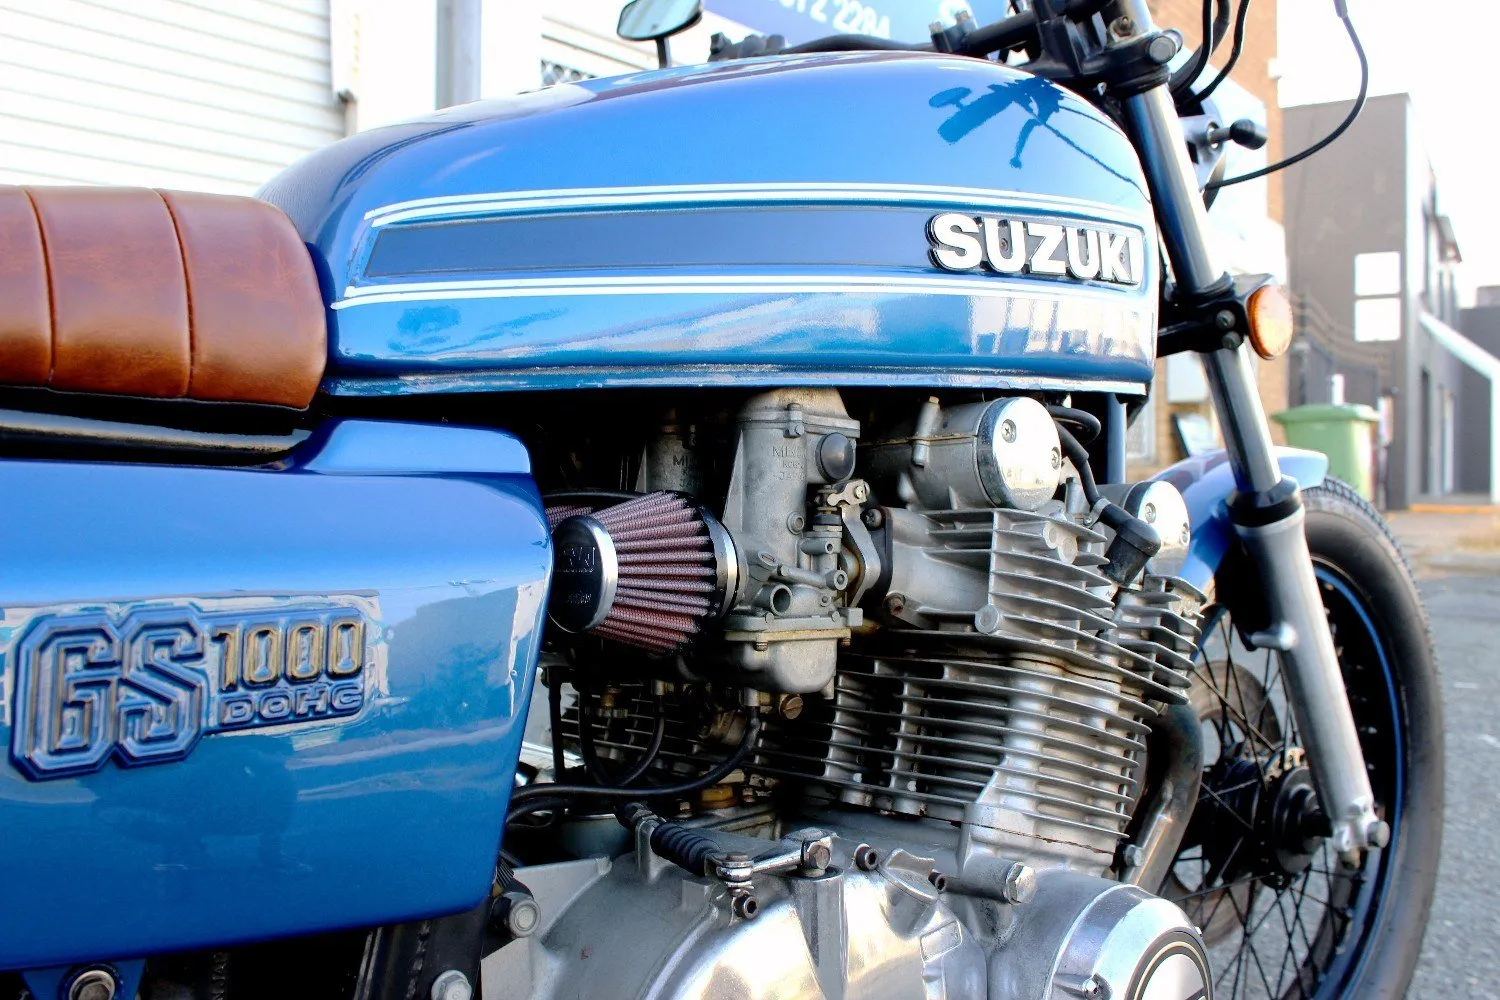
For a change here I wanted to keep the side covers, although the airbox was removed, I wanted to colour match them and keep them installed. They were in pretty rough condition so once removed I had to do a bit of plastic repair and finishing to make sure they painted up nicely and would last another 40 years. As I was stripping the bike down, I inadvertently knocked one of the 4 pod filters lightly with by spanner, the bloody thing fell right off. The flange was still clamped to the carb but the press fit filter was now missing. That’s what your bike is relying on to keep its moving parts clean!? I swiftly replaced the cheap pods with a set of DNA filters, something I know will do the job right and last a lifetime.
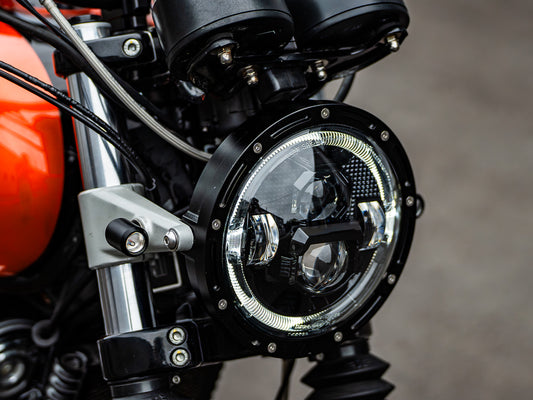
On the front end the old Suzuki received a full hit of LED lighting from the Purpose Built Moto range. 5.75” LED flashpoint with some Beehive indicators used as mounting hadware to tie it all in with an ultra clean finish. Personally I would have liked to see the classic headlight used to suit the style, but the for the rider visibility is key as this is his daily rider. When it comes to visibility of a headlight The LED flashpoint is second to none.
That was the fabrication and fitting done, The bike was stripped and parts sent for paint. Utilizing a new colour match camera we were able to photograph the tank, and punch out a perfect colour match for the original royal blue paint that even accounts for sun fade and ageing. Fuck me, the future is now!
The old tyres had to go, and keeping with our overall styling of this big rig, a set of Shinko E270 tyres were stretched over our freshly painted and pin striped wheels. Some people don’t realize that old tyres, regardless of the amount of tread left can get increasingly hard and slippery over time. These particular tyres pulled off the GS1000 were over 20 years old! You might not ever notice it in dry weather but in the wet you’d be in for a wild ride, so keep an eye on your tyres age by checking the date printed on the tyre wall.
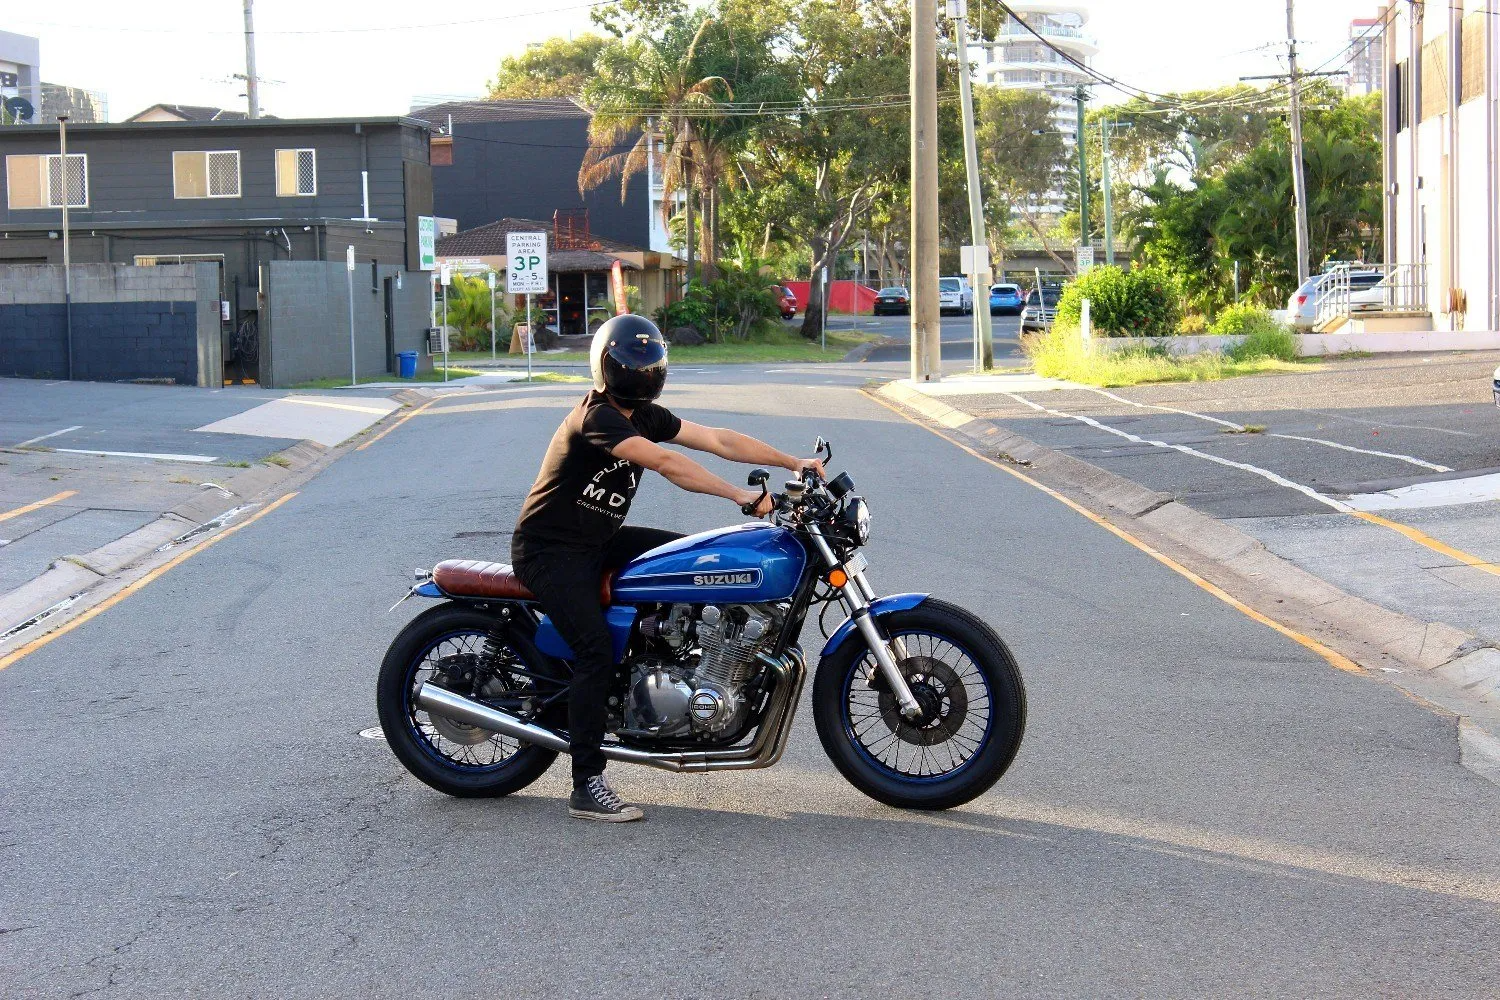
Once the finished parts were back in my hands, a quick assembly was wrapped up with the addition of some new Gazi Sport x rear shocks. The fresh paint and parts cleaned up with some Celectro detailing products and the bike put on the road for a shakedown ride. We’re getting good at this brat seat thing, and although it looks like a plank, the seat, suspension and bars give a comfortable ride.
The GS1000 is a big heavy bike, lets not bullshit. The last thing I would call it is nimble, however it is pretty fun. You’ve got a huge amount of stick and the Low rise MX bars with new brat seat give a comfortable touring style riding position. It’s no ground breaking custom, but the subtle touches made on this Iconic old boy have given it a new life. The 1978 Suzuki GS1000 came into us as a tired and beaten commuter in desperate need of some TLC. Leaving the garage the rider is sitting on top of a well layed out and classy custom, fit for the daily ride and a weekends riding through the hills.
WE BUILD BIKES WITH PURPOSE.
Purpose Built Moto is home for unique custom motorcycle builds. We offer a unique motorcycle customizing experience in the heart of the Gold Coast.
36 comments
Hey Mick,
Check out this link for your front fender:
https://purposebuiltmoto.com/product/fender-fabrication-pack-2/
Dude, that’s a sweet little front fender. Where did you get it?
Hi Tom
Im doing a similar thing to a 79’ GS 750 and was wondering how the bike ran with the pods on the carbs, i’ve heard all sorts of rumours of rough running due to the air not being stored up to well before it enters the carb. I wanted to loose my airbox but mindful that i want it to run right in all of the rev range.
Jase
You’ll need to rejet your carbs for sure. otherwise the bike will run too lean.
THis model came standard with a single disc set up.
We did no modifications to the front brake system.
Nice work on this bike, it is gorgeous! I am rebuilding the exact same bike, I see you have moved to a one rotor front brake system instead of the stock dual system. What type brake system did you use for the upgrade and does it handle as well as the dual?
Standard wheel size and the Shinko E-270 tyres to suit.