Installing Scrambler Mirrors
Our scrambler mirrors are a massive hit with riders everywhere. Who would have thought that a well-designed, well made and sharply priced product would be so popular?! We’ve put a lot of time into these refinements, learning as we installed and used them on countless makes and models of bike.
Our latest update includes a 360 degree adjuster, and the addition of a new bar end mounting kit. The magic of scrambler mirrors and bar end kit is that it is ultimately adaptable. It can be mounted from your standard mirror mounts, from your lever pivot bolt, off the end of the bars and used under or on top of the handlebars. These are adaptable to suit any bike and rider preference, and look good doing it.
Now lets run you through mounting the Purpose Built Moto Scrambler mirrors and Bar end mounting kit.
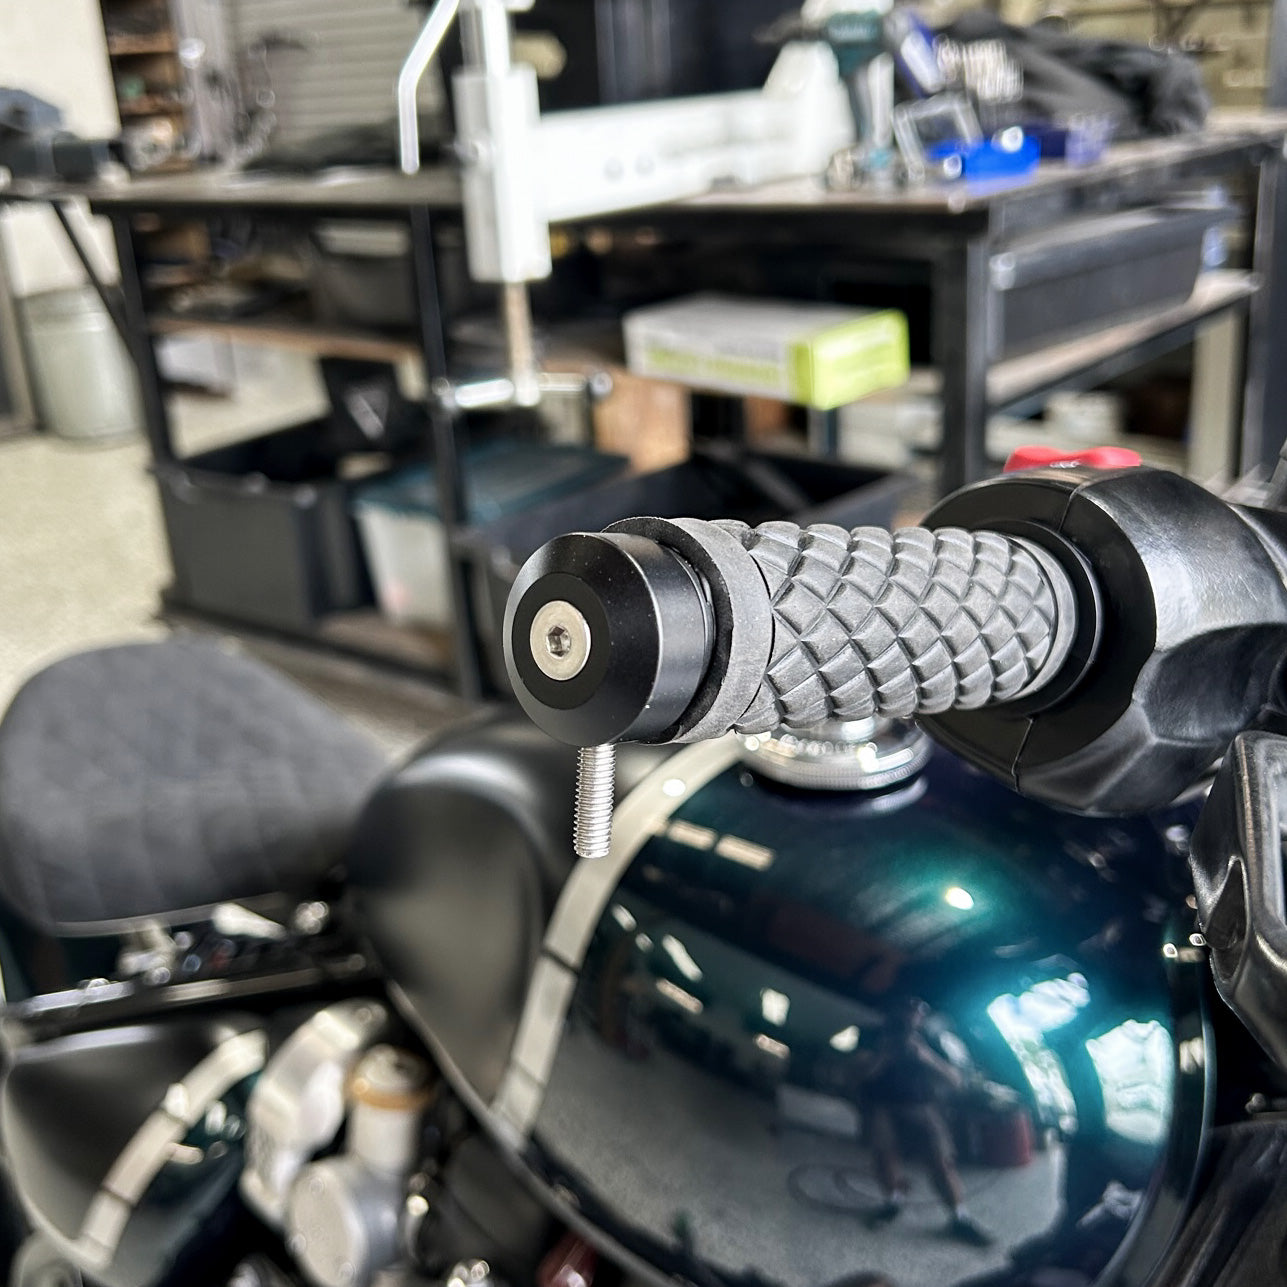
Bar end mounting option
What you need:
2 x Purpose Built Moto Scrambler mirrors
1 x bar end mounting kit
M4 Tap
Allen keys
10mm Spanner
Drill bit set
Thread locker
Step 1 – Prepping your handlebars
We need to make sure we have a clear run at the install, so if it hasn’t already been done, we need to remove any obstructions in the handlebar, and trim the caps off the end of the grips. If you have a late model triumph, or any other motorcycle that already has an M6 thread in the handlebar you can skip all of the steps and go straight to step 3.
Once that’s done we can move onto installing the threaded slug.
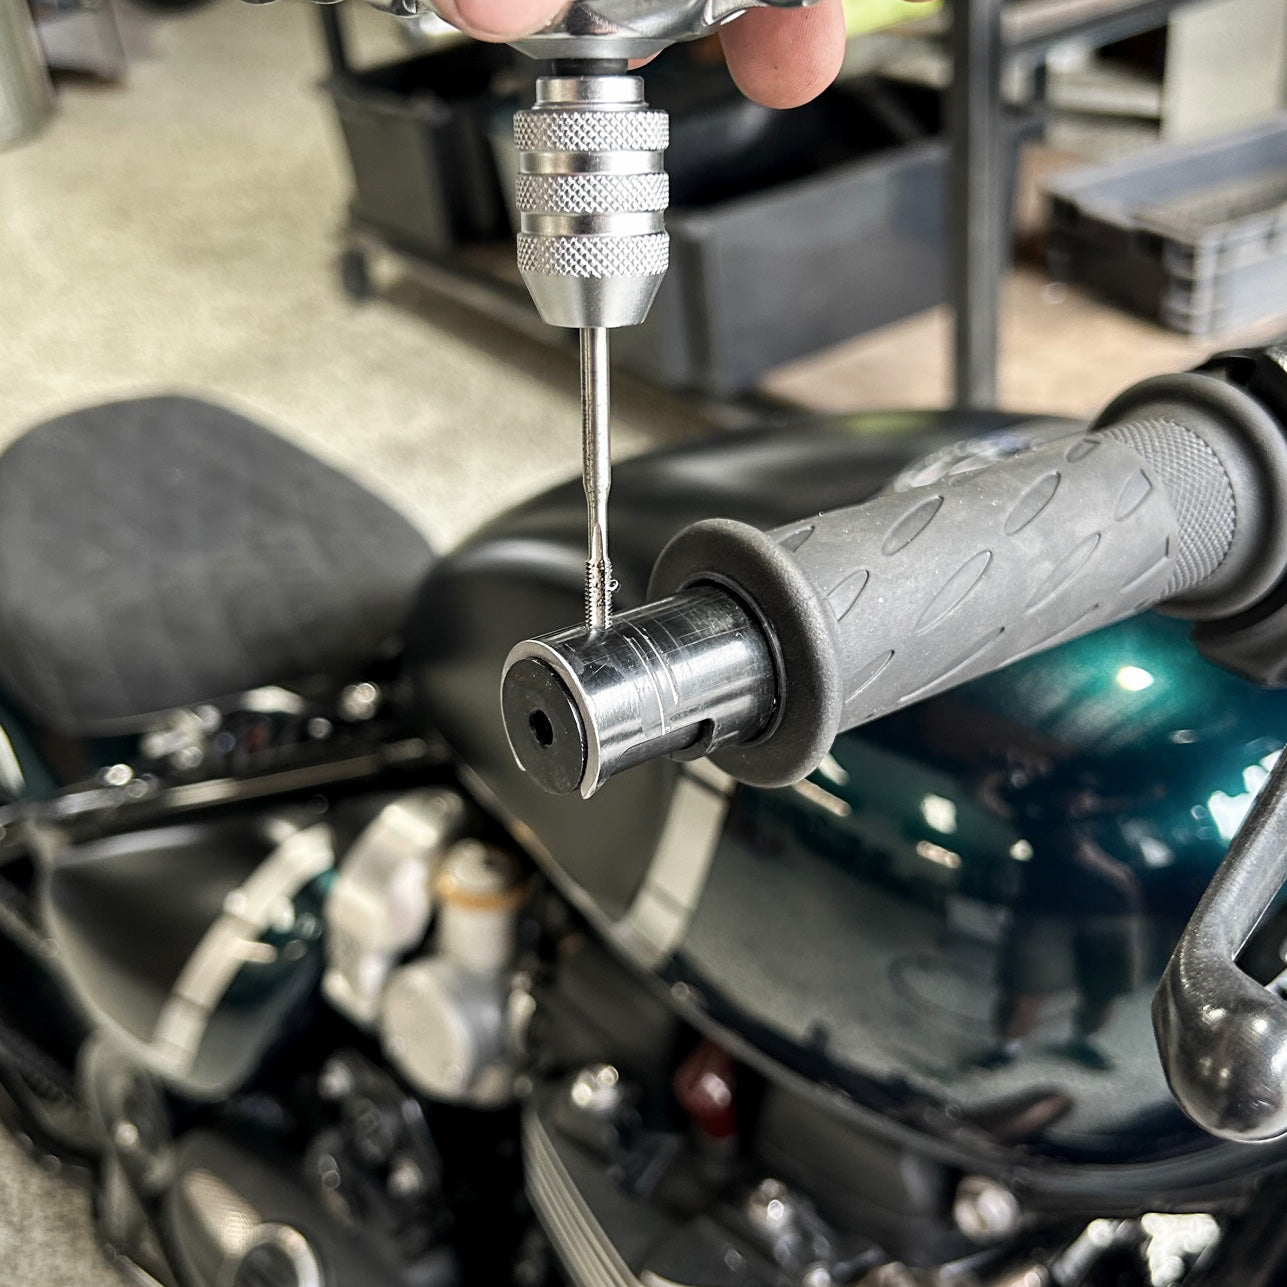
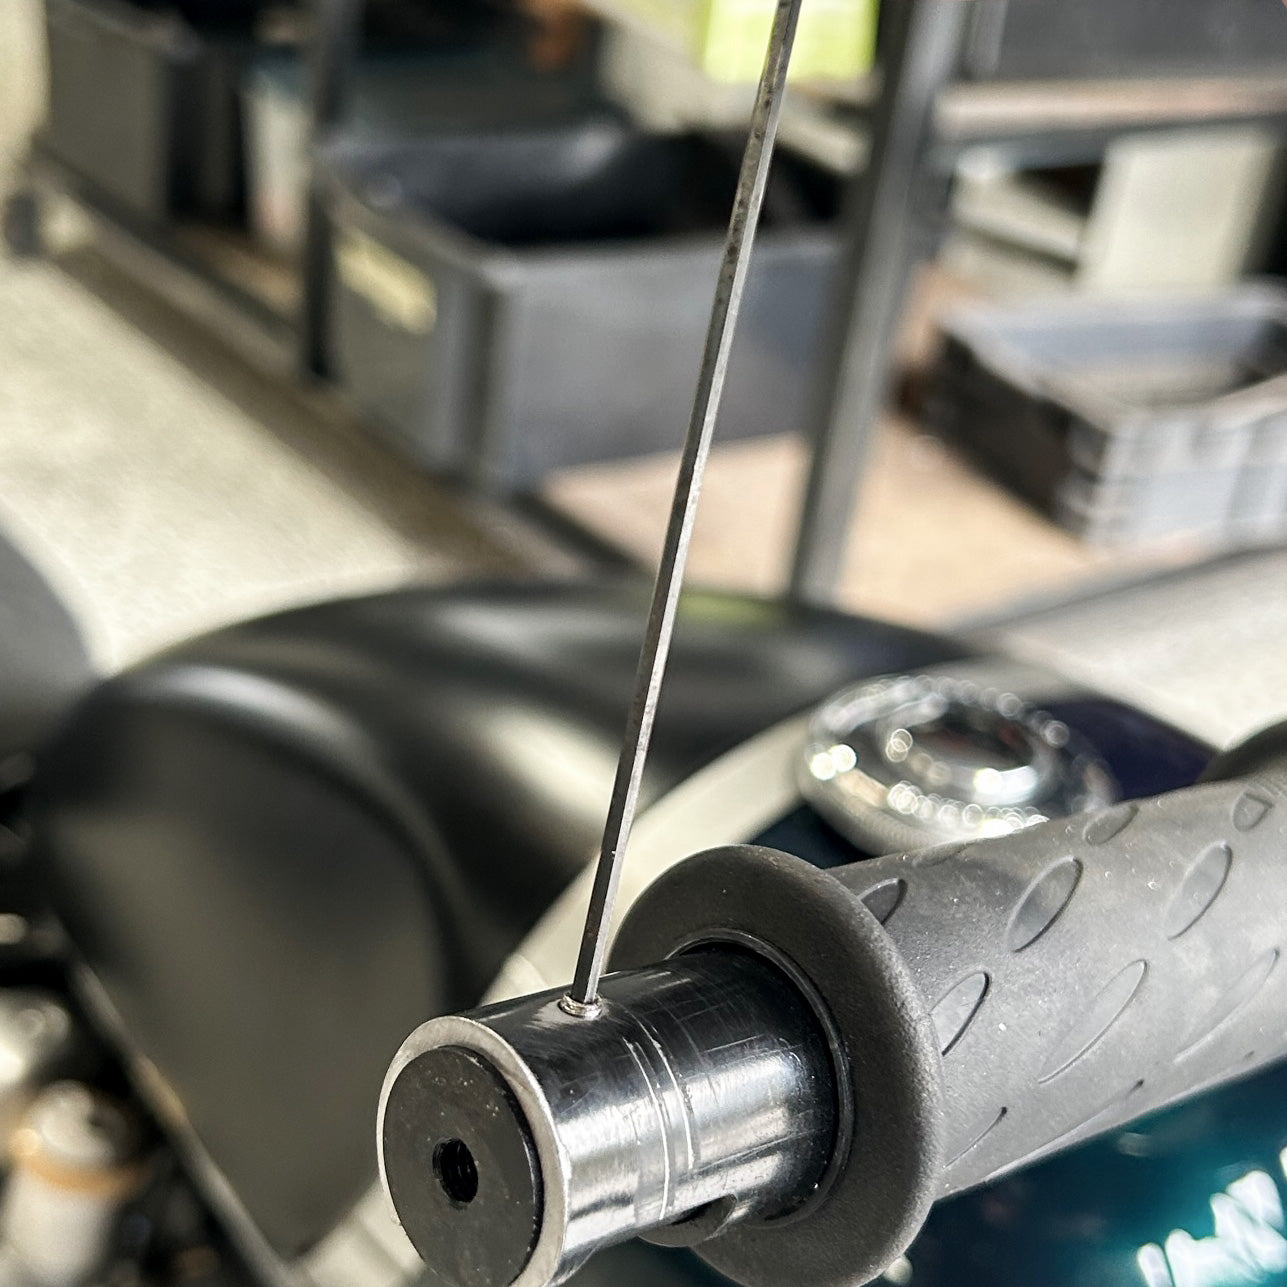
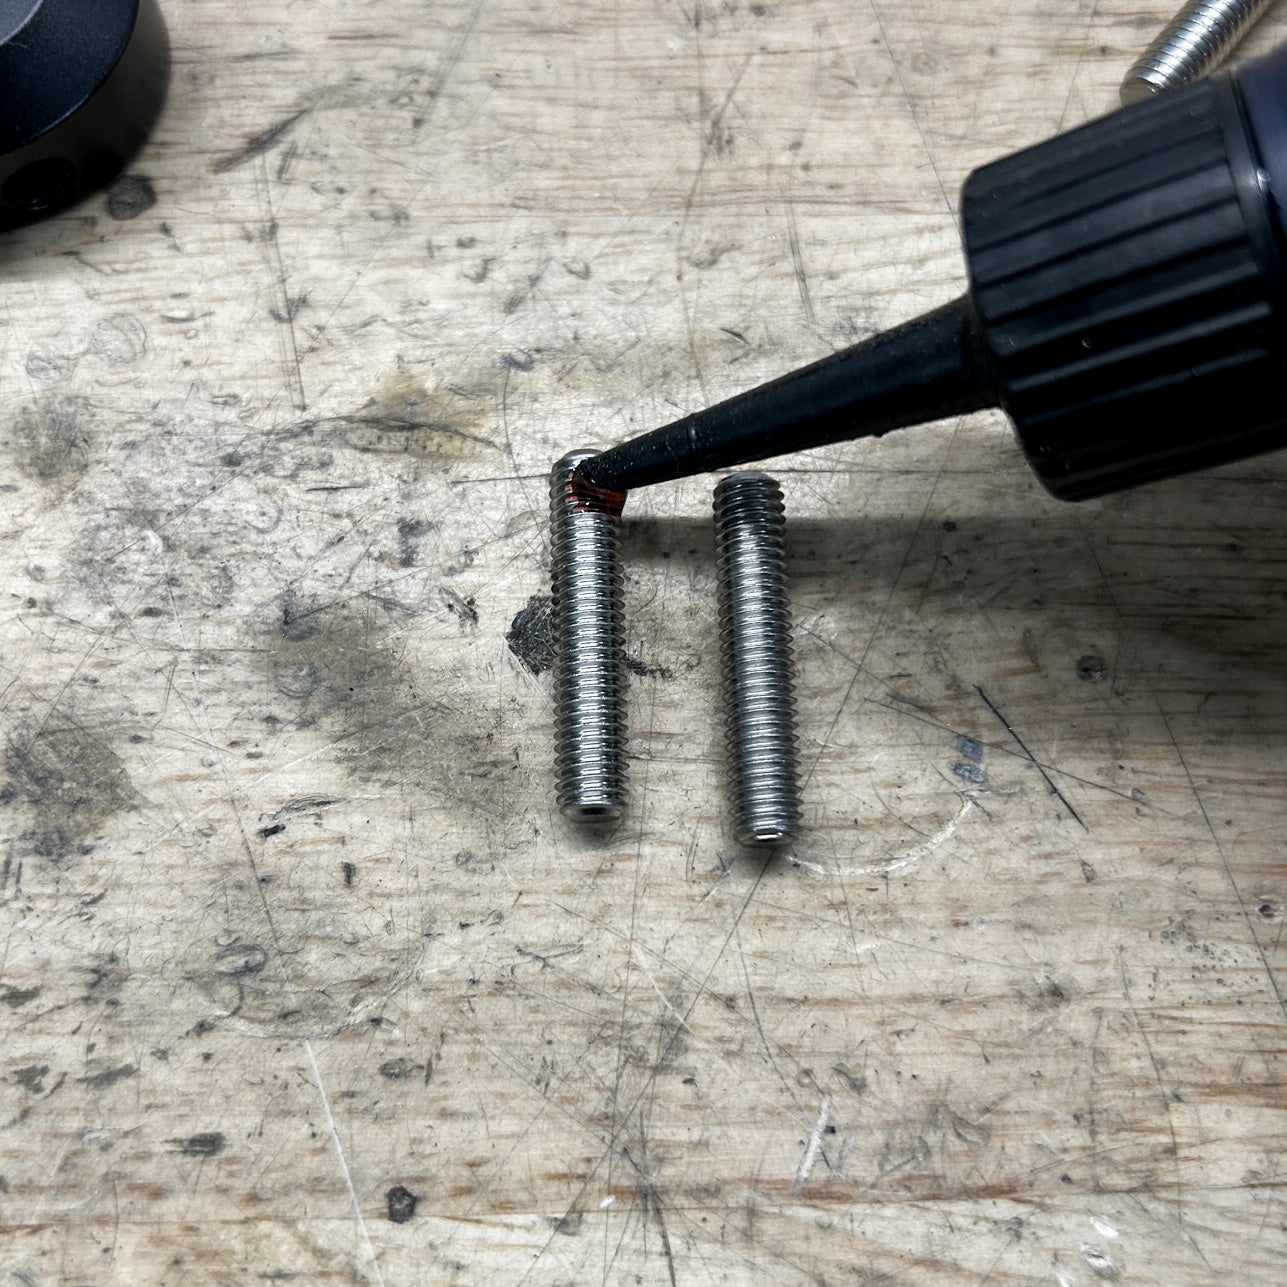
Step 2 – Install and fix threaded slug
The kit provides 2 x threaded slugs and an extra spacer spacer for your kit, these 3 sizes will cover 90% of motorcycle handlebar internal sizes. Aftermarket clip ons may be the exception. Find the appropriate size slug for your bars and tap them into place. Depending on your bars they may be a little tight, or go straight in, use your common sense and measure to double check it will fit.
Fixing the threaded slug requires a small hole to be drilled and tapped in the top of your handlebars for the grub screw provided. Once drilled, make sure the depth is enough so the grub screw does not protrude from the handlebar radius, apply some thread glue, and tighten the M4 grub screw into the threaded slug.
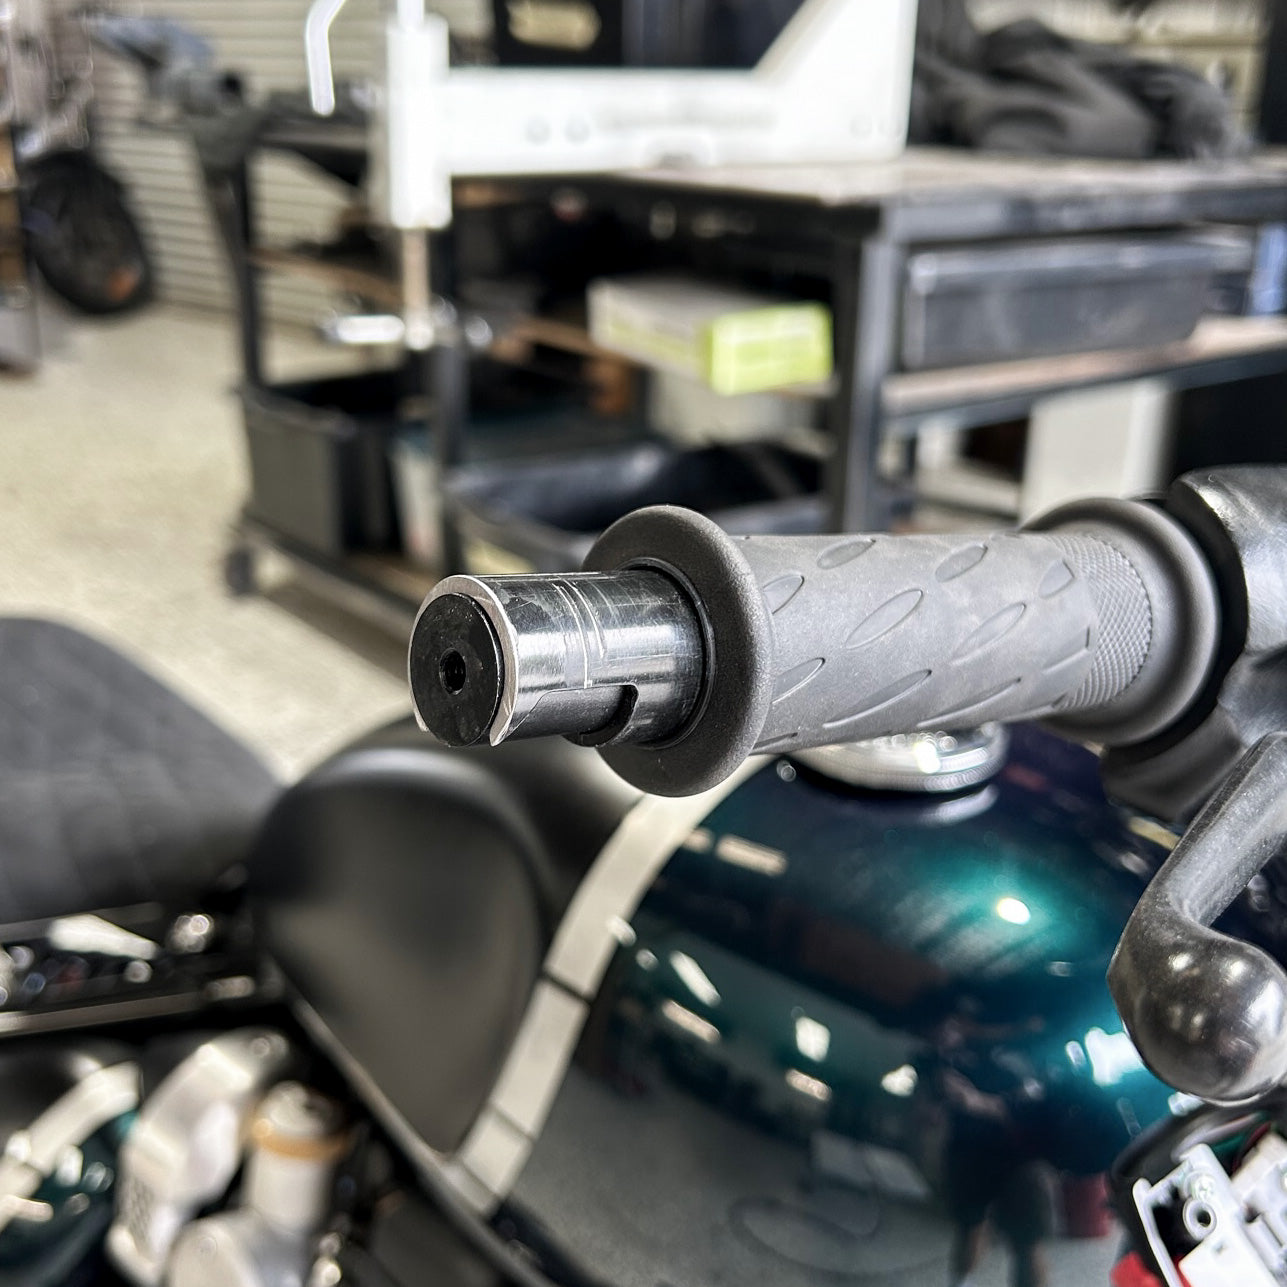
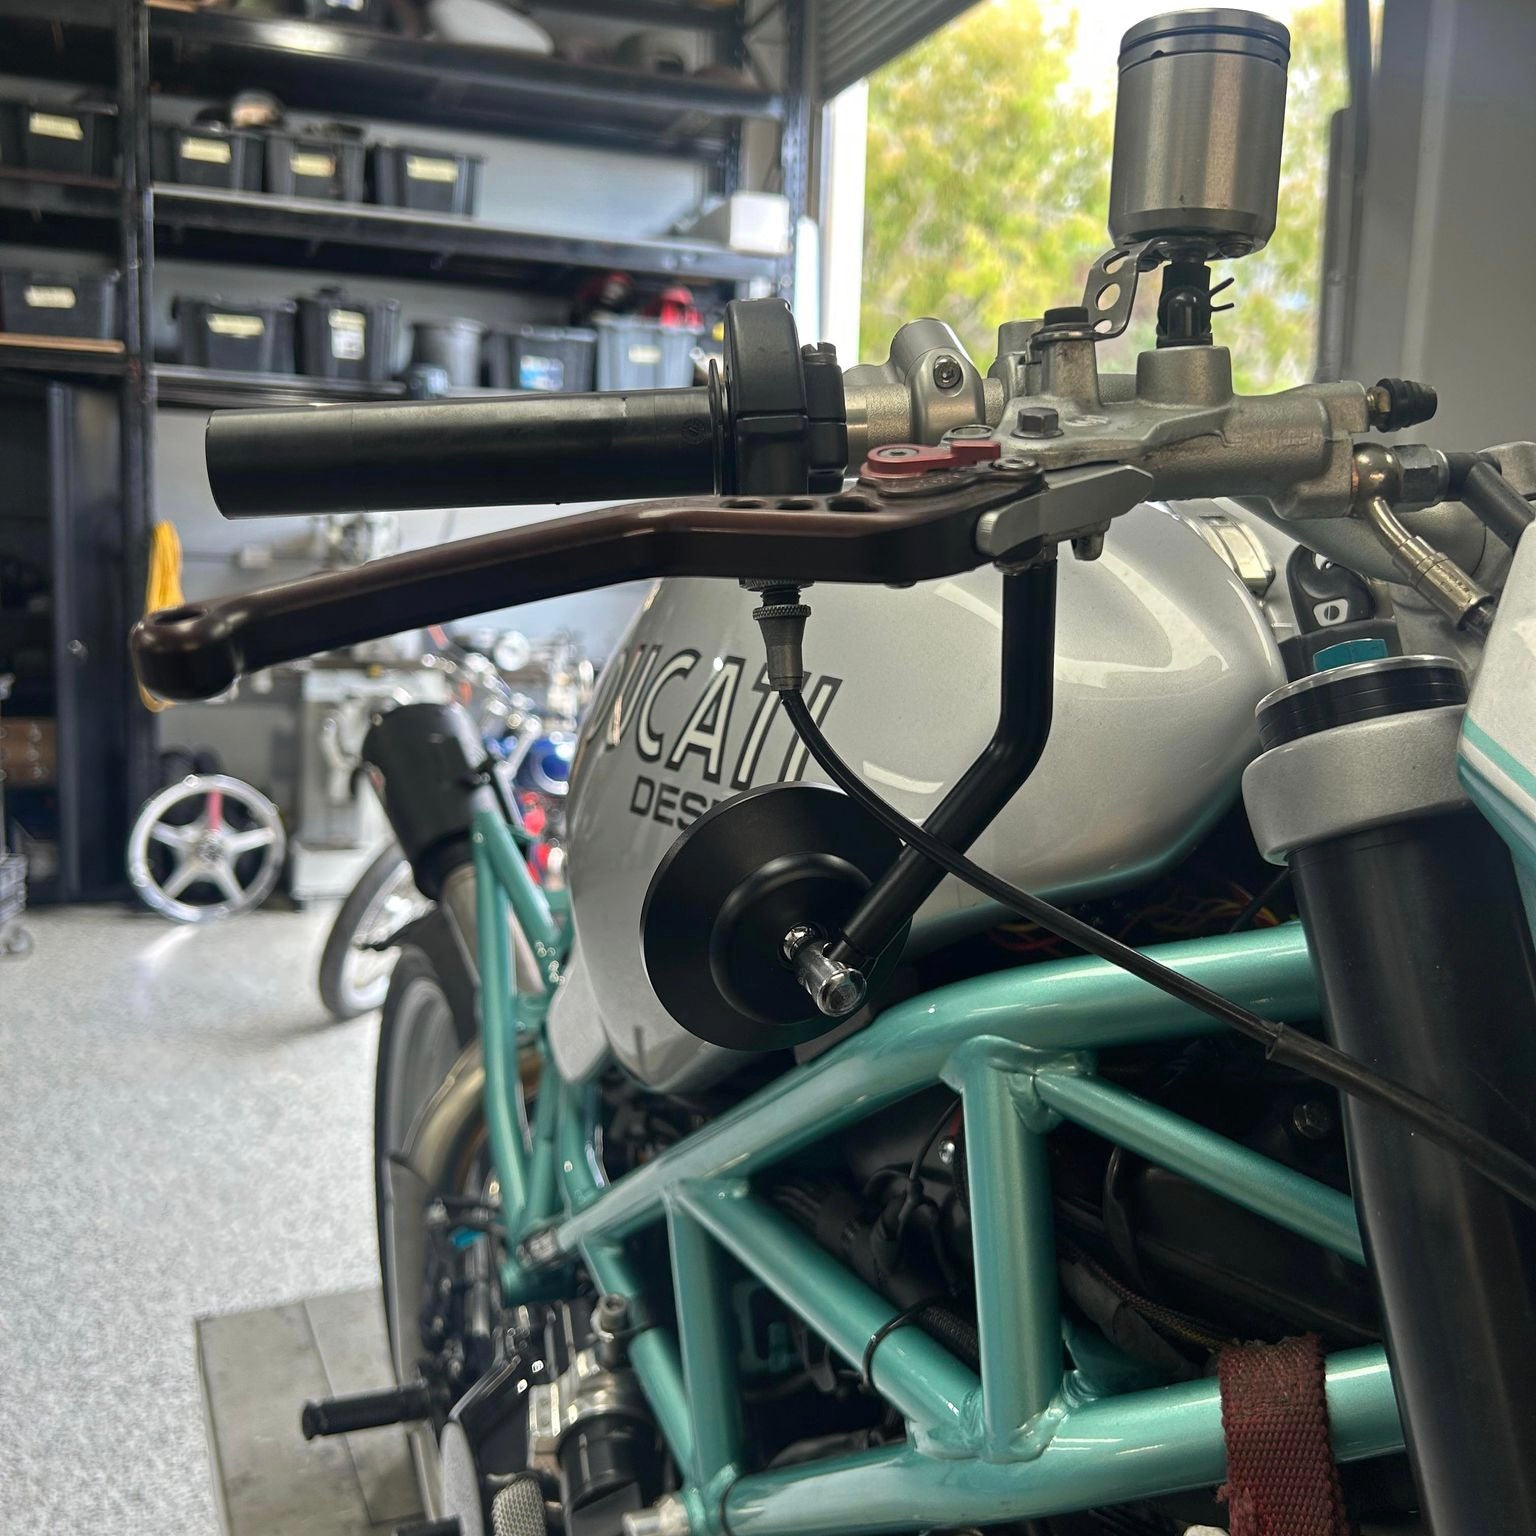
Step 3 – Fixing bar end mount
Apply thread glue to the M6 countersunk screws provided and fix your bar mount in place. This can be done under or on top of your bars.
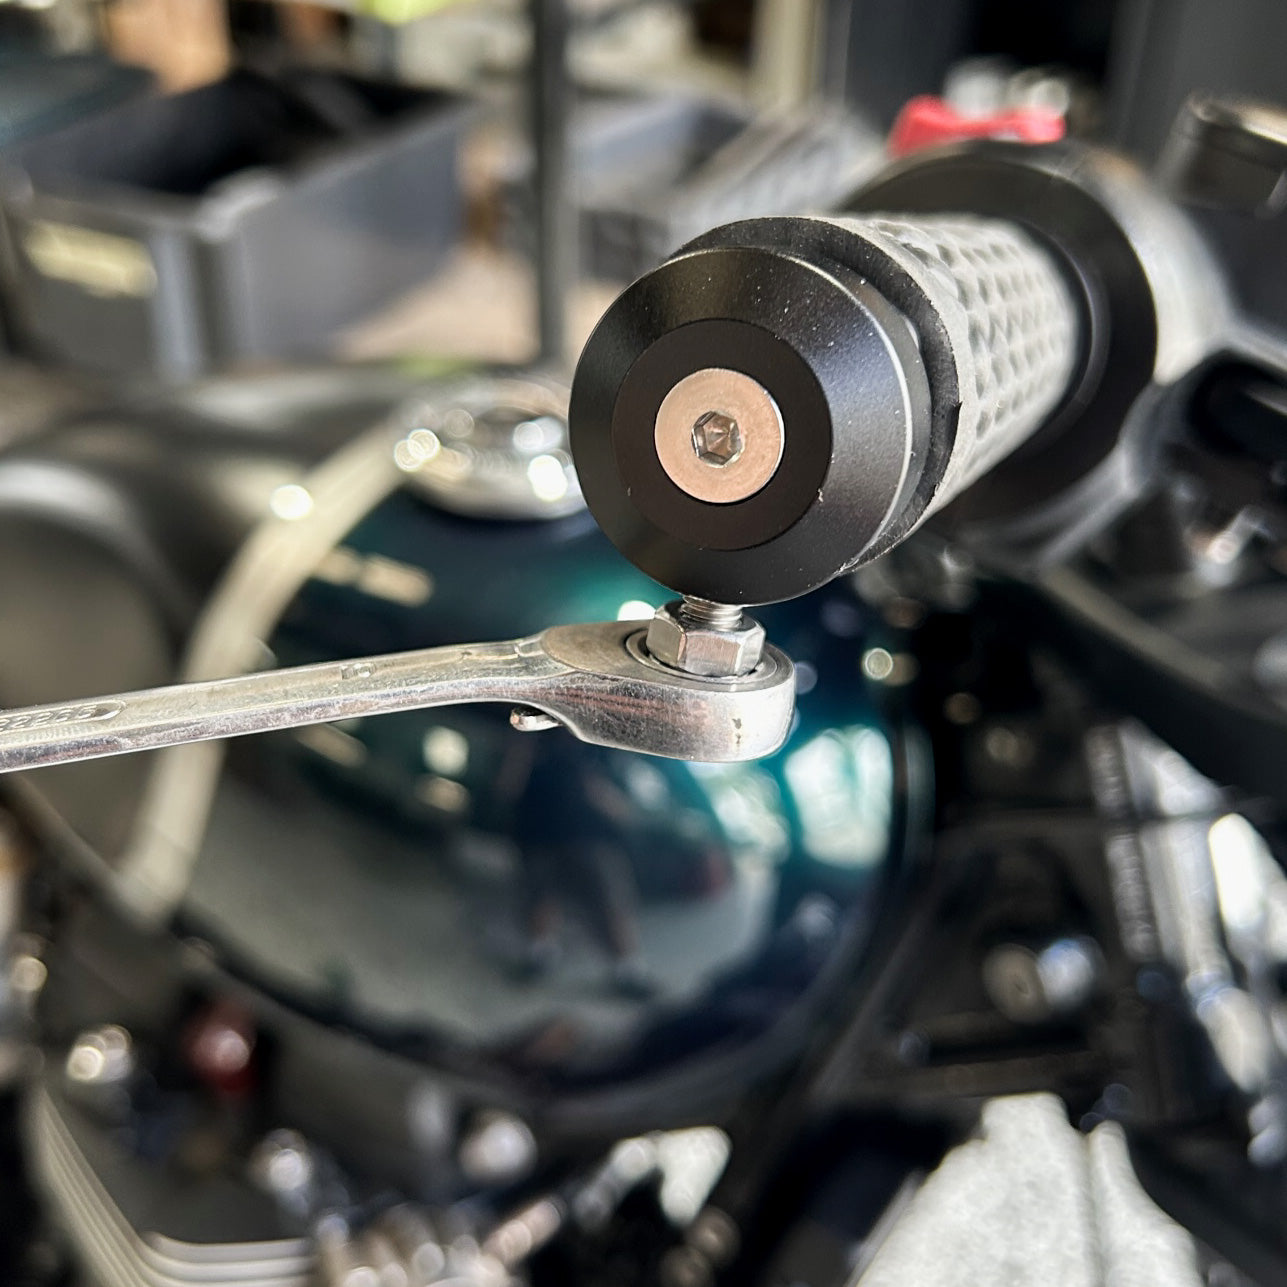
With the bar end mount in place, apply thread glue to the M6 threaded stud, and fix in place with a 10mm spanner and 2 of the nuts provided stacked on top of each other.
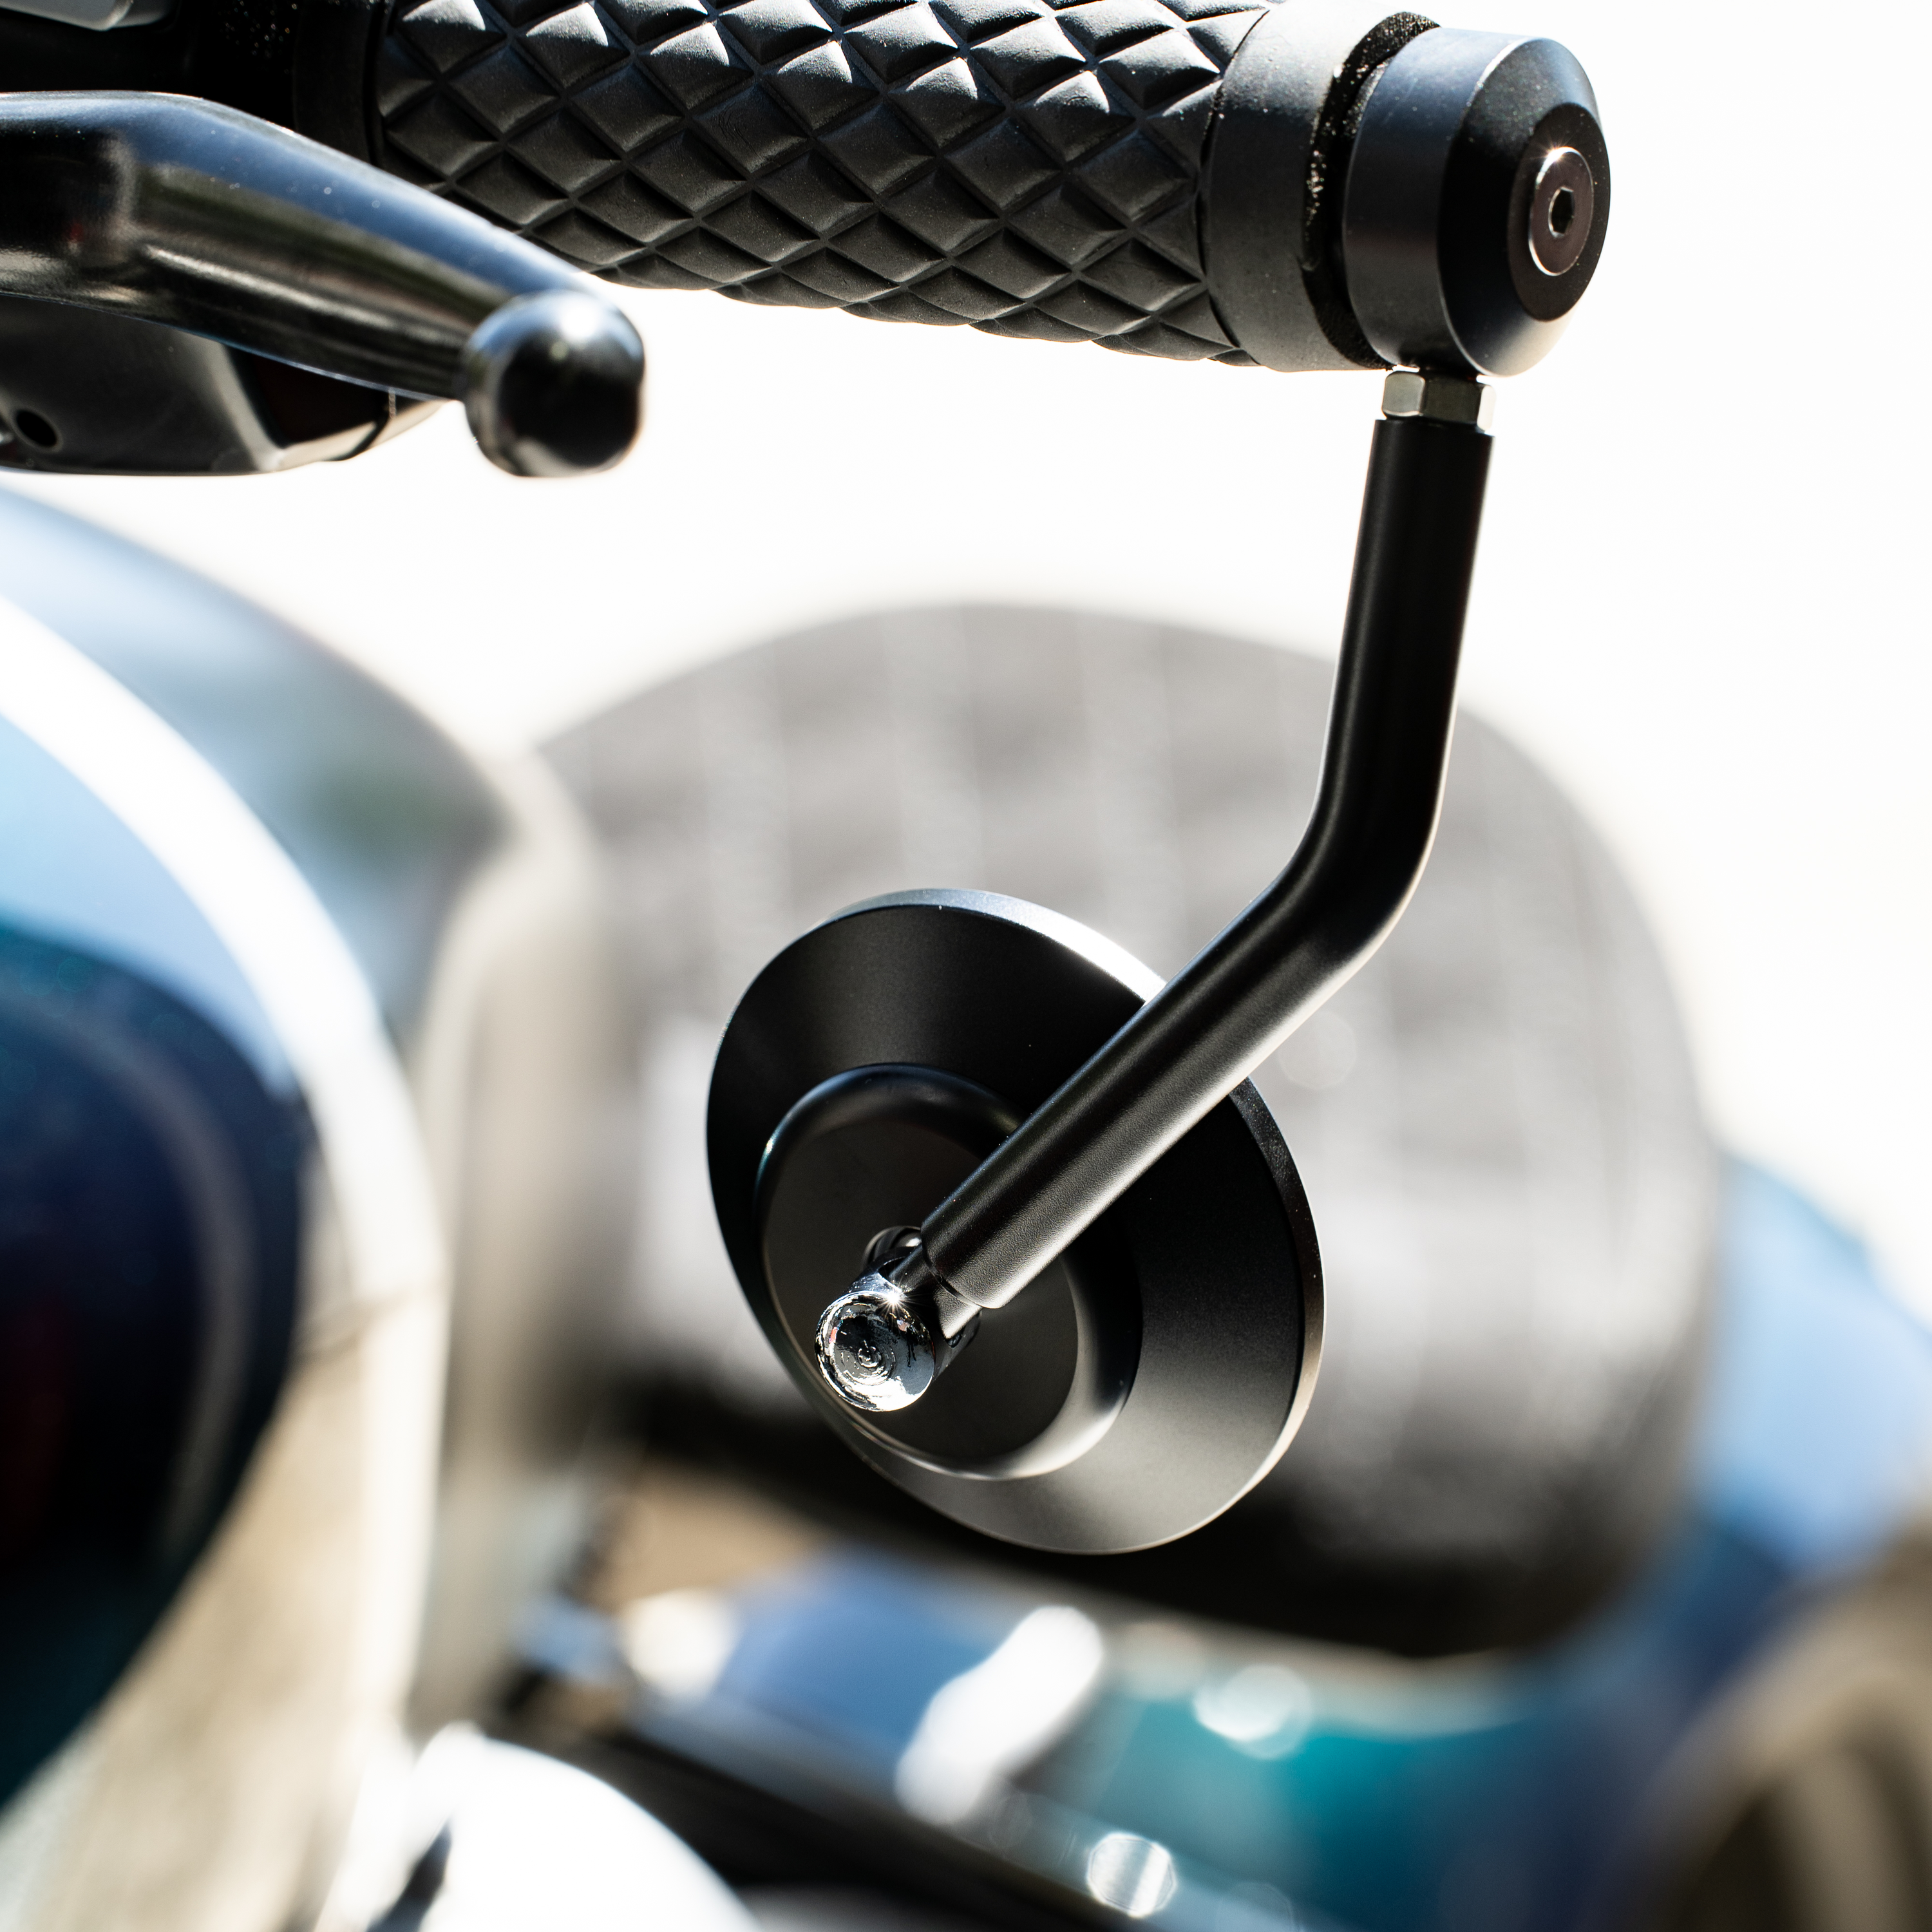
Step 4 – Mirror install
Wind one M6 lock nut with thread glue all the way onto the threaded stud, apply thread glue to the Mirror arm thread and thread onto the stud. When the mirror is all the way on, wind back until it reaches the ideal position for your vision. Finger tighten the M6 lock nut.
Step 5 – Check clearances
Check your steering from full lock left to full lock right carefully to make sure the mirrors don’t contact your tank or fairings. If they do, adjust them to suit, and re-adjust your mirrors to achieve proper vision when riding.
Scrambler Mirrors – how to mount on your levers
Here you’ll be shown how to mount the Purpose Built Moto scrambler mirrors on your lever pivot bolts, either under or above your handlebars.
What you’ll need:
- Purpose Built Moto Scrambler Mirrors + provided hardware
- 8mm + 10mm spanners
- Thread Locker (med strength)
- 6mm drill + battery drill (motorcycle dependant)
This process is dead simple, and achievable on nearly any motorcycle Lets get started.
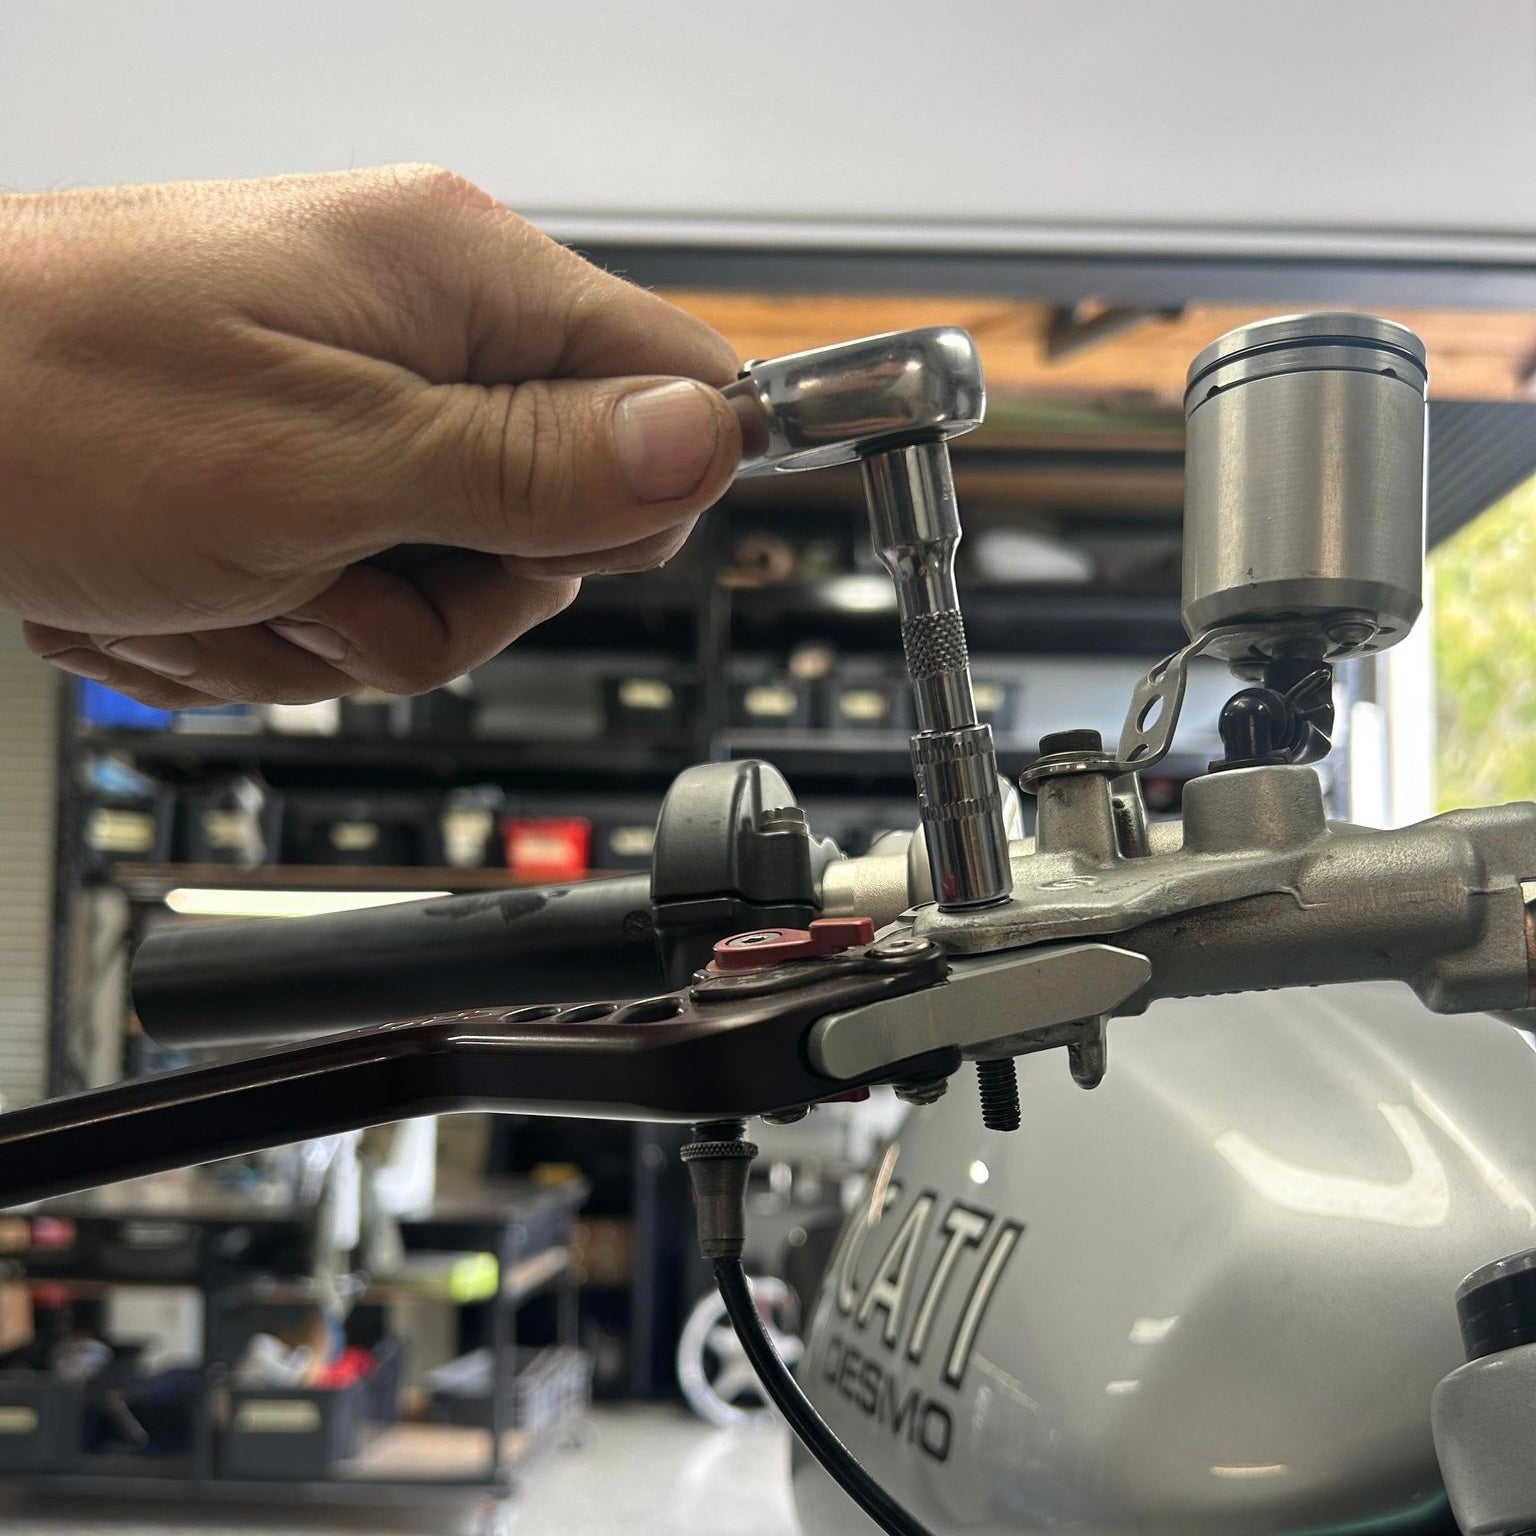
1. Check your levers and disassemble the mirror assembly Firstly check your mirror pivot bolts, they should be M6. Remove the lever pivot bolts and replace with the M6 bolt provided in your mirror kit. Remove the mirror body off the mirror arm.
Note: some motorcycles will have an 8mm pivot spacer, or enlarged section of the factory bolt. In this case the spacer will need to be drilled out to 6mm to have the new Scrambler mirror bolt pass through it.
2. Install the new M6 mirror mount bolt.
Install the new bolt and tighten on the lever thread. Place some thread glue on the thread and spin on your M6 locknut provided in the kit. Depending on your lever type you can use 1, or 2 lock nuts. That’s up to you.
3. Fit the Mirror Arm.
With the lock nut in place, wind the mirror arm into place. Use the lock nut to lock the mirror arm into position with your 10mm spanner.

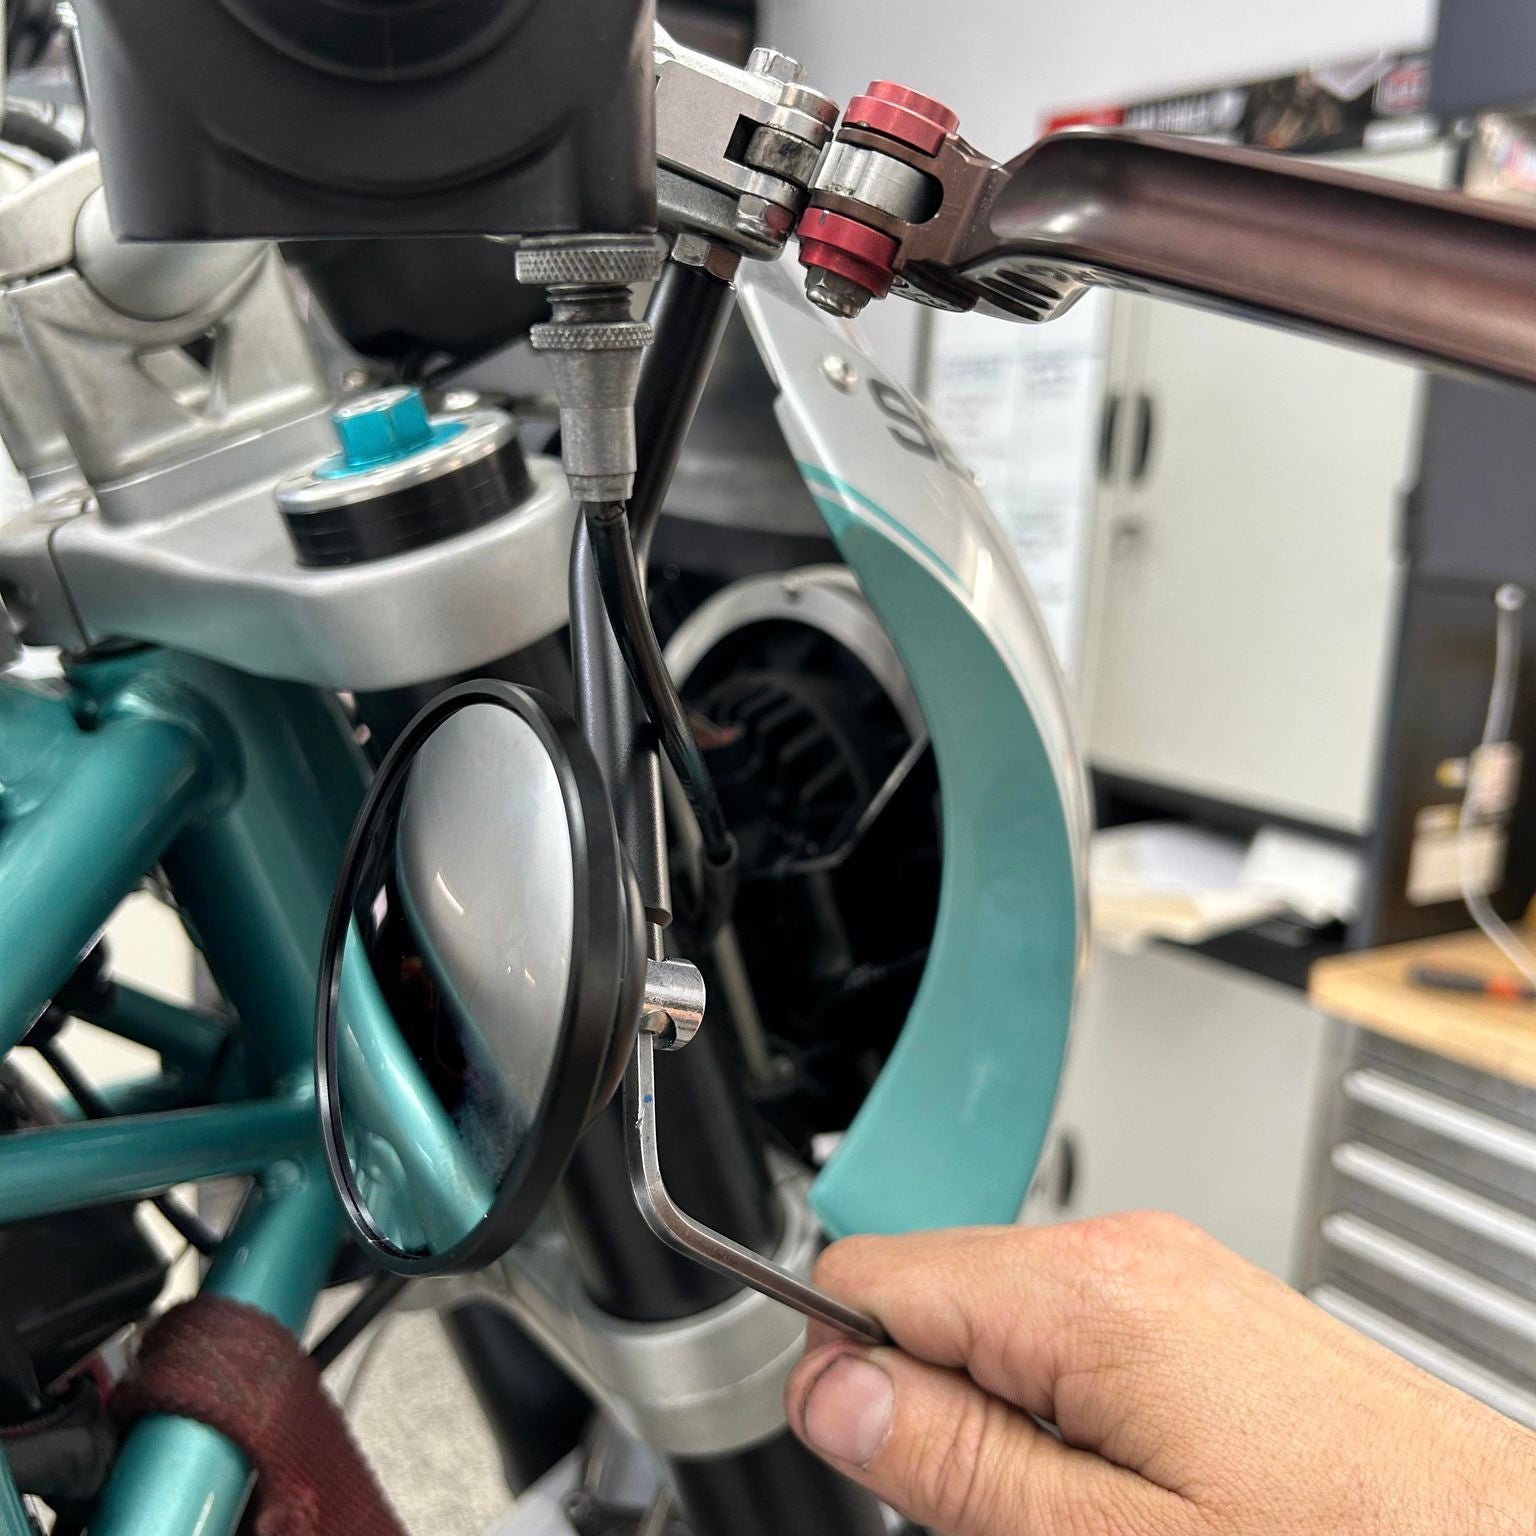
4. Fit mirror body
Using some thread flue, tighten the M6 bolt through the mirror body into the mirror arm. Here you can eyeball about where your mirror needs to sit. Final adjustment can be done on the next step.
5. Mirror adjustment
Once you’ve installed mirrors on both sides sit on the bike and check the adjustment. Here you can use the lever pivot lock nut, the M6 bolt between the mirror body and mirror arm or the pivot adjuster on the mirror itself. Once set in place, lock off and tighten all your fasteners.
6. Clearance check
With your bike on the ground, carefully check mirror clearance with your tank from full lock left, to full lock right. This is especially important with mounting your Scrambler Mirrors under the handlebars. If there is a clearance problem, you can adjust your mirrors again, flip them to on top of the handlebars, or grab our Bar end mounting kit (link here) and install that for a bar end mount option.
Step 6 – tell your mates where you got those tidy-looking mirrors and enjoy!
WE BUILD BIKES WITH PURPOSE.
Purpose Built Moto is home for unique custom motorcycle builds. We offer a unique motorcycle customizing experience in the heart of the Gold Coast.