
It’s time I gave you a run down on how to troubleshoot motorcycle electrics for common wiring problems you would find on your bike
This article’s been inspired by bout of recent jobs I’ve had through the shop, all custom motorcycles, mostly all DIY built, and all with electrical problems. Easily fixed electrical problems. Anywhere you can buy motorcycles you’ll see half finished projects, or old bikes stored away because, “It has electrical gremlins”. That’s bullshit code for poor fault finding, and lazy auto electricians.
Good technicians are hard to find, and technicians that will look at your motorcycle electrics are even rarer. I’ve mentioned a couple of times before that in a previous life I worked as an electrician and I’m busy enough as it is, so here I’m going to run through some simple fault finding processes and common faults that are easily fixed on your custom motorcycle.
In this how-to troubleshoot motorcycle electrics guide we will cover:
- How not to troubleshoot motorcycle electrics (you’re doin it wrong)
- How you should be troubleshooting
- Top 5 faults that ruin your motorcycle electrics
1. How not to trouble shoot your motorcycle electrics
Before I built bikes, I used to fault find and trouble shoot electrical systems that you could drive around in. Motorcycles should be infinitely simpler right? Yeah they are, however the same problems plague most people no matter what you’re working on. Whether it be an electrician on an automated mining system, or a garage builder hitting his head on the toolbox about his CB550 not starting. I always see the same thing. Assumption of knowledge, and non linear process.
The problem isn’t your bike, it’s the way you’re trying to fix it.
Let me explain. So you have a problem on a system, this system has 3 parts, and the 3 parts are joined by links in-between. If all of these links talk to each other, you have an outcome. Let’s say it’s a starter system on a bike to keep it simple.
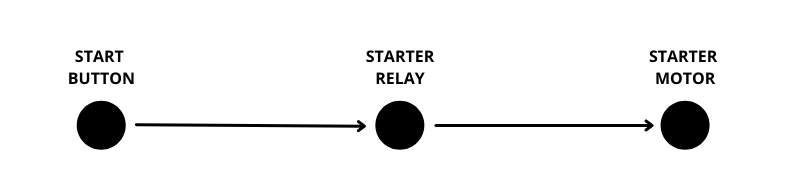
You have a trigger, the start button. A driver, the starter relay. The equipment , the starter motor. The outcome is that you hit the starter button and the starter motor turns. But you hit that button and get nothing.
Now most people will jump to a conclusion drawn from past experience and guess what the problem is. On a 3 part system you’re shooting fish in a barrel so you might get it right. What you’re doing is training in bad habits for when you face a real problem with many more layers.
So your mate had a bike like this and it was the starter relay, but that’s working here, so you assume the starter motor is buggered. Swap it out or bench test it but its still not fixed, the button is working fine so it cant be that? So you jump around aimlessly until you stumble on the problem. Can you see what I’m getting at here?
Most people assume they know (when they don’t) and jump around the system guessing until they find it. The first step in fixing a problem, is knowing the way to fix the problem.
2. How to troubleshoot motorcycle electrics (or anything) properly
Step 1. Quit fucking around, don’t assume you know, and if you’re new to this draw a diagram. How does the system work. Draw out the key players in the system in logical order of operation. The best way to fix something is to first understand how it works.
The obvious way to problem solve this starter issue is to start from the start, and work your way to the end (the outcome). Jumping around gets you nowhere. I’ll list it out the way I would solve this issue.
- Test battery voltage – Always start with a charged battery
- Check voltage to your button
- Check the button switches properly when pressed
- Test the link between the button and starter relay
- Test the ground on your starter relay
- Check the relay is engaging (across the heavy duty terminals)
- Check the voltage/battery lead of the relay
- Check the lead from the relay to the starter motor
- Check the resistance of both heavy leads
- Check grounding on the starter motor or engine
- Test the starter motor for spec.

No assumptions made, completely linear process. If you followed that you will be guaranteed to find your problem.
Problems on your bikes electrics will get far more complicated than this, but I promise if you leave what you think you know behind, take a step back think about this as I’ve shown you. The process will be far less stressful and if you do it right, you can’t not find the problem you’re looking for.
Using the right method for trouble shooting, and having a workshop manual on hand for the wiring diagram and specs of your equipment is fool proof. You really only need a multimeter and hand tools.
Equipped with that new knowledge, and assuming you won’t just throw it all away, let me list out some common and sometimes hard to pick up faults I find in motorcycle electrics.
3. Top 5 Faults that cause problems on motorcycle electrical systems
Purpose Built Moto hand builds custom motorcycles from junk heaps (or brand new bikes sometimes) but between this I often help people out with their bikes electrical problems. Each week I’ll find and fix a faulty part, dodgy join or poor wiring. With this experience let me share a few things to look out for.
- Bad Grounds
Without exaggerating I can say 80% of the electrical problems I see are due to poor earthing. You strip the bike, paint the engine, powder coat the frame and put it all back together suddenly nothing works? Or you’ve taken your bike through a rain storm, across a creek or just live near the coast and eventually you start having dramas with your lights and charging system…. Why?
GROUNDING!
Poor metal to metal contact is that fastest way to electrical headaches on your motorcycle. Check your grounding, clean the terminals, clear away paint or powdercoat where your grounds are connected and if you’re riding through water or live in a corrosive or humid environment use some connection grease or spray.
As a rule of thumb I have 3 major grounding points on my bikes when I wire them from scratch. Engine, Frame and to the Reg/Rec. All with heavy gauge cable, especially to the engine if you’re running an electric starter motor. That’s a minimum, most of the time I’ll have a frame ground on the front and rear of the motorcycle.
2, Broken or bad solder joins
Another very common problem. If you’re making a solder join it removes the flexibility your cable once had, it fills the core with molten solder that sets hard. Without the proper shielding or being subject to movement it can break. A lot of the time you wont even see it. That’s why its important to test and not assume the cable is fine just because its not physically broken or cut.
To avoid this place your solder joins in a place where they won’t be subject to movement and use good quality solder + heat shrink.
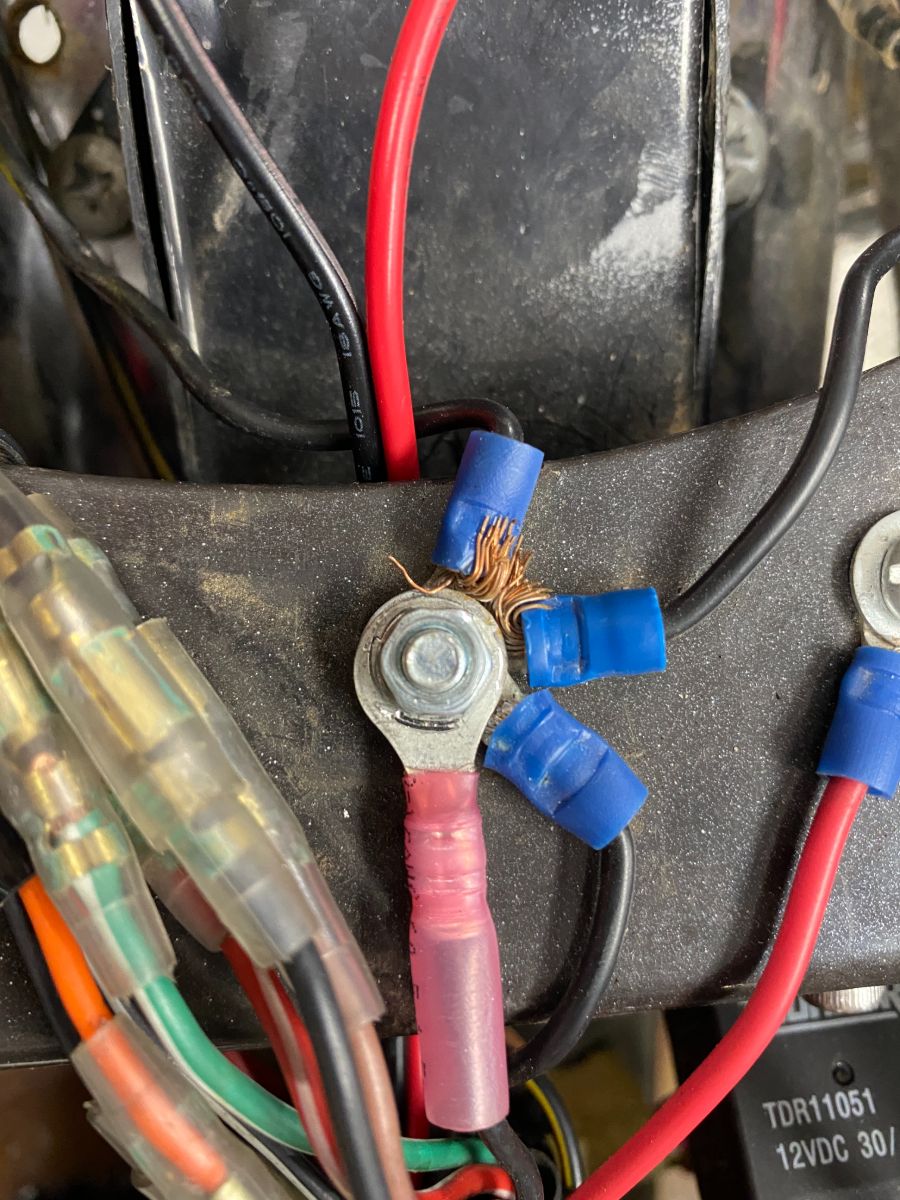
3. Incorrectly crimped terminals
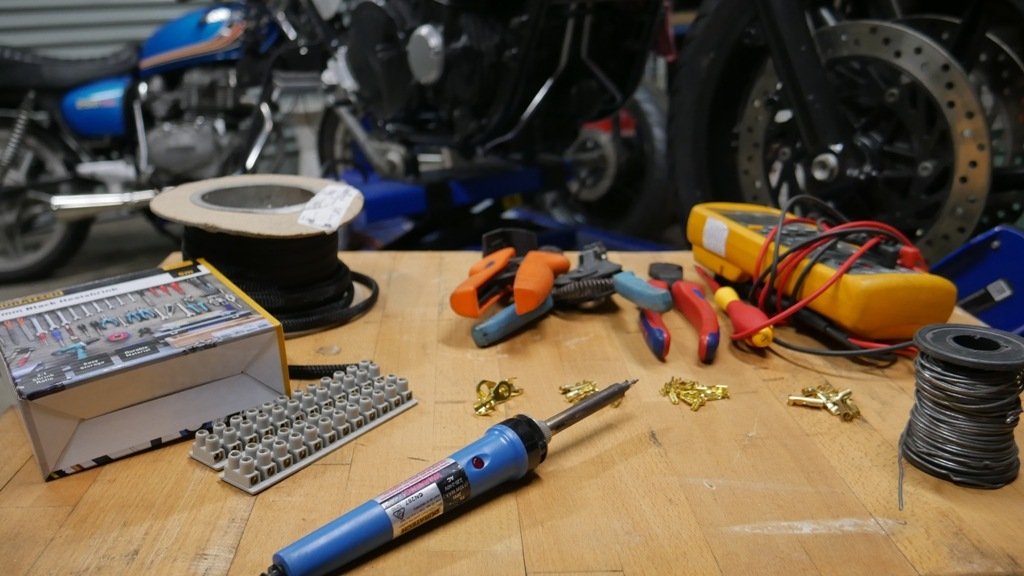
This is one I see from both garage builders and mechanics shops. Let me be explicitly clear those cheap crush crimp tools from the auto store are garbage and you should burn them in fire. I have 8 different crimping tools at the shop and I use all of them.
When I’m wiring our Purpose Built Moto customs I usually only need 3.
Insulated lug crimping tool
Un-insulated brass terminal crimping tool
Battery lead crimping tool
If you’re wiring a bike you should have those at least. Without them, you run the risk of bad joins and faulty connections that are really difficult to find. I’ve even had crimps that look fine, but because of the wrong tool, the cable has been broken inside and is causing a fault.
4. Bad joining practice
What does bad joining practice mean? It’s a broad term that would cover any join you’ve made where the right method hasn’t been used.
- Twisted wires wrapped in electrical tap
- Inline crimp joiners used with bad crimping tools
- Solder joins not made properly
- Incorrect lugs used on certain parts of your system.
All very easily avoided problems. Buy your materials from an auto electrical supplier not just the local auto shop, get the right tools and do the smallest bit of research before starting. It will pay itself off I promise!
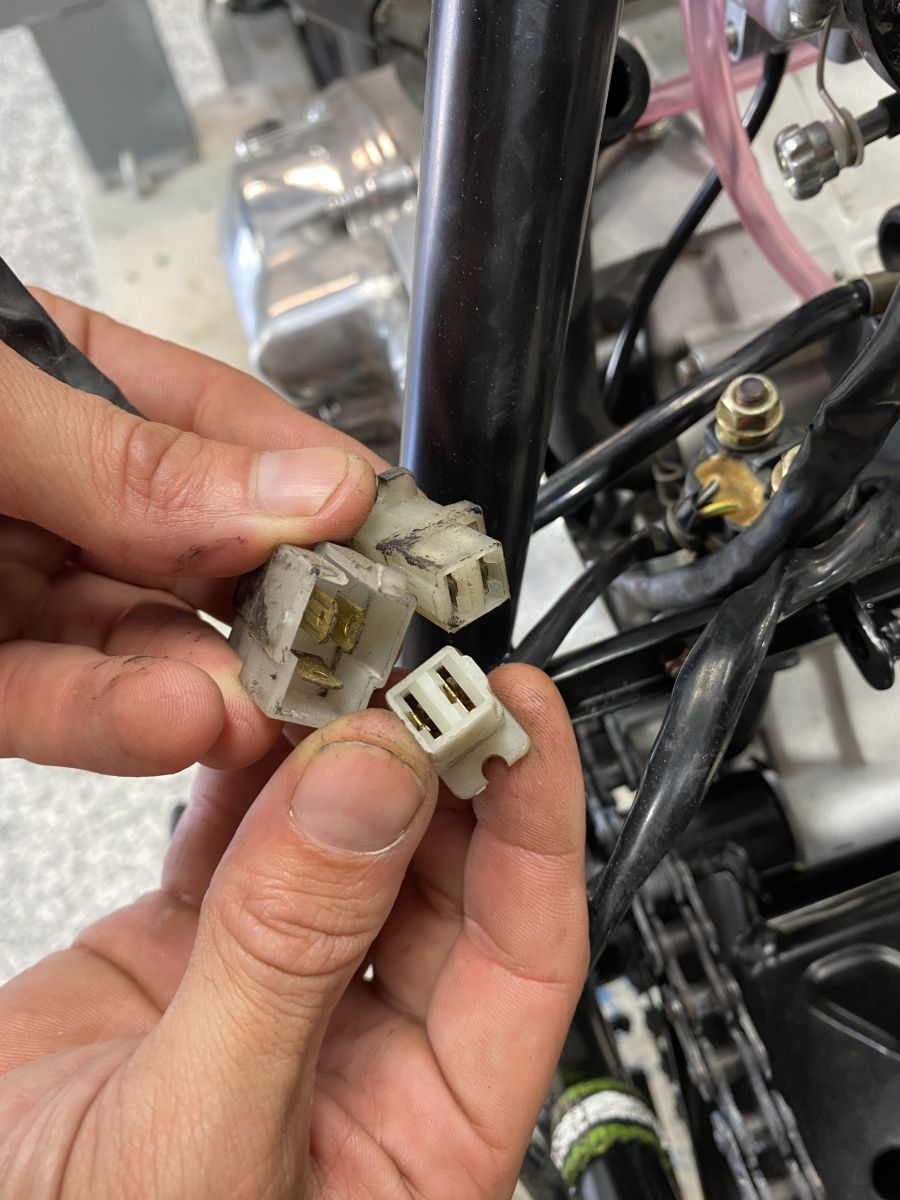
5. Old and Corroded connections
I wanted to specifically highlight grounding as its by far the most common and troublesome fault I see. But this is an extension of what I said above. Corrosion kills electrical components. as an example, if an electrical connection has some corrosion the resistance of that connection rises, that in turn causes more heat as current passes through, which causes more corrosion. This cycle is exactly what you want to prevent from starting. The best way to stop this ever being a problem is making the correct connections in the first place, and if you see fit, use come anti corrosion grease or spray on your plugs, joins and terminations.
If you’ve got an old motorcycle chances are you’re going to need this advice at some point in your riding life. This is a high level overview of how I solve electrical problems on motorcycles day in, day out. There are many intricacies involved with finding and fixing issues on bike electrics, but that’s the method I apply EVERY.SINGLE.TIME so take note, and hopefully that will help you get the job done faster, with a better outcome.
If this article has inspired you to troubleshoot motorcycle electrics then I would recommend checking out these other articles to get your head around how everything on your motorcycle is wired together.
Motorcycle Electrics 101 – A Simple Explanation Of Your Bikes Electrics
Motorcycle Electrics 101 – How To Rewire Your Cafe Racer or Bobber Project
Top 5 Wiring Mistakes To Avoid On Your Cafe Racer
YouTube: How To Install A Motorcycle Relay
Thanks for taking the time.
Tom.
WE BUILD BIKES WITH PURPOSE.
Purpose Built Moto is home for unique custom motorcycle builds. We offer a unique motorcycle customizing experience in the heart of the Gold Coast.


3 comments
Hey Pavel,
If you have corrosion through the bike I would also check the grounding on your reg/rec. If you’re going through batteries quickly I would say to check your charging system and possibly starter system connections to make sure they are clean and not corroded. The next step will be replacing the reg/rec.
Hello Tom! I really liked this article , your approach is correct and simple in every way.
Instead of guessing and assuming, you simply eliminate one possible cause after another. I am riding a 2019 CB1000R. It is absolutely a gorgeous motorcycle in my opinion, but there is always a problem when starting the bike especially after it’s had been standing all day at work after a short ride. I have bought I believe 3 different batteries already ( 2 lithium, 1 original factory battery), but no matter what, it will happily start in the morning after it stood all night untouched ( at room temperature ), but always be an absolute pig to start after work. Now I am not very knowledgeable when it comes to motorcycle electrics, to be honest I know nothing about it , I just know how to connect a new battery and clean the terminals , but that’s about it…
I have disconnected a grounding point bolt on the motorcycle and found a quiet deep layer of corrosion underneath it. I am literally about to finish cleaning all that off and connect everything back, hope it will help and won’t cause any problems in the future.
If it won’t , I might ask you to guide me through possible causes on this particular model. Will appreciate if you could help !
At the moment, it has a fresh Lithium Noco battery, which claims to have twice the CCA of the original battery, and to be honest it does crank the bike much happier especially when the engine is hot. Will treat that area with ACF 50 , but it is perpendicular to the ground so it won’t stick for too long I am afraid…
Any advice you might have will be greatly appreciated! Thank you! Pavel
This was excellent, thank you!